在上一节课中我们学会了PyQty5的安装,以及两个环境的配置,那么今天这节课我们学习一下窗口部件如按钮,和我们函数的绑定,这个学会了,我们就可以自己设计界面自己写函数,从而设计出自己的小工具
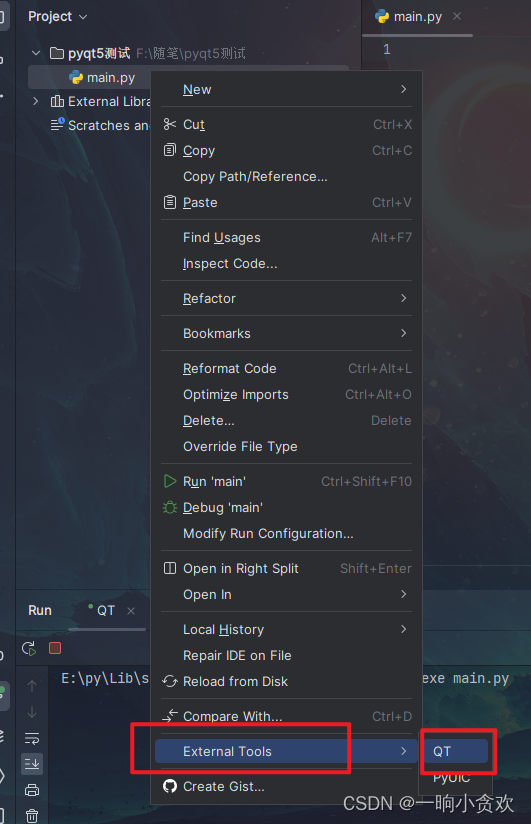
1、那么首先我们新建一个py文件,右击打开设计窗口
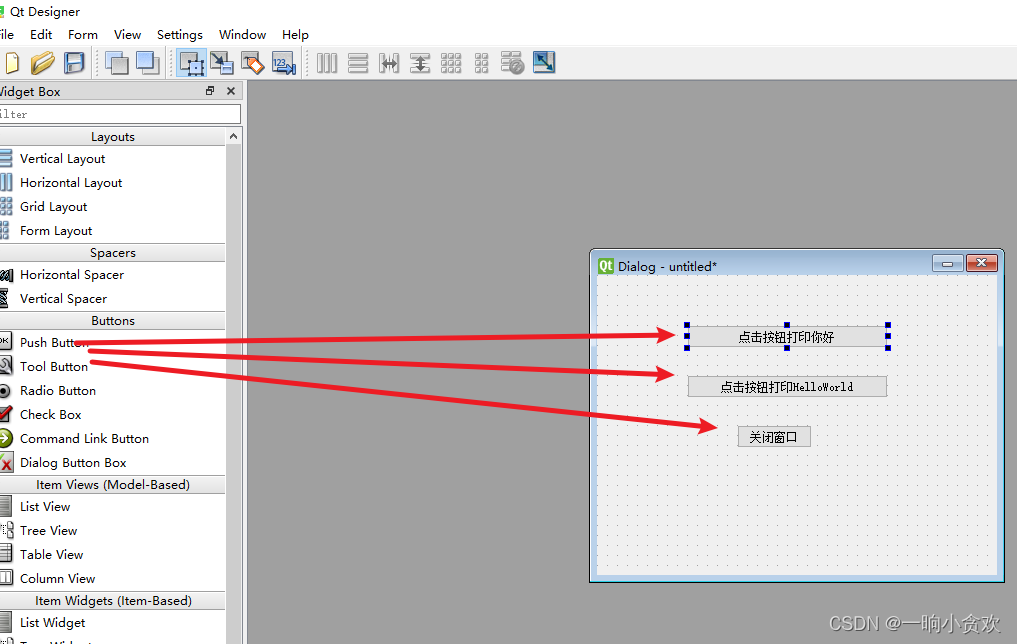
2、我们点击左边的【Buttons】拖动3个【Push Button】按钮,双击改一下名字
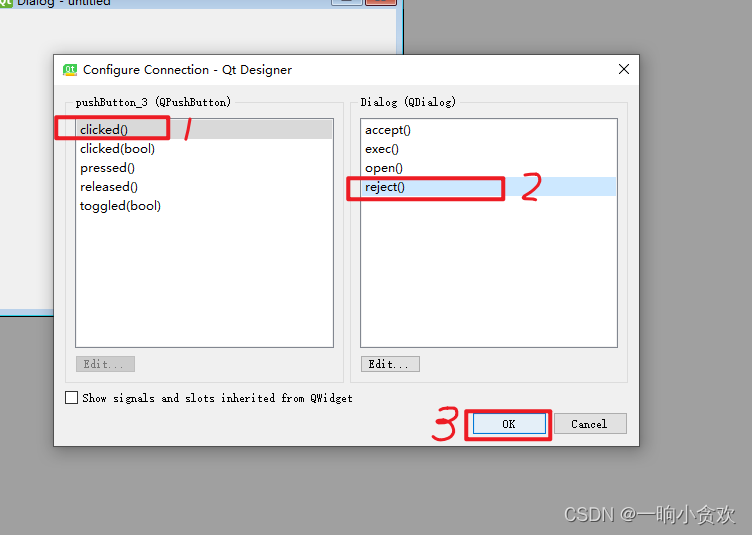
2、关闭按钮,我们先给他绑定一个关闭函数(这一步先照着做一下)
2-1点击左上角箭头的图标
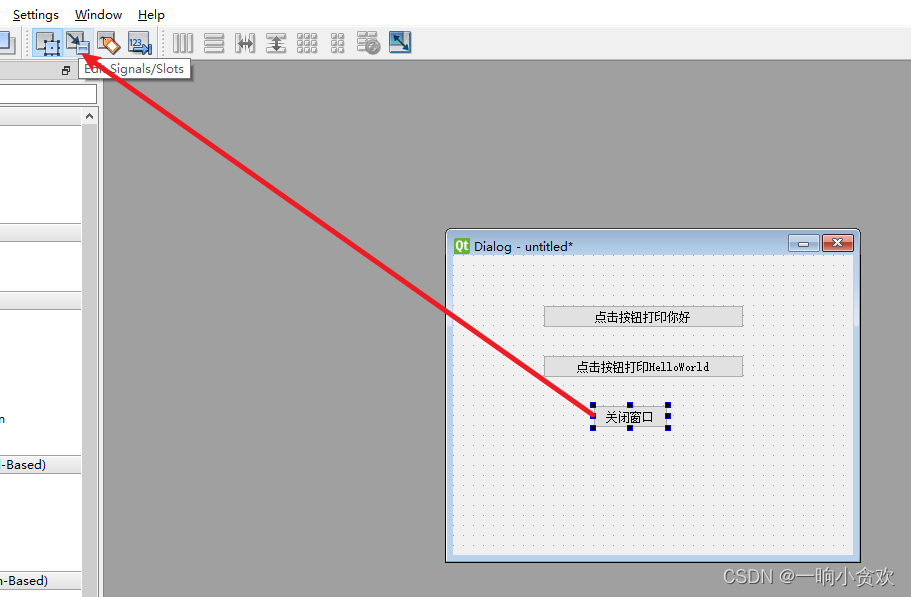
2-2点击【关闭窗口】按钮,拖动到空白位置

2-3按照下图点击(F3退出)
3、改一下两个按钮的对象名(随便起的)


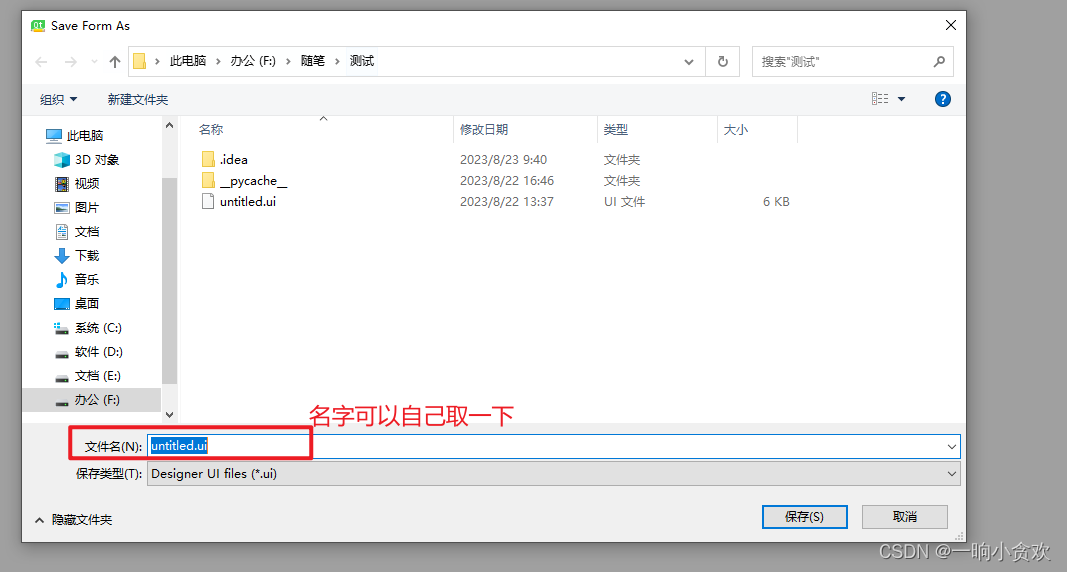
4、那么我们简易的小窗口就创建好了,我们【Ctrl+s】保存一下
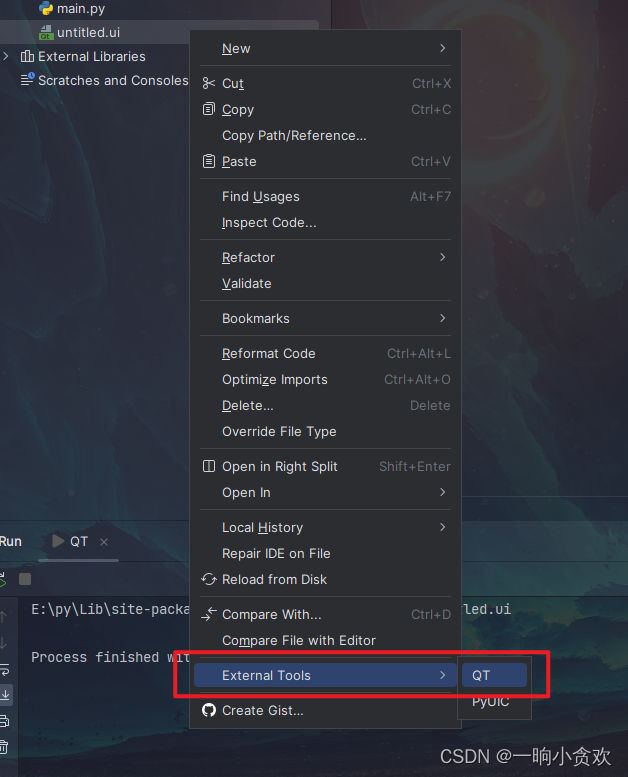
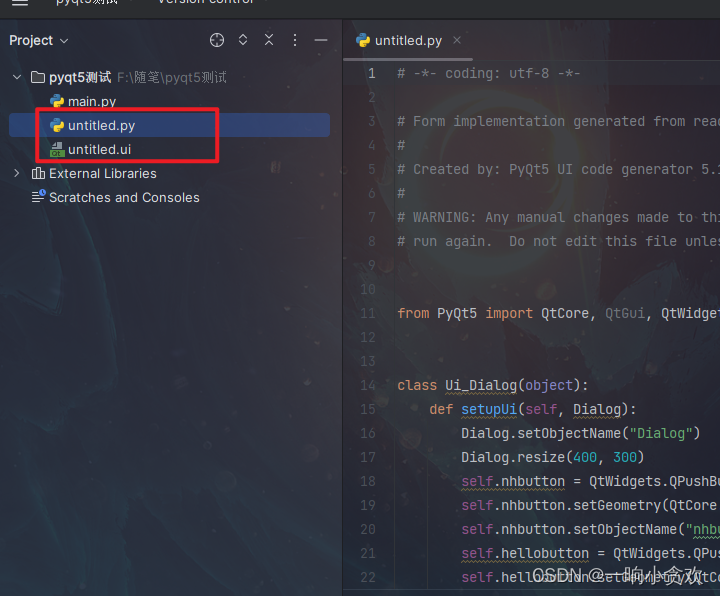
接下来我们用上一节配置的环境,将刚刚设计的ui文件转换为py文件,会生成同名py文件
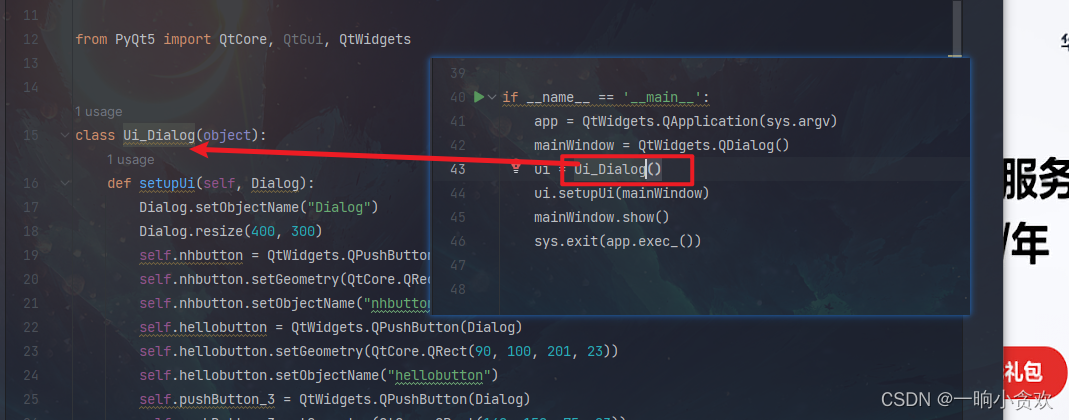
5、接下来我们添加创建对象的代码,记得改一下自己的类名
if __name__ == '__main__':
    app = QtWidgets.QApplication(sys.argv)
    mainWindow = QtWidgets.QDialog()
    ui = Ui_Dialog()
    ui.setupUi(mainWindow)
    mainWindow.show()
    sys.exit(app.exec_())
视频演示,看起来没有上面问题
6、接下来我们将两个按钮绑定一下函数
6-1,我们先看一下我们的按钮
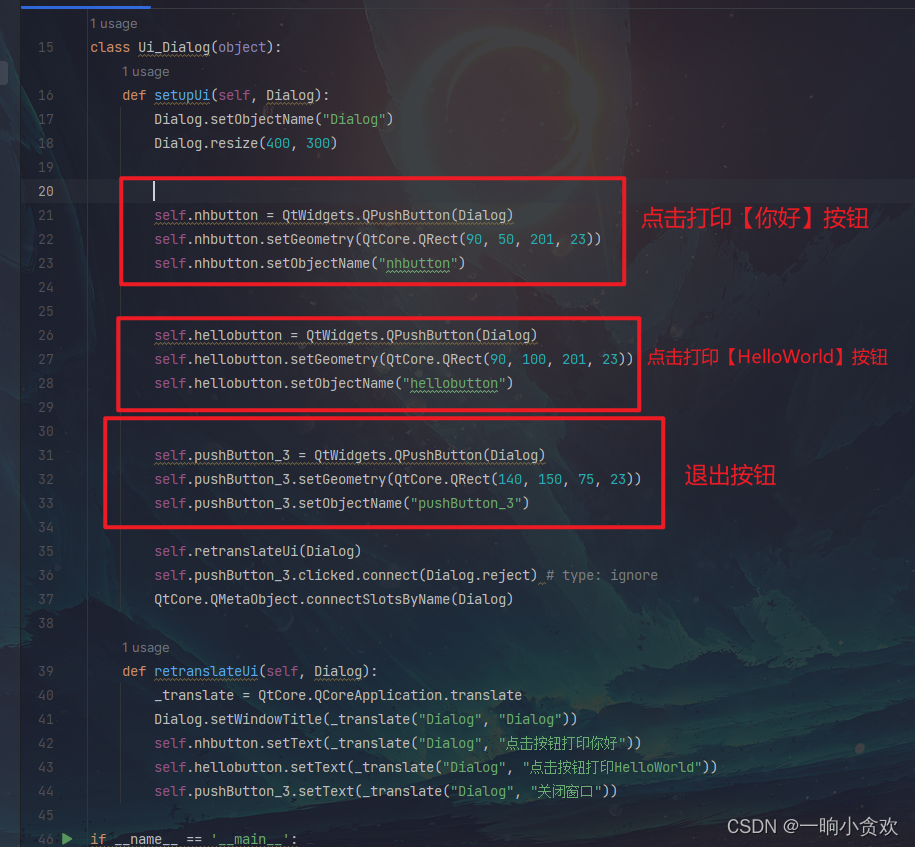
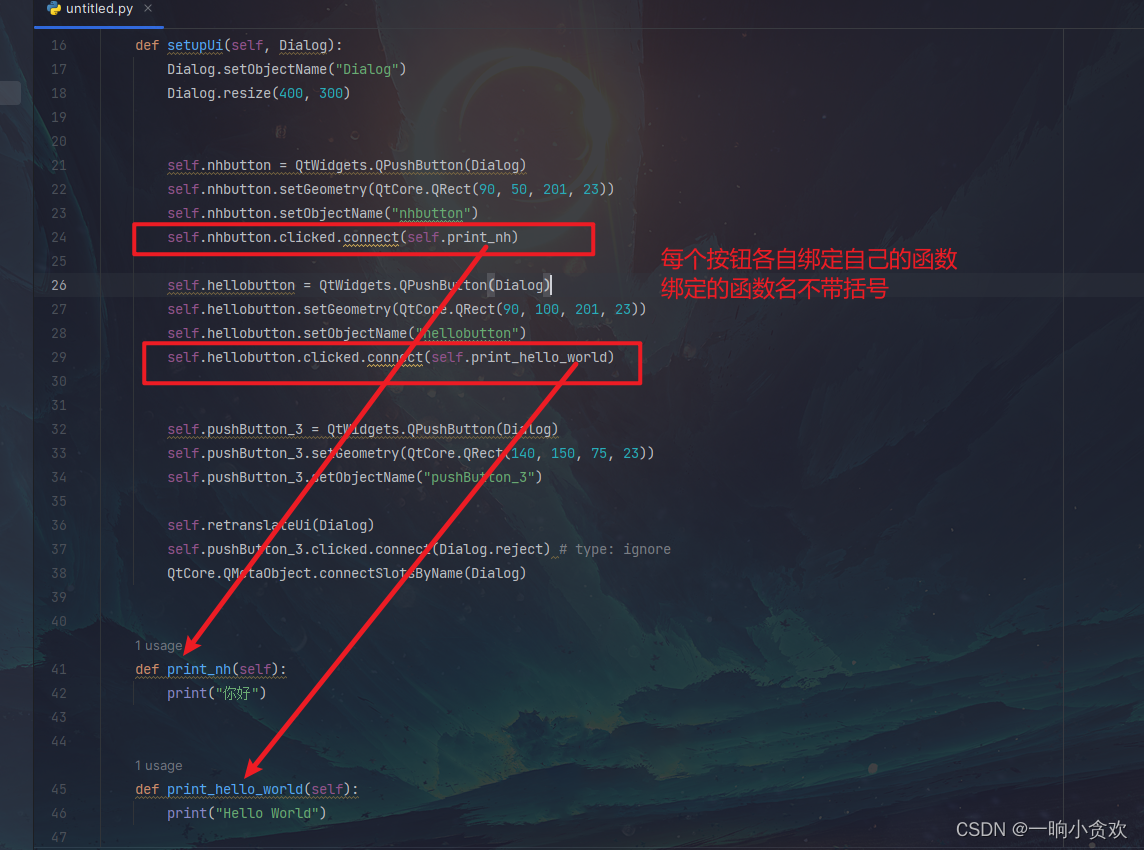
6-1,按钮绑定函数是:self.button.clicked.connect(绑定的函数),注意绑定的函数不带括号
# -*- coding: utf-8 -*-
import sys

# Form implementation generated from reading ui file 'untitled.ui'
#
# Created by: PyQt5 UI code generator 5.15.6
#
# WARNING: Any manual changes made to this file will be lost when pyuic5 is
# run again.  Do not edit this file unless you know what you are doing.


from PyQt5 import QtCore, QtGui, QtWidgets


class Ui_Dialog(object):
    def setupUi(self, Dialog):
        Dialog.setObjectName("Dialog")
        Dialog.resize(400, 300)


        self.nhbutton = QtWidgets.QPushButton(Dialog)
        self.nhbutton.setGeometry(QtCore.QRect(90, 50, 201, 23))
        self.nhbutton.setObjectName("nhbutton")
        self.nhbutton.clicked.connect(self.print_nh)

        self.hellobutton = QtWidgets.QPushButton(Dialog)
        self.hellobutton.setGeometry(QtCore.QRect(90, 100, 201, 23))
        self.hellobutton.setObjectName("hellobutton")
        self.hellobutton.clicked.connect(self.print_hello_world)


        self.pushButton_3 = QtWidgets.QPushButton(Dialog)
        self.pushButton_3.setGeometry(QtCore.QRect(140, 150, 75, 23))
        self.pushButton_3.setObjectName("pushButton_3")

        self.retranslateUi(Dialog)
        self.pushButton_3.clicked.connect(Dialog.reject) # type: ignore
        QtCore.QMetaObject.connectSlotsByName(Dialog)


    def print_nh(self):
        print("你好")


    def print_hello_world(self):
        print("Hello World")

    def retranslateUi(self, Dialog):
        _translate = QtCore.QCoreApplication.translate
        Dialog.setWindowTitle(_translate("Dialog", "Dialog"))
        self.nhbutton.setText(_translate("Dialog", "点击按钮打印你好"))
        self.hellobutton.setText(_translate("Dialog", "点击按钮打印HelloWorld"))
        self.pushButton_3.setText(_translate("Dialog", "关闭窗口"))


if __name__ == '__main__':
    app = QtWidgets.QApplication(sys.argv)
    mainWindow = QtWidgets.QDialog()
    ui = Ui_Dialog()
    ui.setupUi(mainWindow)
    mainWindow.show()
    sys.exit(app.exec_())
7、搞定!