高德MarkerAPI如下图 :
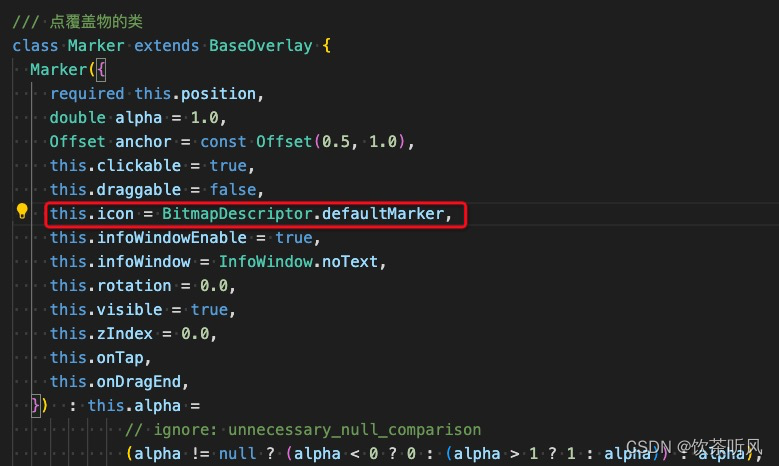
由于高德地图目前只提供加载icon的方式,所以需要提供对应的BitmapDescriptor类型:
1.默认的提供的是纯色的默认图片
  /// 创建引用默认着色的BitmapDescriptor
  static BitmapDescriptor defaultMarkerWithHue(double hue) {
    assert(0.0 <= hue && hue < 360.0);
    String filename = "BLUE.png";
    if (hue == hueRed) {
      filename = "RED.png";
    } else if (hue == hueOrange) {
      filename = "ORANGE.png";
    } else if (hue == hueYellow) {
      filename = "YELLOW.png";
    } else if (hue == hueGreen) {
      filename = "GREEN.png";
    } else if (hue == hueCyan) {
      filename = "CYAN.png";
    } else if (hue == hueAzure) {
      filename = "AZURE.png";
    } else if (hue == hueBlue) {
      filename = "BLUE.png";
    } else if (hue == hueViolet) {
      filename = "VIOLET.png";
    } else if (hue == hueMagenta) {
      filename = "MAGENTA.png";
    } else if (hue == hueRose) {
      filename = "ROSE.png";
    }
    return BitmapDescriptor._(<dynamic>[
      'fromAssetImage',
      "packages/amap_flutter_map/res/$filename",
      AMapUtil.devicePixelRatio
    ]);
  }
2.加载本地图片的方式
  ///根据输入的icon路径[iconPath]创建[BitmapDescriptor]
  static BitmapDescriptor fromIconPath(String iconPath) {
    return BitmapDescriptor._(<dynamic>[
      'fromAsset',
      iconPath,
    ]);
  }
static Future<BitmapDescriptor> fromAssetImage(
ImageConfiguration configuration,
String assetName, {
AssetBundle? bundle,
String? package,
bool mipmaps = true,
}) async {
if (!mipmaps && configuration.devicePixelRatio != null) {
return BitmapDescriptor._(<dynamic>[
'fromAssetImage',
assetName,
configuration.devicePixelRatio,
]);
}
final AssetImage assetImage =
AssetImage(assetName, package: package, bundle: bundle);
final AssetBundleImageKey assetBundleImageKey =
await assetImage.obtainKey(configuration);
final Size? size = configuration.size;
return BitmapDescriptor._(<dynamic>[
'fromAssetImage',
assetBundleImageKey.name,
assetBundleImageKey.scale,
if (kIsWeb && size != null)
[
size.width,
size.height,
],
]);
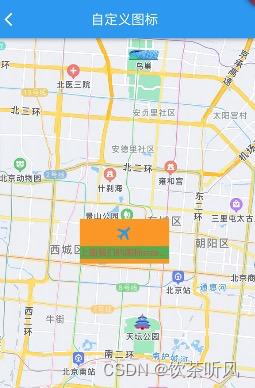
}3.自定义widget方式
所以我们要想加载自定义marker,大致的步骤分为:
- 将自定义widget转为png图片
- 将png图片转为Uint8List
 /// 根据将PNG图片转换后的二进制数据[byteData]创建BitmapDescriptor
  static BitmapDescriptor fromBytes(Uint8List byteData) {
    return BitmapDescriptor._(<dynamic>['fromBytes', byteData]);
  }

  final dynamic _json;

  dynamic toMap() => _json;
}
Uint8List? bd = await ImageUtil.convertWidgetToImage(customMarkWidget());
Marker marker = Marker(
position: markerPosition,
icon: BitmapDescriptor.fromBytes(bd!);
// icon: BitmapDescriptor.fromIconPath(_iconPath));ImageUtil.dart
import 'package:flutter/cupertino.dart';
import 'package:flutter/rendering.dart';
import 'dart:typed_data';
import 'dart:ui' as ui;

class MapImageUtil{

  //自定义Marker  需要将Widget成
  static Future<Uint8List?> convertWidgetToImage(Widget widget,
      {Alignment alignment = Alignment.center,
        Size size = const Size(double.maxFinite, double.maxFinite),
        double devicePixelRatio = 1.0,
        double pixelRatio = 1.0}) async {
    RenderRepaintBoundary repaintBoundary = RenderRepaintBoundary();
    RenderView renderView = RenderView(
      child: RenderPositionedBox(alignment: alignment, child: repaintBoundary),
      configuration: ViewConfiguration(
        size: size,
        devicePixelRatio: devicePixelRatio,
      ),
      window: ui.window,
    );

    PipelineOwner pipelineOwner = PipelineOwner();
    pipelineOwner.rootNode = renderView;
    renderView.prepareInitialFrame();

    BuildOwner buildOwner = BuildOwner(focusManager: FocusManager());
    RenderObjectToWidgetElement rootElement = RenderObjectToWidgetAdapter(
      container: repaintBoundary,
      child: widget,
    ).attachToRenderTree(buildOwner);
    buildOwner.buildScope(rootElement);
    buildOwner.finalizeTree();

    pipelineOwner.flushLayout();
    pipelineOwner.flushCompositingBits();
    pipelineOwner.flushPaint();
    ui.Image image = await repaintBoundary.toImage(pixelRatio: pixelRatio);
    ByteData? byteData = await image.toByteData(format: ui.ImageByteFormat.png);
    return byteData!.buffer.asUint8List();
  }
}
Widget customMarkWidget() {
return Container(
constraints: BoxConstraints(
maxWidth: 400,
maxHeight: 200,
),
color: Colors.orange,
child: Column(
crossAxisAlignment: CrossAxisAlignment.center,
mainAxisAlignment: MainAxisAlignment.center,
children: <Widget>[
//必须用Directionality包裹否则会引起崩溃
Directionality(
textDirection: TextDirection.ltr,
child: Transform.rotate(
angle: pi / 4,
child: const Icon(
Icons.airplanemode_active,
size: 80,
color: Colors.blue,
),
)),
SizedBox(
height: 20,
),
Directionality(
textDirection: TextDirection.ltr,
child: Container(
color: Colors.green,
child: Text("想要展示的文字",
overflow: TextOverflow.ellipsis,
maxLines: 1,
style: TextStyle(color: Colors.red, fontSize: 40))),
)
],
),
);最终展示效果如下: