怎样看Django和DRF的源码
CBV原理
class OrderView(View):
    def get(self, request, *args, **kwargs):
        ret = {


            'code': 1000,
            'msg': 'xxx'
        }

        return HttpResponse(json.dumps(ret), status=201)

    def post(self, request, *args, **kwargs):
        return HttpResponse('创建订单')

    def put(self, request, *args, **kwargs):
        return HttpResponse('更新订单')

    def delete(self, request, *args, **kwargs):
        return HttpResponse('删除订单')
-
我们自定义一个
OrderView类,继承于View类 -
path('order/',views.OrderView.as_view()), -
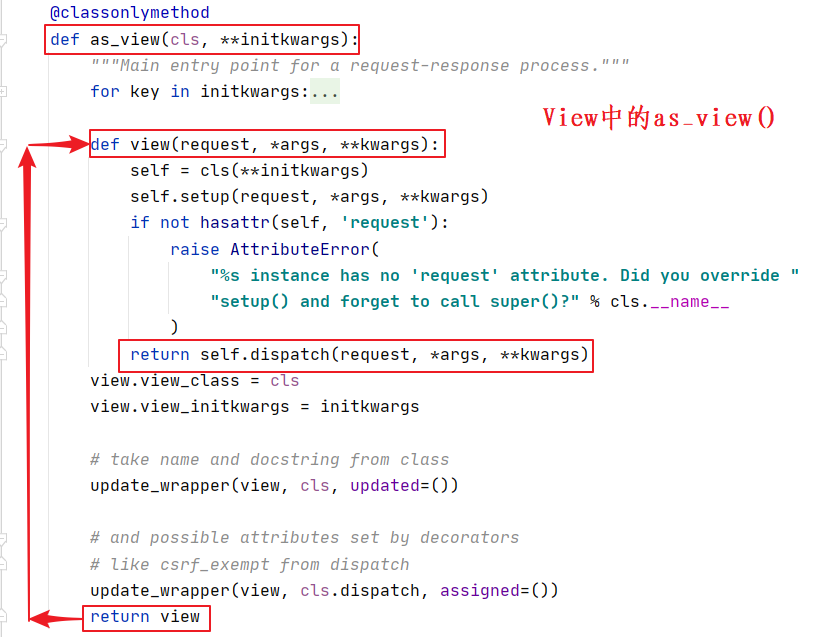
url中是调用的
OrderView的as_view()方法,但是我们并没有定义,说明这个方法是继承于View -
于是找到
View中的as_view()
-
其中
cls指的就是我们自定义的OrderView,而self则是将其实例化后的对象 -
接下来跳转至
dispatch方法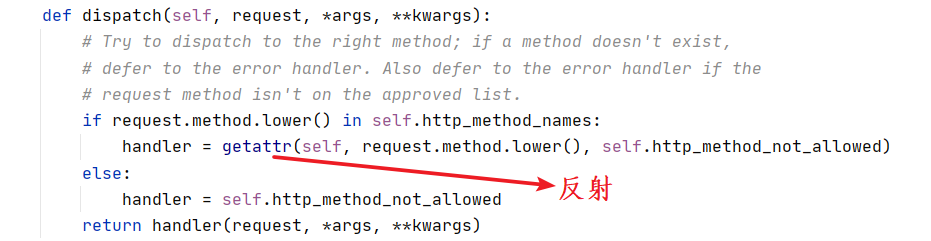
-
可以知道`如果在Django项目中使用CBV的模式,实际上调用了getattr的方式来执行获取类中的请求方法对应的函数
-
当然也可以自定义
dispatch方法来实现自己的操作
DRF的APIView源码+用户认证
class Myauthentication(object):
    # 用户认证
    def authenticate(self, request):
        token = request._request.GET.get('token')
        # 此处可以获取用户名和密码,进行数据校验
        if not token:
            raise exceptions.AuthenticationFailed('用户认证失败')
        return ('alex', None)
    def authenticate_header(self, val):
        pass

class DogView(APIView):
    # 进行用户认证
    authentication_classes = [Myauthentication, ]
    def get(self, request, *args, **kwargs):
        print(request)
        # 此request和原生的request不同
        # 是DRF的dispatch加工后的request
        print(request.user)
        # 即Myauthentication中的authenticate返回的元组
        self.dispatch
        ret = {


            'code': 1000,
            'msg': 'xxx'
        }
        return HttpResponse(json.dumps(ret), status=201)

    def post(self, request, *args, **kwargs):
        return HttpResponse('创建Dog')

    def put(self, request, *args, **kwargs):
        return HttpResponse('更新Dog')

    def delete(self, request, *args, **kwargs):
        return HttpResponse('删除Dog')
-
同理,根据urls文件可知,先去找
as_view()方法, -
自定义的
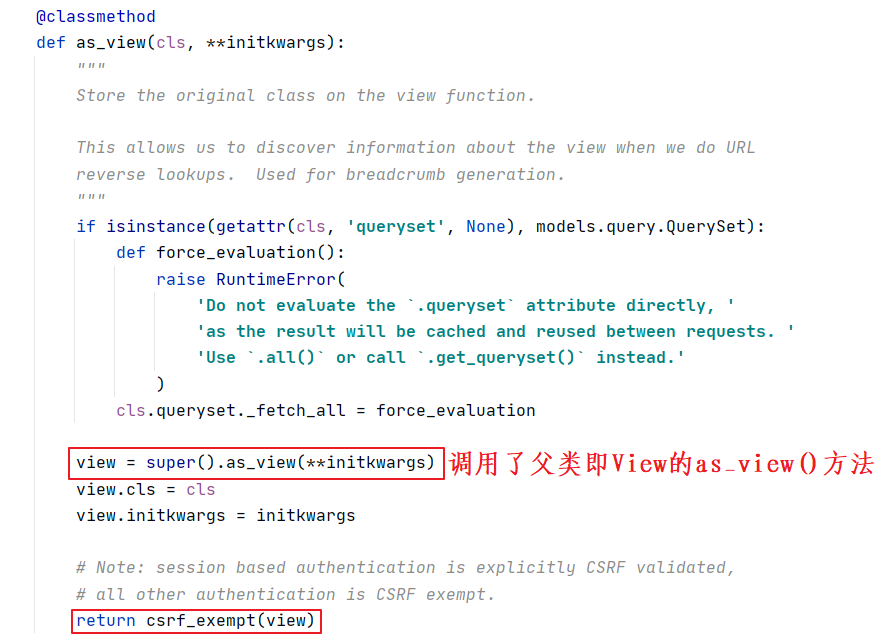
DogView没有,那么去找它的父类,即APIView的as_view()扫描二维码关注公众号,回复: 16248204 查看本文章
-
-
可见它是调用了
View的as_view()方法,而通过上面的CBV分析,最终是调用self的dispatch方法 -
然而,需要注意,此例
self,指的是我们自定义的DogView,因此想要寻找dispatch,需要从DogView一层一层的找 -
而
APIView中是有dispatch方法的,故而转到源码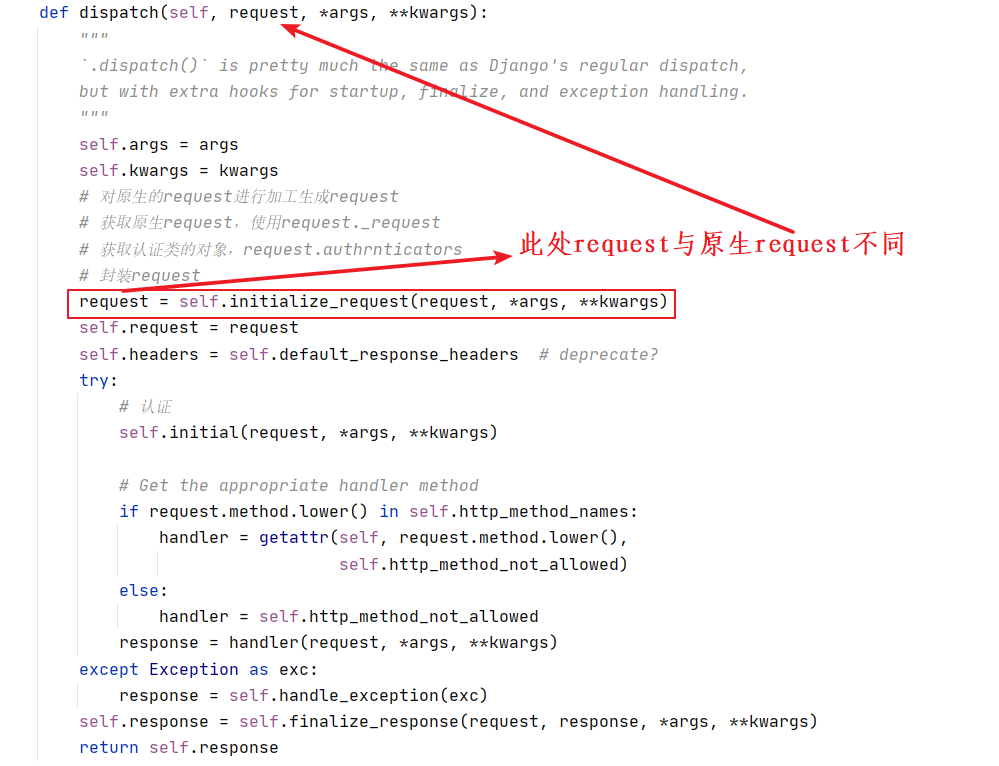
-
原生的
request被intialize_request加工,跳转至源码 -
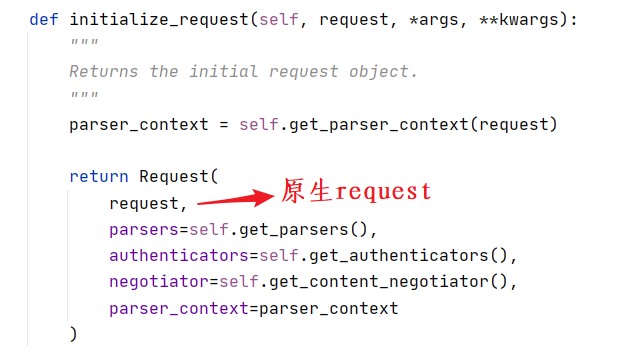
-
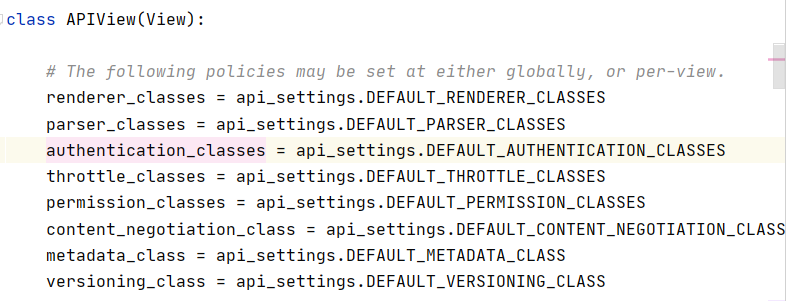
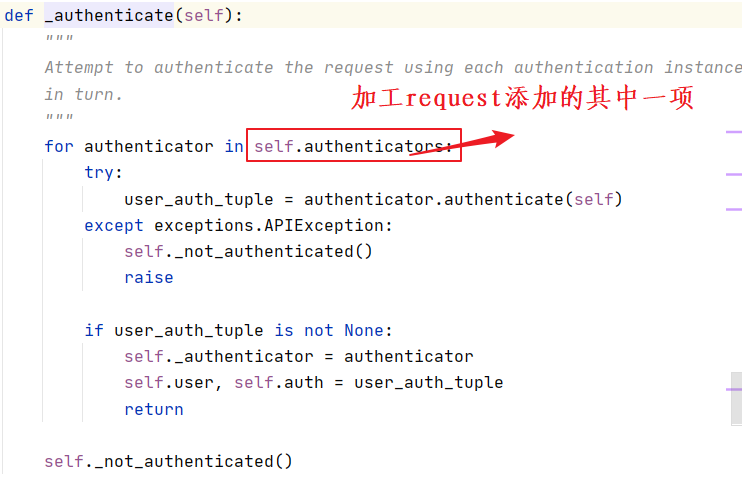
其中增加了一项
authenticators,调用的是self.get_authenticators,同理,这个方法,也需要从DogView开始找,自己没有向父类找 -

-
将
self.authentication_classes的类列表实例化为对象,继续跳转 -
-
可以在
DogView中自定义一个authentication_classes,就可以将默认的覆盖 -
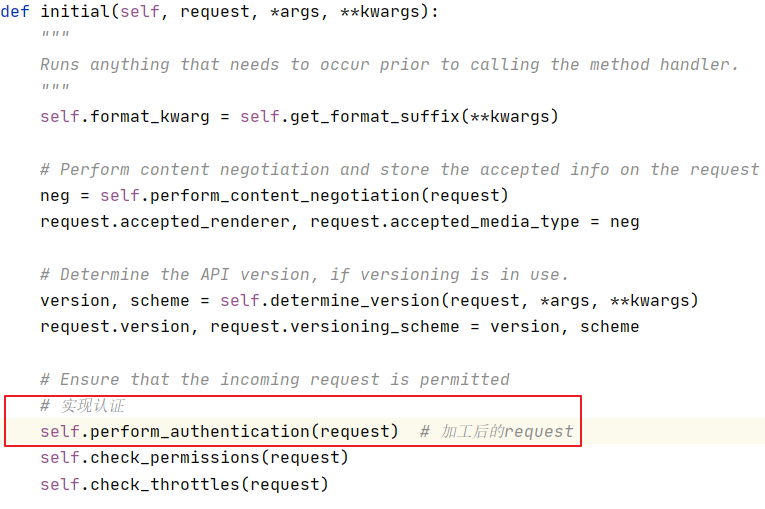
回到
APIView中的dispatch,找到intial跳转,(传入的参数是加工后的request) -
-
继续跳转
-
找到加工后的
request(从intialize_request返回值处跳转) -
左侧先设置展开

-
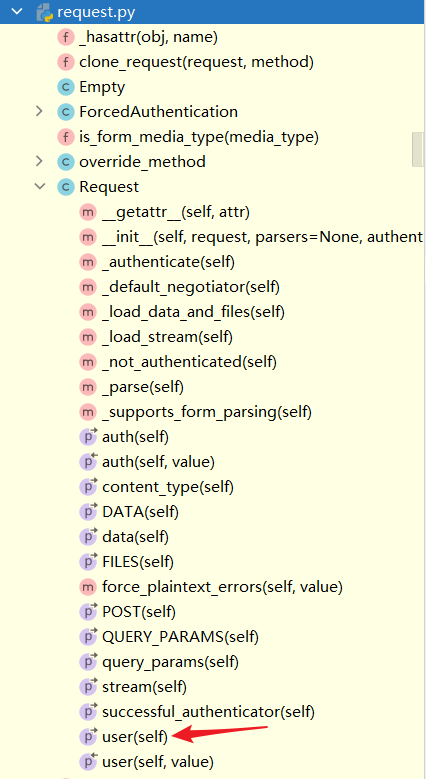
-
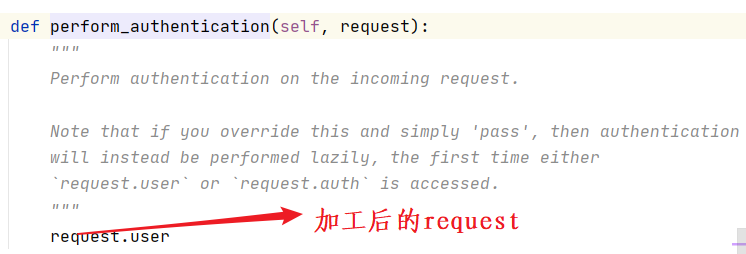
找到
user
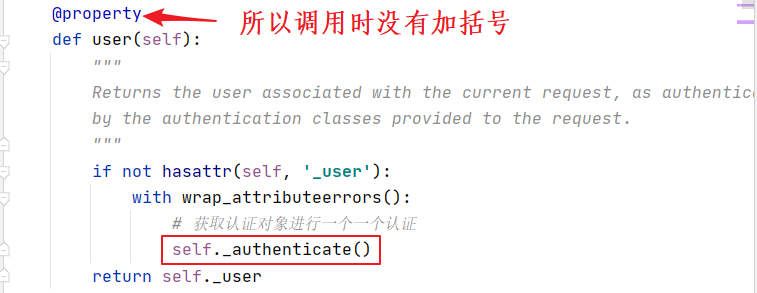
- 继续跳转
-
其中每一个
authenticator都有一个authenticate方法,所以我们在自定义的Myauthentication中也要写一个authenticate -
此外还需要一个
authenticate_header方法
74)] -
其中每一个
authenticator都有一个authenticate方法,所以我们在自定义的Myauthentication中也要写一个authenticate -
此外还需要一个
authenticate_header方法 -
这样实现了基础的用户认证(此时url中token可以随便写)