2、创建SpringBoot项目
2.1、创建项目
2.2、导入依赖
SpringBoot项目中的依赖会根据项目创建时选择的依赖自动添加,springboot管理的可以通过启动器添加,其余的正常添加。
-
spring-boot-starter-web:用于实现HTTP接口(包含了SpringMVC),使用SpringMVC构建web项目的入门者,使用Tomcat作为默认嵌入式容器,
-
spring-boot-starter-test:包含了单元测试所需的jar包
-
spring-boot-starter-thymeleaf:是一个模板引擎,和Velocity、FreeMarker类似,用于替代 JSP
-
spring-boot-devtools:对象项目进行热部署,当java代码发生改变时,可以自动部署更新后的代码,需要在settings配置

<dependencies>

    <!--web环境相关依赖,集成有Tomcat、dispatcherServlet、xml配置等-->
    <dependency>
        <groupId>org.springframework.boot</groupId>
        <artifactId>spring-boot-starter-web</artifactId>
    </dependency>


    <!--单元测试-->
    <dependency>
        <groupId>org.springframework.boot</groupId>
        <artifactId>spring-boot-starter-test</artifactId>
        <scope>test</scope>
    </dependency>

     <!--thymeleaf模板的依赖-->
    <dependency>
        <groupId>org.springframework.boot</groupId>
        <artifactId>spring-boot-starter-thymeleaf</artifactId>
    </dependency>

    <!--日志启动器依赖-->
    <dependency>
        <groupId>org.springframework.boot</groupId>
        <artifactId>spring-boot-starter-logging</artifactId>
    </dependency>

    <!--redis的依赖,内部默认的连接池lettuce-core-->
    <dependency>
        <groupId>org.springframework.boot</groupId>
        <artifactId>spring-boot-starter-data-redis</artifactId>
    </dependency>

    <!-- 配置注解处理器,用于yml文件绑定数据,且可以支持Spring配置文件 -->
    <dependency>
        <groupId>org.springframework.boot</groupId>
        <artifactId>spring-boot-configuration-processor</artifactId>
        <optional>true</optional>
    </dependency>

    <!--JSR303数据验证-->
    <dependency>
        <groupId>org.springframework.boot</groupId>
        <artifactId>spring-boot-starter-validation</artifactId>
    </dependency>

    <!--springboot的热部署,当代码改变时,可以自动部署更新后的代码,需要在settings中配置Compiler-->
    <dependency>
        <groupId>org.springframework.boot</groupId>
        <artifactId>spring-boot-devtools</artifactId>
        <scope>runtime</scope>
        <optional>true</optional>
    </dependency>

    <!--mysql的依赖-->
    <dependency>
        <groupId>com.mysql</groupId>
        <artifactId>mysql-connector-j</artifactId>
        <scope>runtime</scope>
    </dependency>

    <!--德鲁伊数据连接池启动器-->
    <dependency>
        <groupId>com.alibaba</groupId>
        <artifactId>druid-spring-boot-starter</artifactId>
        <version>1.2.6</version>
    </dependency>

    <!--JDBC-->
    <dependency>
        <groupId>org.springframework.boot</groupId>
        <artifactId>spring-boot-starter-jdbc</artifactId>
    </dependency>

    <!--lombok依赖-->
    <dependency>
        <groupId>org.projectlombok</groupId>
        <artifactId>lombok</artifactId>
        <optional>true</optional>
    </dependency>

</dependencies>
<!--redis默认的连接池lettuce-core需要此依赖-->
<dependency>
    <groupId>org.apache.commons</groupId>
    <artifactId>commons-pool2</artifactId>
    <version>2.11.1</version>
</dependency>

<!--mybatis的启动器-->
<!--        <dependency>-->
<!--            <groupId>org.mybatis.spring.boot</groupId>-->
<!--            <artifactId>mybatis-spring-boot-starter</artifactId>-->
<!--            <version>2.2.0</version>-->
<!--        </dependency>-->

<!--   pagehelper分页插件,内部集成了mybatis  -->
<dependency>
    <groupId>com.github.pagehelper</groupId>
    <artifactId>pagehelper-spring-boot-starter</artifactId>
    <version>1.3.1</version>
</dependency>

<!-- 对sql语句进行解析和组装-->
<dependency>
    <groupId>com.github.jsqlparser</groupId>
    <artifactId>jsqlparser</artifactId>
    <version>4.1</version>
</dependency>

<!--shiro依赖-->
<dependency>
    <groupId>org.apache.shiro</groupId>
    <artifactId>shiro-spring</artifactId>
    <version>1.7.1</version>
</dependency>

<!--Swagger的依赖-->
<dependency>
    <groupId>io.springfox</groupId>
    <artifactId>springfox-swagger2</artifactId>
    <version>2.9.2</version>
</dependency>
<dependency>
    <groupId>io.springfox</groupId>
    <artifactId>springfox-swagger-ui</artifactId>
    <version>2.9.2</version>
</dependency>

<!--开启邮箱任务-->
<dependency>
    <groupId>org.springframework.boot</groupId>
    <artifactId>spring-boot-starter-mail</artifactId>
</dependency>

<!--fastjson的依赖-->
<dependency>
    <groupId>com.alibaba</groupId>
    <artifactId>fastjson</artifactId>
    <version>1.2.76</version>
</dependency>

<!--jjwt用于作为JSON对象在各方之间安全地传输信息。 -->
<dependency>
    <groupId>io.jsonwebtoken</groupId>
    <artifactId>jjwt</artifactId>
    <version>0.9.1</version>
</dependency>

<!-- 开启aop -->
<dependency>
    <groupId>org.springframework.boot</groupId>
    <artifactId>spring-boot-starter-aop</artifactId>
    <version>2.5.4</version>
</dependency>

<!-- 内置的不支持jsp,所以要添加支持jsp的tomcat
    <dependency>
        <groupId>org.apache.tomcat.embed</groupId>
        <artifactId>tomcat-embed-jasper</artifactId>
    </dependency>
-->
<!--jsp标签库支持
    <dependency>
        <groupId>javax.servlet</groupId>
        <artifactId>jstl</artifactId>
    </dependency>
-->
2.3、创建配置文件
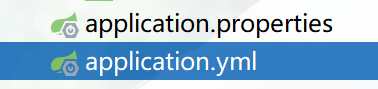
在SpringBoot中一些基础配置是内部封装好的,即使不做任何配置,项目也可以正常启动,做一些springmvc相关的跳转操作。而 SpringBoot 默认使用以下 2 种全局的配置文件,其文件名是固定的。
-
application.properties(优先级大于yaml文件。)
#启动端口 server.port=8080 #启动路径:默认为/ server.servlet.context-path=/ # 应用名称 spring.application.name=springbootproject # 数据源 spring.datasource.driver-class-name=com.mysql.cj.jdbc.Driver spring.datasource.url=jdbc:mysql://localhost:3306/数据库?serverTimezone=UTC spring.datasource.username=root spring.datasource.password=密码 # 配置模板引擎 # 开启模板缓存(默认值: true ) spring.thymeleaf.cache=true # 检查模板是否存在,然后再呈现(默认值: true ) spring.thymeleaf.check-template=true # 检查模板位置是否正确(默认值 :true ) spring.thymeleaf.check-template-location=true #Content-Type 的值(默认值: text/html ) spring.thymeleaf.content-type=text/html # 开启 MVC Thymeleaf 视图解析(默认值: true ) spring.thymeleaf.enabled=true # 模板编码 spring.thymeleaf.encoding=UTF-8 # 要被排除在解析之外的视图名称列表,⽤逗号分隔 spring.thymeleaf.excluded-view-names= # 要运⽤于模板之上的模板模式。另⻅ StandardTemplate-ModeHandlers( 默认值: HTML5) spring.thymeleaf.mode=HTML5 # 在构建 URL 时添加到视图名称前的前缀(默认值: classpath:/templates/ ) spring.thymeleaf.prefix=classpath:/templates/ # 在构建 URL 时添加到视图名称后的后缀(默认值: .html ) spring.thymeleaf.suffix=.html -
application.yml:YAML 格式的语言(可读性更好,推荐使用)
server:
  port: 8080
  servlet:
    context-path: /
spring:
  application:
    # 应用名称
    name: springbootproject

    #数据源
  datasource:
    driver-class-name: com.mysql.cj.jdbc.Driver
    url: jdbc:mysql://localhost:3360/数据库?userUnicode=true&characterEncoding=UTF-8&useSSL=false&serverTimezone=UTC
    username: root
    password: 密码

    #配置模板引擎(默认的Thymeleaf的,基本不用怎么配置)
  thymeleaf:
    cache: true   # 开启模板缓存(默认值: true )
    check-template: true  # 检查模板是否存在,然后再呈现(默认值: true )
    check-template-location: true # 检查模板位置是否正确(默认值 :true )
    encoding: UTF-8   # 模板编码(默认值: UTF-8  )
    servlet:
      content-type: text/html  #Content-Type 的值(默认值: text/html )
    enabled: true  #开启 MVC Thymeleaf 视图解析(默认值: true )
    excluded-view-names:     # 要被排除在解析之外的视图名称列表,⽤逗号分隔
    mode: HTML5   # 要运⽤于模板之上的模板模式( 默认值: HTML5)
    prefix: classpath:/templates/   #视图前缀(默认值: classpath:/templates/ )
    suffix: .html   # 视图后缀(默认值: .html )
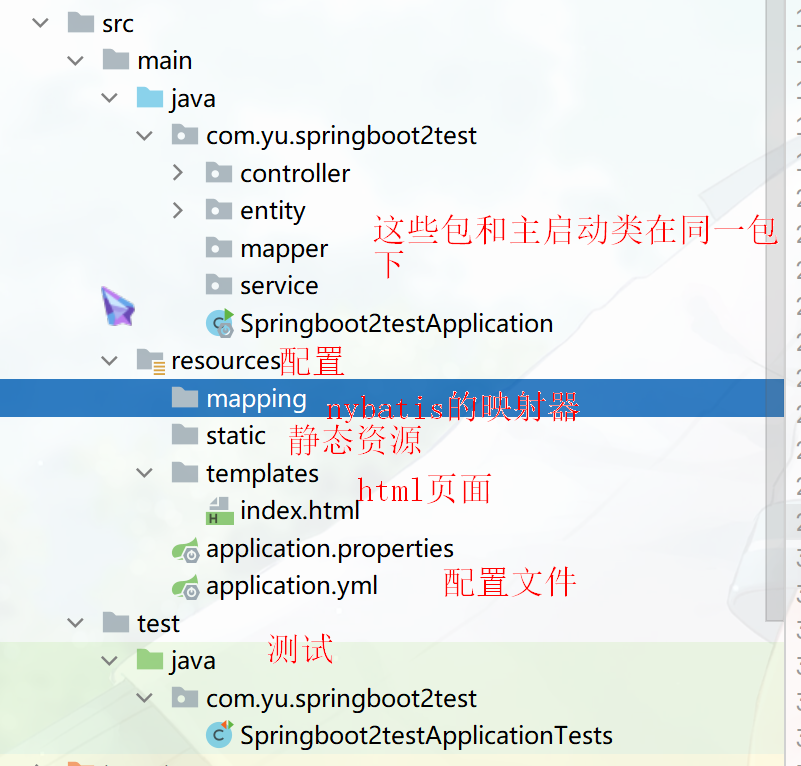
2.4、包的创建
在SpringBoot中创建的 controller、service 等包需要和 SpringbootApplication 启动类同级且在同一包下。
2.5、多开发环境配置
在实际的项目开发中,一个项目通常会存在多个环境,例如,开发环境、测试环境和生产环境等。不同环境的配置也不尽相同,例如开发环境使用的是开发数据库,测试环境使用的是测试数据库,而生产环境使用的是线上的正式数据库。
Spring Profiles 为在不同环境下使用不同的配置提供了支持,我们可以通过激活、指定参数等方式快速切换环境。有两种方式:
-
多profile文件方式:使用 多 个配置文件
-
applcation.yml、properties:默认配置,用来激活其他三种环境配置
# 选择环境激活 spring: #配置环境 profiles: active: dev -
application-dev.yml、properties:开发环境配置
-
application-test.yml、properties:测试环境配置
-
application-prod.yml、properties:生产环境配置
-
-
多文档块配置:在同一个配置文件中,使用 —来分割
# 选择环境激活
spring:
  #配置环境
  profiles:
    active: dev
---
#开发环境
server:
  port: 8080
spring:
  profiles: dev
---
#测试环境
server:
  port: 8081
spring:
  profiles: test
---
#生产环境
server:
  port: 8082
spring:
  profiles: prod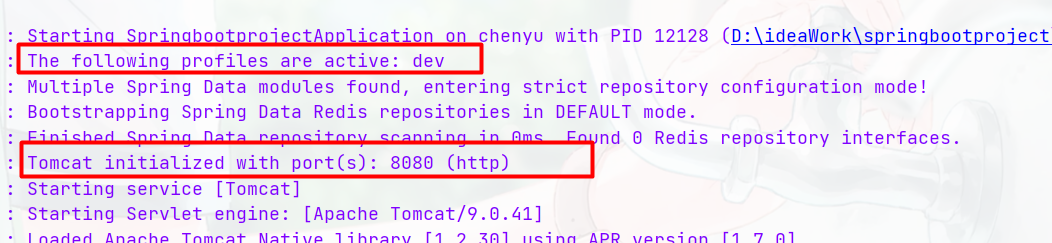
2.6、静态资源的处理
静态资源即:CSS、JS、images、HTML等,在Spring中需要指定这个些文件的映射路径,SpringBoot不再需要进行此项配置,它有默认的配置路径。
可以导入静态资源的几种方法
-
自行配置,如果在配置文件中自己配置后,默认的路径失效,会按照自己配置的路径来
spring: mvc: static-path-pattern: -
推荐使用:
默认的四种路径下,可以直接使用 /** 找到相应的静态资源classpath:/META-INF/resources/:webjars资源的目录classpath:/resources/:reources目录下的resources目录classpath:/static/:resources目录下的static目录classpath:/public/:resources目录下的public目录

-
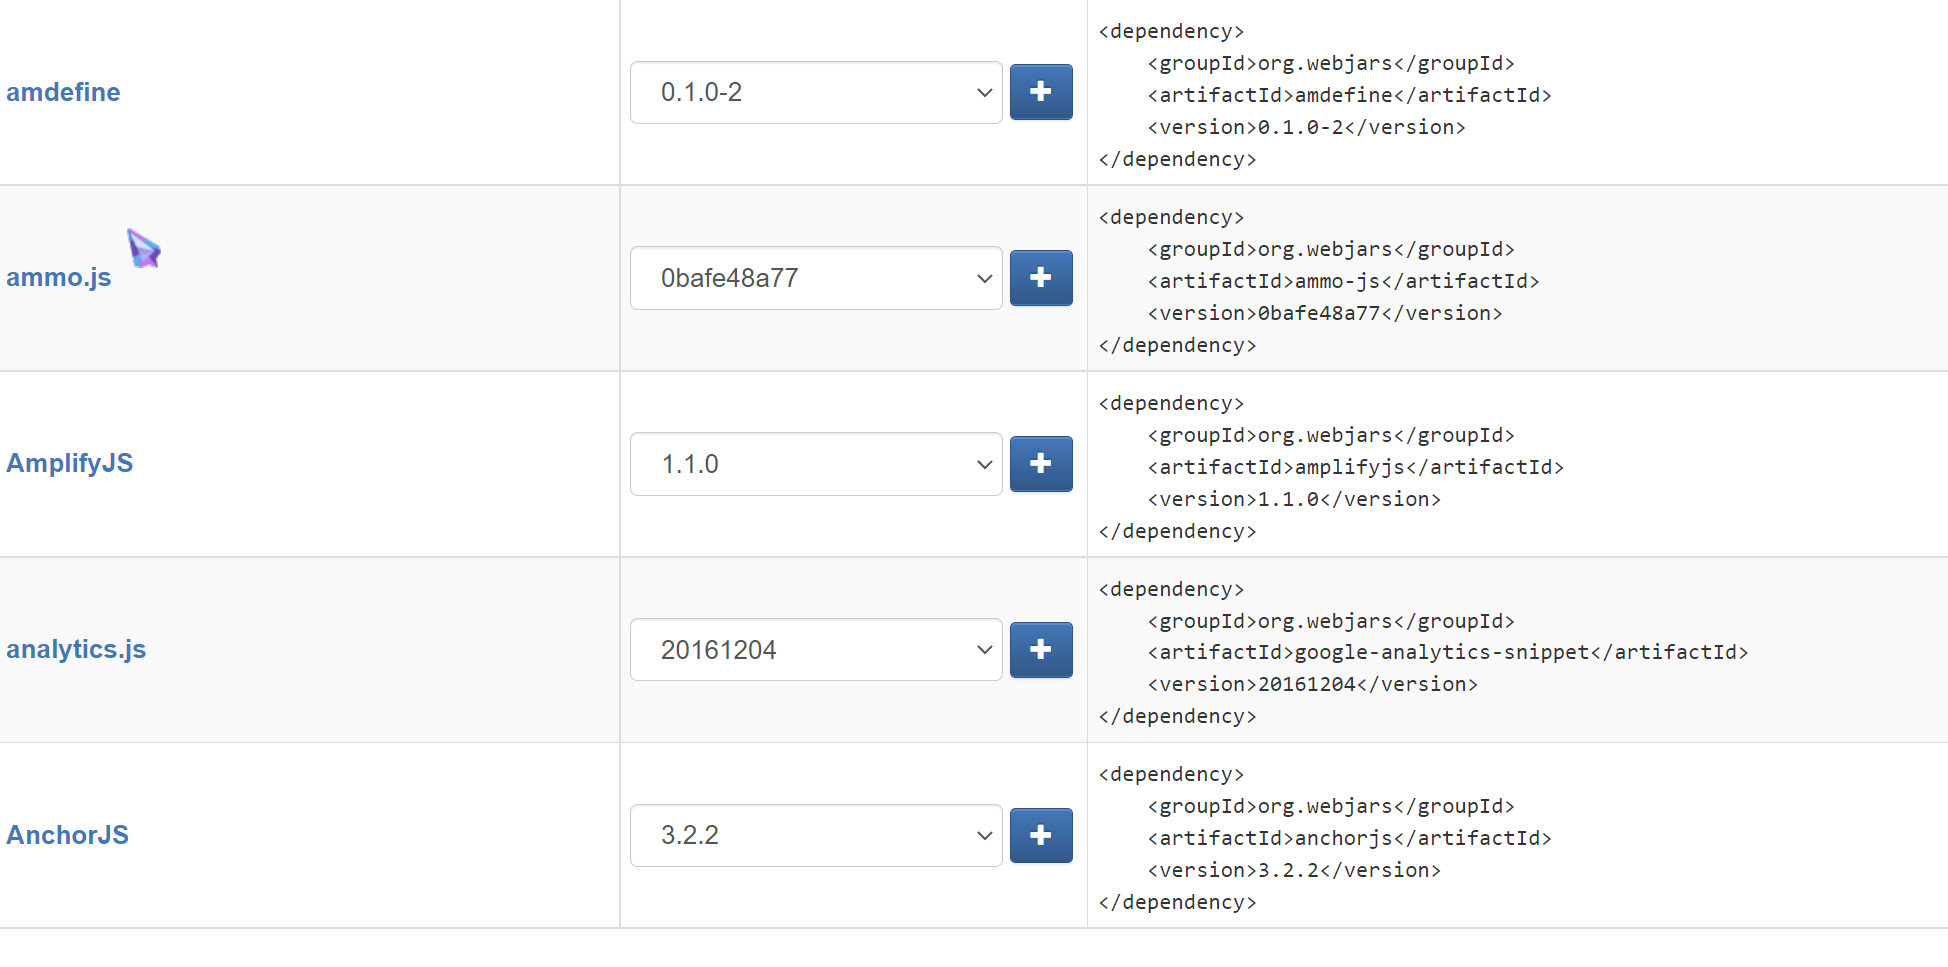
通过导入webjars的依赖:它可以将 Web 前端资源(JS,CSS 等)打成一个个的 Jar 包,然后将这些 Jar 包部署到 Maven 中央仓库中进行统一管理,当 Spring Boot 项目中需要引入 Web 前端资源时,只需要访问 WebJars 官网,找到所需资源的 pom 依赖,将其导入到项目中即可。
所有通过 WebJars 引入的前端资源都存放在当前项目类路径(classpath)下的“/META-INF/resources/webjars/” 目录中
<dependency>
    <groupId>org.webjars</groupId>
    <artifactId>jquery</artifactId>
    <version>3.6.0</version>
</dependency>