友情链接:点击打开链接
1.将Activity传值到Fragment
具体步骤:
<1>声明碎片事务器对象
private FragmentManager fragmentManager;
<2>得到碎片事务器对象
FragmentTransaction fragmentTransaction = this.FragmentManager.beginTransaction();
<3>将我们需要添加的Fragment对象作为子元素添加到LinearLayout的Container容器中
fragmentTransaction.add(R.id.linearLayout_container,Fragment);
<4>将之前添加的Fragment对象也向Fragment的返回栈添加一份
fragmentTransaction.addBackStack(null);
<5>提交碎片事务,提交之后的操作才会生效。
fragmentTransaction.commit();
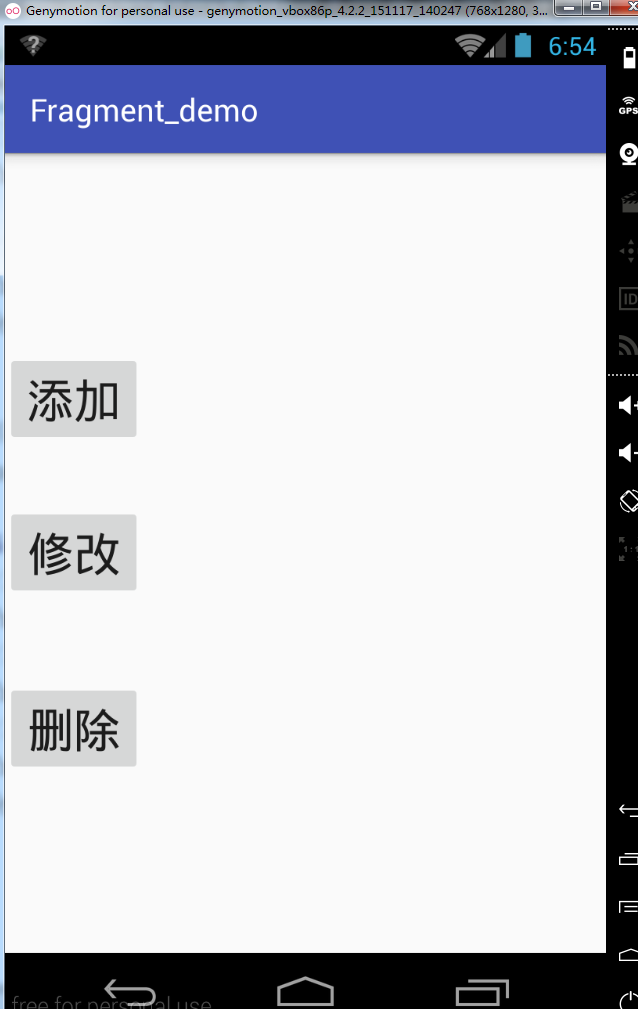
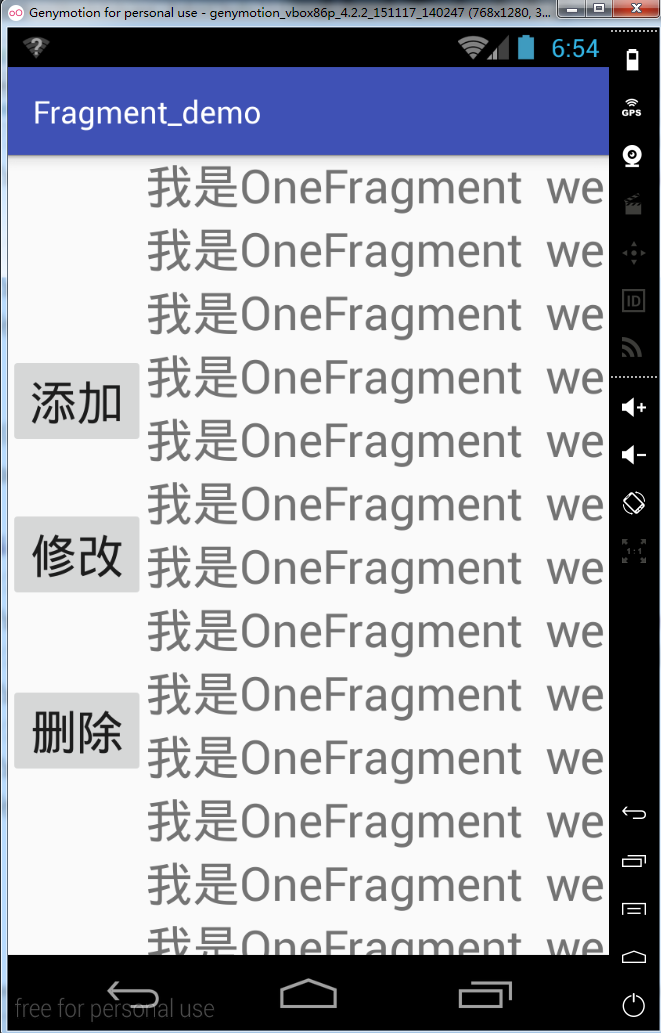
具体效果:
实例代码:
业务逻辑代码:
package com.example.tf.fragment_demo;

import android.app.FragmentManager;
import android.app.FragmentTransaction;
import android.os.Bundle;
import android.support.v7.app.AppCompatActivity;
import android.view.View;
import com.example.tf.fragment_demo.fragments.OneFragment;
import com.example.tf.fragment_demo.fragments.TwoFragment;


public class MainActivity extends AppCompatActivity {

    /**
     * 声明碎片管理器对象
     */
    private FragmentManager fragmentManager;

    @Override
    protected void onCreate(Bundle savedInstanceState) {
        super.onCreate(savedInstanceState);
        setContentView(R.layout.activity_main);
        //1.得到碎片管理器对象
        this.fragmentManager=this.getFragmentManager();
    }
    //private OneFragment oneFragment=new OneFragment();//多次添加同一个地址报错
    private OneFragment oneFragment;
    /**
     * 添加Fragment
     * 注意:同一个fragment对象只能往同一个容器中添加一次,如果多次添加会报异常:java.lang.IllegalStateException: Fragment already added: OneFragment{5352c090 #0 id=0x7f0c0053}
     * @param view
     */
    public void add(View view){
        oneFragment=new OneFragment();
        //2.通过碎片管理器对象得到碎片事务对象
        FragmentTransaction fragmentTransaction=this.fragmentManager.beginTransaction();
        //将oneFragment对象作为linearLayout_container的子元素添加到linearLayout_container容器里面
        fragmentTransaction.add(R.id.linearLayout_container,oneFragment);
        //将之前添加到容器linearLayout_container里面的fragment 也添加到fragment 返回栈中一份
        fragmentTransaction.addToBackStack(null);
        //提交碎片事务,提交之后之前的操作才会生效
        fragmentTransaction.commit();
        System.out.println("===add=====");
    }

    private TwoFragment twoFragment;
    /**
     * 修改Fragment
     * @param view
     */
    public void update(View view){
        //2.通过碎片管理器对象得到碎片事务对象
        FragmentTransaction fragmentTransaction=this.fragmentManager.beginTransaction();
        twoFragment=new TwoFragment();
        //使用TwoFragment 替换LinearLayout 容器中的其它子元素,如果之前添加了多个子元素,则只替换其中部分子元素
        //replace 在替换指定Fragment 对象时会首先判断LinearLayout容器中是否有子元素,如果没有则直接添加一个子元素
        fragmentTransaction.replace(R.id.linearLayout_container,twoFragment);

        //提交碎片事务,提交之后之前的操作才会生效
        fragmentTransaction.commit();
        System.out.println("===update=====");
    }
    /**
     * 删除Fragment
     * @param view
     */
    public void delete(View view){
        //2.通过碎片管理器对象得到碎片事务对象
        FragmentTransaction fragmentTransaction=this.fragmentManager.beginTransaction();
        //将twoFragment对象从碎片事务管理器中删除,即从指定容器中删除了
        fragmentTransaction.remove(twoFragment);
        //提交碎片事务,提交之后之前的操作才会生效
        fragmentTransaction.commit();
        System.out.println("===delete=====");
    }
}
主UI视图的xml代码:
<?xml version="1.0" encoding="utf-8"?>
<RelativeLayout xmlns:android="http://schemas.android.com/apk/res/android"
    android:layout_width="match_parent"
    android:layout_height="match_parent">

    <Button
        android:layout_width="wrap_content"
        android:layout_height="wrap_content"
        android:text="添加"
        android:onClick="add"
        android:textSize="30sp"
        android:id="@+id/button_add"
        android:layout_alignParentTop="true"
        android:layout_alignParentStart="true"
        android:layout_marginTop="127dp" />

    <Button
        android:layout_width="wrap_content"
        android:layout_height="wrap_content"
        android:text="修改"
        android:onClick="update"
        android:textSize="30sp"
        android:id="@+id/button_update"
        android:layout_centerVertical="true"
        android:layout_alignParentStart="true" />

    <Button
        android:layout_width="wrap_content"
        android:layout_height="wrap_content"
        android:text="删除"
        android:onClick="delete"
        android:textSize="30sp"
        android:id="@+id/button_delete"
        android:layout_marginTop="52dp"
        android:layout_below="@+id/button_update"
        android:layout_alignParentStart="true" />

    <!--
    如果想同时实现水平和垂直两个方向的滚动操作,则可以使用ScrollView 嵌套HorizontalScrollView或者
    HorizontalScrollView嵌套ScrollView都可以实现水平和垂直两个方向的滚动操作
     -->

    <ScrollView
        android:layout_width="match_parent"
        android:layout_height="match_parent"
        android:layout_toEndOf="@+id/button_add">
        <HorizontalScrollView
            android:layout_width="match_parent"
            android:layout_height="match_parent"
            android:layout_toEndOf="@+id/button_add">
            <LinearLayout
                android:id="@+id/linearLayout_container"
                android:orientation="vertical"
                android:layout_width="match_parent"
                android:layout_height="match_parent"
                android:layout_alignParentTop="true"
                android:layout_toEndOf="@+id/button_add">
            </LinearLayout>
        </HorizontalScrollView>
    </ScrollView>

</RelativeLayout>
<1>第一个Fragment.java
package com.example.tf.fragment_demo.fragments;

import android.app.Fragment;
import android.os.Bundle;
import android.support.annotation.Nullable;
import android.view.LayoutInflater;
import android.view.View;
import android.view.ViewGroup;

import com.example.tf.fragment_demo.R;

import java.util.zip.Inflater;

/**
 * Created by TF on 2018/6/13.
 */
public class OneFragment extends Fragment {

    @Nullable
    @Override
    public View onCreateView(LayoutInflater inflater, ViewGroup container, Bundle savedInstanceState) {
        return inflater.inflate(R.layout.fragment_one,null);
    }
}
<2>第二个Fragment.java
同上,基本没有区别
[1]第一个的xml布局代码:
<?xml version="1.0" encoding="utf-8"?>
<LinearLayout xmlns:android="http://schemas.android.com/apk/res/android"
android:orientation="vertical" android:layout_width="match_parent"
android:layout_height="match_parent">

<TextView
    android:layout_width="match_parent"
    android:layout_height="wrap_content"
    android:text="我是OneFragment  we help each other and we love each other love me love my dog"
    android:singleLine="true"
    android:gravity="center"
    android:textSize="30sp"
    android:id="@+id/textView_one" />
</LinearLayout>
[2]第二个的xml布局代码:
同上,与第一个没有区别
2.将Fragment传值给Activity
1.得到Fragment所依附的Activity并通过findViewById()查找控件并赋值。
2.通过得到fragment所依附的Activity并给Activity提供setter函数传值到Activity或者让Activity实现传值的
接口来实现。
实例效果:

业务逻辑代码:
主类代码:
package com.example.lenovo.dialog_demo;

import android.content.DialogInterface;
import android.preference.DialogPreference;
import android.support.v7.app.AlertDialog;
import android.support.v7.app.AppCompatActivity;
import android.os.Bundle;
import android.text.TextUtils;
import android.view.View;
import android.widget.EditText;
import android.widget.TextView;
import android.widget.Toast;

import com.example.lenovo.dialog_demo.interfaces.PassValue;

import org.w3c.dom.Text;

import java.lang.reflect.Field;

public class MainActivity extends AppCompatActivity implements PassValue{

    private TextView textView_name;
    @Override
    protected void onCreate(Bundle savedInstanceState) {
        super.onCreate(savedInstanceState);
        setContentView(R.layout.activity_main);

        textView_name = (TextView) this.findViewById(R.id.textView_name);
    }

    //通过setter函数传值到当前Activity
    @Override
    public void setName(String name) {
        textView_name.setText(name);
    }
}
副类代码:
package com.example.lenovo.dialog_demo.fragments;

import android.app.Fragment;
import android.os.Bundle;
import android.text.TextUtils;
import android.view.LayoutInflater;
import android.view.View;
import android.view.ViewGroup;
import android.widget.Button;
import android.widget.EditText;

import com.example.lenovo.dialog_demo.R;
import com.example.lenovo.dialog_demo.interfaces.PassValue;

public class DetailFragment extends Fragment{
    private EditText editText_userName;
    @Override
    public View onCreateView(LayoutInflater inflater, ViewGroup container, Bundle savedInstanceState) {

        View view = inflater.inflate(R.layout.fragment_detail,container,false);
        editText_userName = (EditText) view.findViewById(R.id.editText_userName);

        Button button_pass = (Button) view.findViewById(R.id.button_pass);
        button_pass.setOnClickListener(new View.OnClickListener() {
            @Override
            public void onClick(View view) {
                String userName = editText_userName.getText().toString();
                if(TextUtils.isEmpty(userName)){
                    editText_userName.setError("用户名不能为空");
                    editText_userName.requestFocus();
                    return;
                }
                //得到当前Fragment所依附的Activity
                //MainActivity mainActivity = (MainActivity) getActivity();

                //方式一:找到Activity中的TextView控件
               //TextView textView_name = mainActivity.findViewById(R.id.textView_name);
                //textView_name.setText(userName);

                //方式二:给Activity增加setter函数传值给Activity
                //mainActivity.setName(userName);

                //使用接口完成通用传值操作
                PassValue passValue = (PassValue) getActivity();
                passValue.setName(userName);

            }
        });
        return view;
    }
}
定义一个接口:
package com.example.lenovo.dialog_demo.interfaces;

public interface PassValue  {
    void setName(String name);
}
用户界面的xml:
<?xml version="1.0" encoding="utf-8"?>
<LinearLayout xmlns:android="http://schemas.android.com/apk/res/android"
    android:orientation="horizontal"
    android:layout_width="match_parent"
    android:layout_height="match_parent">

    <LinearLayout
        android:id="@+id/linearLayout_left"
        android:orientation="vertical"
        android:layout_weight="1"
        android:layout_height="match_parent"
        android:layout_width="match_parent"
        >
    <fragment
        android:id="@+id/fragment"
        android:layout_width="match_parent"
        android:layout_height="wrap_content"
        android:name="com.example.lenovo.dialog_demo.fragments.DetailFragment"
        />
    </LinearLayout>

    <LinearLayout
        android:id="@+id/linearLayout_right"
        android:orientation="vertical"
        android:layout_weight="1"
        android:layout_width="match_parent"
        android:layout_height="match_parent"
        >
    <TextView
        android:layout_width="match_parent"
        android:layout_height="match_parent"
        android:gravity="center"
        android:text="姓名"
        android:textSize="30sp"
        android:id="@+id/textView_name"
        />
    </LinearLayout>

</LinearLayout>
用户输入界面的xml:
<?xml version="1.0" encoding="utf-8"?>
<LinearLayout xmlns:android="http://schemas.android.com/apk/res/android"
    android:orientation="vertical"
    android:layout_width="match_parent"
    android:layout_height="match_parent">

    <EditText
        android:layout_width="match_parent"
        android:layout_height="wrap_content"
        android:hint="请输入你的姓名"
        android:id="@+id/editText_userName"
        />
    <Button
        android:layout_width="wrap_content"
        android:layout_height="wrap_content"
        android:text="传值到Activity"
        android:id="@+id/button_pass"
        />
</LinearLayout>
3.Fragment传值给Fragment(中心思想:并不是传值,而是通过查找目标控件,将要传的值"塞"给"目标控件")。
注意:一个Fragment的子类listFragment
继承listFragment有哪些好处?
A.自带界面并且界面上有一个ListView,这个ListView对象为mList
B.点击用户界面获取数据时,监听器不用自己写,ListFragment已经封装好了,可以直接使用
主要方式:一个Fragment得到FragmentManager查找到另一个Fragment。
1.并通过setter函数查找控件并赋值。
2.getView方法得到view查找控件并赋值。
FragmentLeft(要传值的):
package com.hsj.example.fragmentpassvaluetofragmentdemo05.fragments;

import android.app.ListFragment;
import android.os.Bundle;
import android.view.View;
import android.widget.ArrayAdapter;
import android.widget.ListView;

import com.hsj.example.fragmentpassvaluetofragmentdemo05.R;

import java.util.ArrayList;
import java.util.List;

/**
 * 继承ListFragment 有哪些好处?
 *  A:自带界面并且界面上有一个ListView,通过查看源码发现这个ListView 对象为mList
 *  B:点击用户条目获取数据时监听器不用自己编写,ListFragment 已经封装好了,我们直接使用
 */
public class LeftFragment_bak01 extends ListFragment {

    private  List<String> data;
    @Override
    public void onActivityCreated(Bundle savedInstanceState) {
        super.onActivityCreated(savedInstanceState);
        data=new ArrayList<>();
        for(int i=0;i<20;i++){
            data.add("小丽"+i);
        }
        ArrayAdapter<String> adapter=new ArrayAdapter<String>(getActivity(),android.R.layout.simple_list_item_1,data);

        setListAdapter(adapter);


    }

    /**
     * 当用户点击ListView控件上的条目时自动调用的方法
     * @param l
     * @param v
     * @param position
     * @param id
     */
    @Override
    public void onListItemClick(ListView l, View v, int position, long id) {
        String item=data.get(position);

        //由于现在LeftFragment 和RightFragment 使用的是同一个FragmentManager 添加到MainActivity 界面上的,因此可以通过FragmentManager 找到需要的Fragment
        //
        //TextView textView_name= (TextView) getActivity().getFragmentManager().findFragmentById(R.id.fragment_right).getView().findViewById(R.id.textView_name);
        //textView_name.setText(item);
        //Toast.makeText(getActivity(), "item="+item, Toast.LENGTH_SHORT).show();

        RightFragment rightFragment= (RightFragment) getActivity().getFragmentManager().findFragmentById(R.id.fragment_right);
        //rightFragment.setName(item);
    }
}
FragmentRight(接受的):
package com.hsj.example.fragmentpassvaluetofragmentdemo05.fragments;

import android.app.Fragment;
import android.os.Bundle;
import android.support.annotation.Nullable;
import android.view.LayoutInflater;
import android.view.View;
import android.view.ViewGroup;
import android.widget.AdapterView;
import android.widget.ListView;
import android.widget.TextView;

import com.hsj.example.fragmentpassvaluetofragmentdemo05.R;

/**
 * Created by hsjwcf on 2018/6/14.
 */
public class RightFragment extends Fragment {
    private TextView textView_name;
    @Nullable
    @Override
    public View onCreateView(LayoutInflater inflater, ViewGroup container, Bundle savedInstanceState) {
        View view=inflater.inflate(R.layout.fragment_right,null);
        textView_name= (TextView) view.findViewById(R.id.textView_name);


        LeftFragment leftFragment= (LeftFragment) getActivity().getFragmentManager().findFragmentById(R.id.fragment_left);
        ListView listView=leftFragment.getListView();
        listView.setOnItemClickListener(new AdapterView.OnItemClickListener() {
            @Override
            public void onItemClick(AdapterView<?> parent, View view, int position, long id) {
                //1.通过适配器控件获取数据
                //String item=parent.getItemAtPosition(position).toString();
                //textView_name.setText(item);

                //2.通过用户点击的条目获取数据
                String item=((TextView)view).getText().toString();
                textView_name.setText(item);
            }
        });


        return view;
    }


}
3.注意:万能的接口回调(适合所有的处置方式):
使用步骤:
1.自定义传值的接口:
interface PassValue{
void setName(String name);
}
2.声明一个接口类型的对象:
private PassValue passvalue
3.给接口类型的对象提供setter函数:
public void setPassValue(PassValue passvalue){
this.passvalue = passvalue;
}
4.在传值的目标端(RightFragment)调用setter函数
5.在需要传值的地方调用PassValue接口类型的对象passValue.setValue(需要传递的值)
1.leftFragment:
package com.hsj.example.omnipotentinterfacecallbackdemo06.fragments;

import android.app.ListFragment;
import android.os.Bundle;
import android.view.View;
import android.widget.ArrayAdapter;
import android.widget.ListView;

import java.util.ArrayList;
import java.util.List;

/**
 * 万能的接口回调的编写步骤:
 *  1.自定义传值的接口
 *       interface PassValue{
            void setName(String name);
         }
    2.声明一个接口类型的对象
        private PassValue passValue;
    3.给接口类型的对象提供setter 函数
        public void setPassValue(PassValue passValue){
            this.passValue=passValue;
        }
    4.在需要传值的目标对象中调用setter函数,相当于注册监听器对象
        LeftFragment leftFragment= (LeftFragment) getActivity().getFragmentManager().findFragmentById(R.id.fragment_left);
            //相当于注册监听器
            leftFragment.setPassValue(new LeftFragment.PassValue() {
                @Override
                public void setName(String name) {
                    textView_name.setText(name);
                }
            });

    5.在需要传值的地方调用传值对象的传值方法完成传值操作
        passValue.setName(item);

 *
 */
public class LeftFragment extends ListFragment {

    private  List<String> data;

    //1.自定义传值的接口
    interface PassValue{
        void setName(String name);
    }

    //2.声明一个接口类型的对象
    private PassValue passValue;

    //3.给接口类型的对象提供setter 函数
    public void setPassValue(PassValue passValue){
        this.passValue=passValue;
    }

    @Override
    public void onActivityCreated(Bundle savedInstanceState) {
        super.onActivityCreated(savedInstanceState);
        data=new ArrayList<>();
        for(int i=0;i<20;i++){
            data.add("小丽"+i);
        }
        ArrayAdapter<String> adapter=new ArrayAdapter<String>(getActivity(),android.R.layout.simple_list_item_1,data);

        setListAdapter(adapter);
    }

   /*static  class Add{
        int add(int num1,int num2){
            int sum=num1+num2;
            return sum;
        }
    }

    static class Test{
        public static void main(String[] args){
            Add a=new Add();
            a.add(5,6);
        }
    }*/

    @Override
    public void onListItemClick(ListView l, View v, int position, long id) {

       String item= data.get(position);

        //执行传值操作,相当于用户点击了按钮
        passValue.setName(item);
    }
}
2.rightFragment:
package com.hsj.example.omnipotentinterfacecallbackdemo06.fragments;

import android.app.Fragment;
import android.os.Bundle;
import android.support.annotation.Nullable;
import android.view.LayoutInflater;
import android.view.View;
import android.view.ViewGroup;
import android.widget.TextView;

import com.hsj.example.omnipotentinterfacecallbackdemo06.R;


/**
 * Created by hsjwcf on 2018/6/14.
 */
public class RightFragment extends Fragment {
    private TextView textView_name;
    @Nullable
    @Override
    public View onCreateView(LayoutInflater inflater, ViewGroup container, Bundle savedInstanceState) {
        View view=inflater.inflate(R.layout.fragment_right,null);
        textView_name= (TextView) view.findViewById(R.id.textView_name);


        LeftFragment leftFragment= (LeftFragment) getActivity().getFragmentManager().findFragmentById(R.id.fragment_left);
        //相当于注册监听器
        /*leftFragment.setPassValue(new LeftFragment.PassValue() {
            @Override
            public void setName(String name) {
                textView_name.setText(name);
            }
        });*/

        MyPassValue myPassValue=new MyPassValue();

        leftFragment.setPassValue(myPassValue);


        return view;
    }


    class MyPassValue implements LeftFragment.PassValue{

        @Override
        public void setName(String name) {
            textView_name.setText(name);
        }
    }


}