报错问题如下:
严重性	代码	说明	项目	文件	行	禁止显示状态
错误	LNK2001	无法解析的外部符号 "void __cdecl cv::imshow(class std::basic_string<char,struct std::char_traits<char>,class std::allocator<char> > const &,class cv::_InputArray const &)" (?imshow@cv@@YAXABV?$basic_string@DU?$char_traits@D@std@@V?$allocator@D@2@@std@@ABV_InputArray@1@@Z)	demo_opencv48	D:\myopencv-cpu\my_cv\test_opencv48\demo_opencv48\main.obj	1
错误	LNK2001	无法解析的外部符号 "public: __thiscall cv::Mat::~Mat(void)" (??1Mat@cv@@QAE@XZ)	demo_opencv48	D:\myopencv-cpu\my_cv\test_opencv48\demo_opencv48\main.obj	1
错误	LNK2001	无法解析的外部符号 "public: __thiscall cv::Mat::Mat(int,int,int,class cv::Scalar_<double> const &)" (??0Mat@cv@@QAE@HHHABV?$Scalar_@N@1@@Z)	demo_opencv48	D:\myopencv-cpu\my_cv\test_opencv48\demo_opencv48\main.obj	1
错误	LNK2001	无法解析的外部符号 "void __cdecl cv::line(class cv::_InputOutputArray const &,class cv::Point_<int>,class cv::Point_<int>,class cv::Scalar_<double> const &,int,int,int)" (?line@cv@@YAXABV_InputOutputArray@1@V?$Point_@H@1@1ABV?$Scalar_@N@1@HHH@Z)	demo_opencv48	D:\myopencv-cpu\my_cv\test_opencv48\demo_opencv48\main.obj	1
错误	LNK2001	无法解析的外部符号 "int __cdecl cv::waitKey(int)" (?waitKey@cv@@YAHH@Z)	demo_opencv48	D:\myopencv-cpu\my_cv\test_opencv48\demo_opencv48\main.obj	1
错误	LNK1120	5 个无法解析的外部命令	demo_opencv48	D:\myopencv-cpu\my_cv\test_opencv48\demo_opencv48\Release\demo_opencv48.exe	1
解决方法:(确保你的OpenCV系统环境已成功写入path前提下)
这些错误表明你的项目无法正确链接到OpenCV库。要解决这些问题,需要确保你的项目正确配置了OpenCV的包含目录、库目录和链接库。以下是可能的步骤:
确认OpenCV安装路径:确保你已经安装了OpenCV库,然后找到它的安装路径。
设置包含目录:在你的项目中添加OpenCV库的包含目录,这将使编译器能够找到OpenCV头文件。在你的项目设置中添加类似以下内容的目录:
C:\path\to\opencv\include
设置库目录:添加OpenCV库的库目录,这将让链接器知道在哪里查找OpenCV的链接库。在你的项目设置中添加类似以下内容的目录:
C:\path\to\opencv\lib
添加链接库:在你的项目设置中添加需要的OpenCV链接库。对于OpenCV 4,你可以添加名为 opencv_world 的链接库。确保在链接器设置中添加类似以下内容的链接库:
opencv_world{

    version number}.lib
注意替换 {version number} 为你所安装的OpenCV版本的实际版本号。
重新编译:完成上述步骤后,重新编译你的项目,这样编译器就能正确找到并链接OpenCV库。
测试代码:
#include <opencv2/opencv.hpp>
#include <iostream>
#include <cmath>

int main() {


    // Create a black image
    cv::Mat image(400, 800, CV_8UC3, cv::Scalar(0, 0, 0));

    // Create the x-axis values
    std::vector<double> x_values;
    for (int x = 0; x < image.cols; x++) {


        double value = static_cast<double>(x) / image.cols * 4 * CV_PI;  // Range: 0 to 4*pi
        x_values.push_back(value);
    }

    // Calculate the corresponding y-axis values (sin function)
    std::vector<double> y_values;
    for (double x : x_values) {


        double y = 200 * (1 - std::sin(x));
        y_values.push_back(y);
    }

    // Draw the curve
    for (size_t i = 1; i < x_values.size(); i++) {


        cv::Point pt1(static_cast<int>(x_values[i - 1] / (4 * CV_PI) * image.cols), static_cast<int>(y_values[i - 1]));
        cv::Point pt2(static_cast<int>(x_values[i] / (4 * CV_PI) * image.cols), static_cast<int>(y_values[i]));
        cv::line(image, pt1, pt2, cv::Scalar(0, 0, 255), 2);
    }

    // Show the image with the curve
    cv::imshow("Sin Curve", image);
    cv::waitKey(0);

    return 0;
}
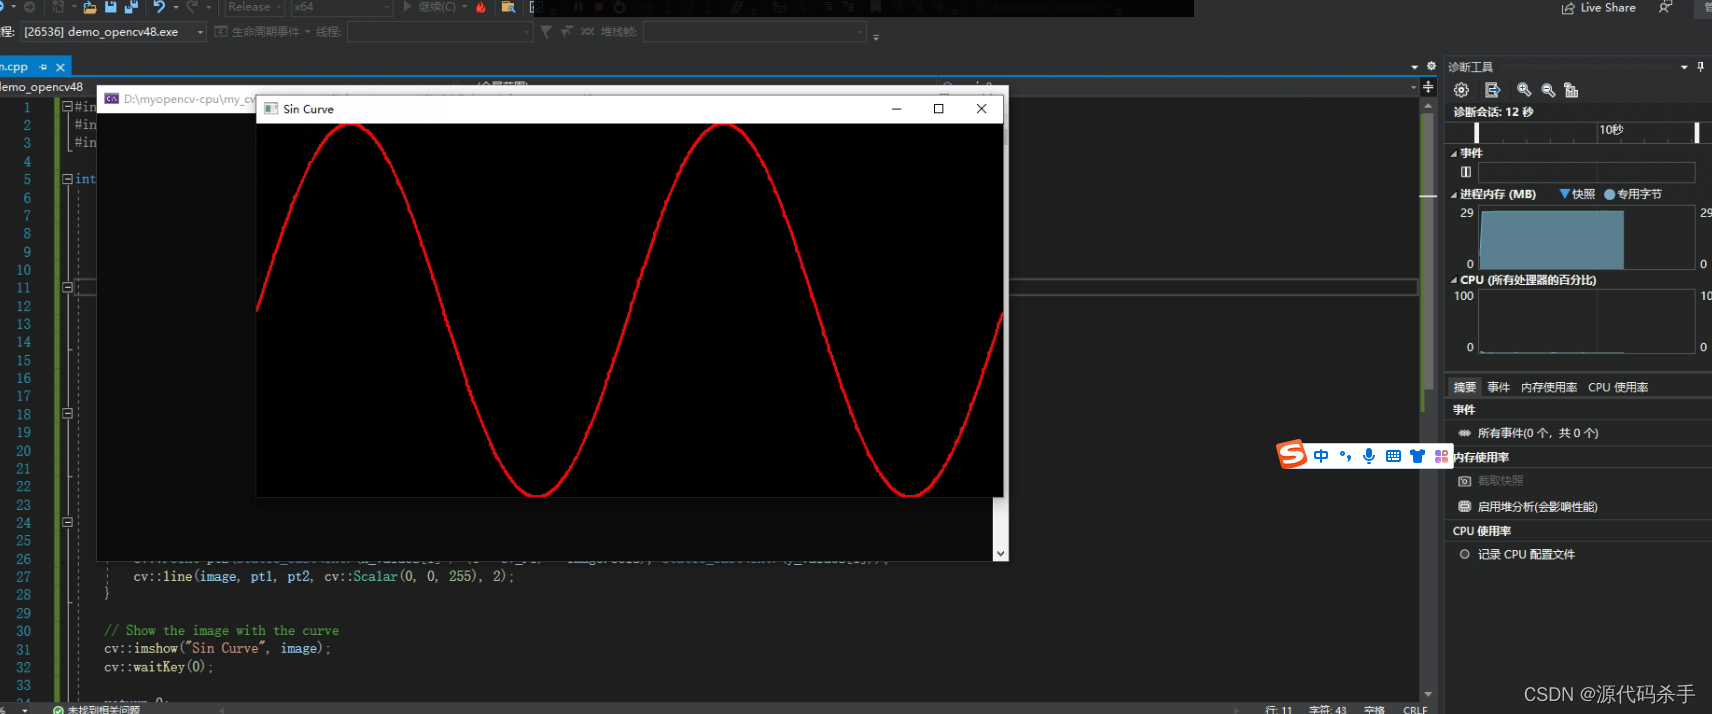
执行结果: