说明:使用了macOS后发现,win系统能使用的xshell、xftp等连接服务器及其文件传输等软件均不能使用了,没有兼容的版本。所以我们刚切换到mac系统该如何去适应呢。
一、连接远程服务器
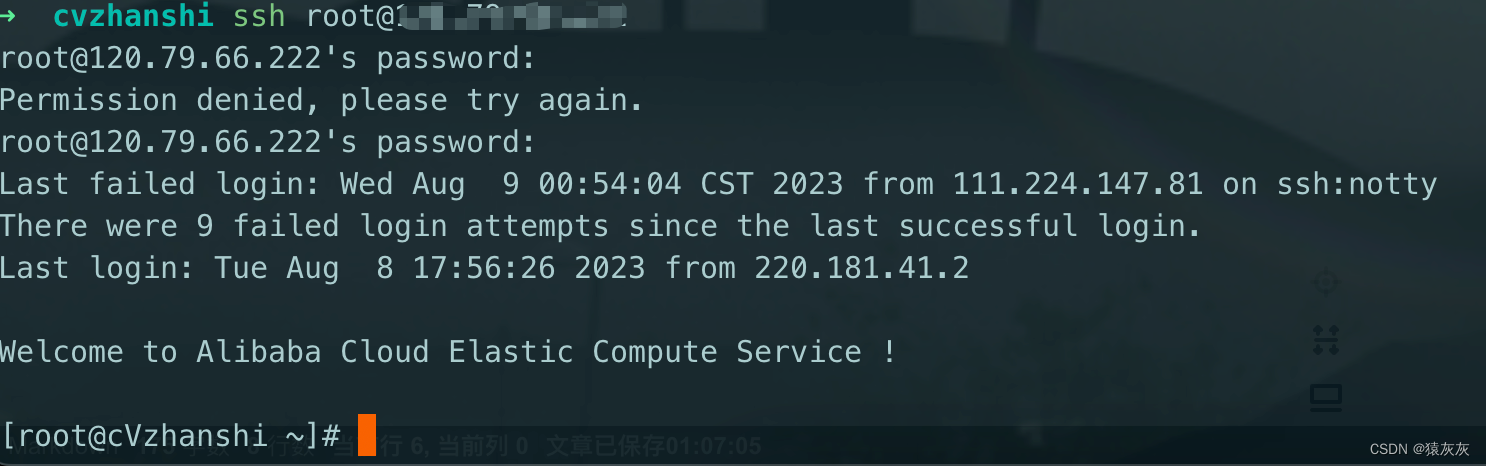
macOS中前文也说道我们使用的是iterm2进行终端控制的,所以连接远程服务器可以通过ssh来连接
方式一:ssh 用户名@公网ip的方式进行连接
缺点:每次都需要输入命令且输入密码来进行登陆,比较繁琐
疑问:有没有一种只输入一次密码就能每次简单登陆的方法呢?
方式二:通过脚本进行登陆
- 找一个地方创建脚本
- 编辑脚本,内容如下:
#!/usr/bin/expect
set timeout 30
spawn ssh -p [lindex $argv 0] [lindex $argv 1]@[lindex $argv 2]
expect {


        "(yes/no)?"
        {

    send "yes\n";exp_continue}
        "password:"
        {

    send "[lindex $argv 3]\n"}
}
interact

# 变量说明
# [lindex $argv 0]:端口号
# [lindex $argv 1]:服务器用户名
# [lindex $argv 2]:服务器IP地址
# [lindex $argv 3]:服务器密码
- 编辑完成给予脚本执行权限
# 文件名字可以随便取
chmod 777 ssh_server.sh
- 打开iTerm2,打开Preferences配置界面,Profiles -> general,左下角点击+号,新建profile,参考下面图片在对应位置输入内容即可。
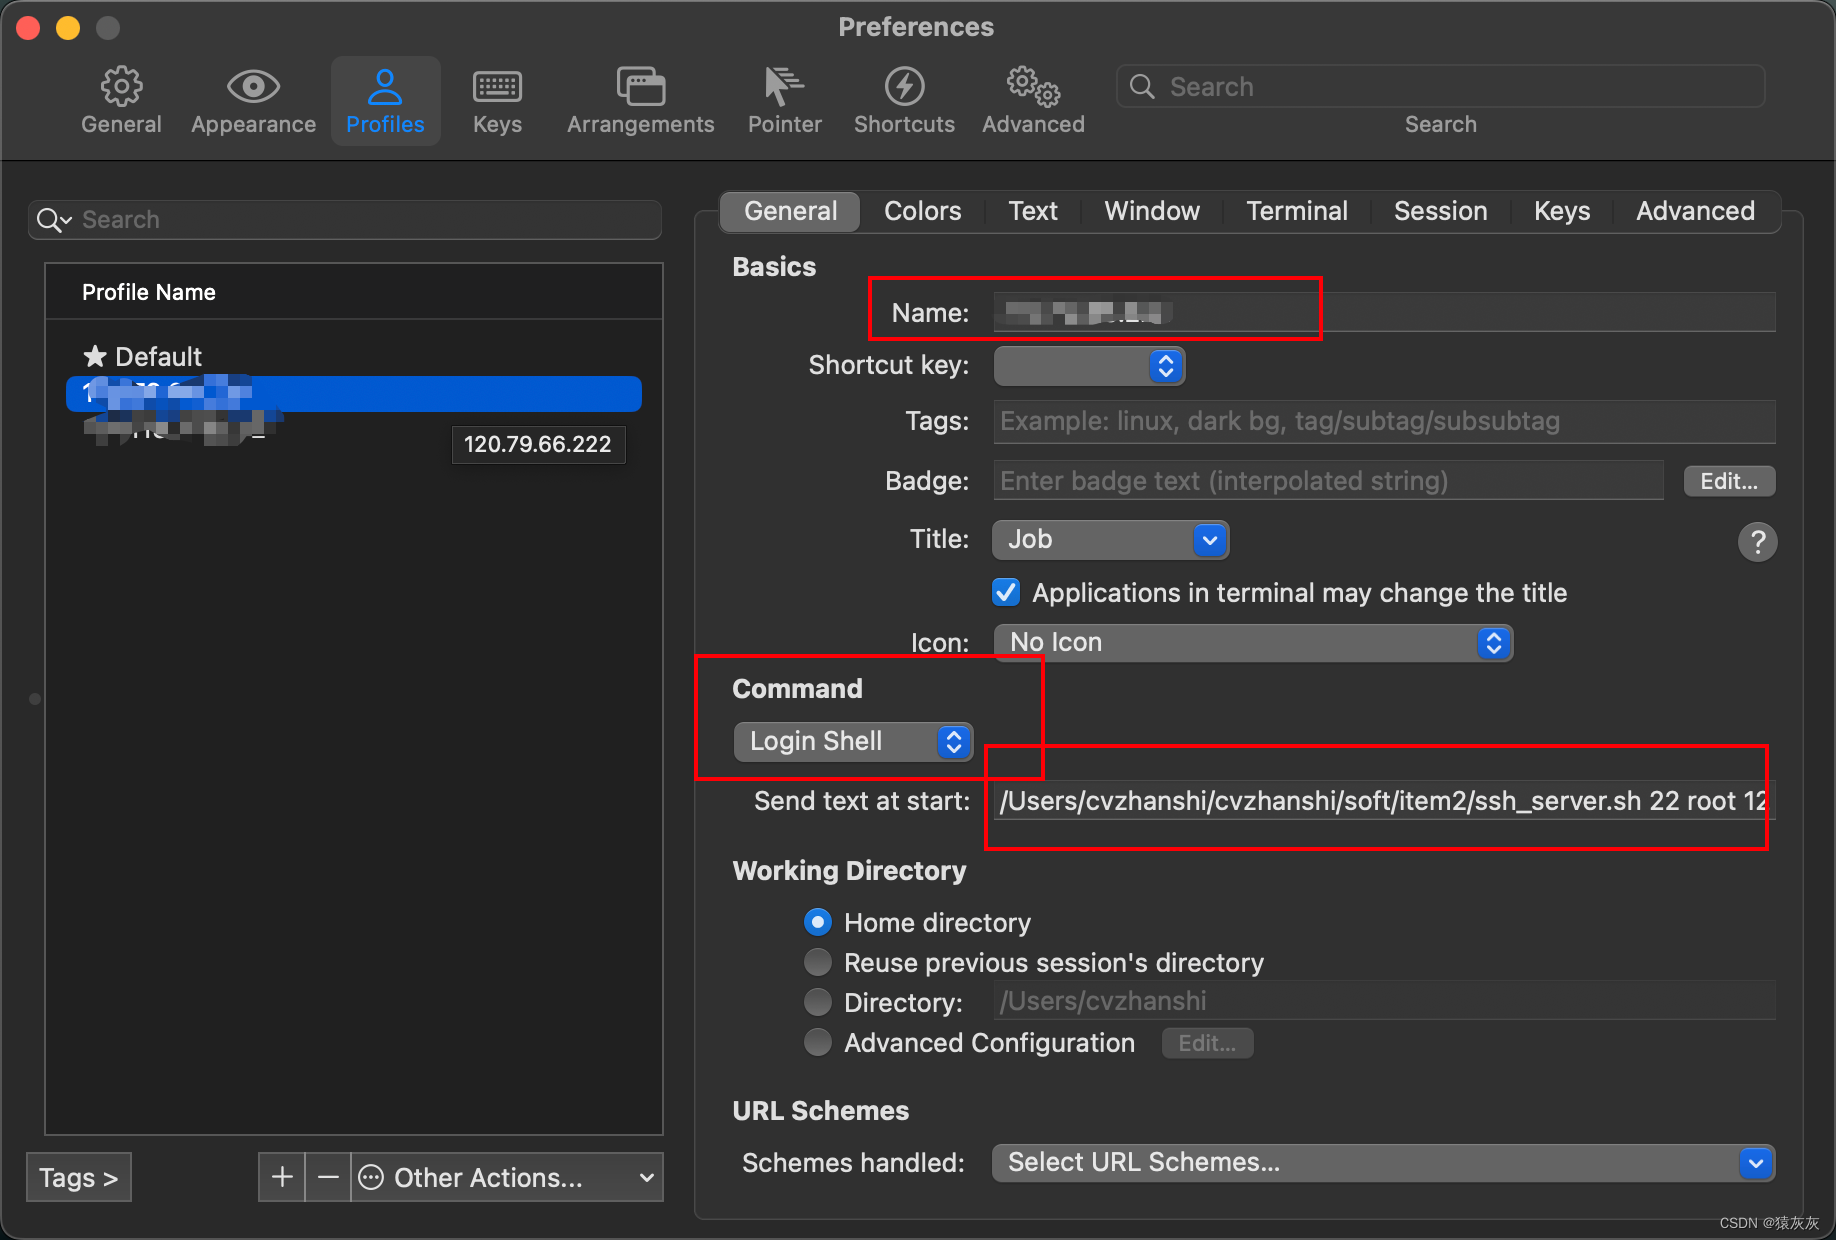
Name:根据需求输入,通常选择标识性较强的内容便于区分,例如服务器的IP地址
Command:这里选择login Shell
Send text at start :填写格式形如A B C D E这样,每一个部分之间用空格隔开,根据自己实际情况填写,下面是对每一部分内容的解释
A代表咱们上面写的本机保存sh脚本的路径:/Users/iterm/ssh_server.sh

B代表服务器端口号一般远程连接端口为:22

C代表服务器用户名一般为:root

D代表服务器IP:根据服务器对外暴露的公网IP填写

E代表服务器密码:根据自己实际的服务器密码填写
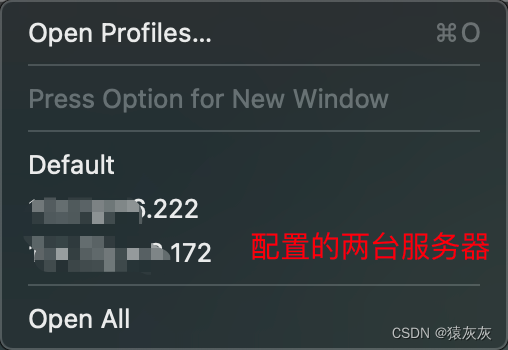
- 设置好之后打开iTerm2,点击profiles,点击前面自己新增的连接远程服务器的profile的名字。首次连接需要输入一次服务器密码,之后再连接就免密码登陆了。
二、文件传输
方式一:通过app去实现文件传输
- transmit(mac系统最推荐的,没有之一) 官网收费有点贵,可以通过万能的某宝
- filezilla
- 等等
方式二:通过lrzsz
- 给mac以及服务器都装上lrzsz
# mac安装通过homebrew
brew install lrzsz
# Linux系统安装通过yum
yum -y install lrzsz
- mac下载iterm2-zmodem
 wget https://raw.github.com/mmastrac/iterm2-zmodem/master/iterm2-send-zmodem.sh

 wget https://raw.github.com/mmastrac/iterm2-zmodem/master/iterm2-recv-zmodem.sh
# 如果wget notfound
brew install wget

# 如果网络不佳直接去github下载
# https://github.com/robberphex/iTerm2-zmodem
- 下载下来的两个文件iterm2-recv-zmodem.sh和iterm2-send-zmodem.sh需要修改一下rz和sz的路径因为文件对应的还是原来intel芯片下的mac通过homebrew下载的路径,m芯片homebrew安装路径变了
iterm2-send-zmodem.sh
#!/bin/bash
# Author: Matt Mastracci ([email protected])
# AppleScript from http://stackoverflow.com/questions/4309087/cancel-button-on-osascript-in-a-bash-script
# licensed under cc-wiki with attribution required
# Remainder of script public domain

osascript -e 'tell application "iTerm2" to version' > /dev/null 2>&1 && NAME=iTerm2 || NAME=iTerm
if [[ $NAME = "iTerm" ]]; then
	FILE=$(osascript -e 'tell application "iTerm" to activate' -e 'tell application "iTerm" to set thefile to choose file with prompt "Choose a file to send"' -e "do shell script (\"echo \"&(quoted form of POSIX path of thefile as Unicode text)&\"\")")
else
	FILE=$(osascript -e 'tell application "iTerm2" to activate' -e 'tell application "iTerm2" to set thefile to choose file with prompt "Choose a file to send"' -e "do shell script (\"echo \"&(quoted form of POSIX path of thefile as Unicode text)&\"\")")
fi
if [[ $FILE = "" ]]; then
	echo Cancelled.
	# Send ZModem cancel
	echo -e \\x18\\x18\\x18\\x18\\x18
	sleep 1
	echo
	echo \# Cancelled transfer
else
	# 此处需要修改
	# usr/local/bin/sz "$FILE" --escape --binary --bufsize 4096
	/opt/homebrew/Cellar/lrzsz/0.12.20_1/bin/sz "$FILE" --escape --binary --bufsize 4096
	sleep 1
	echo
	echo \# Received "$FILE"
fi
iterm2-recv-zmodem.sh
#!/bin/bash
# Author: Matt Mastracci ([email protected])
# AppleScript from http://stackoverflow.com/questions/4309087/cancel-button-on-osascript-in-a-bash-script
# licensed under cc-wiki with attribution required
# Remainder of script public domain

osascript -e 'tell application "iTerm2" to version' > /dev/null 2>&1 && NAME=iTerm2 || NAME=iTerm
if [[ $NAME = "iTerm" ]]; then
	FILE=$(osascript -e 'tell application "iTerm" to activate' -e 'tell application "iTerm" to set thefile to choose folder with prompt "Choose a folder to place received files in"' -e "do shell script (\"echo \"&(quoted form of POSIX path of thefile as Unicode text)&\"\")")
else
	FILE=$(osascript -e 'tell application "iTerm2" to activate' -e 'tell application "iTerm2" to set thefile to choose folder with prompt "Choose a folder to place received files in"' -e "do shell script (\"echo \"&(quoted form of POSIX path of thefile as Unicode text)&\"\")")
fi

if [[ $FILE = "" ]]; then
	echo Cancelled.
	# Send ZModem cancel
	echo -e \\x18\\x18\\x18\\x18\\x18
	sleep 1
	echo
	echo \# Cancelled transfer
else
	cd "$FILE"
	# /usr/local/bin/rz --rename --escape --binary --bufsize 4096
	/opt/homebrew/Cellar/lrzsz/0.12.20_1/bin/rz --rename --escape --binary --bufsize 4096
	sleep 1
	echo
	echo
	echo \# Sent \-\> $FILE
fi
- 查看路径方法
brew list lrzsz
# 以下是输出结果
/opt/homebrew/Cellar/lrzsz/0.12.20_1/bin/lrb
/opt/homebrew/Cellar/lrzsz/0.12.20_1/bin/lrx
/opt/homebrew/Cellar/lrzsz/0.12.20_1/bin/lrz
/opt/homebrew/Cellar/lrzsz/0.12.20_1/bin/lsb
/opt/homebrew/Cellar/lrzsz/0.12.20_1/bin/lsx
/opt/homebrew/Cellar/lrzsz/0.12.20_1/bin/lsz
/opt/homebrew/Cellar/lrzsz/0.12.20_1/bin/rz
/opt/homebrew/Cellar/lrzsz/0.12.20_1/bin/sz
/opt/homebrew/Cellar/lrzsz/0.12.20_1/share/man/ (2 files)
- 赋予两个脚本的执行权限
chmod 777 /usr/local/bin/iterm2-*
- 设置iterm2的触发器
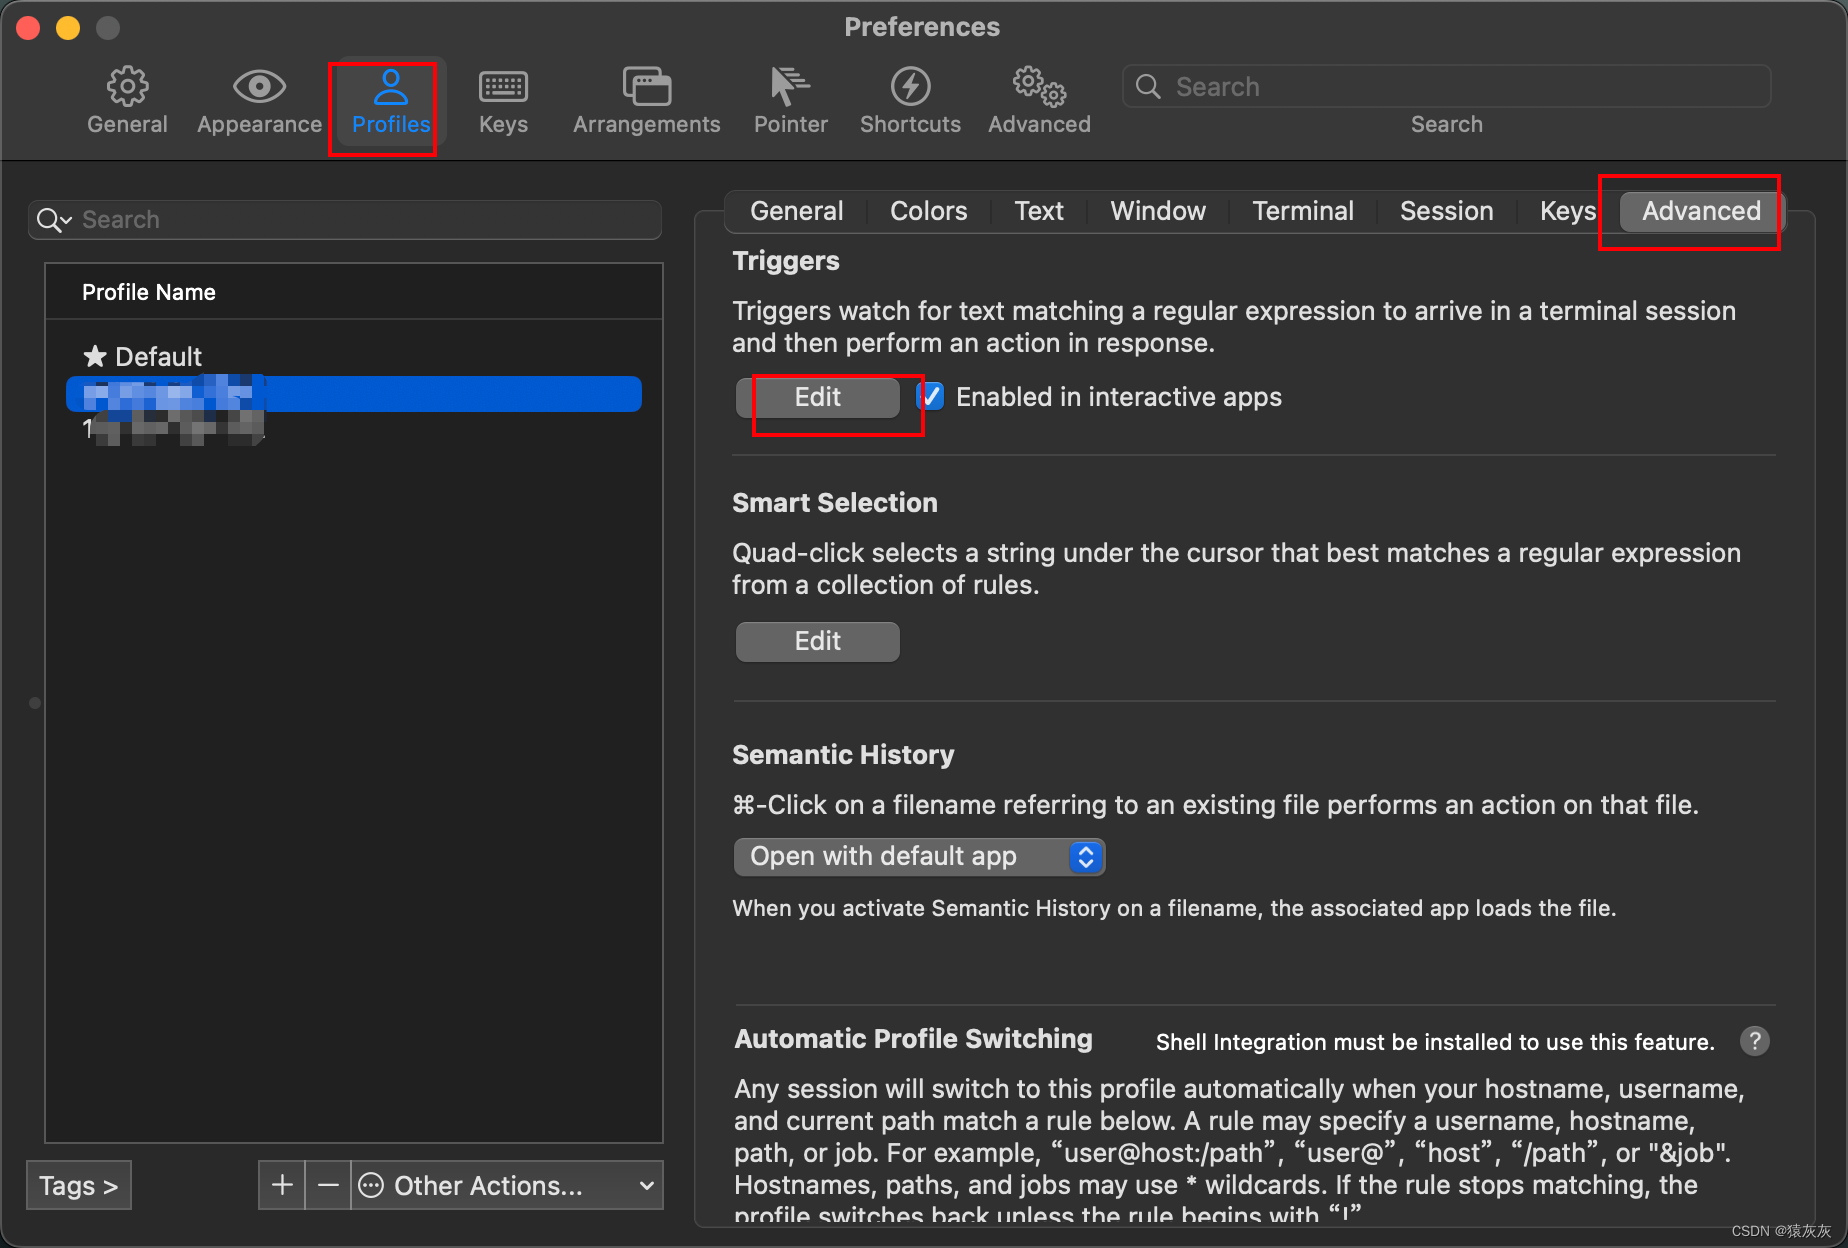
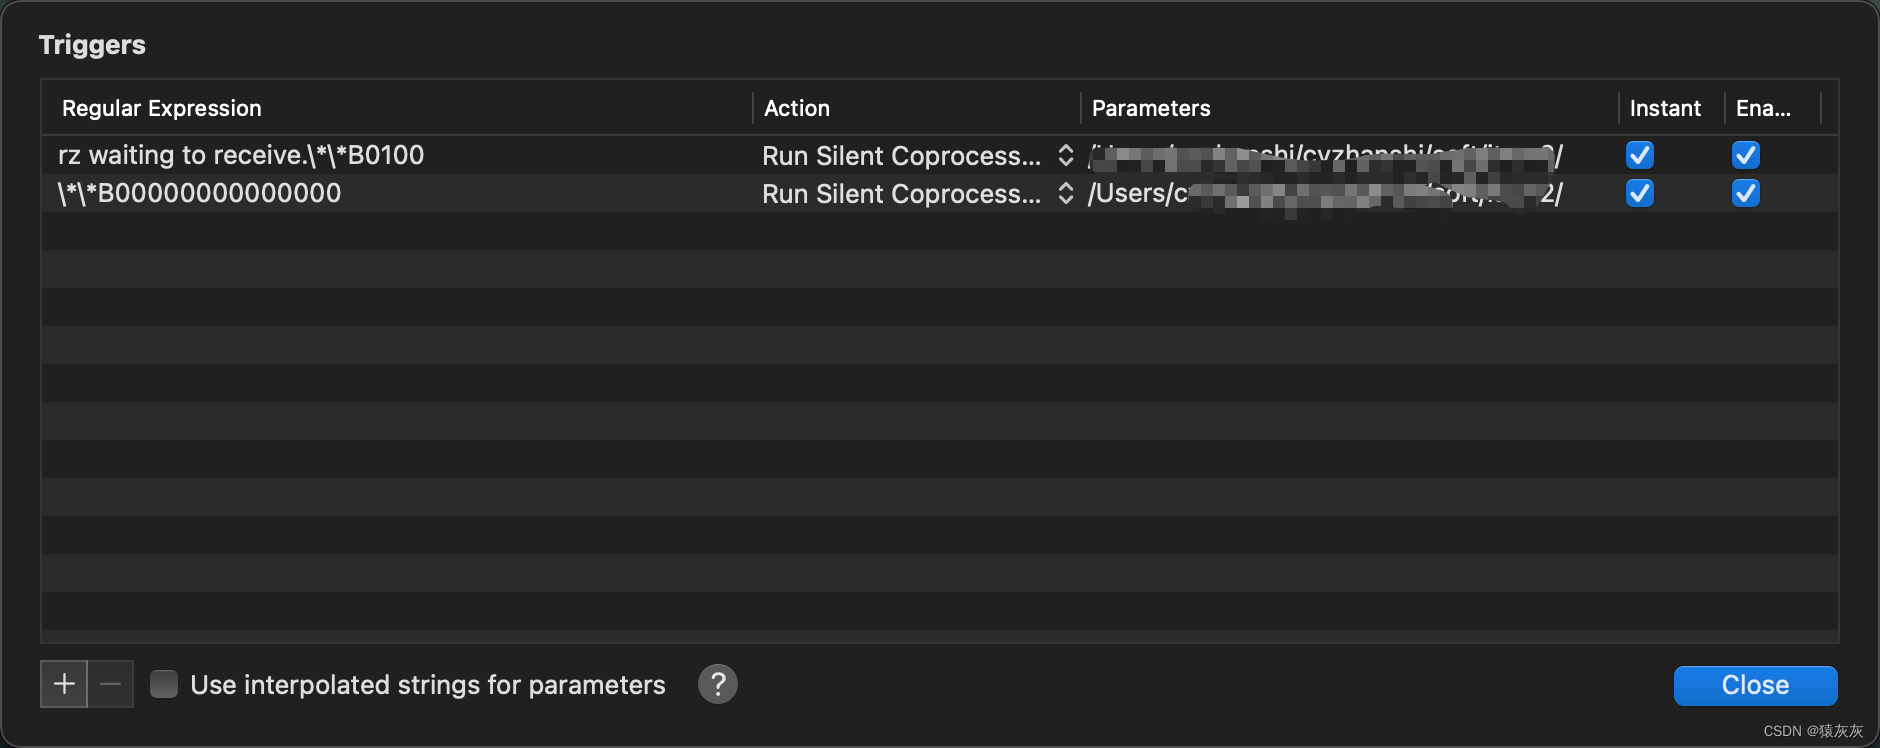
# 设置内容
    Regular expression: rz waiting to receive.\*\*B0100
    Action: Run Silent Coprocess
    Parameters: /usr/local/bin/iterm2-send-zmodem.sh
    Instant: checked

    Regular expression: \*\*B00000000000000
    Action: Run Silent Coprocess
    Parameters: /usr/local/bin/iterm2-recv-zmodem.sh
    Instant: checked
- 重启iTerm 2 ,连接上服务器,就能通过rz、sz来上传下载文件了
注意:如果是用expect脚本登录的,无法使用lszrz。上述的脚本连接就是使用的cxpect
解决方式待更新!!!!