一、安卓系统环境
高通865,Android10
二、编译cpp代码启动进程实现方式
1、在vendor下面新建一个TestInit模块,目录结构如下:
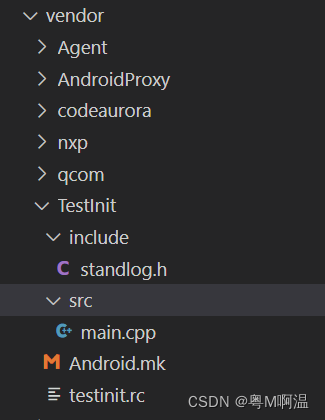
2、include 中standlog.h文件
#ifndef VCLOG_H
#define VCLOG_H

#include <android/log.h>
#include <stdio.h>
#define LOG_TAG "testinit"

#define filename(x) strrchr(x, '/') ? strrchr(x, '/') + 1 : x

#define LOGI(...)                                                            \
        do                                                                   \
        {                                                                    \
                printf(__VA_ARGS__);                                         \
                printf("\n");                                                \
                __android_log_print(ANDROID_LOG_INFO, LOG_TAG, __VA_ARGS__); \
        } while (0)

#define LOGE(...)                                                             \
        do                                                                    \
        {                                                                     \
                printf(__VA_ARGS__);                                          \
                printf("\n");                                                 \
                __android_log_print(ANDROID_LOG_ERROR, LOG_TAG, __VA_ARGS__); \
        } while (0)

#define LOGD(...)                                                             \
        do                                                                    \
        {                                                                     \
                printf(__VA_ARGS__);                                          \
                printf("\n");                                                 \
                __android_log_print(ANDROID_LOG_DEBUG, LOG_TAG, __VA_ARGS__); \
        } while (0)

#define LOGW(...)                                                            \
        do                                                                   \
        {                                                                    \
                printf(__VA_ARGS__);                                         \
                printf("\n");                                                \
                __android_log_print(ANDROID_LOG_WARN, LOG_TAG, __VA_ARGS__); \
        } while (0)

#define LOGV(...)                                                               \
        do                                                                      \
        {                                                                       \
                printf(__VA_ARGS__);                                            \
                printf("\n");                                                   \
                __android_log_print(ANDROID_LOG_VERBOSE, LOG_TAG, __VA_ARGS__); \
        } while (0)

#endif
3、main.cpp代码如下:
#include <stdio.h>
#include <stdlib.h>
#include <string.h>
#include <unistd.h>
#include "standlog.h"

 #define filename(x) strrchr(x, '/') ? strrchr(x, '/') + 1 : x

using namespace std;

int main()
{
    LOGI("%s: %s(%d):%s", filename(__FILE__), __FUNCTION__, __LINE__, "start testinit service");
   printf(">>>>>>>>>>>>>>>testinit main");
    while (true)
    {
        sleep(60 * 60);
    }
    return 0;
}
4、Android.mk代码如下
LOCAL_PATH:= $(call my-dir)

include $(CLEAR_VARS)
LOCAL_MODULE := testinit # 模块的名称
LOCAL_CFLAGS += -Wno-error=date-time
LOCAL_SRC_FILES = src/main.cpp \
# $(call all-cpp-files-under, src) \ #使用宏定义引入src文件夹下所有的cpp文件


LOCAL_MODULE_TAGS := optional
LOCAL_C_INCLUDES := $(LOCAL_PATH)/include

LOCAL_SHARED_LIBRARIES := \
        liblog \
        libcutils

LOCAL_CPPFLAGS += -fexceptions
LOCAL_INIT_RC := testinit.rc #设置init rc

include $(BUILD_EXECUTABLE)
5、testinit.rc
service testinit /system/bin/testinit
class main #main类,属于main的服务会开机被运行,且死掉会重启 如果设置了class main 那么需要把进程设置一个死循环,然后就会无限重启,详细细看main.cpp
user root
group root
disabled
on property:sys.boot_completed=1
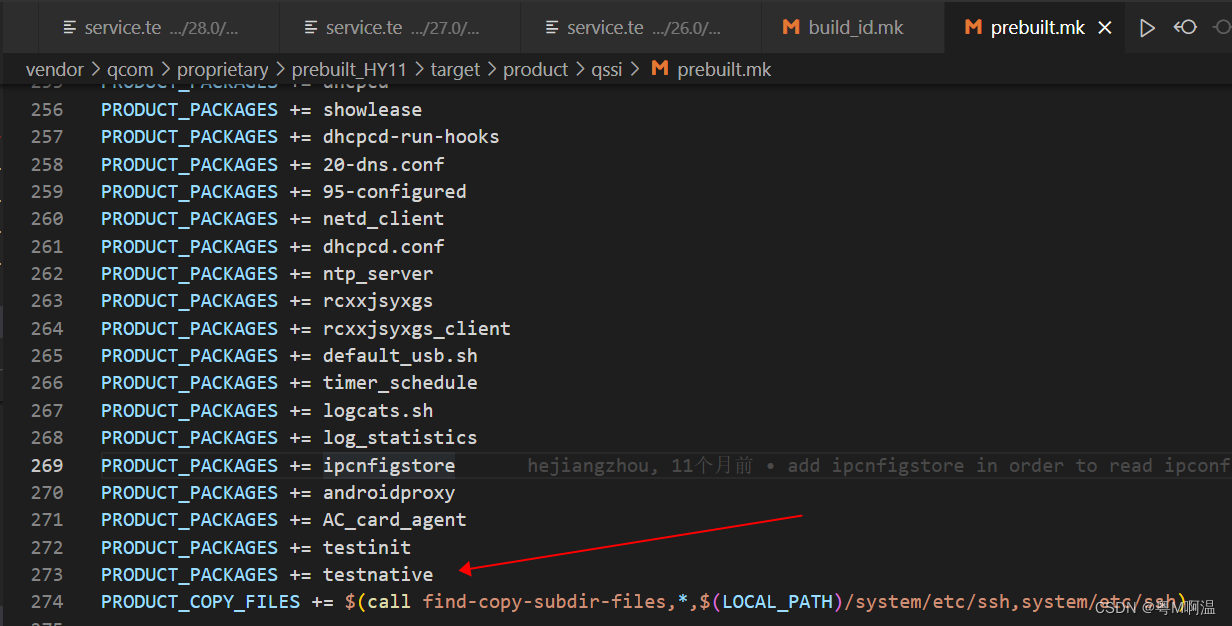
start testinit6、将我们的模块加入到工程的编译文件中
vendor/qcom/proprietary/prebuilt_HY11/target/product/qssi/prebuilt.mk

7、配置selinux
(1)、在device/qcom/sepolicy/qva/private/file_contexts中添加如下代码
/system/bin/testinit u:object_r:testinit_exec:s0(2)、在device/qcom/sepolicy/qva/private/目录中添加 testinit.te
typeattribute testinit coredomain;

init_daemon_domain(testinit)
(3)、在device/qcom/sepolicy/qva/public/目录中添加testinit.te
type testinit, domain;
type testinit_exec, exec_type, file_type, system_file_type;
8、编译刷系统验证进程是否存在

如果进程不存在,可以查看下/system/bin/目录下,testinit二进制文件是否存在
ls -l /system/bin/testinit三、集成二进制文件实现方式
1、在vendor下面新建一个TestNative模块,目录结构如下:

2、Android.mk代码如下
LOCAL_PATH:= $(call my-dir)

include $(CLEAR_VARS)
LOCAL_SRC_FILES := testnative
LOCAL_MODULE := testnative
LOCAL_MODULE_CLASS := EXECUTABLES
LOCAL_MODULE_TAGS := optional
LOCAL_MODULE_PATH := $(PRODUCT_OUT)/system/bin
LOCAL_INIT_RC := testnative.rc
include $(BUILD_PREBUILT)
3、testnative.rc
service testnative /system/bin/testnative
   user root
   group root
   disabled

on property:sys.boot_completed=1
   start testnative
4、将我们的模块加入到工程的编译文件中
vendor/qcom/proprietary/prebuilt_HY11/target/product/qssi/prebuilt.mk
5、配置selinux
(1)、在device/qcom/sepolicy/qva/private/file_contexts中添加如下代码
/system/bin/testnative u:object_r:testnative_exec:s0(2)、在device/qcom/sepolicy/qva/private/目录中添加 testnative.te
typeattribute testnative coredomain;

init_daemon_domain(testnative)
(3)、在device/qcom/sepolicy/qva/public/目录中添加 testnative.te
type testnative, domain;
type testnative_exec, exec_type, file_type, system_file_type;
6、编译刷系统验证进程是否存在
