文章目录
| cv2.imread() | (文件路径,flags) | 读取图像 |
| cv2.imshow() | (图像title,图片对象) | 显示图像 |
| cv2.imwrite() | (文件名,图片对象) | 保存图像 |
| cv2.split() | 通道分离 | |
| cv2.merge() | 通道融合 | |
| cv2.waitKey() | 等待按键 | |
| cv2.destroyAllWindows() | 销毁窗口 | |
| cv2.Canny() | 边缘检测 |
图片的读取
图像属性读取
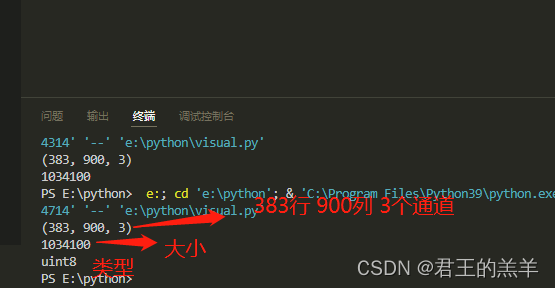
img = cv2.imread(r'C:\Users\Administrator\Desktop\beginning.jpg')
# 行、列和通道的数量(如果图像是彩色的)
dimensions = img.shape
print(dimensions)
# 图像的大小(图像高度 × 图像宽度 × 图像通道数)
total_number_of_elements= img.size
print(total_number_of_elements)
# 图像的类型
image_dtype = img.dtype
print(image_dtype)
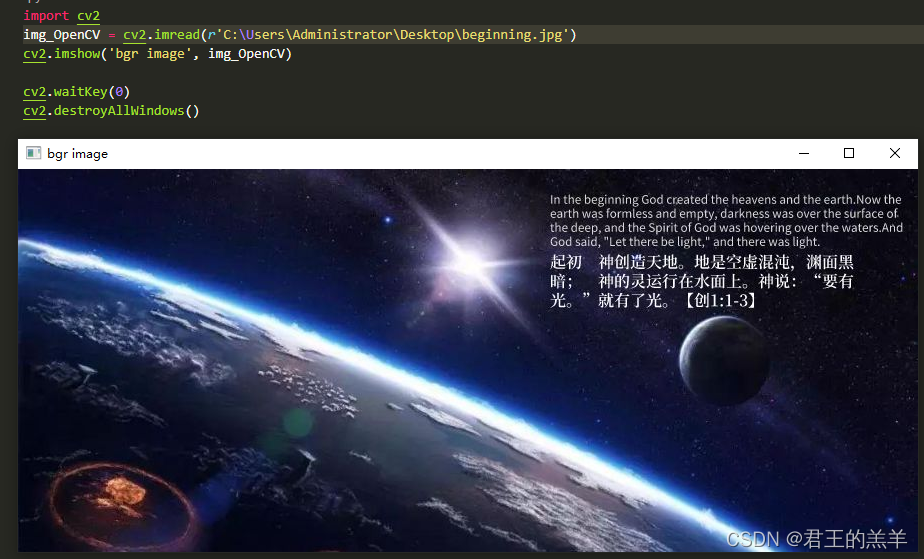
原图像读取
import cv2
img_OpenCV = cv2.imread(r'C:\Users\Administrator\Desktop\beginning.jpg')
cv2.imshow('bgr image', img_OpenCV)
cv2.waitKey(0)
cv2.destroyAllWindows()
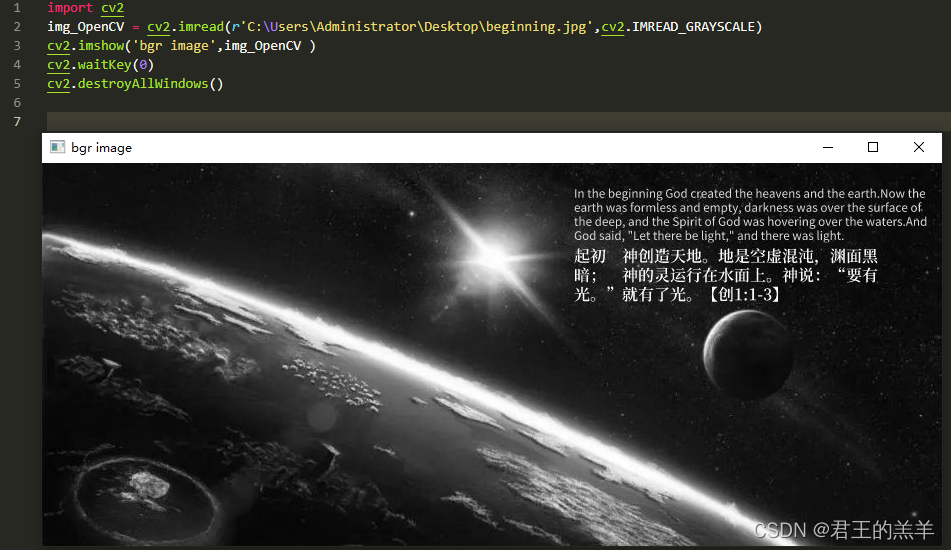
灰度方式读取
img_OpenCV = cv2.imread(r'C:\Users\Administrator\Desktop\beginning.jpg',cv2.IMREAD_GRAYSCALE)
或
img_OpenCV = cv2.imread(r'C:\Users\Administrator\Desktop\beginning.jpg',2)
cv2.imread参数说明:cv2.imread(文件路径,flags)
文件路径——一般使用绝对路径即可
flags=1——读取前后,图片格式不变
flags=2——读取后,图片格式转为灰度图
flags=3——读取后,图片格式转为BGR三信道图像
RGB通道更改顺序
b, g, r = cv2.split(img_OpenCV)
img_matplotlib = cv2.merge([r, g, b])

只显示某一通道
img_OpenCV = cv2.imread(r'C:\Users\Administrator\Desktop\beginning.jpg')
# img_OpenCV[:, :, 0]=0
img_OpenCV[:, :, 1]=0
img_OpenCV[:, :, 2]=0

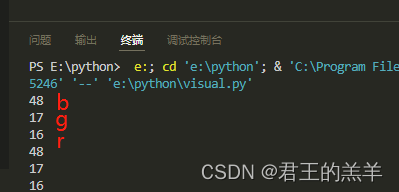
读取某个像素点的通道值
img = cv2.imread(r'C:\Users\Administrator\Desktop\beginning.jpg')
(b, g, r) = img[0, 0]
print(b)
print(g)
print(r)
x=img[0, 0,0]
y=img[0, 0,1]
z=img[0, 0,2]
print(x)
print(y)
print(z)
读取图像的局部

图像的预处理
图像灰度化
图像去噪声
轮廓识别
OpenCV 提供了函数 cv2.Canny()来实现 Canny 边缘检测,其语法形式如下:
edges = cv.Canny( image, threshold1, threshold2[, apertureSize[, L2gradient]])
其中:
edges 为计算得到的边缘图像。
image 为 8 位输入图像。
threshold1 表示处理过程中的第一个阈值。
threshold2 表示处理过程中的第二个阈值。
apertureSize 表示 Sobel 算子的孔径大小。
L2gradient 为计算图像梯度幅度(gradient magnitude)的标识。其默认值为 False。如果为 True,则使用更精确的 L2 范数进行计算(即两个方向的导数的平方和再开方),否则使用 L1 范数(直接将两个方向导数的绝对值相加)。
import cv2 as cv
import numpy as np
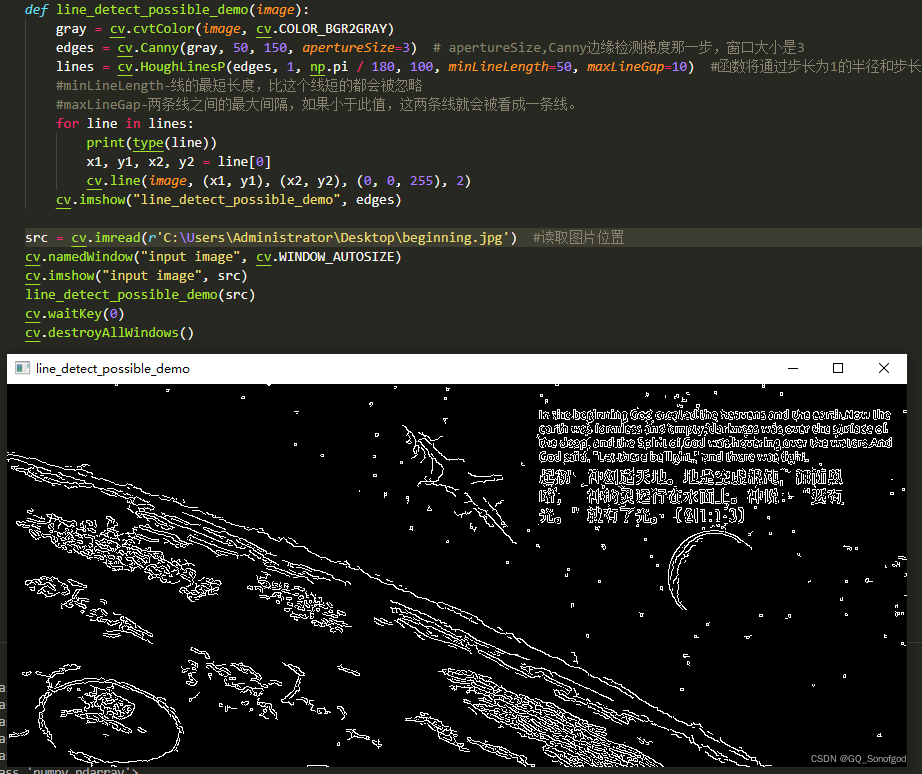
def line_detect_possible_demo(image):
gray = cv.cvtColor(image, cv.COLOR_BGR2GRAY)
edges = cv.Canny(gray, 50, 150, apertureSize=3) # apertureSize,Canny边缘检测梯度那一步,窗口大小是3
lines = cv.HoughLinesP(edges, 1, np.pi / 180, 100, minLineLength=50, maxLineGap=10) #函数将通过步长为1的半径和步长为π/180的角来搜索所有可能的直线
#minLineLength-线的最短长度,比这个线短的都会被忽略
#maxLineGap-两条线之间的最大间隔,如果小于此值,这两条线就会被看成一条线。
for line in lines:
print(type(line))
x1, y1, x2, y2 = line[0]
cv.line(image, (x1, y1), (x2, y2), (0, 0, 255), 2)
cv.imshow("line_detect_possible_demo", edges)
src = cv.imread(r'C:\Users\Administrator\Desktop\beginning.jpg') #读取图片位置
cv.namedWindow("input image", cv.WINDOW_AUTOSIZE)
cv.imshow("input image", src)
line_detect_possible_demo(src)
cv.waitKey(0)
cv.destroyAllWindows()
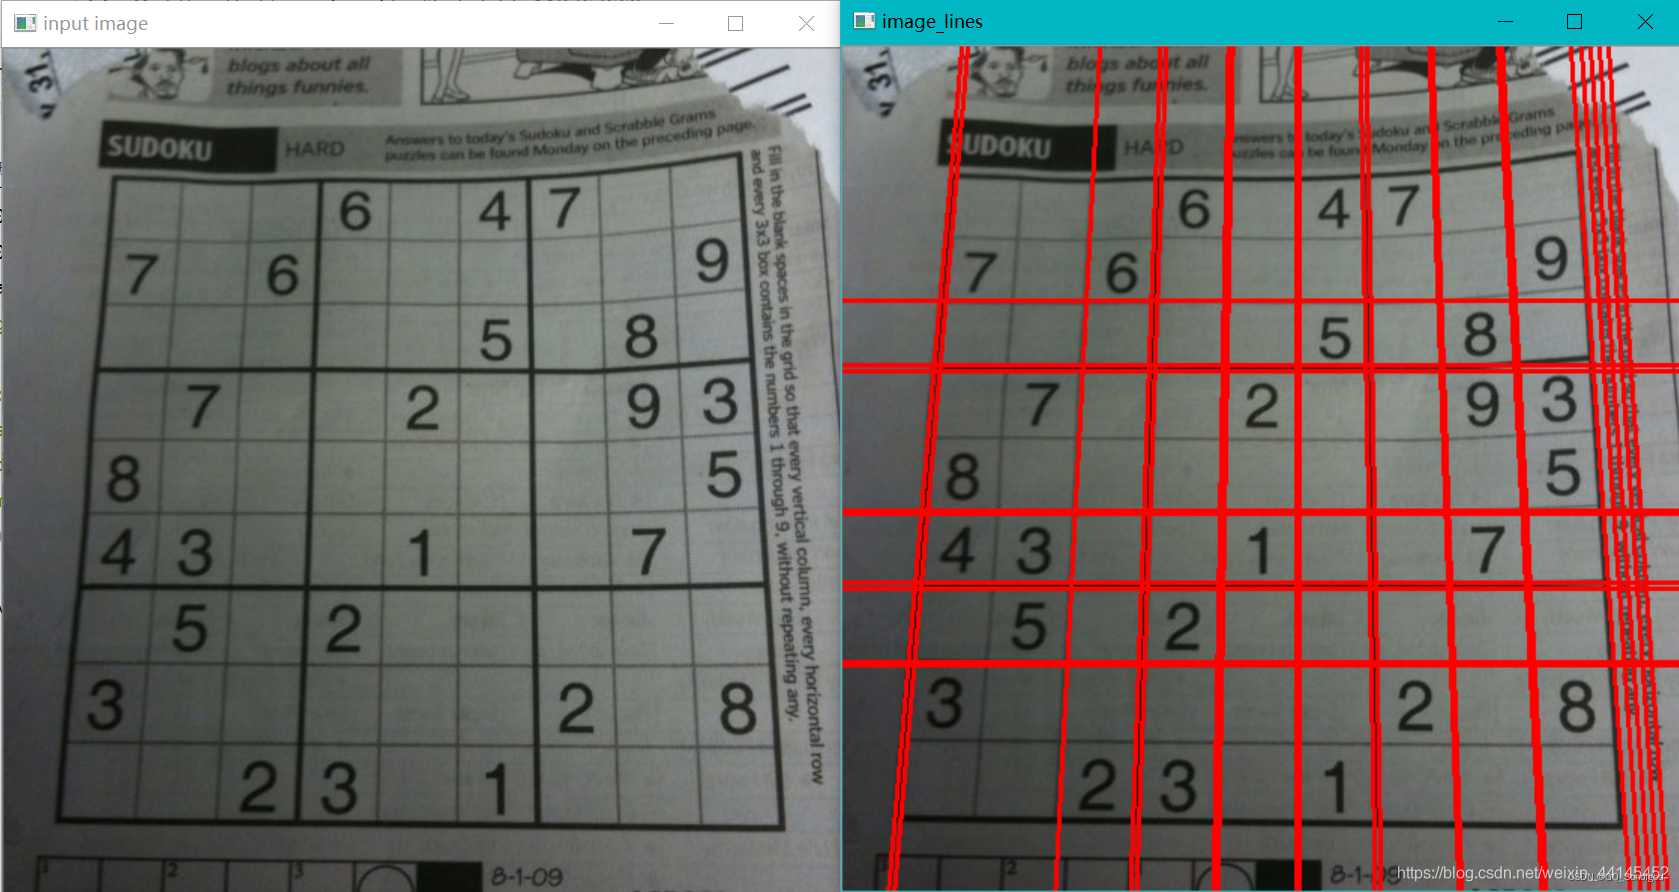
直线检测
import cv2 as cv
import numpy as np


def line_detect_possible_demo(image):
    gray = cv.cvtColor(image, cv.COLOR_BGR2GRAY)
    edges = cv.Canny(gray, 50, 150, apertureSize=3)  # apertureSize,Canny边缘检测梯度那一步,窗口大小是3
    lines = cv.HoughLinesP(edges, 1, np.pi / 180, 100, minLineLength=50, maxLineGap=10)  #函数将通过步长为1的半径和步长为π/180的角来搜索所有可能的直线
    #minLineLength-线的最短长度,比这个线短的都会被忽略
    #maxLineGap-两条线之间的最大间隔,如果小于此值,这两条线就会被看成一条线。
    for line in lines:
        print(type(line))
        x1, y1, x2, y2 = line[0]
        cv.line(image, (x1, y1), (x2, y2), (0, 0, 255), 2)
    cv.imshow("line_detect_possible_demo", image)

src = cv.imread("C:/Users/lenovo/Desktop/opencv/daima/banknum/template-matching-ocr/images/sudoku.png")  #读取图片位置
cv.namedWindow("input image", cv.WINDOW_AUTOSIZE)
cv.imshow("input image", src)
line_detect_possible_demo(src)
cv.waitKey(0)
cv.destroyAllWindows()
直线交点检测
def lineCrossLine(p1, p2, q1, q2):
	def pointAndPointToLine(pt0, pt1): ## 由两点得直线的标准方程 ax+by=c
		x0, y0 = pt0
		x1, y1 = pt1
		return (y1-y0, x0-x1, x0 * y1 - y0 * x1)
	a0,b0,c0 = pointAndPointToLine(p1,p2)
	a1,b1,c1 = pointAndPointToLine(q1,q2)
	dd = a0 * b1 - a1 * b0
	if abs(dd) < 1e-6: return None
	return ((c0 * b1 - c1 * b0) / dd, (a0 * c1 - a1 * c0) / dd)

if __name__ == '__main__':
	print(lineCrossLine((0,0),(1,1),(1,1),(1,0)))
	print(lineCrossLine((0,2),(3,0),(3,1),(2,3)))
	print(lineCrossLine((0,2),(0,1),(0,1),(2,3)))
	print(lineCrossLine((0,2),(3,0),(0,4),(6,0)))
	print(lineCrossLine((1,2),(3,5),(1,2),(7,4)))
颜色识别
形状识别
数字识别
图像的保存
cv2.imwrite('data/1.png',img)