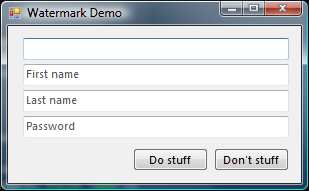
在使用 C# 的 TextBox 控件时,有时候会有以下需求:在用户没有输入文字时,TextBox 有文字提示,如下图。
但是 C# 自带的 TextBox 控件貌似没有这个属性,于是 Google 之。终于在这篇文章《Watermarked TextBox in Windows Forms on .NET》中找到了答案。
下面将一步步为大家介绍如何实现此功能。
创建一个测试项目
- 打开 VS 2015,在 File 菜单中,选择 New -> Project… 来打开 New Project 对话框。
- 选择 Visual C# -> Windows Forms Application。
- 在 Name 框中键入 Test。
- 点击 OK 按钮。
创建继承控件
这一小节的内容可以参考 MSDN 的《演练:使用 Visual C# 从 Windows 窗体控件继承》。
使用 Visual C# 可以通过继承创建功能强大的自定义控件。通过继承,可以创建不仅保留了标准 Windows 窗体控件的所有内在功能,而且还包含自定义功能的控件。在本文中,将创建一个名为 WatermarkTextBox 的简单继承控件。此控件将继承标准 Windows 窗体 TextBox 控件的功能,并实现文章开头提到的水印文字功能。
- 打开前面已创建好的 Test 项目。
- 在 Solution Explorer 中右击 Test,选择 Add -> User Control…。
- 在打开的 Add New Item 对话框中,在 WatermarkTextBox.cs 框中键入 Test。然后点击 Add 按钮。
- 在 Solution Explorer 中右击 WatermarkTextBox.cs,再选择 View Code。
- 找到 class 语句行
public partial class WatermarkTextBox : UserControl,并将此控件的继承类型从 UserControl 改成 TextBox。这允许我们所继承的控件继承 TextBox 控件的所有功能。 - 在 Solution Explorer 中打开 WatermarkTextBox.cs 节点,以显示设计器生成的代码文件 WatermarkTextBox.Designer.cs。右击此文件并选择 View Code。
- 找到
InitializeComponent方法并删除分配AutoScaleMode属性的行(即删除:this.AutoScaleMode = System.Windows.Forms.AutoScaleMode.Font;)。 TextBox 控件中没有此属性。 - 选择 Save All 保存项目。
- 在 Solution Explorer 中右击 Test,选择 Build 编译项目。
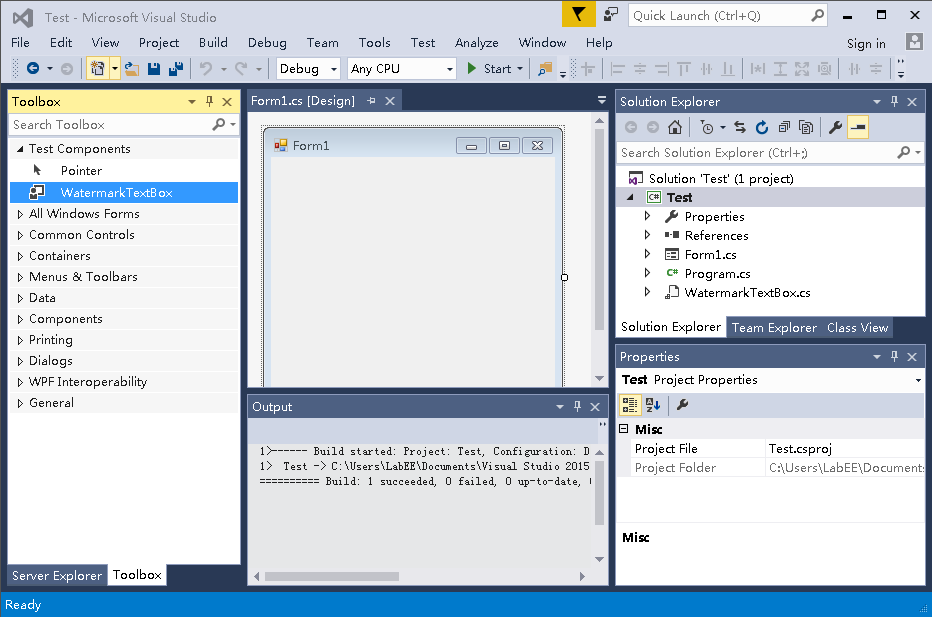
- 在 Solution Explorer 中双击 Form1.cs。此时,在左边的 Toolbox 中就可以看到我们新添加的 WatermarkTextBox 控件了。
为继承控件添加水印文字功能
这部分内容即可参考文章开头的《Watermarked TextBox in Windows Forms on .NET》一文。文章提到的方法是通过 SendMessage 发送 EM_SETCUEBANNER 消息,即可达到添加水印文字的效果。具体方法如下:
- 在 Solution Explorer 中右击 WatermarkTextBox.cs,选择 View Code。
- 由于 DllImport 是 System.Runtime.InteropServices 命名控件下的一个属性类,因此需要在 WatermarkTextBox.cs 代码中添加一行代码:
using System.Runtime.InteropServices; - 按照下面的代码段修改 WatermarkTextBox.cs 的代码即可。
namespace Test
{
    public partial class WatermarkTextBox : TextBox
    {
        public WatermarkTextBox()
        {
            InitializeComponent();
        }

        private const uint ECM_FIRST = 0x1500;
        private const uint EM_SETCUEBANNER = ECM_FIRST + 1;

        [DllImport("user32.dll", CharSet = CharSet.Auto, SetLastError = false)]
        static extern IntPtr SendMessage(IntPtr hWnd, uint Msg, uint wParam, [MarshalAs(UnmanagedType.LPWStr)] string lParam);

        private string watermarkText;
        public string WatermarkText
        {
            get { return watermarkText; }
            set
            {
                watermarkText = value;
                SetWatermark(watermarkText);
            }
        }

        private void SetWatermark(string watermarkText)
        {
            SendMessage(this.Handle, EM_SETCUEBANNER, 0, watermarkText);
        }
    }
}- 1
- 2
- 3
- 4
- 5
- 6
- 7
- 8
- 9
- 10
- 11
- 12
- 13
- 14
- 15
- 16
- 17
- 18
- 19
- 20
- 21
- 22
- 23
- 24
- 25
- 26
- 27
- 28
- 29
- 30
- 31
- 32
调用继承控件
- 在 Solution Explorer 中右击 Test,选择 Rebuild 编译项目。将刚才添加的功能重新编译进继承控件。
- 在 Solution Explorer 中双击 Form1.cs。
- 在左边的 Toolbox 中选择 WatermarkTextBox 控件,并将其拉到 Form1 中。
- 在控件属性 Properties 窗口中,我们可以找到上一节给 WatermarkTextBox 控件添加的 WatermarkText 属性。只要在该属性中输入你想要的水印文字,即可达到如下的效果。
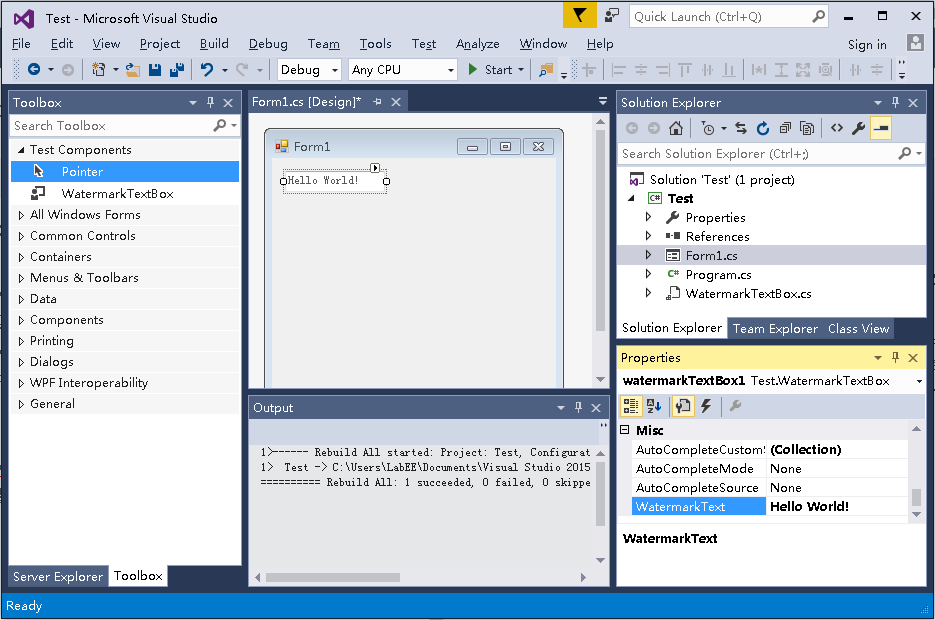
这样就大功告成啦!
原链接 http://blog.csdn.net/heray1990/article/details/51180081