1.去官网下载Flume(使用Flume需安装jdk1.6以上版本)
2.解压后进入其根目录新建checkpoint和dataDi目录
3.进入conf目录,新建hdfs_sink.conf
agent.sources = r1
agent.channels = c1
agent.sinks = k1

agent.sources.r1.type = exec
agent.sources.r1.command = tail -f /opt/xfs/logs/tomcat/xfs-cs/logs/xfs_cs_1

agent.sources.r1.channels = c1

agent.sinks.k1.type = hdfs
agent.sinks.k1.hdfs.path = hdfs://192.168.0.71:9000/flumetest/%y-%m-%d/%H
agent.sinks.k1.hdfs.filePrefix=cs-
agent.sinks.k1.hdfs.round = true
agent.sinks.k1.hdfs.roundValue = 1
agent.sinks.k1.hdfs.roundUnit = hour


agent.sinks.k1.hdfs.rollInterval = 3600

agent.sinks.k1.hdfs.rollSize = 128000000
agent.sinks.k1.hdfs.rollCount = 0
agent.sinks.k1.hdfs.batchSize = 1000
agent.sinks.k1.channel=c1
agent.sinks.k1.hdfs.useLocalTimeStamp = true
agent.sinks.k1.hdfs.fileType = DataStream

agent.channels.c1.type = file
agent.channels.fileChannel.checkpointDir=/opt/soft/apache-flume-1.6.0-bin/checkpoint
agent.channels.fileChannel.dataDirs=/opt/soft/apache-flume-1.6.0-bin/dataDi
4.将hdfs和common的jar包拷到lib目录下
5.启动
[root@DEMO51 apache-flume-1.6.0-bin]$ bin/flume-ng agent --conf conf --conf-file conf/hdfs.conf --name agent -Dflume.root.logger=INFO,console这时会报一个错
AccessControlException: Permission denied: user=root, access=WRITE, inode="/flumetest/16-08-05/12/cs-.1470369821813.tmp":hadoop:supergroup:drwxr-xr-x新增hadoop用户(用户组貌似不用加),然后再启动
[root@DEMO51 apache-flume-1.6.0-bin]# useradd hadoop
[root@DEMO51 apache-flume-1.6.0-bin]# groupadd hadoop
[root@DEMO51 apache-flume-1.6.0-bin]# useradd -g hadoop hadoop
[root@DEMO51 apache-flume-1.6.0-bin]# su hadoop
[hadoop@DEMO51 apache-flume-1.6.0-bin]$ bin/flume-ng agent --conf conf --conf-file conf/hdfs.conf --name agent -Dflume.root.logger=INFO,console
去hdfs看一下,已经有了
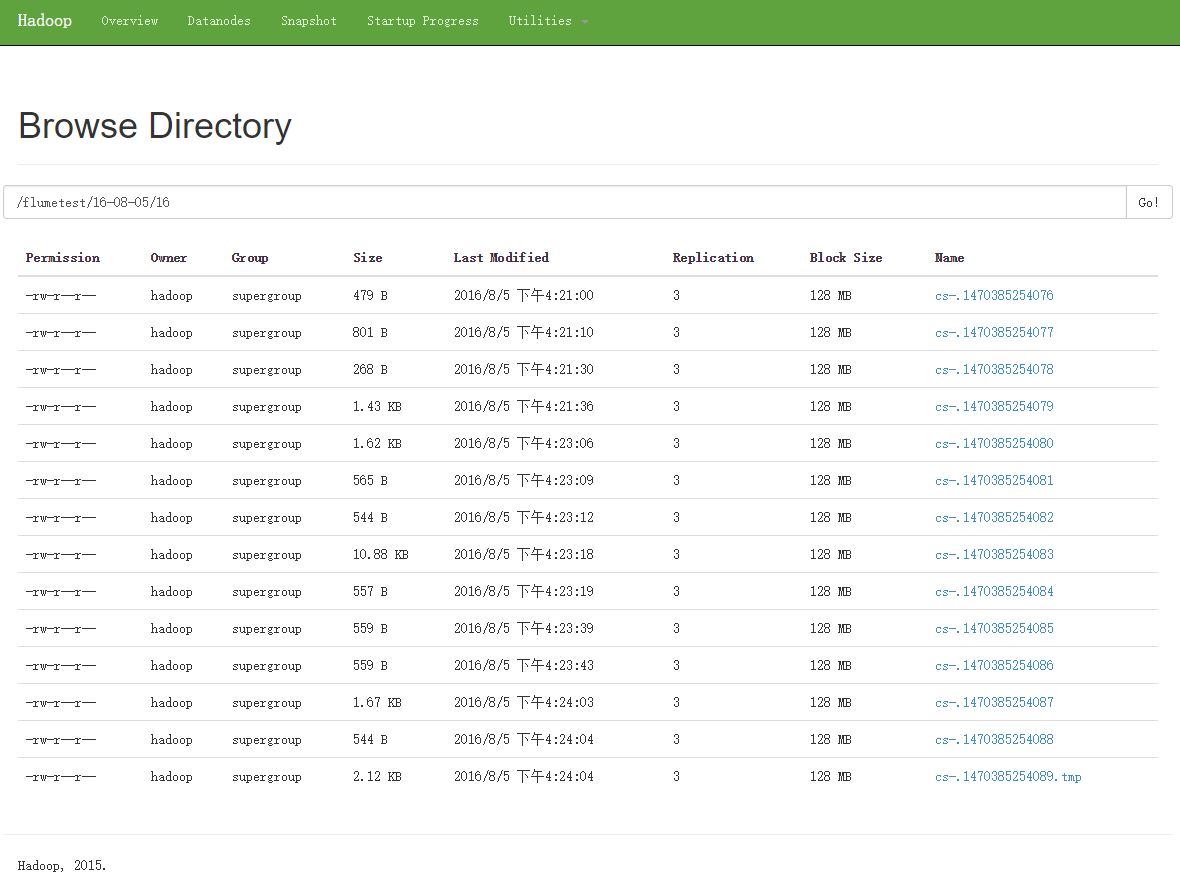
总结:注意两点即可,jar包与用户权限。