一、首页
同样在
WebMvcAutoConfugure类中的自动配置适配类WebMvcAutoConfigurationAdapter中有三个方法,是关于首页的
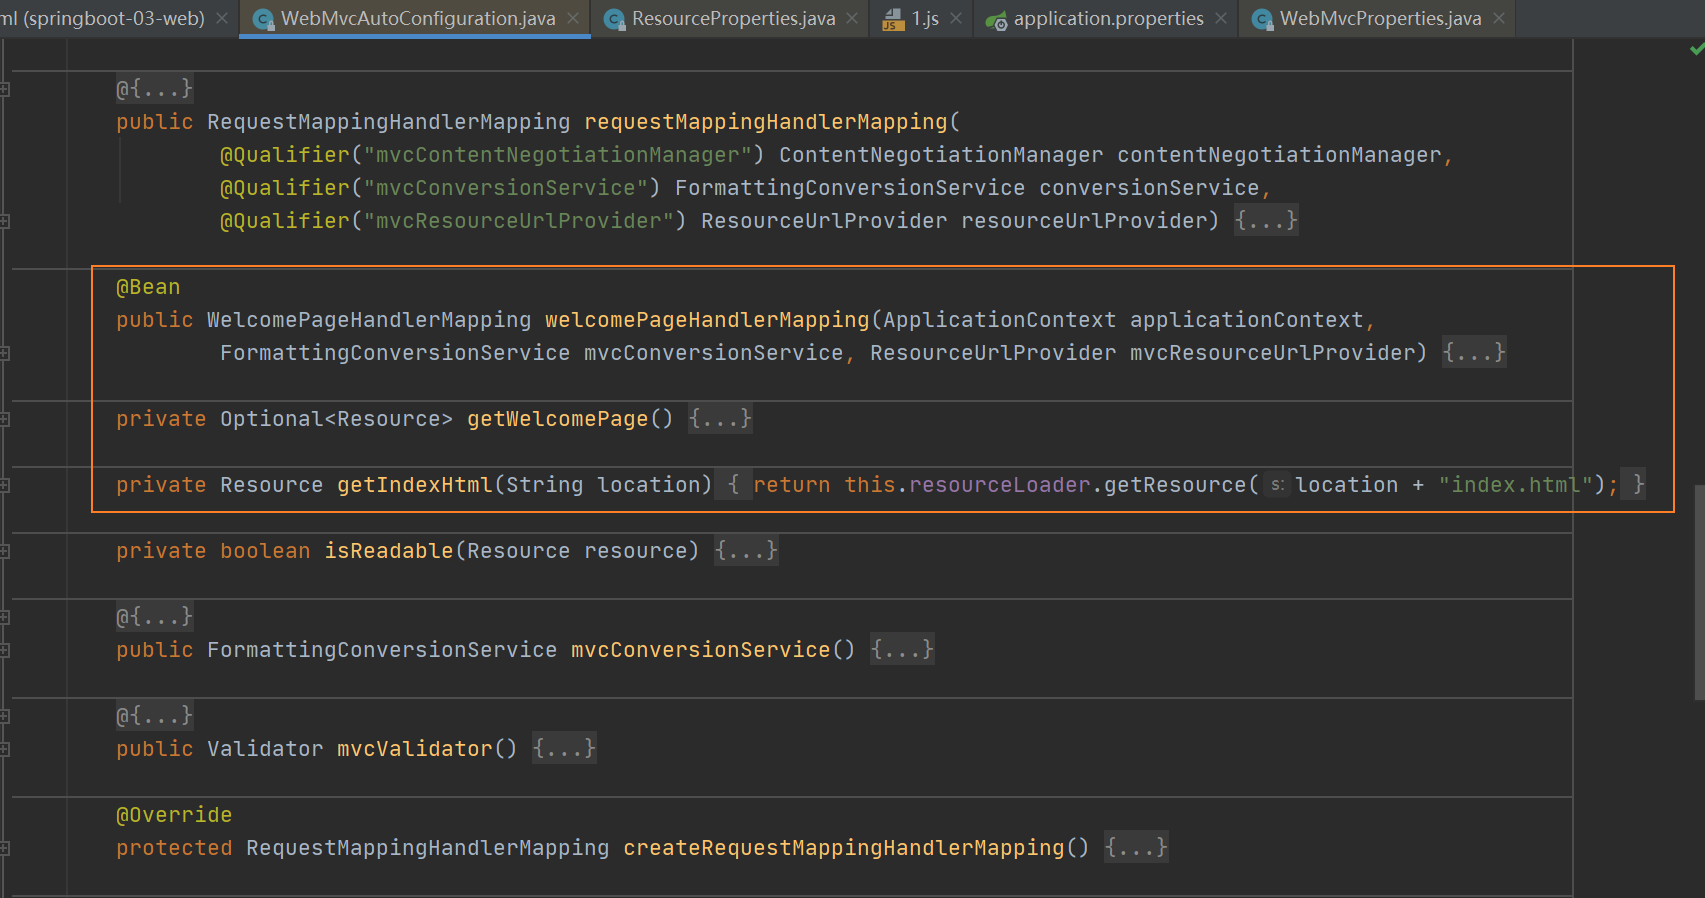
1. 分析源码
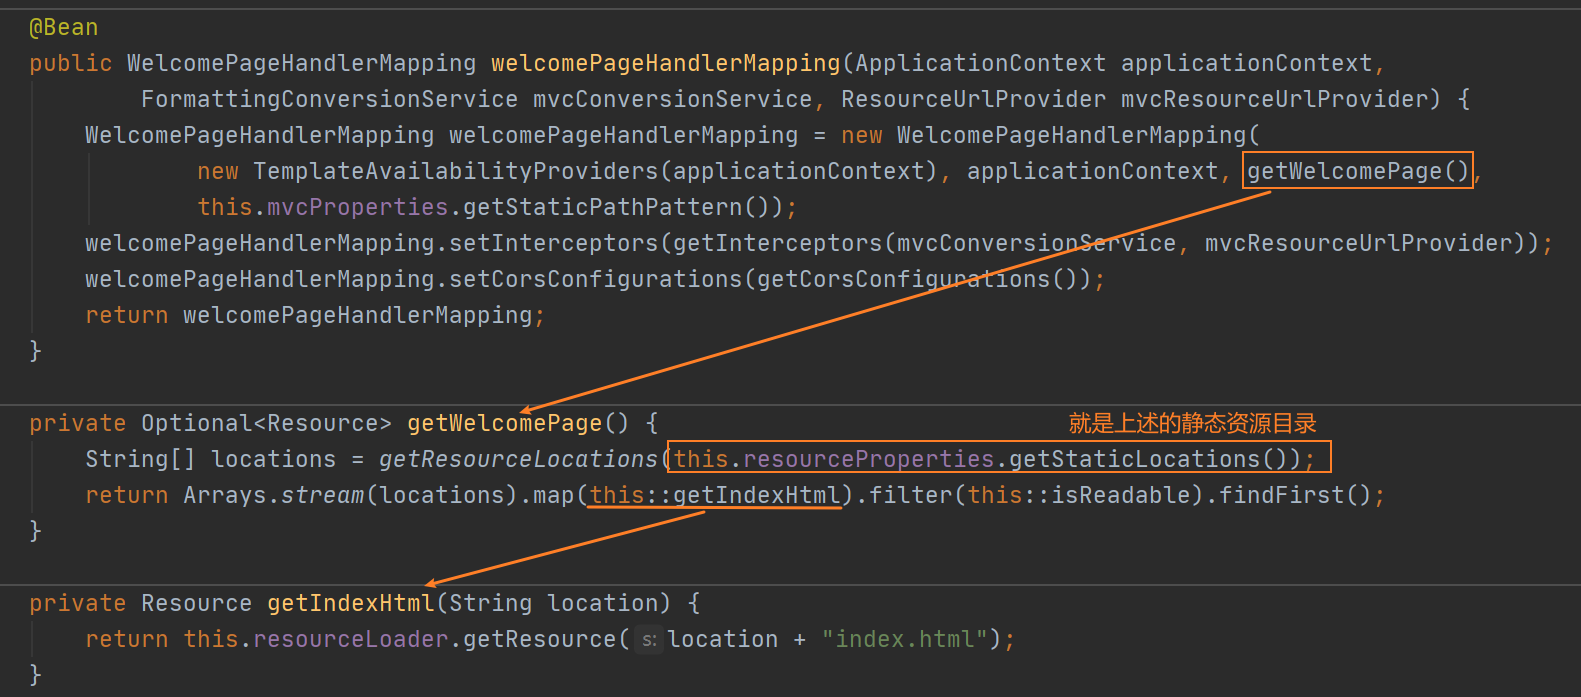
首先是欢迎页处理映射类WelcomePageHandler,它通过@Bean注解被注入到bean中,它通过两种方式获得资源路径:
- 自定义的资源路径
this.mvcProperties.getStaticPathPattern() - 调用
gerWelcomPage获得资源路径
其中getWelcomPage方法中,有个getStaticLocations方法,返回的locations就是上述的四个静态资源路径
String[] locations = getResourceLocations(this.resourceProperties.getStaticLocations());
"classpath:/META-INF/resources/":就是上述的webjars
"classpath:/resources/":reources目录下的resources目录,不存在自己新建
"classpath:/static/":resources目录下的static目录
"classpath:/public/":resources目录下的public目录,不存在自己新建

在getWelcomePage方法中还调用了getIndexHtml方法,用于配置首页,位置就是上述locations的下的index.html
private Resource getIndexHtml(String location) {


   return this.resourceLoader.getResource(location + "index.html");
}
总结:我们将首页index.html文件放置静态资源四个目录任意一个位置即可直接访问加载
2. 直接访问首页测试
我们可以把首页index.html放入以下任意一个目录
"classpath:/META-INF/resources/":就是上述的webjars
"classpath:/resources/":reources目录下的resources目录,不存在自己新建
"classpath:/static/":resources目录下的static目录
"classpath:/public/":resources目录下的public目录,不存在自己新建
这里在resource目录下的public目录下新建index.html表示首页

<!DOCTYPE html>
<html lang="en">
<head>
    <meta charset="UTF-8">
    <title>首页</title>
</head>
<body>
<h1>首页</h1>
</body>
</html>
然后运行主程序测试,访问localhost:8080,成功加载到了首页

3. 通过请求跳转到首页
通常情况下,我们需要通过请求跳转到首页,因此我们需要写一个controller进行视图跳转,那么这个页面放在哪里呢?
在resource下,除了public、resource、staic三个静态目录,还有一个template目录,因此,我们可以将我们的首页放入该目录下,通过请求加载到首页
-
springboot项目默认是不允许直接访问
templates下的文件的,是受保护的。 -
如果要访问templates下的文件,需要模板引擎的支持,推荐使用
thymeleaf,这里导入thymeleaf依赖
<!--thymeleaf-->
<dependency>
    <groupId>org.springframework.boot</groupId>
    <artifactId>spring-boot-starter-thymeleaf</artifactId>
</dependency>
然后,我们将上述index.html移入templates包中

然后再编写一个IndexController

package com.zsr.controller;

import org.springframework.stereotype.Controller;
import org.springframework.web.bind.annotation.RequestMapping;

@Controller
public class IndexController {


    @RequestMapping("/index")
    public String index() {


        return "index";
    }
}
重新启动主程序访问测试,访问/index,成功显示首页

二、图标设置
- 早些版本中Spring Boot对
Favicon进行了默认支持,只需要将.ico图标文件放在四个静态资源目录任意一个即可,并需要在application.properties中通过如下配置关闭默认的图标即可
spring.mvc.favicon.enabled=false #关闭
-
但在Spring Boot项目的issues中提出,如果提供默认的Favicon可能会导致网站信息泄露。如果用户不进行自定义的Favicon的设置,而Spring Boot项目会提供默认的上图图标,那么势必会导致泄露网站的开发框架。
-
因此,在Spring Boot2.2.x中,将默认的favicon.ico移除,同时也不再提供上述application.properties中的属性配置

在这以后,我们需要在
index.html首页文件中进行配置
- 将
.ico图片放在 resources 文件夹下的 static 文件夹下

- 在首页 index.html 中引入图片
<link rel="icon" href="/favicon.ico">
-
访问测试即可

注:可能会出现测试不成功的情况,建议清除浏览器缓存再刷新