基于Nginx1.22+PHP8+MySQL8安装Discuz! X3.5
1. 安装PHP8
更新系统:
yum update
安装EPEL存储库:
yum install epel-release
安装Remi存储库(提供了最新的 PHP 版本):
yum install https://rpms.remirepo.net/enterprise/remi-release-7.rpm
启用Remi存储库中的PHP8:
yum install yum-utils
yum-config-manager --enable remi-php80
安装PHP 8和相关扩展:
yum install php php-cli php-fpm php-mysqlnd php-zip php-devel php-gd php-mbstring php-curl php-xml php-pear php-bcmath php-json
验证PHP安装:
php -v
PHP 8.0.29 (cli) (built: Jun  7 2023 17:25:45) ( NTS gcc x86_64 )
Copyright (c) The PHP Group
Zend Engine v4.0.29, Copyright (c) Zend Technologies
配置和启动PHP-FPM:
systemctl enable php-fpm
systemctl start php-fpm
ss -tnlp | grep 9000
LISTEN     0      128    127.0.0.1:9000                     *:*                   users:(("php-fpm",pid=913,fd=9),("php-fpm",pid=912,fd=9),("php-fpm",pid=911,fd=9),("php-fpm",pid=910,fd=9),("php-fpm",pid=909,fd=9),("php-fpm",pid=908,fd=7))
2. 安装MySQL8
安装编译所需的依赖项:
yum install -y gcc-c++ openssl  openssl-devel make bison ncurses-devel
yum install centos-release-scl
yum install devtoolset-11-gcc devtoolset-11-gcc-c++ devtoolset-11-binutils
编译安装cmake3.25.3
tar xvf cmake-3.25.3.tar.gz
cd cmake-3.25.3
./bootstrap
make && make install
/usr/local/bin/cmake --version
cmake version 3.25.3

ln -s /usr/local/bin/cmake /usr/bin/
cmake --version
cmake version 3.25.3
解压并编译源代码包:
wget https://dev.mysql.com/get/Downloads/MySQL-8.0/mysql-8.0.33.tar.gz
tar xvf mysql-8.0.33.tar.gz
cd mysql-8.0.33

mkdir build
cd build/
运行CMake生成Makefile:
cmake .. -DCMAKE_INSTALL_PREFIX=/usr/local/mysql \
-DMYSQL_DATADIR=/var/lib/mysql \
-DWITH_INNODB_MEMCACHED=ON \
-DWITH_MYISAM_STORAGE_ENGINE=1 \
-DDOWNLOAD_BOOST=1 \
-DWITH_BOOST=/usr/local/boost

make && make install
将MySQL安装到 /usr/local/mysql目录,数据目录为 /var/lib/mysql,启用InnoDB Memcached插件,启用 MyISAM 存储引擎,并指定Boost库的路径
配置MySQL:
groupadd mysql
useradd -r -g mysql -s /bin/false mysql
cd /usr/local/mysql
chown -R mysql:mysql .
bin/mysqld --initialize-insecure --user=mysql --basedir=/usr/local/mysql --datadir=/var/lib/mysql
设置MySQL开机自启动:
cp support-files/mysql.server /etc/init.d/mysql
chkconfig --add mysql
chkconfig mysql on
cat /etc/my.cnf
[mysqld]
datadir=/var/lib/mysql
log-error=/var/lib/mysql/mysql.log
pid-file=/var/lib/mysql/mysql.pid
socket=/var/lib/mysql/mysql.sock
# Disabling symbolic-links is recommended to prevent assorted security risks
symbolic-links=0
# Settings user and group are ignored when systemd is used.
# If you need to run mysqld under a different user or group,
# customize your systemd unit file for mariadb according to the
# instructions in http://fedoraproject.org/wiki/Systemd

[mysqld_safe]
log-error=/var/lib/mysql/mysql.log
pid-file=/var/lib/mysql/mysql.pid
socket=/tmp/mysql.sock
#
# include all files from the config directory
#
!includedir /etc/my.cnf.d
启动MySQL服务:
systemctl restart mysql
systemctl status mysql
进行安全性配置:
/usr/local/mysql/bin/mysql_secure_installation
ln -s /usr/local/mysql/bin/mysql /usr/bin/

mysql -u root -p
Enter password:
Welcome to the MySQL monitor.  Commands end with ; or \g.
Your MySQL connection id is 12
Server version: 8.0.33 Source distribution

Copyright (c) 2000, 2023, Oracle and/or its affiliates.

Oracle is a registered trademark of Oracle Corporation and/or its
affiliates. Other names may be trademarks of their respective
owners.

Type 'help;' or '\h' for help. Type '\c' to clear the current input statement.

mysql>
mysql> update user set host = '%' where user = 'root';
mysql> flush privileges;
3. 配置Nginx1.22
Nginx1.22的安装与配置可参考我的其他博客文章
/usr/local/nginx/sbin/nginx -v
nginx version: nginx/1.22.0
   location / {


        root   html;
        index  index.php index.html index.htm;
    }

           location ~ \.php$ {


            root           html;
            fastcgi_pass   127.0.0.1:9000;
            fastcgi_index  index.php;
            fastcgi_param  SCRIPT_FILENAME  /usr/local/nginx/html$fastcgi_script_name;
            include        fastcgi_params;
        }
/usr/local/nginx/html为网站发布目录,我的为/usr/local/nginx/html
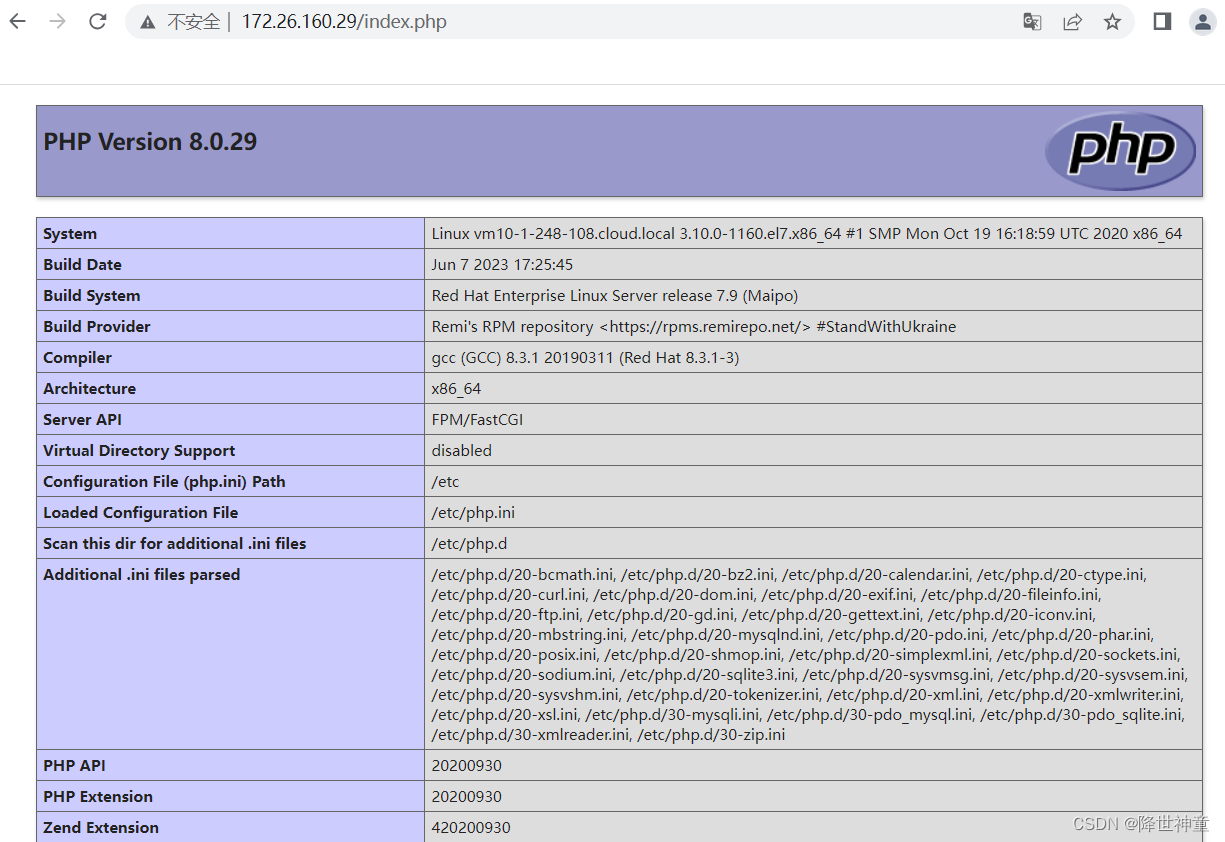
cat /usr/local/nginx/html/index.php
<?php
  echo phpinfo();
?>
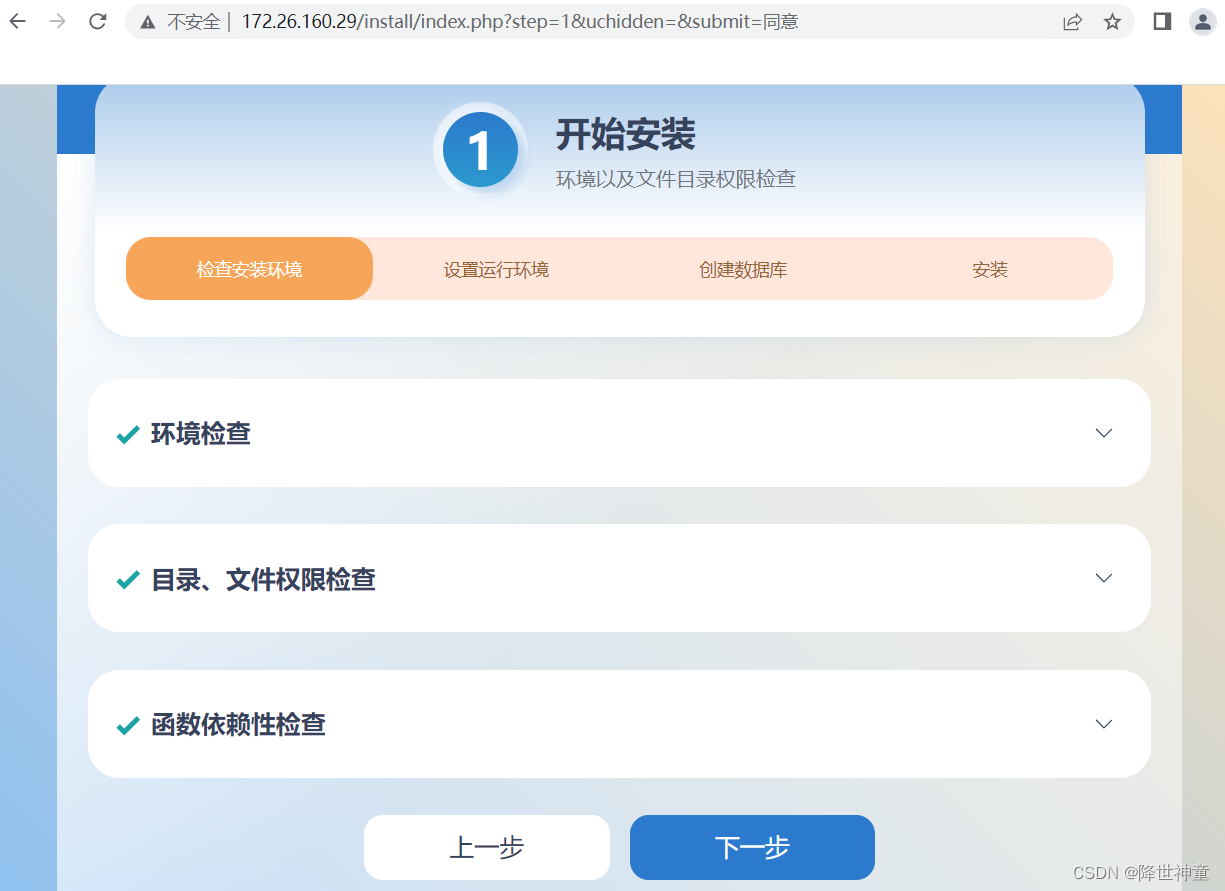
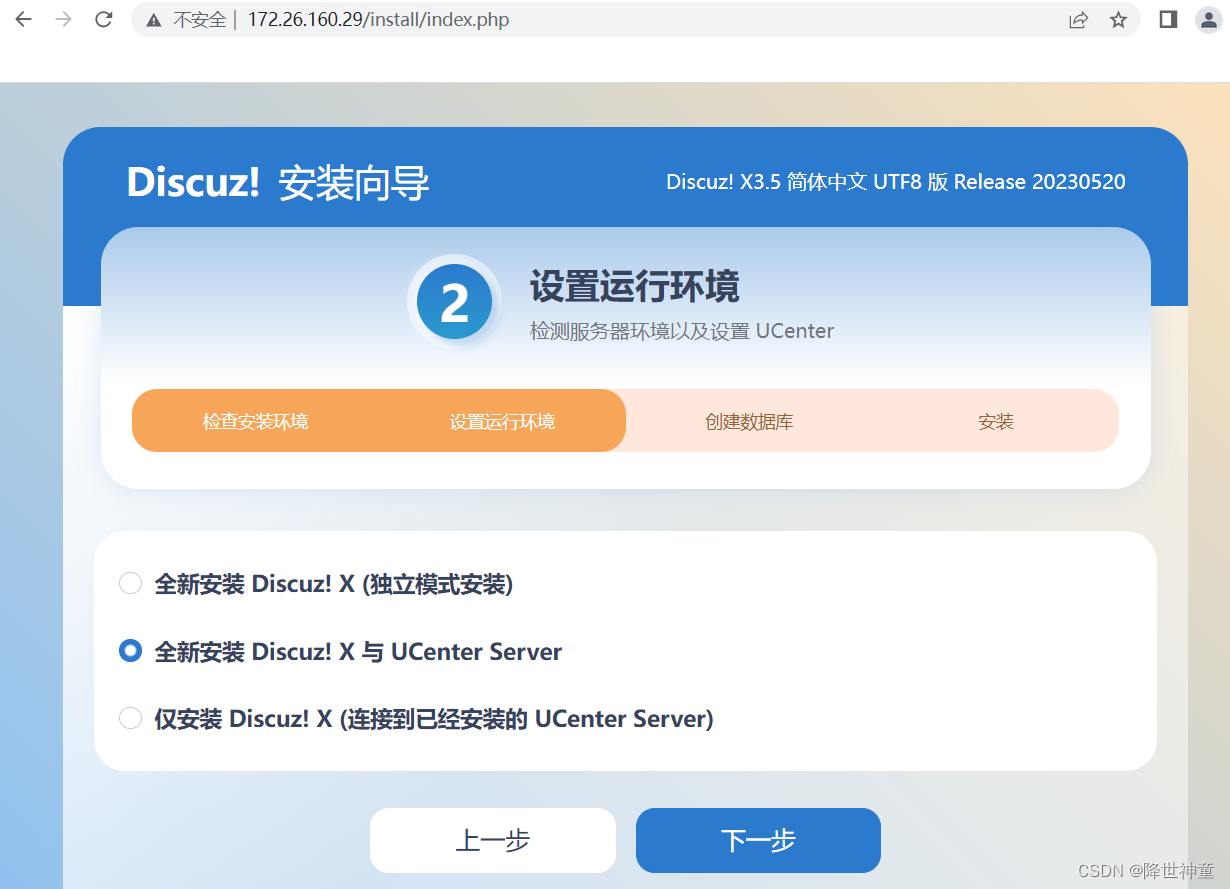
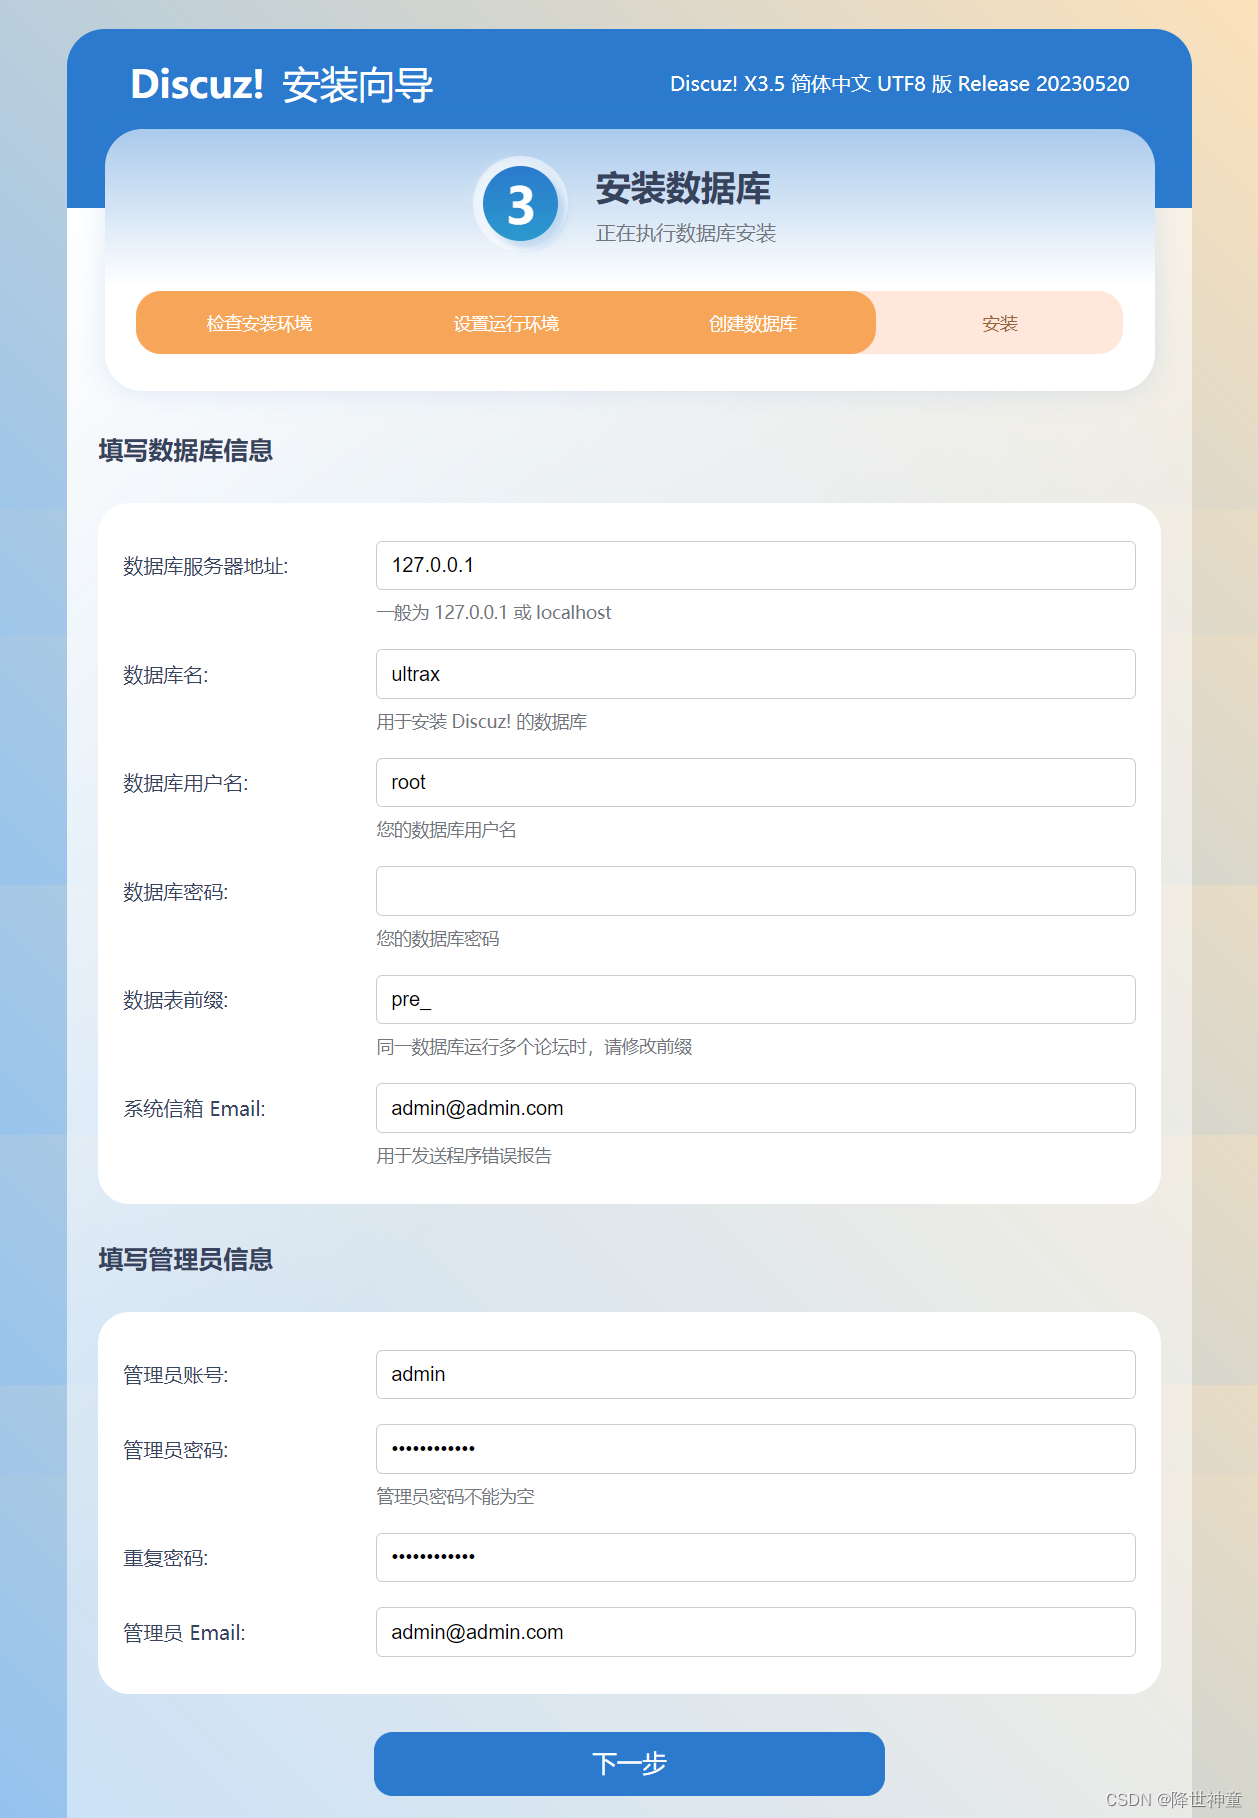
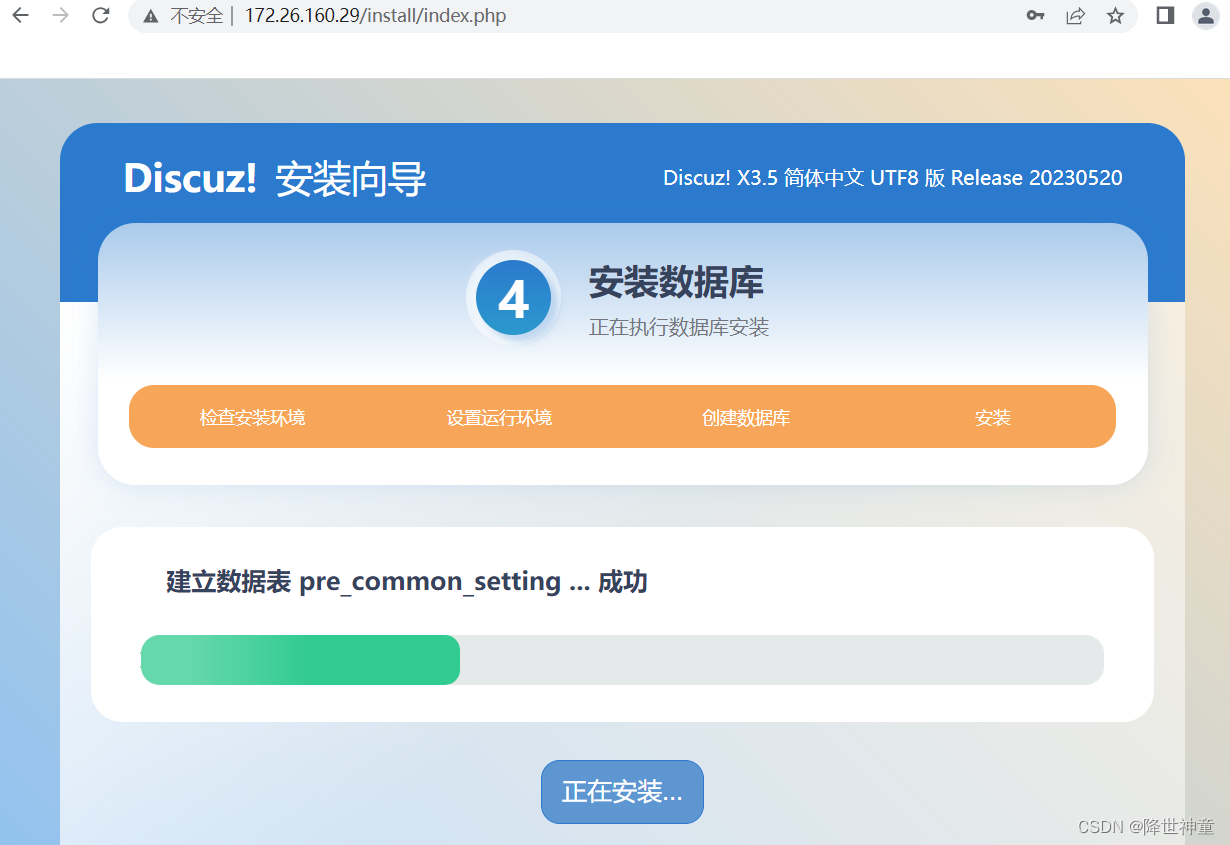
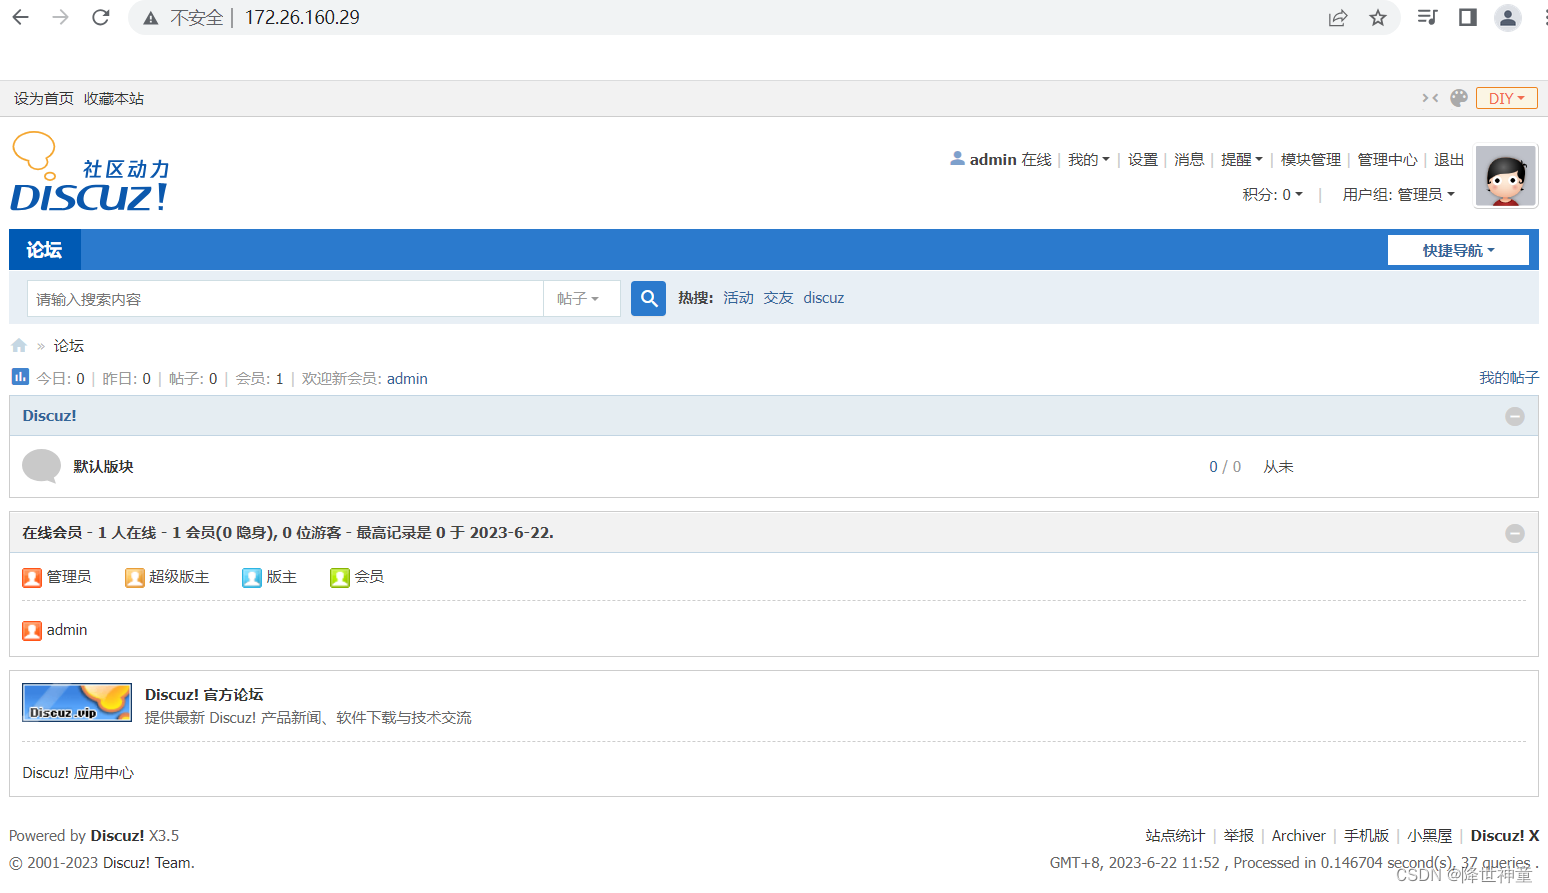
4. 安装Discuz! X3.5
unzip Discuz_X3.5_SC_UTF8_20230520.zip
解压缩得到如下三个文件:
upload这个目录下面的所有文件是我们需要上传到服务器上的可用程序文件
readme目录为产品介绍、授权、安装、升级、转换以及版本更新日志说明
utility目录为论坛附带工具,包括升级程序
将upload这个目录下的所有文件上传到/usr/local/nginx/html目录
cp -r ./upload/* /usr/local/nginx/html/
cd /usr/local/nginx/html/
chmod 757  -R  data/  uc_server/  config/  uc_client/