一、概述
再过两个月,我就30周岁了,开启人生的第四个十年。人生有几个十年,我已经度过了三个。我内心并未感觉自己三十岁,但每次听到同事们说出他们的年龄,心里暗暗比较比他们大了好几岁,才意识到他们真好,我曾经也是他们这样。自古三十而立,成家立业,我现在既没有成家,也不知道我这个写码的工作算不算立业,因为我还不知道过了30岁,还能写几年代码。但不管未来如何,当下好好写码,保持学习,未来也应该不会很差吧。
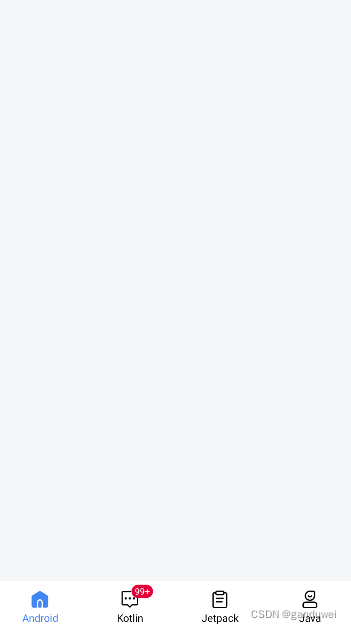
上面纯属扯淡,下面开始今天的正文。现在主流的app首页都是底部几个Tab,上面是Fragment展示内容,就像下图这样。实现这样的需求很简单,我想这应该是Android工程师必备的能力吧。虽然说很容易,没有什么技术难点,但我看到过一些人的实现并不是很完美,多多少少有点问题,在某些场景下会出现bug。
二、代码实现
上面内容部分有两种方式实现:
- 使用FragmentContainerView,承载显示内容的Fragment;
- 使用ViewPager2,和FragmentStateAdapter。
下面的Tab也有两种方式实现:
- 普通的控件实现,如:RadioButton;
- 使用BottomNavigationView。
上面的两种方式可以与下面两种方式任一配合实现。
第一种 FragmentContainerView 搭配 RadioButton
布局:
<?xml version="1.0" encoding="utf-8"?>
<LinearLayout xmlns:android="http://schemas.android.com/apk/res/android"
    xmlns:tools="http://schemas.android.com/tools"
    android:layout_width="match_parent"
    android:layout_height="match_parent"
    android:orientation="vertical">

    <androidx.fragment.app.FragmentContainerView
        android:id="@+id/fragmentContainerView"
        android:layout_width="match_parent"
        android:layout_height="0dp"
        android:layout_weight="1" />

    <View
        android:layout_width="match_parent"
        android:layout_height="1px"
        android:background="#f2f2f2" />

    <LinearLayout
        android:layout_width="match_parent"
        android:layout_height="56dp"
        android:background="@color/white"
        android:orientation="horizontal"
        android:paddingBottom="4dp">

        <RadioButton
            android:id="@+id/radio1"
            android:layout_width="0dp"
            android:layout_height="match_parent"
            android:layout_weight="1"
            android:background="@null"
            android:button="@null"
            android:checked="true"
            android:drawableTop="@drawable/nav_1"
            android:gravity="center"
            android:paddingTop="10dp"
            android:text="Android"
            android:textColor="@color/nav_color"
            android:textSize="12sp" />

        <FrameLayout
            android:layout_width="0dp"
            android:layout_height="match_parent"
            android:layout_weight="1">

            <RadioButton
                android:id="@+id/radio2"
                android:layout_width="match_parent"
                android:layout_height="match_parent"
                android:background="@null"
                android:button="@null"
                android:drawableTop="@drawable/nav_2"
                android:gravity="center"
                android:paddingTop="10dp"
                android:text="Kotlin"
                android:textColor="@color/nav_color"
                android:textSize="12sp" />

            <!--tvBadge:用于显示数量-->
            <TextView
                android:id="@+id/tvBadge"
                android:layout_width="wrap_content"
                android:layout_height="wrap_content"
                android:layout_gravity="center_horizontal"
                android:layout_marginStart="14dp"
                android:layout_marginTop="4dp"
                android:background="@drawable/shape_red_badge"
                android:gravity="center"
                android:minWidth="16dp"
                android:paddingHorizontal="4dp"
                android:paddingVertical="1dp"
                android:textColor="@color/white"
                android:textSize="10sp"
                android:visibility="gone"
                tools:text="99+"
                tools:visibility="visible" />
        </FrameLayout>

        <RadioButton
            android:id="@+id/radio3"
            android:layout_width="0dp"
            android:layout_height="match_parent"
            android:layout_weight="1"
            android:background="@null"
            android:button="@null"
            android:drawableTop="@drawable/nav_3"
            android:gravity="center"
            android:paddingTop="10dp"
            android:text="Jetpack"
            android:textColor="@color/nav_color"
            android:textSize="12sp" />

        <RadioButton
            android:id="@+id/radio4"
            android:layout_width="0dp"
            android:layout_height="match_parent"
            android:layout_weight="1"
            android:background="@null"
            android:button="@null"
            android:drawableTop="@drawable/nav_4"
            android:gravity="center"
            android:paddingTop="10dp"
            android:text="Java"
            android:textColor="@color/nav_color"
            android:textSize="12sp" />
    </LinearLayout>
</LinearLayout>
nav_1.xml(nav_2/3/4 类似)
<?xml version="1.0" encoding="utf-8"?>
<selector xmlns:android="http://schemas.android.com/apk/res/android">
    <item android:drawable="@drawable/icon_nav_1_checked" android:state_checked="true" />
    <item android:drawable="@drawable/icon_nav_1" />
</selector>
nav_color.xml
<?xml version="1.0" encoding="utf-8"?>
<selector xmlns:android="http://schemas.android.com/apk/res/android">
    <item android:color="@color/blue" android:state_checked="true" />
    <item android:color="@color/black" />
</selector>
HomeActivity 代码:
class MainActivity : FragmentActivity, CompoundButton.OnCheckedChangeListener {


	//Fragment对应的Tag,用于在FragmentManager添加和寻找Fragment
    companion object {


        const val TAG_1 = "tag1"
        const val TAG_2 = "tag2"
        const val TAG_3 = "tag3"
        const val TAG_4 = "tag4"
        const val TAG_CHECKED = "checkedTag"
    }
    //当前选中的tab
    private var checkedTag = TAG_1

    override fun onCreate(savedInstanceState: Bundle?) {


        super.onCreate(savedInstanceState)
        setContentView(R.layout.activity_main)
        if (savedInstanceState == null) {

    //如果不是销毁重建,才添加fragment
            val fragment1 = Fragment1.newInstance()
            supportFragmentManager.beginTransaction()
                .add(R.id.fragmentContainerView, fragment1 , TAG_1)
                .commitNow()
        } else {

    //重建时,恢复checkedTag
            checkedTag = savedInstanceState.getString(TAG_CHECKED)!!
        }
        radio1.setOnCheckedChangeListener(this)
        radio2.setOnCheckedChangeListener(this)
        radio3.setOnCheckedChangeListener(this)
        radio4.setOnCheckedChangeListener(this)
    }

    //保存checkedTag,待重建时恢复
    override fun onSaveInstanceState(outState: Bundle) {


        super.onSaveInstanceState(outState)
        outState.putString(TAG_CHECKED, checkedTag)
    }

    //Radio选中事件监听
    override fun onCheckedChanged(buttonView: CompoundButton, isChecked: Boolean) {


        if (isChecked) {


            changeRadioButton(buttonView.id)//将上一个选中的RadioButton置为非选中状态
            when (buttonView.id) {

    //根据当前选中的tab,切换显示的Fragment
                R.id.radio1 -> {


                    changeFragment(TAG_1) {

     Fragment1.newInstance() }
                }
                R.id.radio2 -> {


                    changeFragment(TAG_2) {

     Fragment2.newInstance() }
                }
                R.id.radio3 -> {


                    changeFragment(TAG_3) {

     Fragment3.newInstance() }
                }
                R.id.radio4 -> {


                    changeFragment(TAG_4) {

     Fragment4.newInstance() }
                }
            }
        }
    }

    //将id不是checkedId的RadioButton置为不选中状态
    private fun changeRadioButton(checkedId: Int) {


        if (checkedId != R.id.radio1) radio1.isChecked = false
        if (checkedId != R.id.radio2) radio2.isChecked = false
        if (checkedId != R.id.radio3) radio3.isChecked = false
        if (checkedId != R.id.radio4) radio4.isChecked = false
    }

    //切换显示的Fragment
    private fun changeFragment(fragmentTag: String, createFragment: () -> Fragment) {


        val fragmentManager = supportFragmentManager
        val beginTransaction = fragmentManager.beginTransaction()
        //先找找之前有没有添加过该Fragment
        var fragment = fragmentManager.findFragmentByTag(fragmentTag)
        if (fragment== null) {

    //没有添加过
            fragment= createFragment()//创建Fragment,并添加,fragmentTag一定要传
            beginTransaction.add(R.id.fragmentContainerView, fragment, fragmentTag)
        }
        //找到当前显示的Fragment,并隐藏
        fragmentManager.findFragmentByTag(checkedTag)?.let {


            beginTransaction.hide(it)
        }
        //显示选中的Fragment,注意这里提交事务使用的commitNow
        beginTransaction.show(fragment).commitNow()
        checkedTag = fragmentTag
    }

}
需要注意几点:
- onCreate中,一定要判断savedInstanceState为空时才添加Fragment。如果不为空的话,说明Activity销毁重建了,FragmentManager会恢复之前添加的Fragment;
- 显示隐藏Fragment提交事务时,要使用FragmentTransaction的 commitNow 方法,而不能使用commit方法。commitNow顾名思义是立马就执行;commit是添加一个Action任务,等待执行,如果主线程繁忙,那可能会慢一点才能执行这个任务。 而我们的操作是需要马上生效的,所以当我们操作很快时,会发现使用commit会出现页面重叠的现象。
- 不建议用List或其他方式保存Fragment实例。当Activity销毁重建后,FragmentManager 恢复的Fragment 与 保存的 Fragment 不是同一对象。如果要获得Fragment,通过FragmentManager.findFragmentByTag 获取。所以在添加Fragment时一定要给它Tag。
- 如果在Fragment 中添加 Fragment,要使用Fragment的childFragmentManager 来操作,一定不能使用Activity中的FragmentManager,不然会出现Fragment错乱重叠等问题。
- Fragment必须要有无参构造方法(包括DialogFragment)。Activity重建时,FragmentManager 恢复 Fragment 是通过反射调用无参的构造方法创建Fragment,如果没有无参构造,会出现异常。如果Fragment需要传递参数,最好使用setArguments。
以上几点在其他实现方式中同样生效。

第二种 FragmentContainerView 搭配 BottomNavigationView 的实现
布局:
<?xml version="1.0" encoding="utf-8"?>
<LinearLayout xmlns:android="http://schemas.android.com/apk/res/android"
    xmlns:app="http://schemas.android.com/apk/res-auto"
    android:layout_width="match_parent"
    android:layout_height="match_parent"
    android:orientation="vertical">

	<androidx.fragment.app.FragmentContainerView
    	android:id="@+id/fragmentContainerView"
    	android:layout_height="0dp"
        android:layout_weight="1"/>

    <com.google.android.material.bottomnavigation.BottomNavigationView
        android:id="@+id/bottomNavigationView"
        android:layout_width="match_parent"
        android:layout_height="wrap_content"
        android:layout_gravity="bottom"
        android:background="@color/white"
        app:itemIconTint="@color/nav_color"
        app:itemTextAppearanceActive="@style/itemTextAppearanceActiveStyle"
        app:itemTextAppearanceInactive="@style/itemTextAppearanceInactiveStyle"
        app:itemTextColor="@color/nav_color"
        app:labelVisibilityMode="labeled"
        app:menu="@menu/nav_menu" />
</LinearLayout>
app:itemIconTint 设置图标选中和未选中的颜色。
app:itemTextColor 设置文字选中和未选中的颜色。
itemTextAppearanceActive、itemTextAppearanceInactive设置文本选中和未选中的大小。
app:labelVisibilityMode设置文本显示模式,labeled为总是显示。
nav_menu.xml
<?xml version="1.0" encoding="utf-8"?>
<menu xmlns:android="http://schemas.android.com/apk/res/android">
    <item
        android:id="@+id/item_1"
        android:icon="@drawable/nav_1"
        android:title="Android"/>

    <item
        android:id="@+id/item_2"
        android:icon="@drawable/nav_2"
        android:title="Kotlin"/>

    <item
        android:id="@+id/item_3"
        android:icon="@drawable/nav_3"
        android:title="Jetpack"/>

    <item
        android:id="@+id/item_4"
        android:icon="@drawable/nav_4"
        android:title="Java"/>
</menu>
HomeActivity 代码
class MainActivity : FragmentActivity(), BottomNavigationView.OnNavigationItemSelectedListener {


    //Fragment对应的Tag,用于在FragmentManager添加和寻找Fragment
    companion object {


        const val TAG_1 = "tag1"
        const val TAG_2 = "tag2"
        const val TAG_3 = "tag3"
        const val TAG_4 = "tag4"
        const val TAG_CHECKED = "checkedTag"
    }

    //当前选中的tab
    private var checkedTag = TAG_1

    override fun onCreate(savedInstanceState: Bundle?) {


        super.onCreate(savedInstanceState)
        setContentView(R.layout.activity_main)
        if (savedInstanceState == null) {


            val fragment1 = Fragment1()
            supportFragmentManager.beginTransaction().add(R.id.fragmentContainerView, fragment1, TAG_1).commitNow()
        } else {


            checkedTag = savedInstanceState.getString(TAG_CHECKED)!!
        }
        bottomNavigationView.setOnNavigationItemSelectedListener(this)
    }

    override fun onSaveInstanceState(outState: Bundle) {


        super.onSaveInstanceState(outState)
        outState.putString(TAG_CHECKED, checkedTag)
    }

    //BottomNavigationView选中切换事件
    override fun onNavigationItemSelected(item: MenuItem): Boolean {


        if (supportFragmentManager.isStateSaved) return false
        when (item.itemId) {


            R.id.item_1-> {


                changeFragment(TAG_1) {

     Fragment1() }
            }
            R.id.item_2 -> {


                changeFragment(TAG_2) {

     Fragment2() }
            }
            R.id.item_3 -> {


                changeFragment(TAG_3) {

     Fragment3() }
            }
            R.id.item_4 -> {


                changeFragment(TAG_4) {

     Fragment4() }
            }
        }
        return true
    }

	//切换显示的Fragment
    private fun changeFragment(fragmentTag: String, createFragment: () -> Fragment) {


        if (fragmentTag == checkedTag) return //如果选中的tag是当前显示的tag不处理
        val fragmentManager = supportFragmentManager
        val beginTransaction = fragmentManager.beginTransaction()
        var fragment = fragmentManager.findFragmentByTag(fragmentTag)
        if (fragment == null) {


            fragment = createFragment()
            beginTransaction.add(R.id.fragmentContainerView, fragment, fragmentTag)
        }
        fragmentManager.findFragmentByTag(this.checkedTag)?.let {


            beginTransaction.hide(it)
        }
        beginTransaction.show(fragment).commitNow()
        this.checkedTag = fragmentTag
    }

    //设置badge数量
    private fun setCartBadgeCount(count: Int) {


        if (0 == count) {

    //移除
            bottomNavigationView.removeBadge(R.id.nav2)
        } else {

    //显示
            bottomNavigationView.getOrCreateBadge(R.id.nav2).run {


                backgroundColor = ContextCompat.getColor(this@MainActivity, R.color.red)
                maxCharacterCount = 3//最多几位数,超过100,显示为99+
                number = count
            }
        }
    }
}
和第一种类似,只是监听事件不一样。另外BottomNavigationView 是支持显示和移除Badge的,显示时也可以不设置数量,这样就只显示一个小红点。
使用ViewPager2实现
布局:
<?xml version="1.0" encoding="utf-8"?>
<LinearLayout xmlns:android="http://schemas.android.com/apk/res/android"
    xmlns:app="http://schemas.android.com/apk/res-auto"
    android:layout_width="match_parent"
    android:layout_height="match_parent"
    android:orientation="vertical">

    <androidx.viewpager2.widget.ViewPager2
        android:id="@+id/viewPager2"
        android:layout_width="match_parent"
        android:layout_height="0dp"
        android:layout_weight="1"
        android:orientation="horizontal" />

    <com.google.android.material.bottomnavigation.BottomNavigationView
        android:id="@+id/bottomNavigationView"
        android:layout_width="match_parent"
        android:layout_height="wrap_content"
        android:layout_gravity="bottom"
        android:background="@color/white"
        app:itemIconTint="@color/nav_color"
        app:itemTextAppearanceActive="@style/itemTextAppearanceActiveStyle"
        app:itemTextAppearanceInactive="@style/itemTextAppearanceInactiveStyle"
        app:itemTextColor="@color/nav_color"
        app:labelVisibilityMode="labeled"
        app:menu="@menu/nav_menu" />
</LinearLayout>
android:orientation="horizontal"设置ViewPager2为水平滑动。
HomeActivity 代码:
class HomeActivity : FragmentActivity(), BottomNavigationView.OnNavigationItemSelectedListener {


    override fun onCreate(savedInstanceState: Bundle?) {


        super.onCreate(savedInstanceState)
        setContentView(R.layout.activity_home)
        bottomNavigationView.setOnNavigationItemSelectedListener(this)
        //页面切换监听
        viewPager2.registerOnPageChangeCallback(object : ViewPager2.OnPageChangeCallback() {


            override fun onPageSelected(position: Int) {


                when (position) {


                    0 -> {


                        bottomNavigationView.selectedItemId = R.id.item_1
                    }
                    1 -> {


                        bottomNavigationView.selectedItemId = R.id.item_2
                    }
                    2 -> {


                        bottomNavigationView.selectedItemId = R.id.item_3
                    }
                    3 -> {


                        bottomNavigationView.selectedItemId = R.id.item_4
                    }
                }
            }
        })
        viewPager2.adapter = object : FragmentStateAdapter(this) {


            override fun createFragment(position: Int): Fragment {


                return when (position) {


                    0 -> {


                        Fragment1()
                    }
                    1 -> {


                        Fragment2()
                    }
                    2 -> {


                        Fragment3()
                    }
                    3 -> {


                        Fragment4()
                    }
                    else -> {


                        throw IllegalArgumentException()
                    }
                }
            }

            override fun getItemCount(): Int {


                return 4
            }
        }
    }

    //BottomNavigationView选中切换事件
    override fun onNavigationItemSelected(item: MenuItem): Boolean {


        if (supportFragmentManager.isStateSaved) return false
        when (item.itemId) {


            R.id.item_1-> {


                viewPager2.currentItem = 0
            }
            R.id.item_2-> {


                viewPager2.currentItem = 1
            }
            R.id.item_3-> {


                viewPager2.currentItem = 2
            }
            R.id.item_4 -> {


                viewPager2.currentItem = 3
            }
        }
        return true
    }
}
ViewPager2 是基于RecyclerView实现的,FragmentStateAdapter是RecyclerView.Apdater子类,有两个方法需要我们实现:createFragment 根据position返回一个Fragment;getItemCount 返回Fragment数量。Fragment相关的操作、选中状态保存等都不需要我们处理,FragmentStateAdapter已经处理好,并且当Fragment数量很多时,会回收不需要的Fragment。
这里还遗留了一些问题,比如Fragment里面也有水平滑动的View,会被ViewPager2拦截滑动不了。还有这里的写法似乎有些不妥。等我后面多用用这玩意再来补充。