SpringCloud的服务注册和服务发现是由Eureka来完成的。
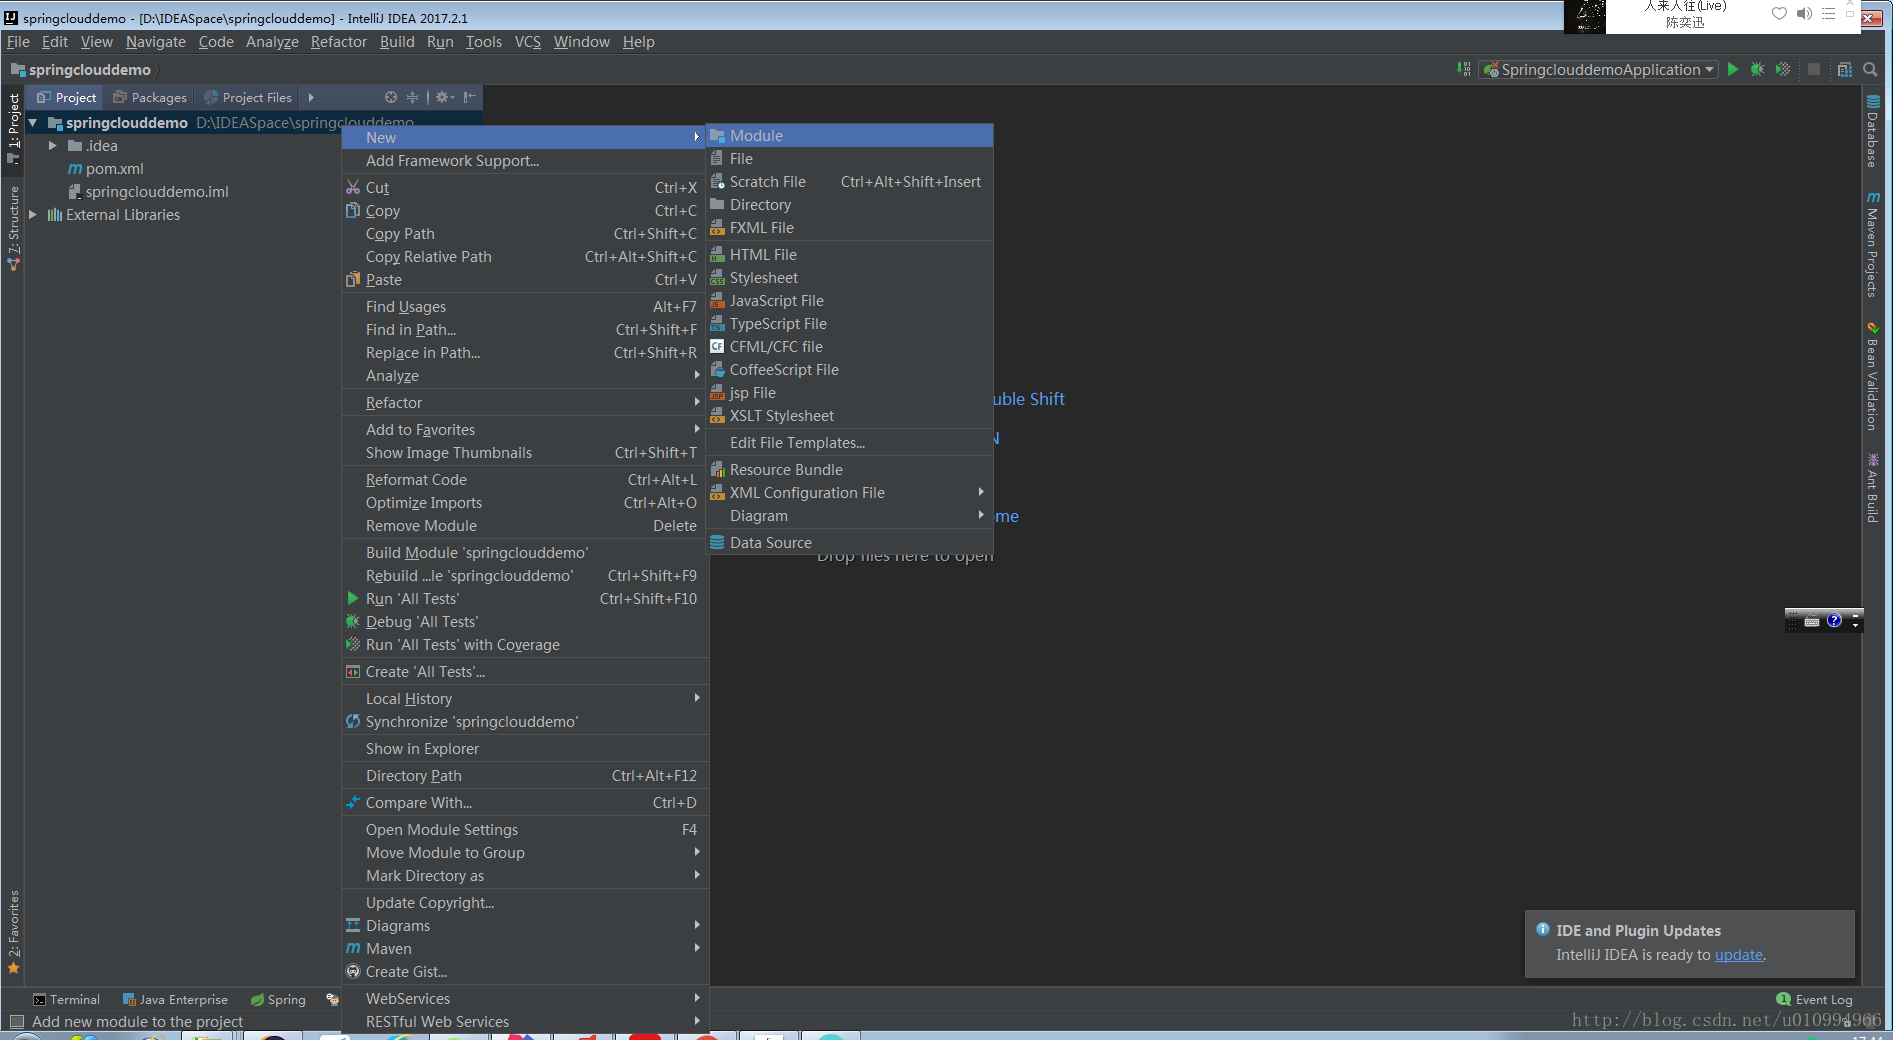
使用IDEA来做demo(包含:高可用注册中心,服务注册与发现,服务调用,负载均衡)
*注:创建项目细节不贴图了
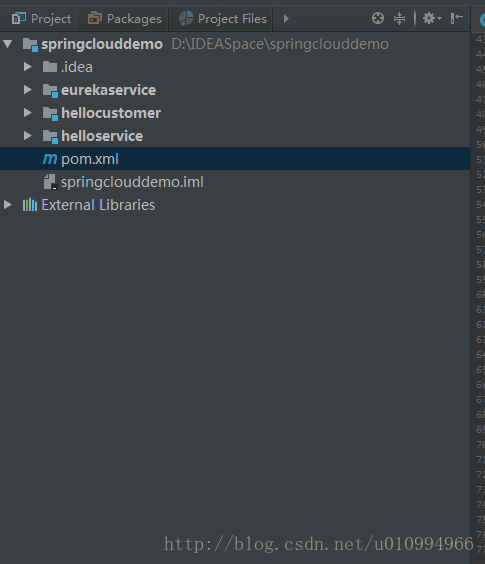
总体项目结构:
一、启动服务注册中心
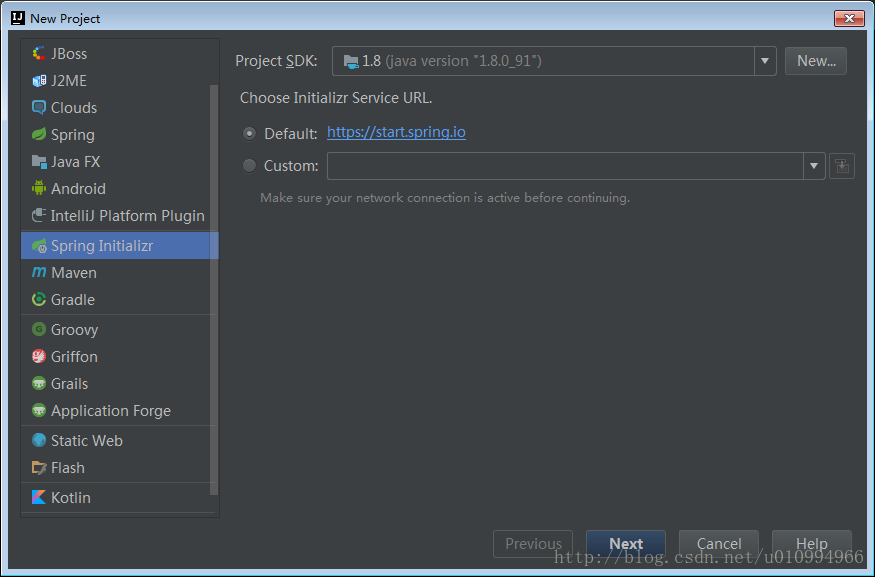
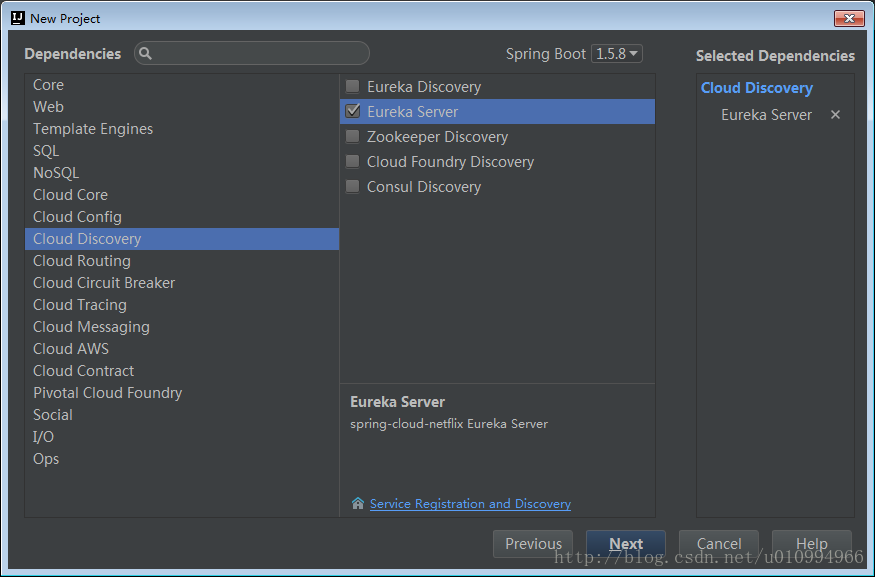
1、创建SpringCloud项目
项目pom.xml
<?xml version="1.0" encoding="UTF-8"?>
<project xmlns="http://maven.apache.org/POM/4.0.0"
         xmlns:xsi="http://www.w3.org/2001/XMLSchema-instance"
         xsi:schemaLocation="http://maven.apache.org/POM/4.0.0 http://maven.apache.org/xsd/maven-4.0.0.xsd">
    <modelVersion>4.0.0</modelVersion>

    <groupId>com.zbb</groupId>
    <artifactId>spring-cloud</artifactId>
    <version>1.0-SNAPSHOT</version>
    <packaging>pom</packaging>

    <name>springclouddemo</name>
    <description>Demo project for Spring Cloud</description>

    <modules>
        <module>eurekaservice</module>
        <module>helloservice</module>
        <module>hellocustomer</module>
    </modules>

    <parent>
        <groupId>org.springframework.boot</groupId>
        <artifactId>spring-boot-starter-parent</artifactId>
        <version>1.5.8.RELEASE</version>
        <relativePath/> <!-- lookup parent from repository -->
    </parent>

    <properties>
        <project.build.sourceEncoding>UTF-8</project.build.sourceEncoding>
        <project.reporting.outputEncoding>UTF-8</project.reporting.outputEncoding>
        <java.version>1.8</java.version>
        <spring-cloud.version>Dalston.SR4</spring-cloud.version>
    </properties>

    <dependencies>
        <!--服务注册中心必要依赖-->
        <dependency>
            <groupId>org.springframework.cloud</groupId>
            <artifactId>spring-cloud-starter-eureka-server</artifactId>
        </dependency>

        <dependency>
            <groupId>org.springframework.boot</groupId>
            <artifactId>spring-boot-starter</artifactId>
        </dependency>

        <dependency>
            <groupId>org.springframework.boot</groupId>
            <artifactId>spring-boot-starter-web</artifactId>
        </dependency>

        <dependency>
            <groupId>org.springframework.boot</groupId>
            <artifactId>spring-boot-starter-test</artifactId>
            <scope>test</scope>
        </dependency>
    </dependencies>

    <dependencyManagement>
        <dependencies>
            <dependency>
                <groupId>org.springframework.cloud</groupId>
                <artifactId>spring-cloud-dependencies</artifactId>
                <version>${spring-cloud.version}</version>
                <type>pom</type>
                <scope>import</scope>
            </dependency>
        </dependencies>
    </dependencyManagement>

    <build>
        <plugins>
            <plugin>
                <groupId>org.apache.maven.plugins</groupId>
                <artifactId>maven-surefire-plugin</artifactId>
                <version>2.4.2</version>
                <configuration>
                    <skipTests>true</skipTests>
                </configuration>
            </plugin>
            <plugin>
                <groupId>org.springframework.boot</groupId>
                <artifactId>spring-boot-maven-plugin</artifactId>
            </plugin>
        </plugins>
    </build>
</project>
2、在项目下创建服务注册中心子项目 eurekaservice
子项目(服务注册中心)pom.xml文件:
<?xml version="1.0" encoding="UTF-8"?>
<project xmlns="http://maven.apache.org/POM/4.0.0"
         xmlns:xsi="http://www.w3.org/2001/XMLSchema-instance"
         xsi:schemaLocation="http://maven.apache.org/POM/4.0.0 http://maven.apache.org/xsd/maven-4.0.0.xsd">
    <parent>
        <artifactId>spring-cloud</artifactId>
        <groupId>com.zbb</groupId>
        <version>1.0-SNAPSHOT</version>
    </parent>
    <modelVersion>4.0.0</modelVersion>

    <groupId>com.zbb</groupId>
    <artifactId>eureka-service</artifactId>
    <version>0.0.1-SNAPSHOT</version>
    <packaging>jar</packaging>

    <properties>
        <project.build.sourceEncoding>UTF-8</project.build.sourceEncoding>
        <project.reporting.outputEncoding>UTF-8</project.reporting.outputEncoding>
        <java.version>1.8</java.version>
    </properties>

    <dependencies>
    <!--服务注册中心必要依赖-->
    <dependency>
        <groupId>org.springframework.cloud</groupId>
        <artifactId>spring-cloud-starter-eureka-server</artifactId>
    </dependency>
    </dependencies>
    <build>
        <plugins>
            <plugin>
                <groupId>org.springframework.boot</groupId>
                <artifactId>spring-boot-maven-plugin</artifactId>
            </plugin>
        </plugins>
    </build>

</project>
3、设置该子项目为服务注册中心
想要开启一个注册中心只需要两步
(1)在启动类(xxxxApplication.java))上添加一条注解@EnableEurekaServer
package com.zbb.eurekaservice;

import org.springframework.boot.SpringApplication;
import org.springframework.boot.autoconfigure.SpringBootApplication;
import org.springframework.cloud.netflix.eureka.server.EnableEurekaServer;

@EnableEurekaServer                 //开启服务注册中心
@SpringBootApplication
public class EurekaServiceApplication {
    public static void main(String[] args)
    {
        SpringApplication.run(EurekaServiceApplication.class, args);
    }
}
(2) 在application.properties中设置注册中心的配置
#注册中心端口
server.port=1111

#主机名
eureka.instance.hostname=localhost

#表示本应用是否是向注册中心注册自己(配置高可用的时候需要设置为true,也就是默认值)
eureka.client.register-with-eureka=false

#是否去检索服务
eureka.client.fetch-registry=false

#eureka服务地址
eureka.client.serviceUrl.defaultZone=http://${eureka.instance.hostname}:${server.port}/eureka/
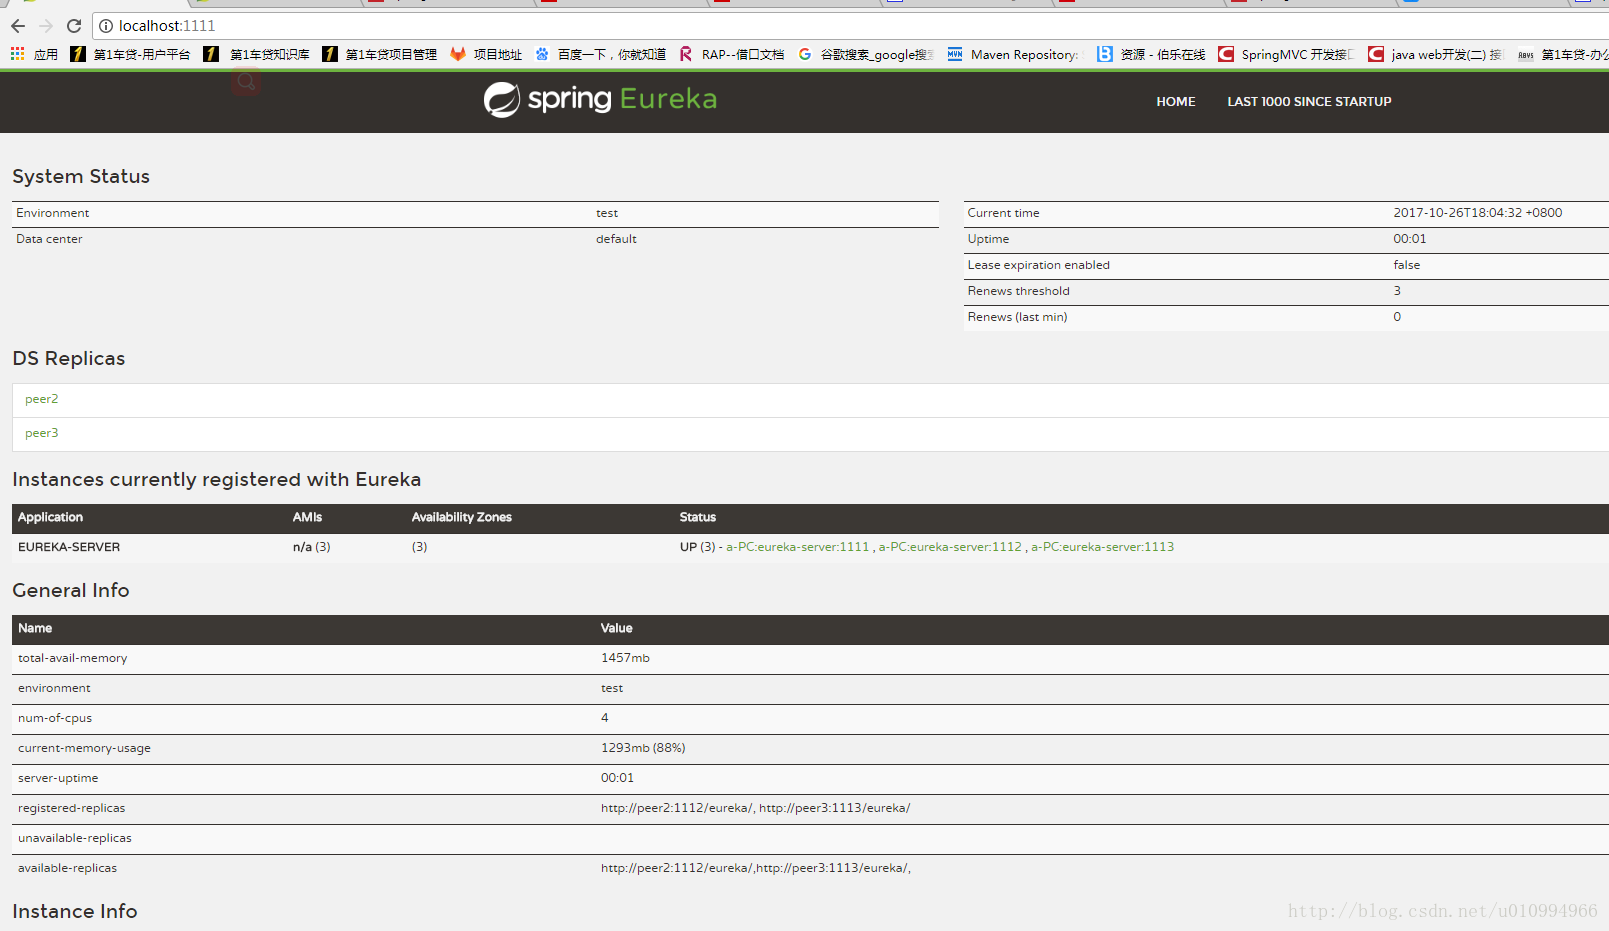
4、如图启动成功
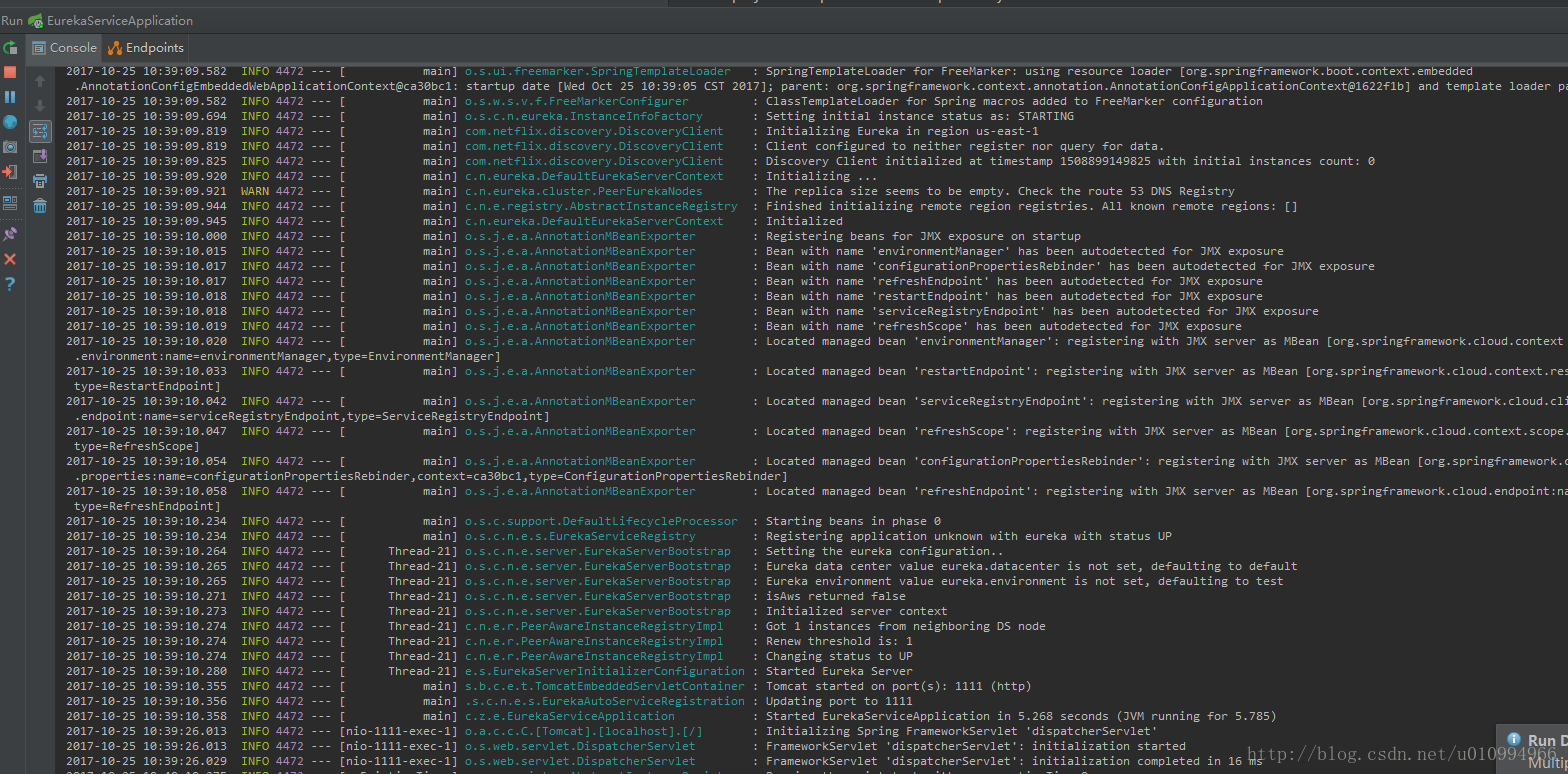
打开浏览器输入:http://localhost:1111/
这时页面会显示Eureka的管理界面
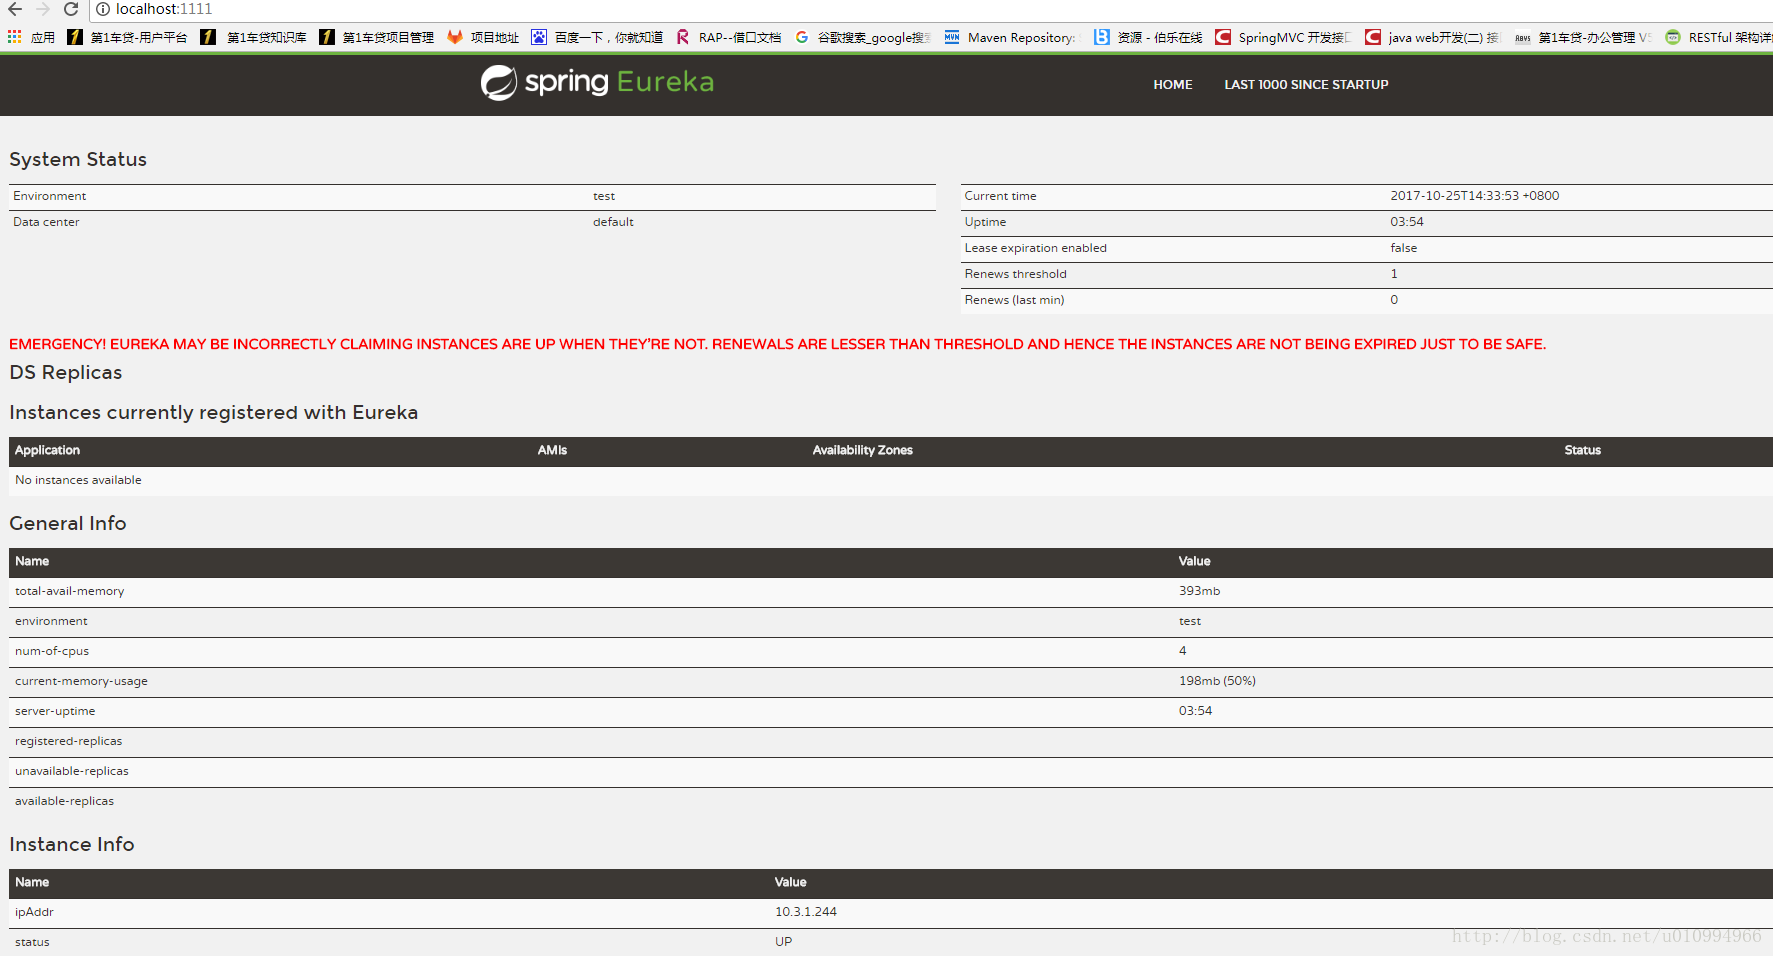
Instances currently registered with Eureka下面表示的就是发现的服务,因为现在还没有服务注册,所以没有发现服务。
注:出现一行红色大字EMERGENCY! EUREKA MAY BE INCORRECTLY CLAIMING INSTANCES ARE UP WHEN THEY’RE NOT. RENEWALS ARE LESSER THAN THRESHOLD AND HENCE THE INSTANCES ARE NOT BEING EXPIRED JUST TO BE SAFE.
这是一种自我保护机制。Eureka Server在运行期间,会统计心跳失败的比例在15分钟之内是否低于85%,如果出现低于的情况(在单机调试的时候很容易满足,实际在生产环境上通常是由于网络不稳定导致),Eureka Server会将当前的实例注册信息保护起来,同时提示这个警告。
二、注册服务提供者
1、创建一个服务提供者的子项目helloservice。(略)
2、添加依赖(pom.xml)
<?xml version="1.0" encoding="UTF-8"?>
<project xmlns="http://maven.apache.org/POM/4.0.0"
         xmlns:xsi="http://www.w3.org/2001/XMLSchema-instance"
         xsi:schemaLocation="http://maven.apache.org/POM/4.0.0 http://maven.apache.org/xsd/maven-4.0.0.xsd">
    <parent>
        <artifactId>spring-cloud</artifactId>
        <groupId>com.zbb</groupId>
        <version>1.0-SNAPSHOT</version>
    </parent>
    <modelVersion>4.0.0</modelVersion>

    <artifactId>helloservice</artifactId>

    <dependencies>
        <dependency>
            <groupId>org.springframework.cloud</groupId>
            <artifactId>spring-cloud-starter-eureka</artifactId>
        </dependency>

    </dependencies>
</project>
3、创建Controller
package com.zbb.controller;

import org.apache.log4j.Logger;
import org.springframework.beans.factory.annotation.Autowired;
import org.springframework.cloud.client.ServiceInstance;
import org.springframework.cloud.client.discovery.DiscoveryClient;
import org.springframework.web.bind.annotation.RequestMapping;
import org.springframework.web.bind.annotation.RequestMethod;
import org.springframework.web.bind.annotation.RestController;

@RestController
public class HelloServiceController {

    private final Logger logger = Logger.getLogger(getClass());

    @Autowired
    DiscoveryClient discoveryClient;    //自动注入DiscoveryClinet

    @RequestMapping(value = "/hello" , method = RequestMethod.GET)
    public String sayHello(){

        ServiceInstance serviceInstance = discoveryClient.getLocalServiceInstance();    //获得service实例

        logger.info("/hello , host:"+serviceInstance.getHost()+"/n"+"/service_id:"+serviceInstance.getServiceId());

        return "成功访问服务";
    }

}
4、激活DiscoveryClient实现
在启动类添加注解:@EnableDiscoveryClient
package com.zbb.helloservice;

import org.springframework.boot.SpringApplication;
import org.springframework.boot.autoconfigure.SpringBootApplication;
import org.springframework.cloud.client.discovery.EnableDiscoveryClient;
import org.springframework.context.annotation.ComponentScan;

@ComponentScan("com.zbb.*")     //组件扫描
@EnableDiscoveryClient          //激活DiscoveryClient实现
@SpringBootApplication
public class HelloServiceApplication {
    public static void main(String[] args){
        SpringApplication.run(HelloServiceApplication.class,args);
    }
}
注:激活DiscoveryClient实现(自动化配置,创建DiscoveryClient接口的实现EnableDiscoveryClient)
5、修改application.properties,指定注册中心
#设置服务名
spring.application.name=hello-service

#指定服务注册中心地址
eureka.client.serviceUrl.defaultZone=http://localhost:1111/eureka
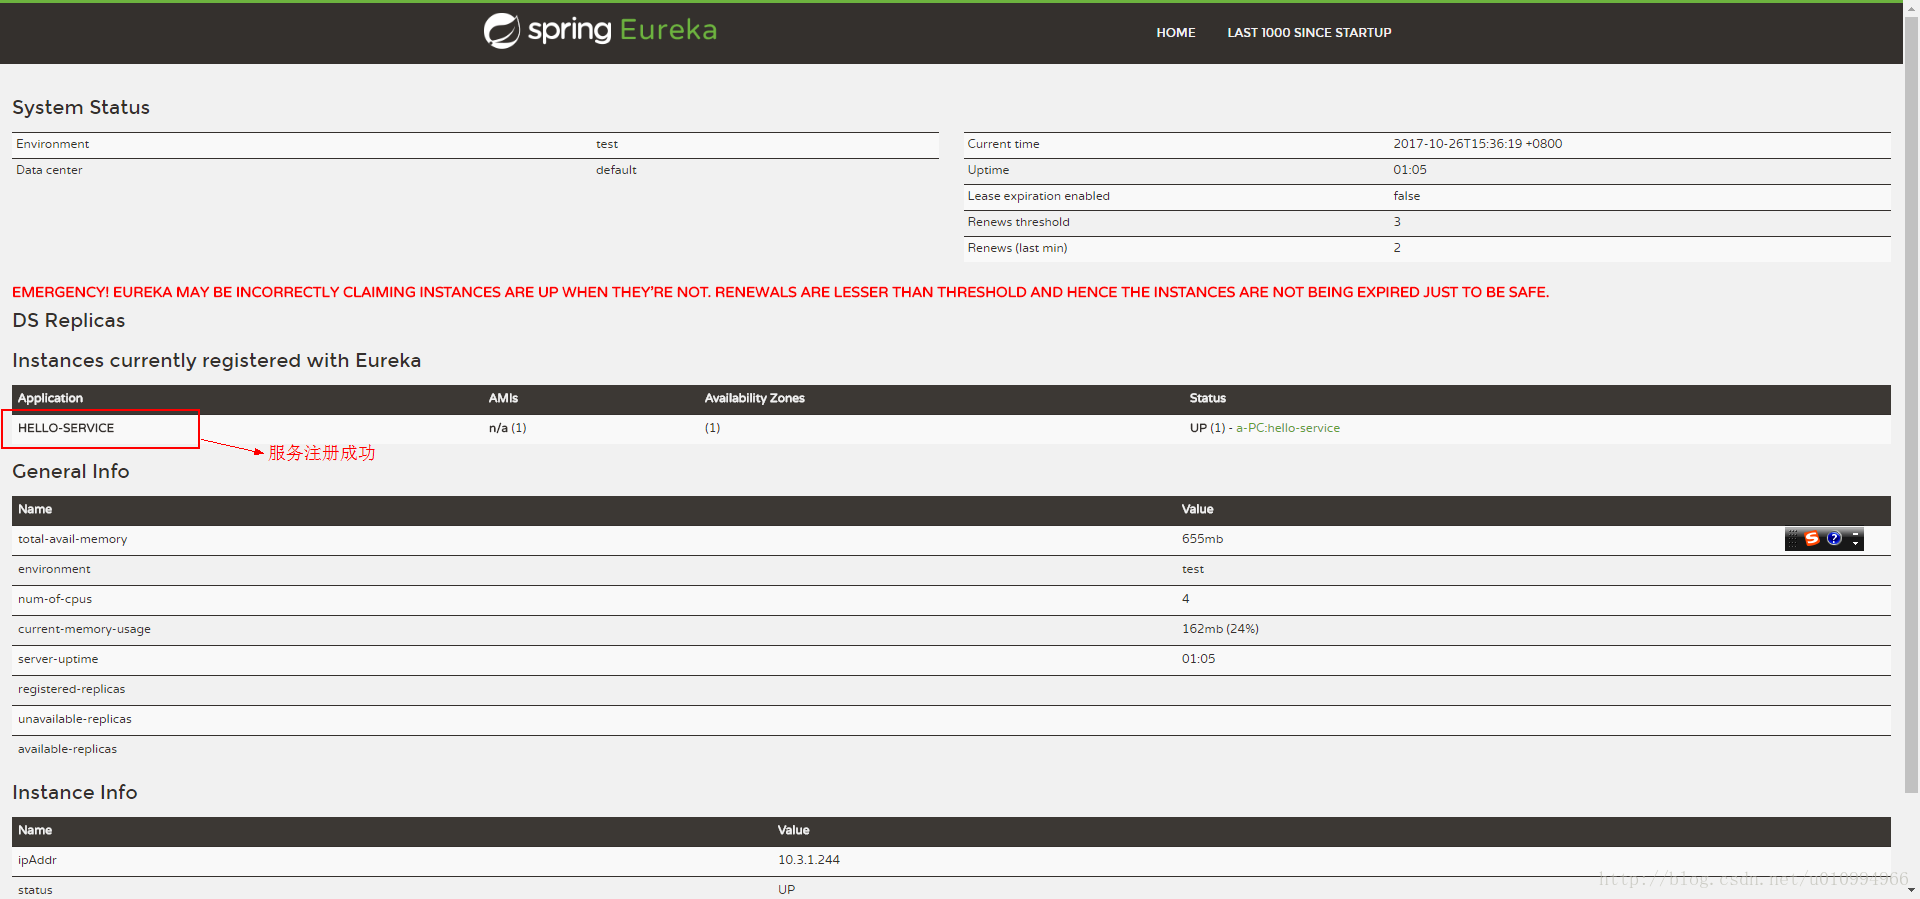
6、启动
先启动注册中心,再启动本服务。
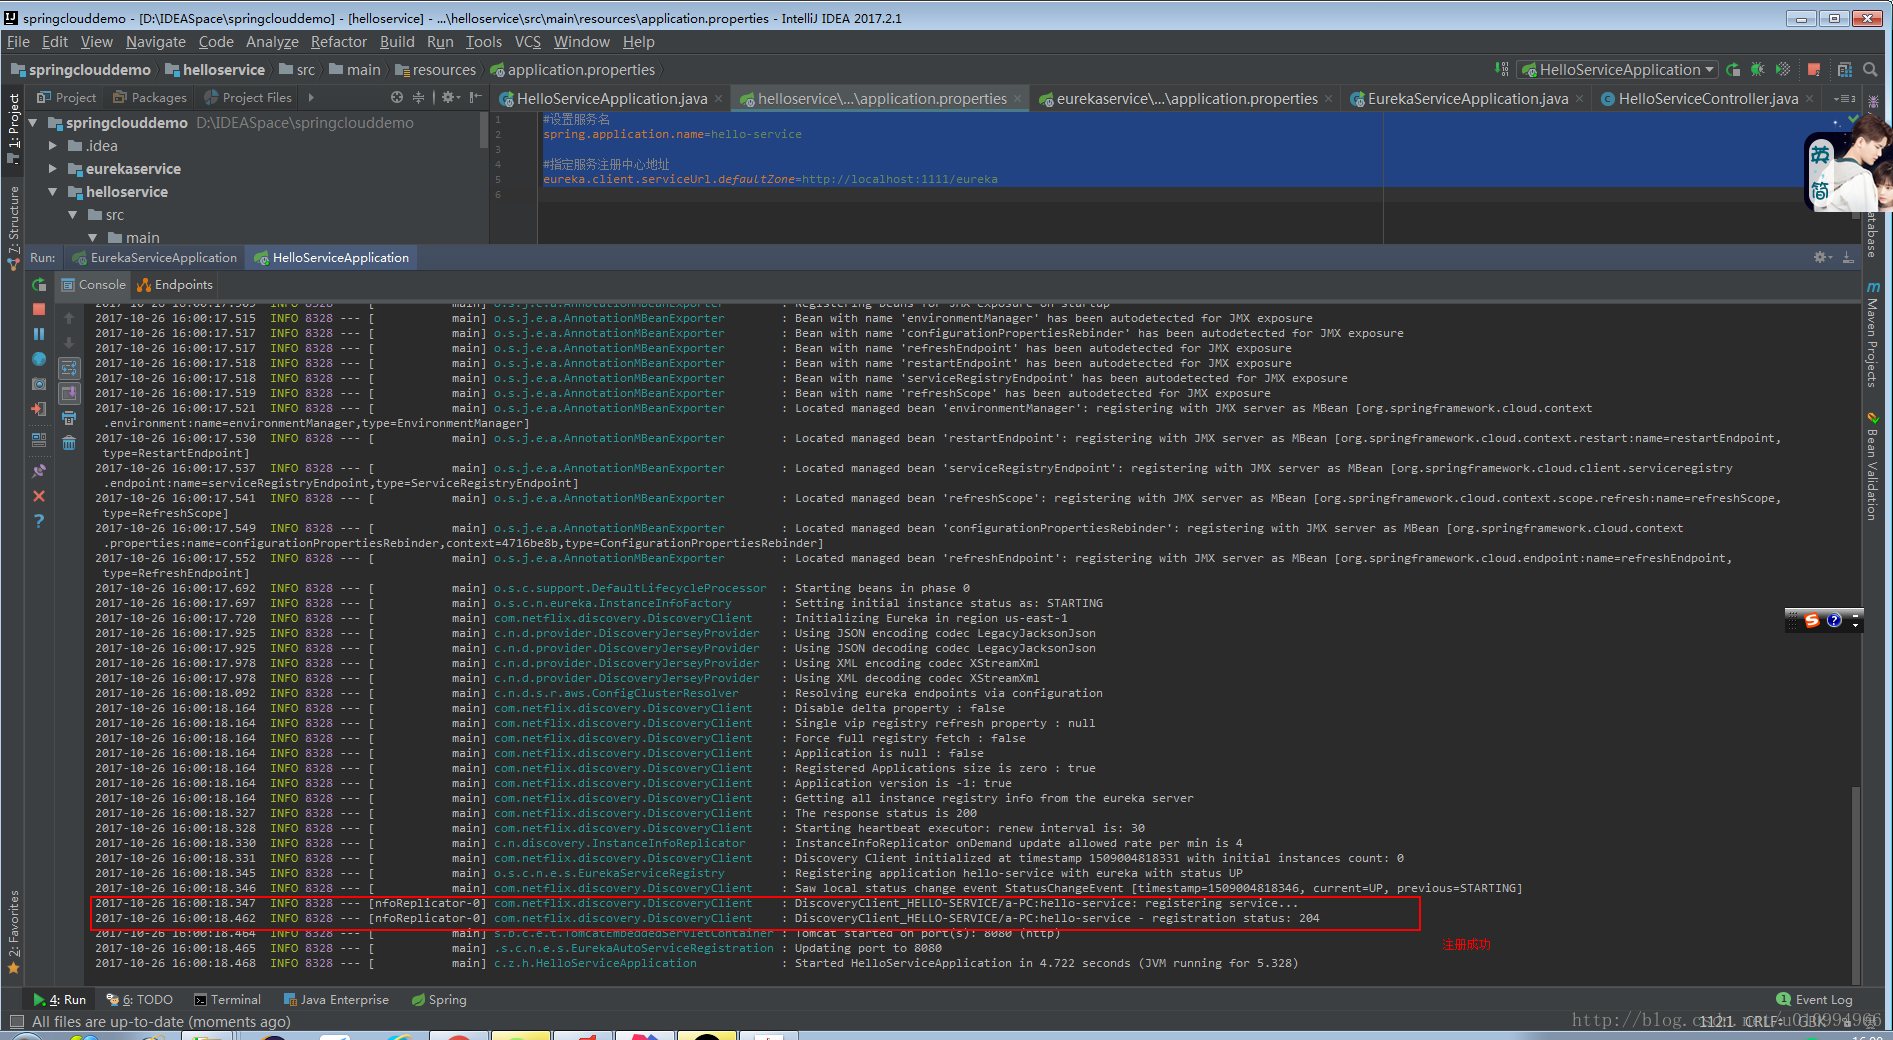
访问:http://localhost:1111/
7、访问http://localhost:8080/hello

查看控制台会发现打印出以下信息:

这里打印的信息就是刚刚在HelloServiceController中注入的DiscoveryClient接口对象从服务注册中心获取的服务信息。
* 三、高可用注册中心搭建*
EurekaServer在设计的时候就开始考虑高可用的问题,在Eureka的服务治理设计中,所有的节点即是服务提供方,也是服务消费方,注册中心也不会例外。
简单点来讲就是使多个注册中心相注册服务,我们以上面eurekaservice为基础进行搭建
1、创建两个properties文件(3个)
application-peer1.properties
#服务名
spring.application.name=eureka-server
#注册中心-01 端口
server.port=1111

#注册中心主机名
eureka.instance.hostname=peer1

#指定另外的注册中心
eureka.client.serviceUrl.defaultZone=http://peer2:1112/eureka/,http://peer3:1113/eureka/
application-peer2.properties
#服务名
spring.application.name=eureka-server
#注册中心-01 端口
server.port=1112

#注册中心主机名
eureka.instance.hostname=peer2

#指定另外的注册中心
eureka.client.serviceUrl.defaultZone=http://peer1:1111/eureka/,http://peer3:1113/eureka/
application-peer3.properties
#服务名
spring.application.name=eureka-server
#注册中心-01 端口
server.port=1113

#注册中心主机名
eureka.instance.hostname=peer3

#指定另外的注册中心
eureka.client.serviceUrl.defaultZone=http://peer1:1111/eureka/,http://peer2:1112/eureka/
2、修改服务生产者(helloservice)的配置文件application.properties
#设置服务名
spring.application.name=hello-service

#指定服务注册中心地址
eureka.client.serviceUrl.defaultZone=http://peer1:1111/eureka/,http://peer2:1112/eureka/,http://peer3:1113/eureka/
3、添加对register1、register2、register3的转换
需要在/etc/host文件中添加对应关系
windows系统host文件路径C:\Windows\System32\drivers\etc
修改完成后的host如下:
# Copyright (c) 1993-2009 Microsoft Corp.
#
# This is a sample HOSTS file used by Microsoft TCP/IP for Windows.
#
# This file contains the mappings of IP addresses to host names. Each
# entry should be kept on an individual line. The IP address should
# be placed in the first column followed by the corresponding host name.
# The IP address and the host name should be separated by at least one
# space.
#
# Additionally, comments (such as these) may be inserted on individual
# lines or following the machine name denoted by a '#' symbol.
#
# For example:
#
#      102.54.94.97     rhino.acme.com          # source server
#       38.25.63.10     x.acme.com              # x client host

# localhost name resolution is handled within DNS itself.
#   127.0.0.1       localhost
#   ::1             localhost
127.0.0.1 peer1
127.0.0.1 peer2
127.0.0.1 peer3
4、通过spring.profiles.active来指定启动注册中心
java -jar eureka-server-0.0.1-SNAPSHOT.jar - -spring.profiles.active=peer1
java -jar eureka-server-0.0.1-SNAPSHOT.jar - -spring.profiles.active=peer1
java -jar eureka-server-0.0.1-SNAPSHOT.jar - -spring.profiles.active=peer1
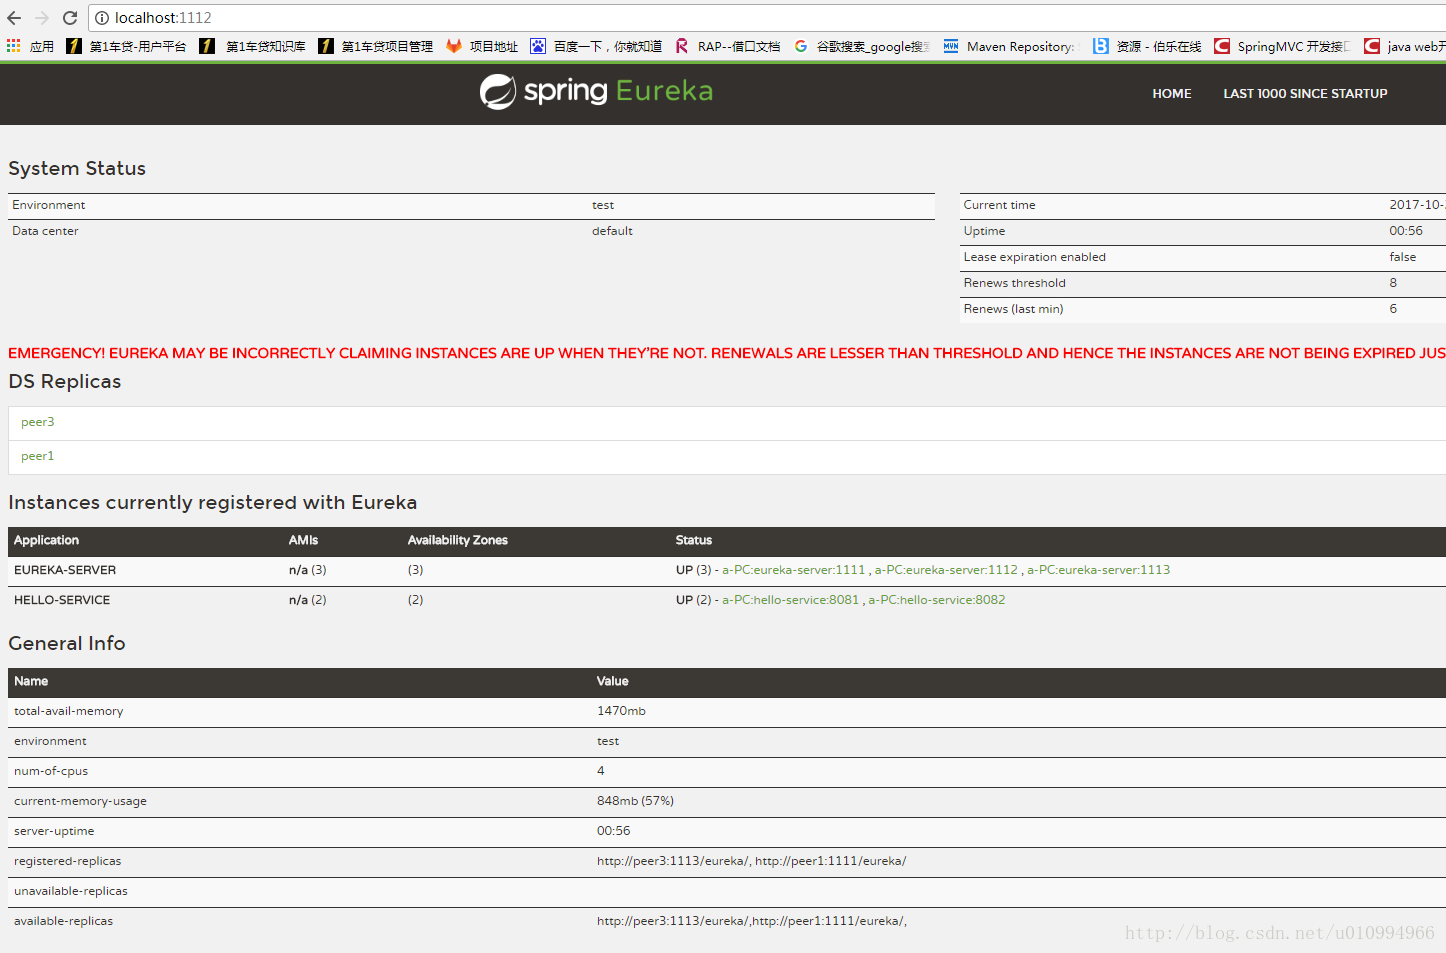
启动成功后访问http://localhost:1111/或http://localhost:1112/或http://localhost:1113/
这里只截图http://localhost:1111/的
可以明显看到发现服务EUREKA-SERVER
Application AMIs Availability Zones Status
EUREKA-SERVER n/a (3) (3) UP (3) - a-PC:eureka-server:1111 , a-PC:eureka-server:1112 , a-PC:eureka-server:1113
5、通过server.port来指定启动注册中心
分别启动两个生产者
java -jar helloservice-1.0-SNAPSHOT.jar –server.port=8081
java -jar helloservice-1.0-SNAPSHOT.jar –server.port=8082
完成后发现,EUREKA-SERVER三个,HELLO-SERVICE两个。
四、注册服务消费
1、创建服务消费子项目 hellocustomer(略)
2、添加依赖(pom.xml)
<?xml version="1.0" encoding="UTF-8"?>
<project xmlns="http://maven.apache.org/POM/4.0.0"
         xmlns:xsi="http://www.w3.org/2001/XMLSchema-instance"
         xsi:schemaLocation="http://maven.apache.org/POM/4.0.0 http://maven.apache.org/xsd/maven-4.0.0.xsd">
    <parent>
        <artifactId>spring-cloud</artifactId>
        <groupId>com.zbb</groupId>
        <version>1.0-SNAPSHOT</version>
    </parent>
    <modelVersion>4.0.0</modelVersion>

    <artifactId>hellocustomer</artifactId>


    <dependencies>
        <dependency>
            <groupId>org.springframework.cloud</groupId>
            <artifactId>spring-cloud-starter-ribbon</artifactId>
            <version>1.3.4.RELEASE</version>
        </dependency>
    </dependencies>

</project>
3、开启eureka客户端
在HelloCustomerApplication.java中添加@EnableDiscoveryClient
package com.zbb.hellocustomer;

import org.springframework.boot.SpringApplication;
import org.springframework.boot.autoconfigure.SpringBootApplication;
import org.springframework.cloud.client.discovery.EnableDiscoveryClient;
import org.springframework.cloud.client.loadbalancer.LoadBalanced;
import org.springframework.context.annotation.Bean;
import org.springframework.context.annotation.ComponentScan;
import org.springframework.web.client.RestTemplate;

@ComponentScan("com.zbb.*")
@EnableDiscoveryClient      //让该应用注册成为eureka客户端,以获得服务发现的能力
@SpringBootApplication
public class HelloCustomerApplication {

    @Bean
    @LoadBalanced                   //开启客户端负载均衡
    RestTemplate restTemplate(){
        return new RestTemplate();
    }

    public static void main(String[] args){
        SpringApplication.run(HelloCustomerApplication.class, args);
    }
}
4、创建Controller (CustomerController.java)
package com.zbb.contorller;

import org.springframework.beans.factory.annotation.Autowired;
import org.springframework.web.bind.annotation.RequestMapping;
import org.springframework.web.bind.annotation.RequestMethod;
import org.springframework.web.bind.annotation.RestController;
import org.springframework.web.client.RestTemplate;

@RestController
public class CustomerController {

    @Autowired
    RestTemplate restTemplate;

    @RequestMapping(value = "/hello-customer" , method = RequestMethod.GET)
    public String HelloController(){
         return  restTemplate.getForEntity("http://hello-service/hello" , String.class).getBody();
    }
}
5、修改配置文件 application.properties
#服务名
spring.application.name=ribbon-consumer
#注册中心-01 端口
server.port=9000


#指定另外的注册中心
eureka.client.serviceUrl.defaultZone=http://peer1:1111/eureka/,http://peer2:1112/eureka/,http://peer3:1113/eureka/
6、启动消费者服务
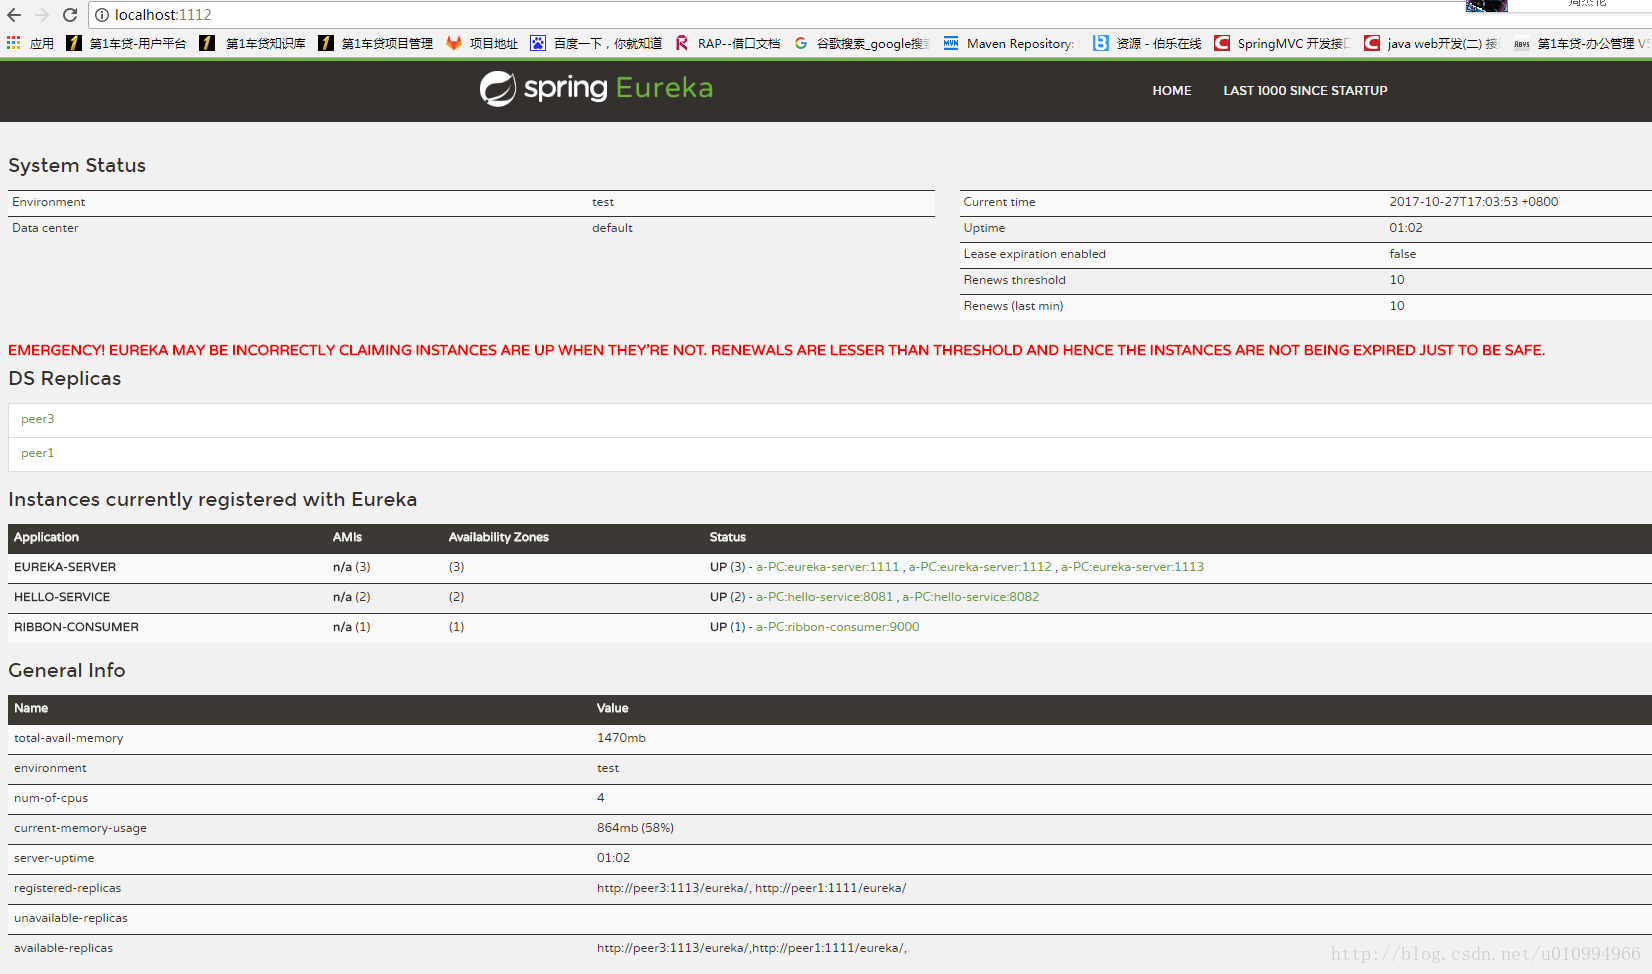
我们会发现有三个注册中心服务可用域有三个,生产者服务可用域两个,消费者服务一个
7、访问消费者服务
http://localhost:9000/hello-customer
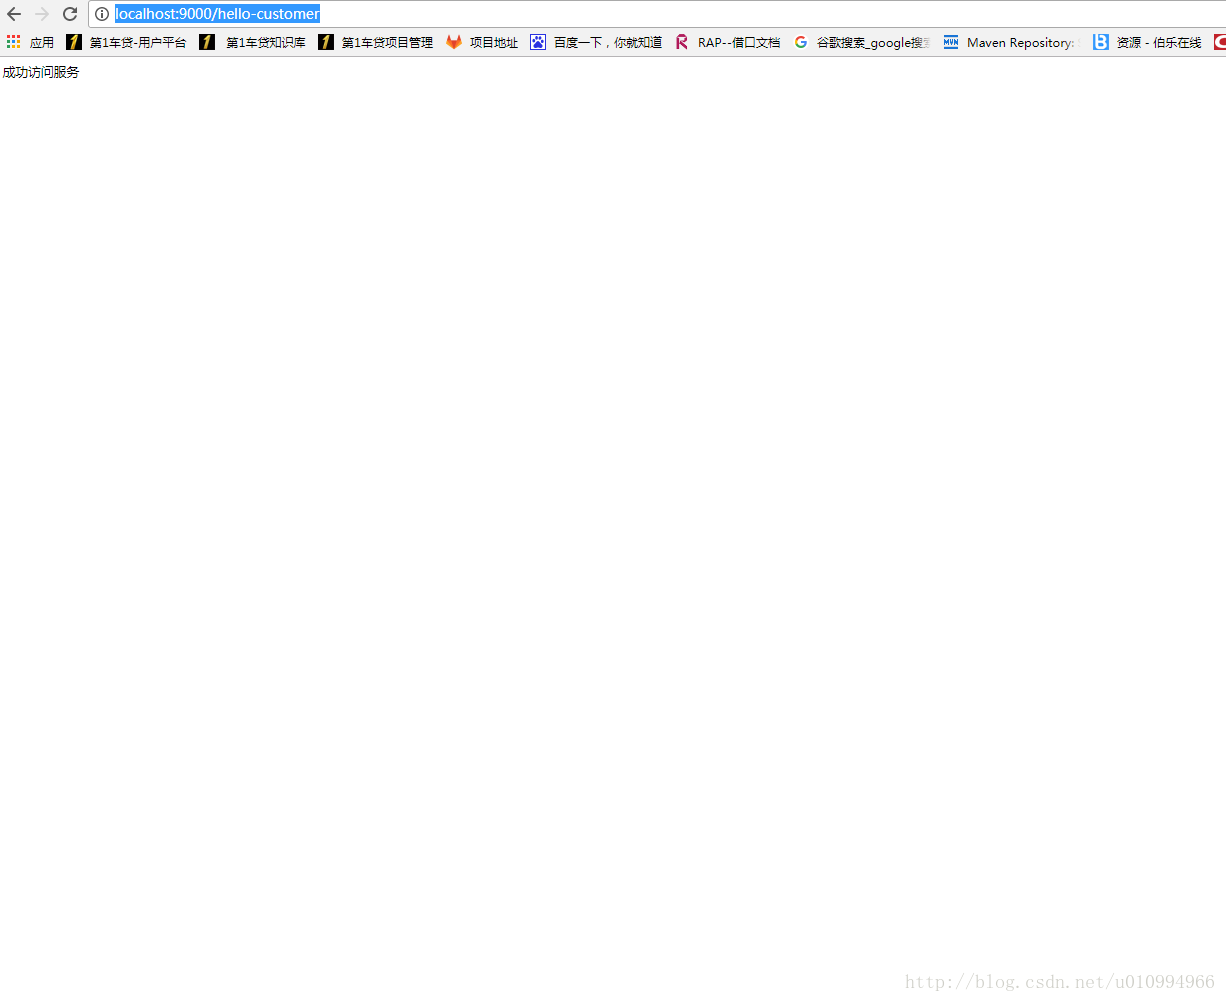
我们发现成功的访问了生产者服务。
现在我停止一个注册中心,看看会有什么效果,停止peer1
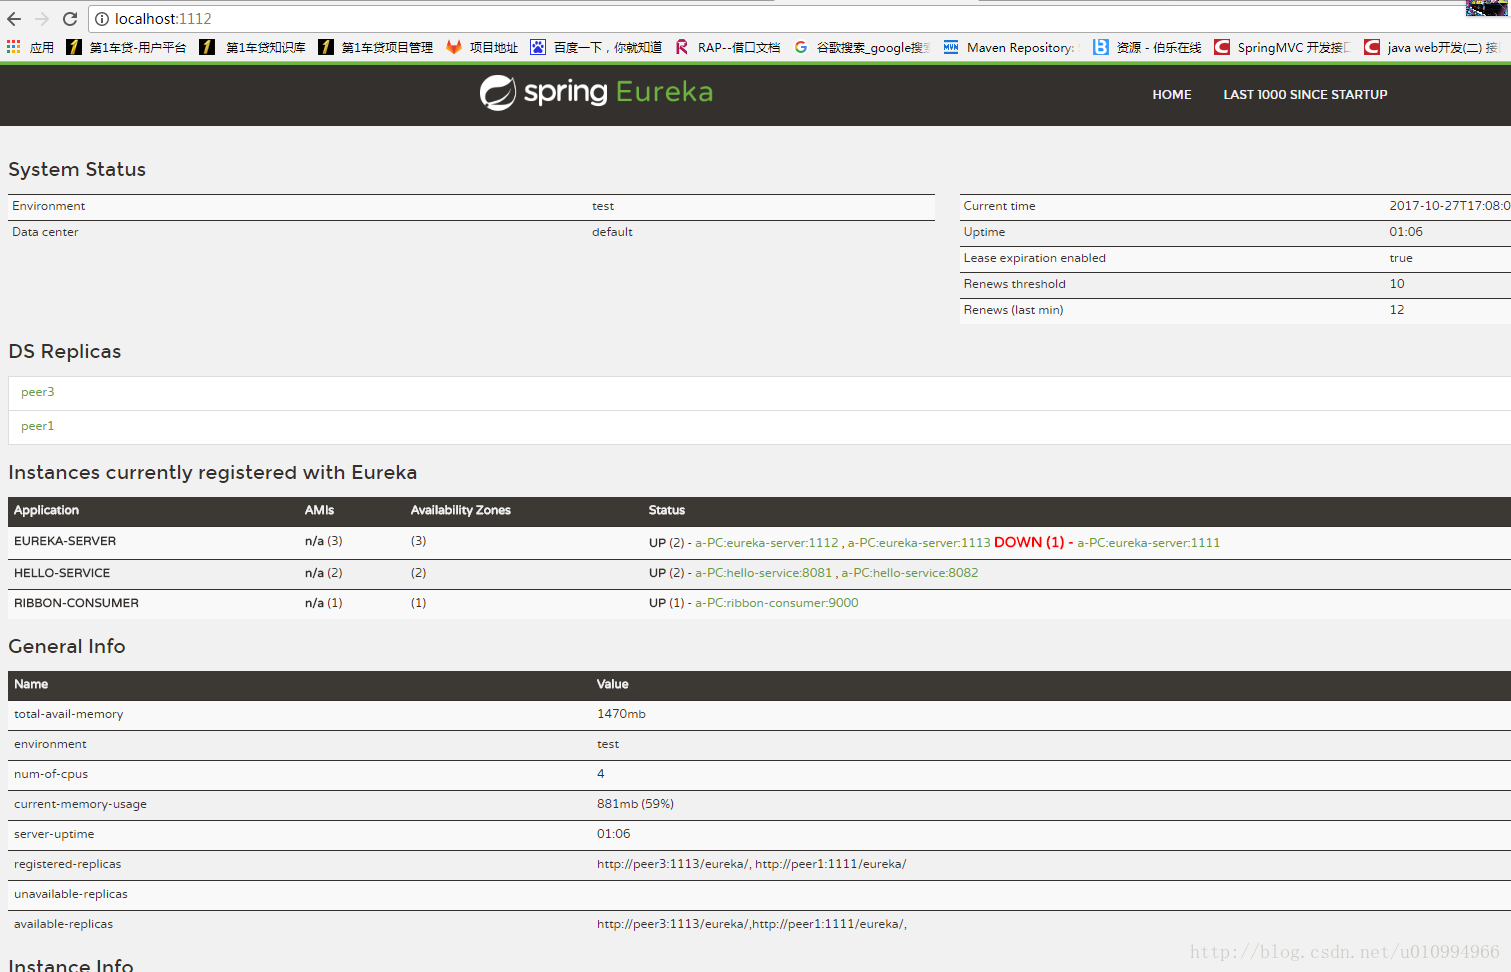
我们发现peer1状态变为down。再次调用生产者服务发现依然可以调用成功!
end