Win10下安装TensorRT
前言
- 由于本人水平有限,难免出现错漏,敬请批评改正。
- 更多精彩内容,可点击进入YOLO系列专栏或我的个人主页查看
- YOLOv5:添加SE、CBAM、CoordAtt、ECA注意力机制
- YOLOv5:yolov5s.yaml配置文件解读、增加小目标检测层
- YOLOv5:IoU、GIoU、DIoU、CIoU、EIoU
- YOLOv7训练自己的数据集(口罩检测)
- YOLOv8训练自己的数据集(足球检测)
- 玩转Jetson Nano(五):TensorRT加速YOLOv5目标检测
- 写本文的起因是在windows系统直接使用
pip install nvidia-tensorrt下载TensorRT报错。
终端:
pip install nvidia-tensorrt -i https://pypi.tuna.tsinghua.edu.cn/simple
报错如下:
WARNING: Ignore distutils configs in setup.cfg due to encoding errors.
Looking in indexes: https://pypi.tuna.tsinghua.edu.cn/simple, https://pypi.ngc.nvidia.com
Collecting nvidia-tensorrt
  Downloading https://pypi.tuna.tsinghua.edu.cn/packages/b8/a3/3da2bd25b6243d7a19b6c08c0e92f7c04f9863e70d213fee3141d574dccb/nvidia-tensorrt-0.0.1.dev5.tar.gz (7.9 kB)
  Preparing metadata (setup.py) ... error
  error: subprocess-exited-with-error

  × python setup.py egg_info did not run successfully.
  │ exit code: 1
  ╰─> [17 lines of output]
      Traceback (most recent call last):
        File "<string>", line 2, in <module>
        File "<pip-setuptools-caller>", line 34, in <module>
        File "C:\Users\Administrator\AppData\Local\Temp\pip-install-507mwyww\nvidia-tensorrt_0d45dd2f5dc44b6c8cc7e459b0fecde9\setup.py", line 150, in <module>
          raise RuntimeError(open("ERROR.txt", "r").read())
      RuntimeError:
      ###########################################################################################
      The package you are trying to install is only a placeholder project on PyPI.org repository.
      This package is hosted on NVIDIA Python Package Index.

      This package can be installed as:
      ```
      $ pip install nvidia-pyindex
      $ pip install nvidia-tensorrt
      ```
      ###########################################################################################

      [end of output]

  note: This error originates from a subprocess, and is likely not a problem with pip.
error: metadata-generation-failed

× Encountered error while generating package metadata.
╰─> See above for output.

note: This is an issue with the package mentioned above, not pip.
hint: See above for details.
相关介绍
- Python是一种跨平台的计算机程序设计语言。是一个高层次的结合了解释性、编译性、互动性和面向对象的脚本语言。最初被设计用于编写自动化脚本(shell),随着版本的不断更新和语言新功能的添加,越多被用于独立的、大型项目的开发。
- PyTorch 是一个深度学习框架,封装好了很多网络和深度学习相关的工具方便我们调用,而不用我们一个个去单独写了。它分为 CPU 和 GPU 版本,其他框架还有 TensorFlow、Caffe 等。PyTorch 是由 Facebook 人工智能研究院(FAIR)基于 Torch 推出的,它是一个基于 Python 的可续计算包,提供两个高级功能:1、具有强大的 GPU 加速的张量计算(如 NumPy);2、构建深度神经网络时的自动微分机制。
- TensorRT是NVIDIA推出的深度学习推理引擎,它可以将深度学习模型转换为高效的可部署格式,并在NVIDIA GPU上进行推理。TensorRT可以通过减少网络中的冗余计算、合并层、减少精度等方式来优化深度学习模型,从而提高模型的推理速度和吞吐量。TensorRT支持多种深度学习框架,包括TensorFlow、Caffe、Mxnet、Pytorch等¹²³。
- TensorRT的优点包括:
- 高性能:在GPU上进行推理,比CPU快40倍。
- 低延迟:通过减少网络中的冗余计算、合并层、减少精度等方式来优化深度学习模型,从而提高模型的推理速度和吞吐量。
- 易于部署:支持多种深度学习框架,包括TensorFlow、Caffe、Mxnet、Pytorch等。
- 灵活性:支持多种精度,包括FP32、FP16和INT8。
- TensorRT的缺点包括:
- 仅适用于推理,不支持训练。
- 仅适用于NVIDIA GPU。
- 需要对模型进行重新训练和转换。
Win10下安装TensorRT
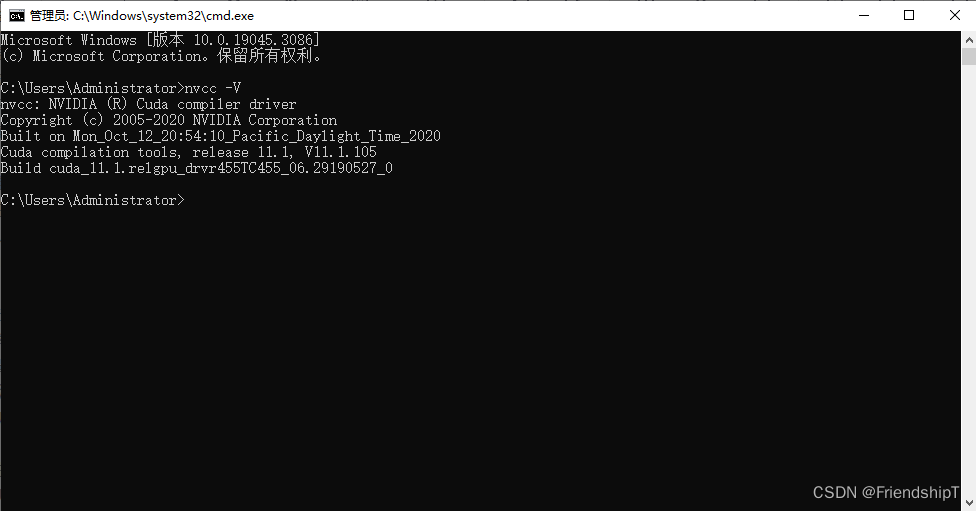
查看cuda版本
nvcc -V
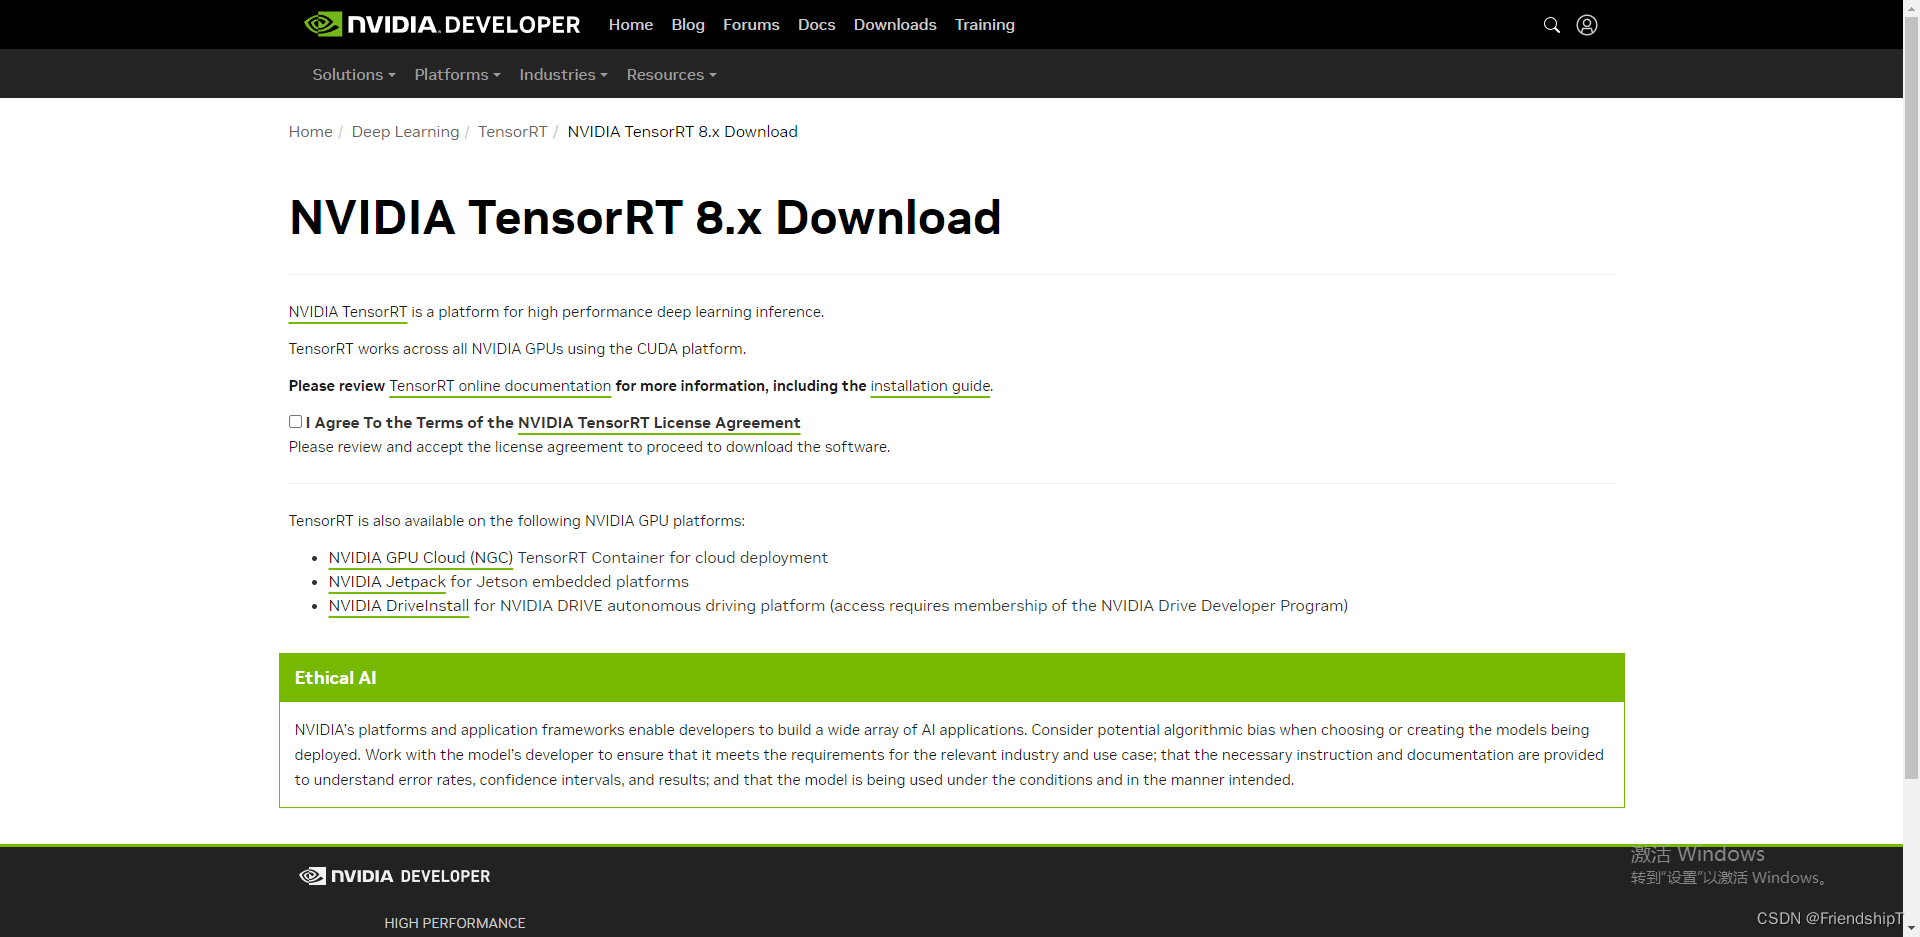
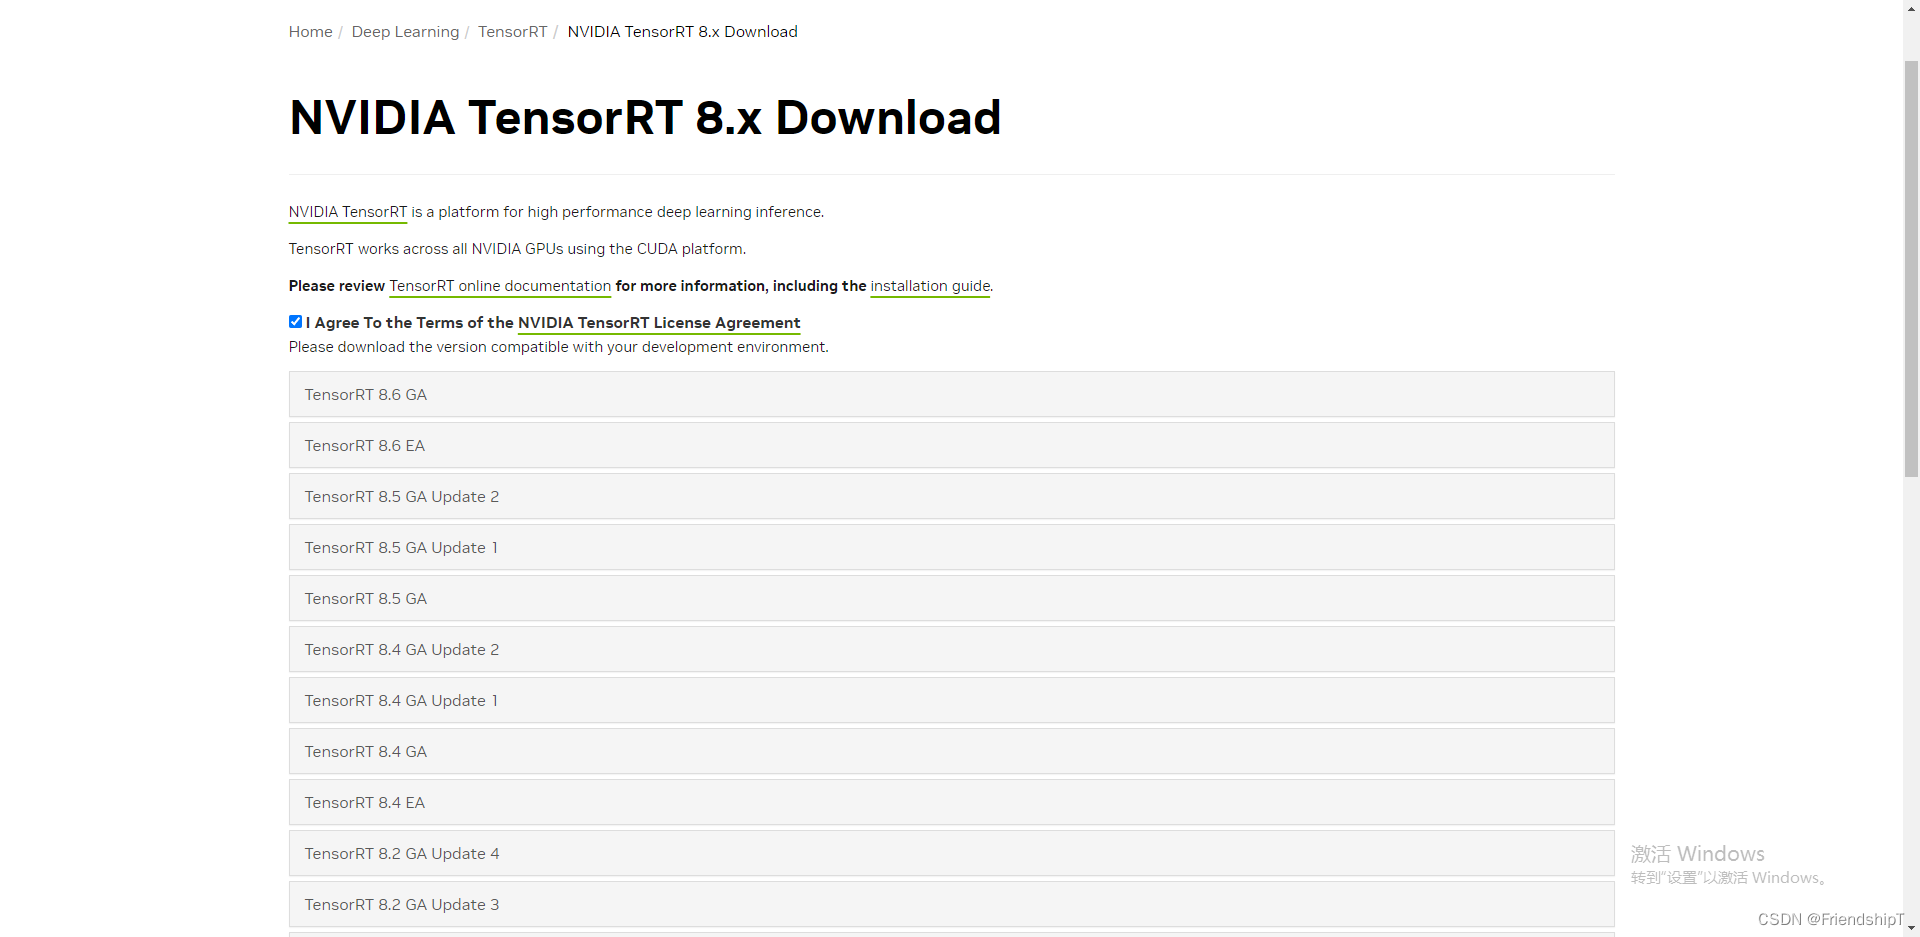
下载tensorrt8.xx版本,适用于Windows的cuda11.x的版本
- 官方下载地址:https://developer.nvidia.com/nvidia-tensorrt-8x-download
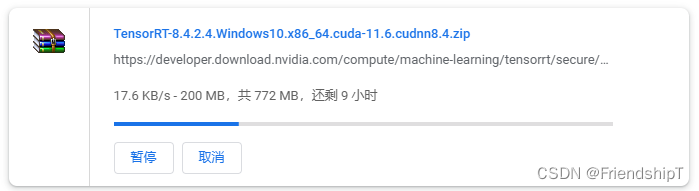
- 由于官方下载地址下载速度缓慢,可进入以下链接免费获取。
- TensorRT-8.4.2.4.zip:https://download.csdn.net/download/FriendshipTang/88042919
注:如链接失效,可私信我!
解压下载好的压缩包
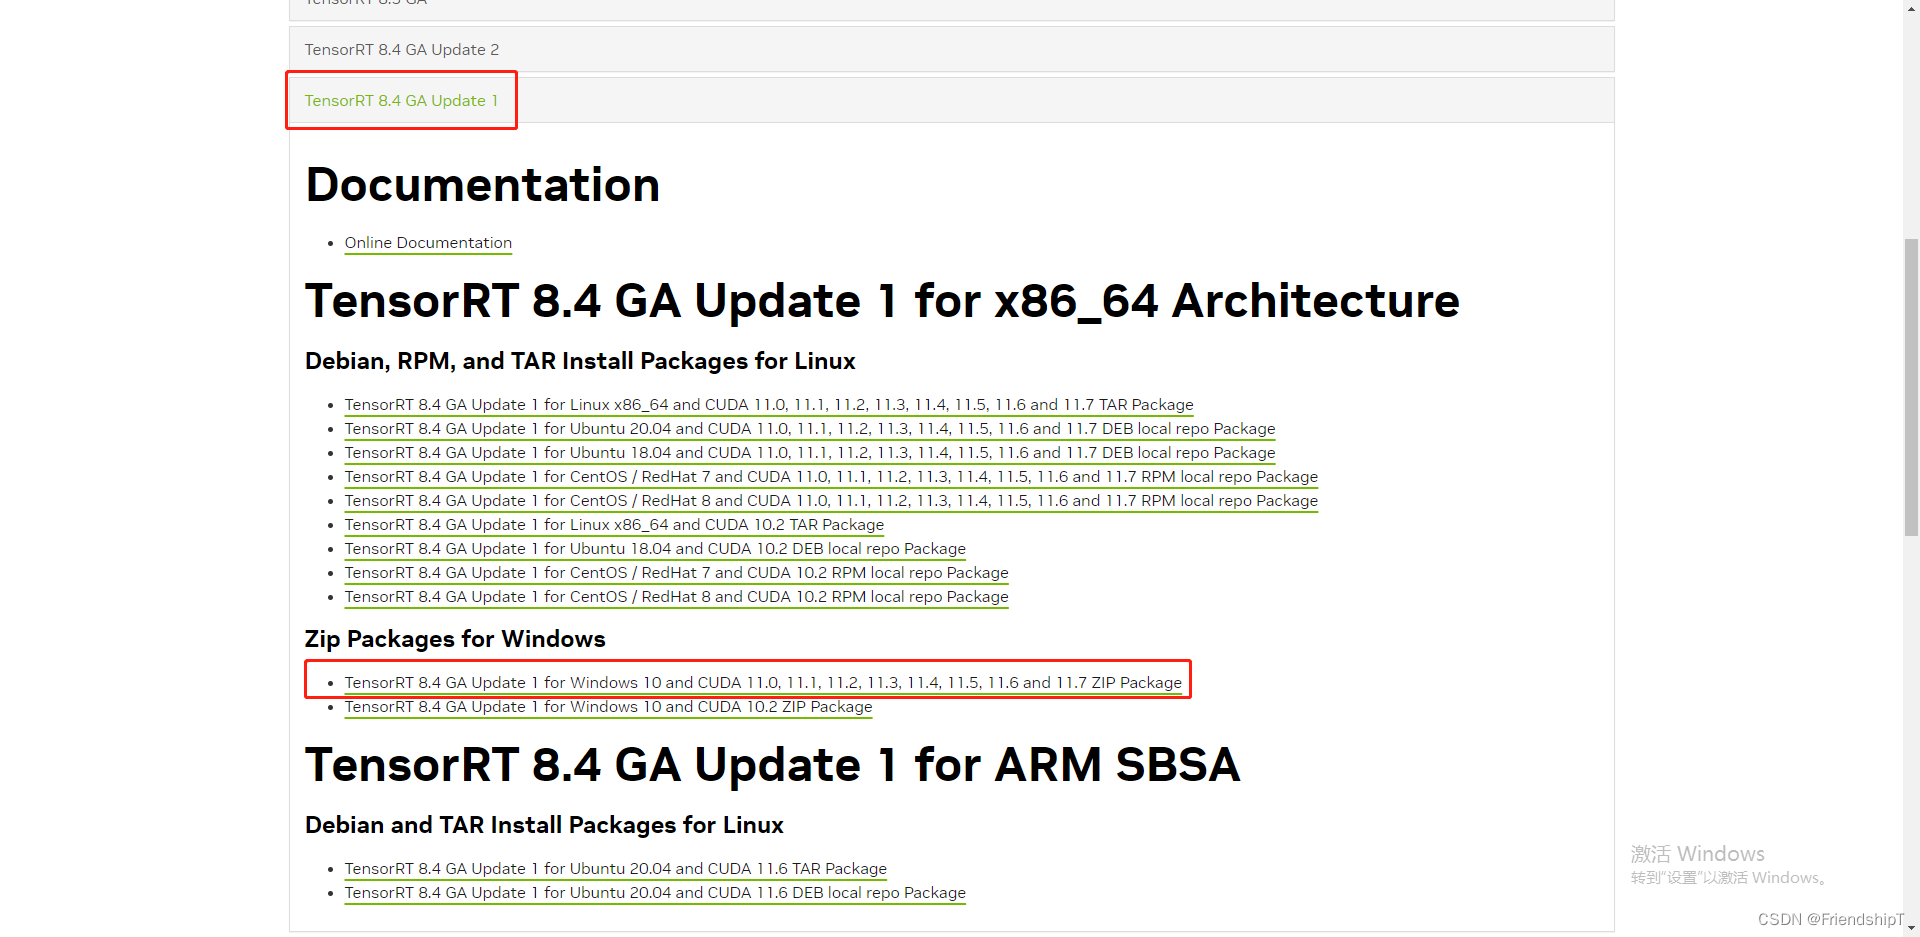
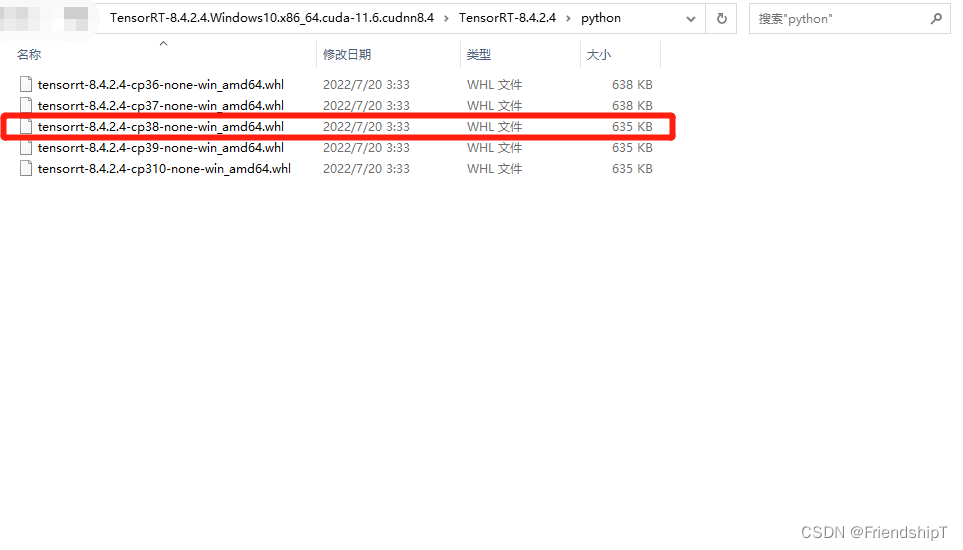
- 找到TensorRT-8.4.2.4.Windows10.x86_64.cuda-11.6.cudnn8.4/TensorRT-8.4.2.4/python/tensorrt-8.4.2.4-cp38-none-win_amd64.whl
- 由于我的python版本为3.8.x,所以选择tensorrt-8.4.2.4-cp38-none-win_amd64.whl
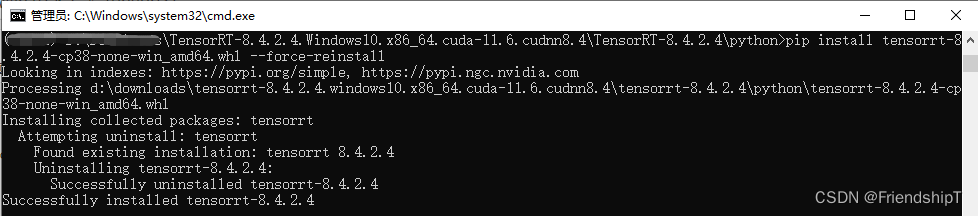
使用pip下载wheel文件
pip install tensorrt-8.4.2.4-cp38-none-win_amd64.whl
遇到新问题
>>> import tensorrt
Traceback (most recent call last):
  File "<stdin>", line 1, in <module>
  File "D:\anaconda3\envs\test2\lib\site-packages\tensorrt\__init__.py", line 129, in <module>
    ctypes.CDLL(find_lib(lib))
  File "D:\anaconda3\envs\test2\lib\site-packages\tensorrt\__init__.py", line 93, in find_lib
    raise FileNotFoundError(
FileNotFoundError: Could not find: nvinfer.dll. Is it on your PATH?
Note: Paths searched were:
['D:\\anaconda3\\envs\\test2', 'D:\\anaconda3\\envs\\test2\\Library\\mingw-w64\\bin', 'D:\\anaconda3\\envs\\test2\\Library\\usr\\bin', 'D:\\anaconda3\\envs\\test2\\Library\\bin', 'D:\\anaconda3\\envs\\test2\\Scripts', 'D:\\anaconda3\\envs\\test2\\bin', 'D:\\anaconda3\\condabin', 'C:\\Program Files\\NVIDIA GPU Computing Toolkit\\CUDA\\v11.1\\bin', 'C:\\Program Files\\NVIDIA GPU Computing Toolkit\\CUDA\\v11.1\\libnvvp', 'C:\\Windows\\system32', 'C:\\Windows', 'C:\\Windows\\System32\\Wbem', 'C:\\Windows\\System32\\WindowsPowerShell\\v1.0', 'C:\\Windows\\System32\\OpenSSH', 'C:\\Program Files\\NVIDIA Corporation\\Nsight Compute 2020.2.1', 'C:\\Program Files (x86)\\NVIDIA Corporation\\PhysX\\Common', 'D:\\Program Files\\Microsoft VS Code\\bin', 'D:\\anaconda3', 'D:\\anaconda3\\Library\\mingw-w64\\bin', 'D:\\anaconda3\\Library\\usr\\bin', 'D:\\anaconda3\\Library\\bin', 'D:\\anaconda3\\Scripts', 'C:\\Users\\Administrator\\AppData\\Local\\Microsoft\\WindowsApps']
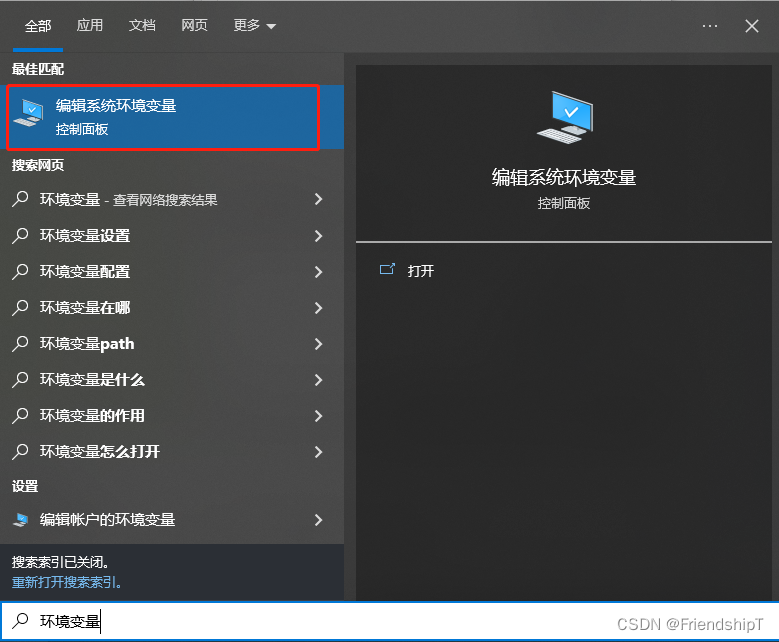
解决方法
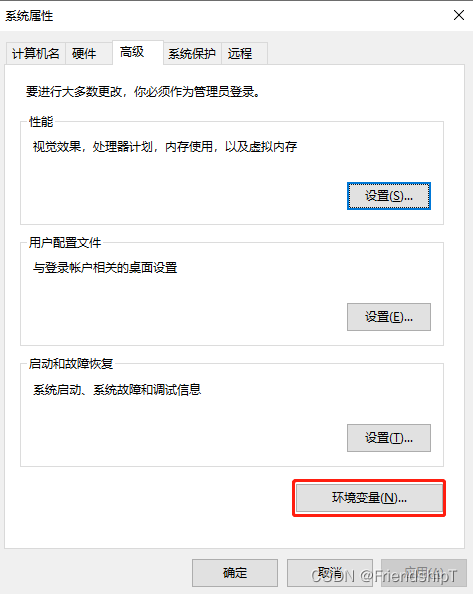
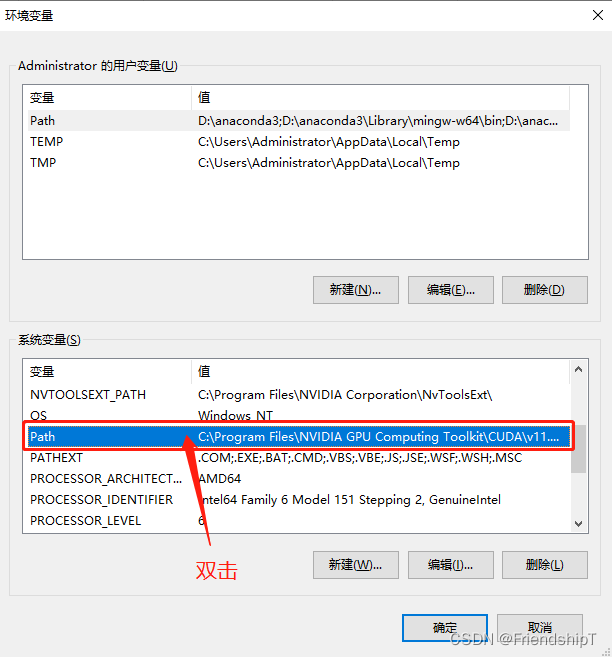
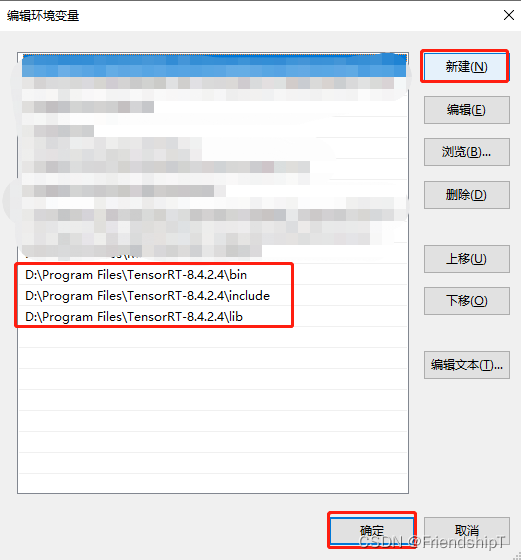
把tensorRT里面的bin、include、lib添加到环境变量即可,操作如下:
测试TensorRT是否安装成功
import tensorrt

没有报错,即安装成功!
参考
[1] https://github.com/ultralytics/yolov5
- 由于本人水平有限,难免出现错漏,敬请批评改正。
- 更多精彩内容,可点击进入YOLO系列专栏或我的个人主页查看
- YOLOv5:添加SE、CBAM、CoordAtt、ECA注意力机制
- YOLOv5:yolov5s.yaml配置文件解读、增加小目标检测层
- YOLOv5:IoU、GIoU、DIoU、CIoU、EIoU
- YOLOv7训练自己的数据集(口罩检测)
- YOLOv8训练自己的数据集(足球检测)
- 玩转Jetson Nano(五):TensorRT加速YOLOv5目标检测