在我之前的如下文章里:
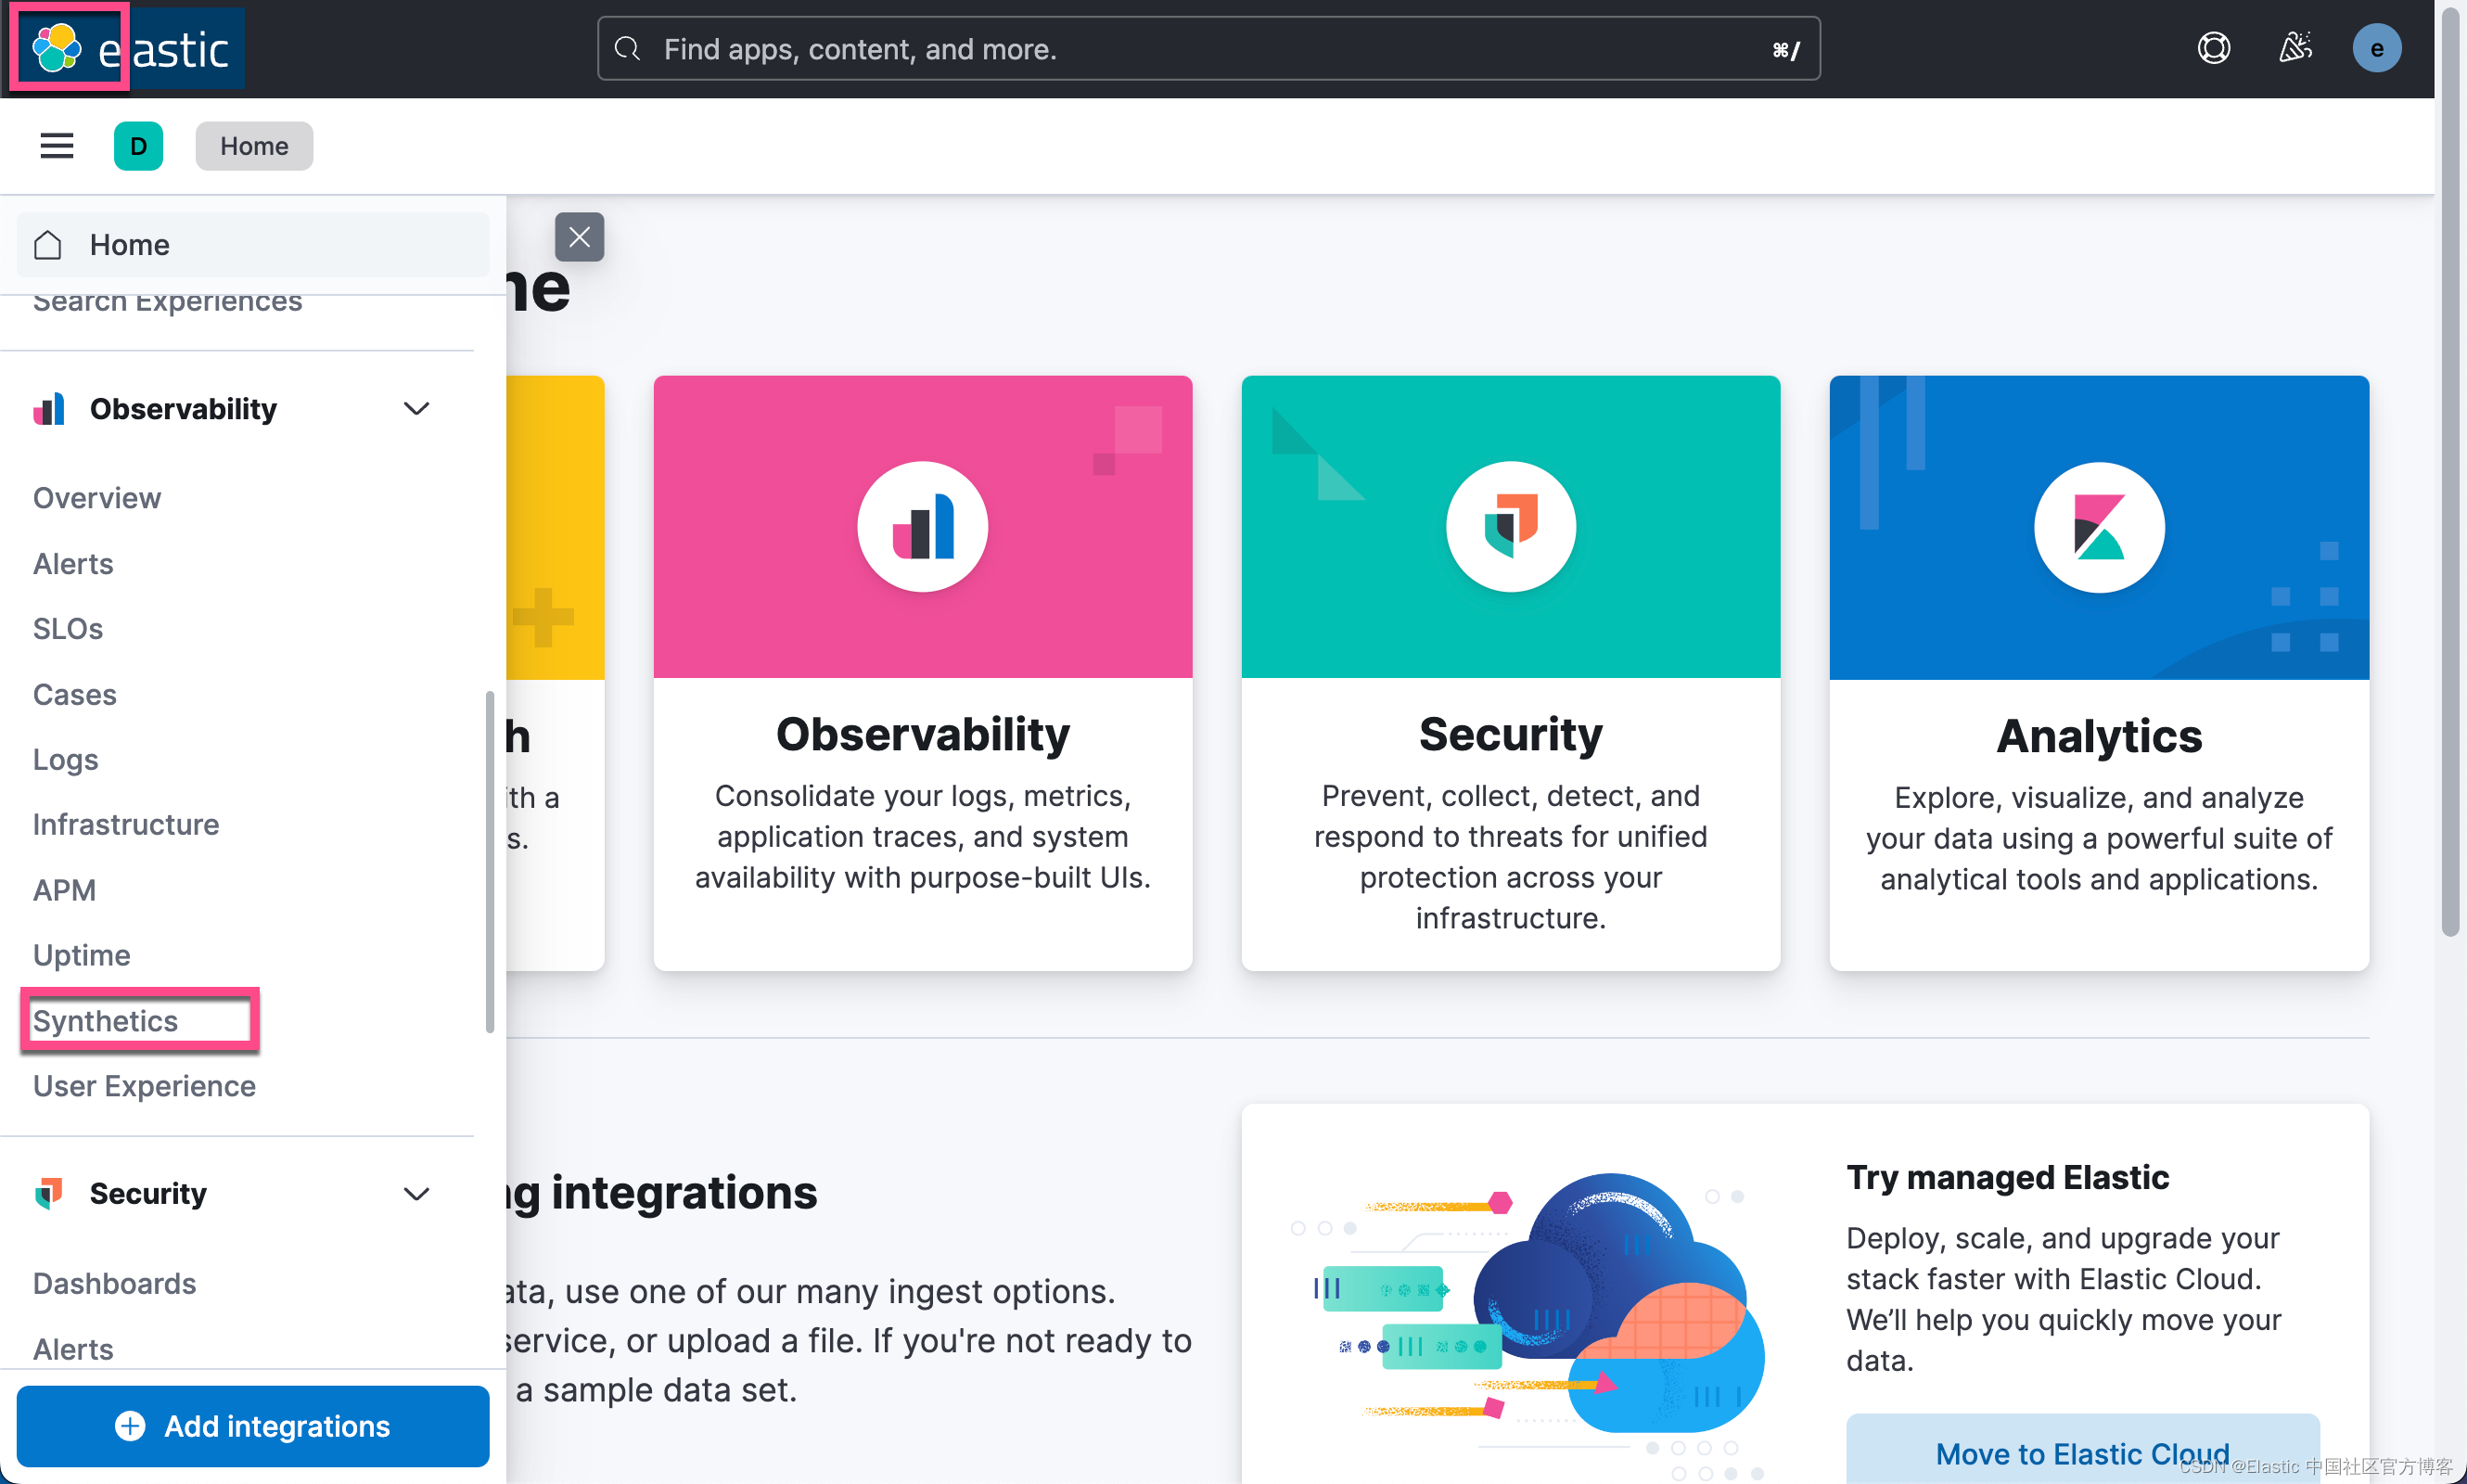
我详细地描述了如何使用 Elastic 的 Synthetic monitoring 来创建轻量级 HTTP/S、TCP 和 ICMP 监测器及浏览器监测器。
安装
我们需要按照之前文章 “Observability:Synthetic monitoring - 合成监测入门(一)” 来安装 Elasticsearch, Kibana, Fleet Server 及 Elastic Agents。在安装完毕后,我们可以看到 Agent 的状态是 Healthy 的。
准备展示应用
我们参照文章 “一个问题的两个方面:使用合成监测将测试和监测相结合”。文章里有介绍一个 demo 应用。我们使用如下的方法来下载下来:
git clone https://github.com/carlyrichmond/synthetics-replicator为了能够正常运行该应用我们需要全局安装 Nx:
npm install --global nx@latest$ npm install --global nx@latest
changed 123 packages, and audited 124 packages in 15s
19 packages are looking for funding
run `npm fund` for details
found 0 vulnerabilities
npm notice
npm notice New major version of npm available! 8.19.2 -> 9.8.1
npm notice Changelog: https://github.com/npm/cli/releases/tag/v9.8.1
npm notice Run npm install -g [email protected] to update!
npm notice 当然,我们也需要安装 npm:
npm install -g npm我们进入到项目的根目录下,并打入如下的命令:
npm install
nx serve synthetics-replicator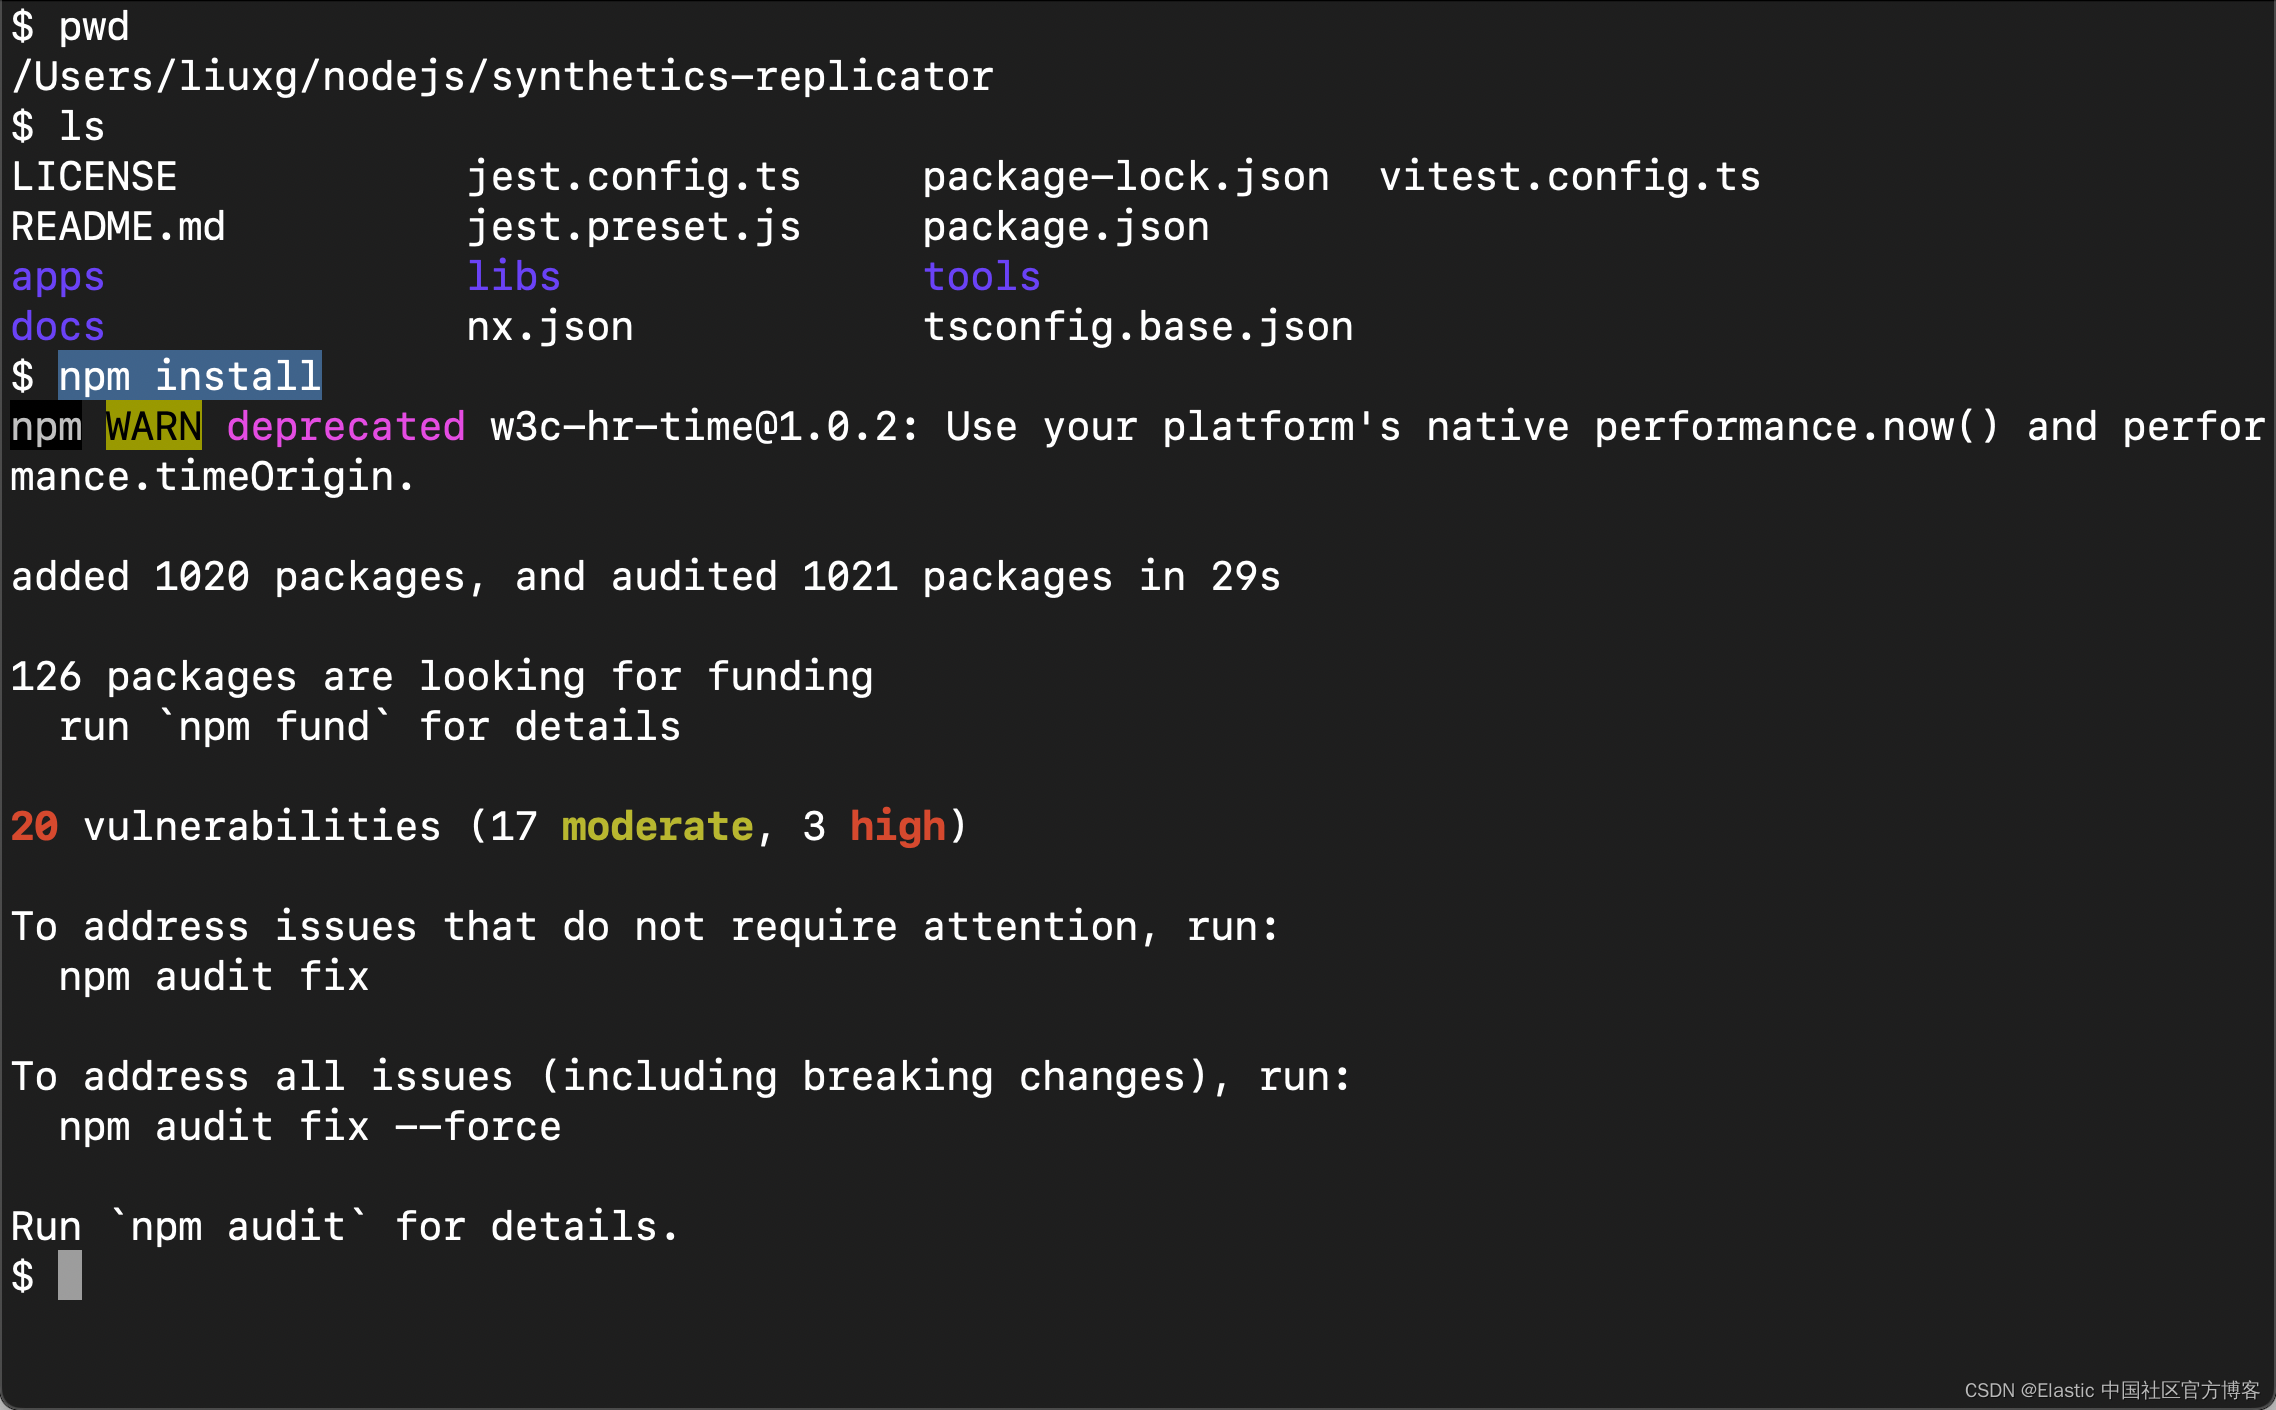
我们使用如下的命令来运行服务器:
nx serve synthetics-replicator
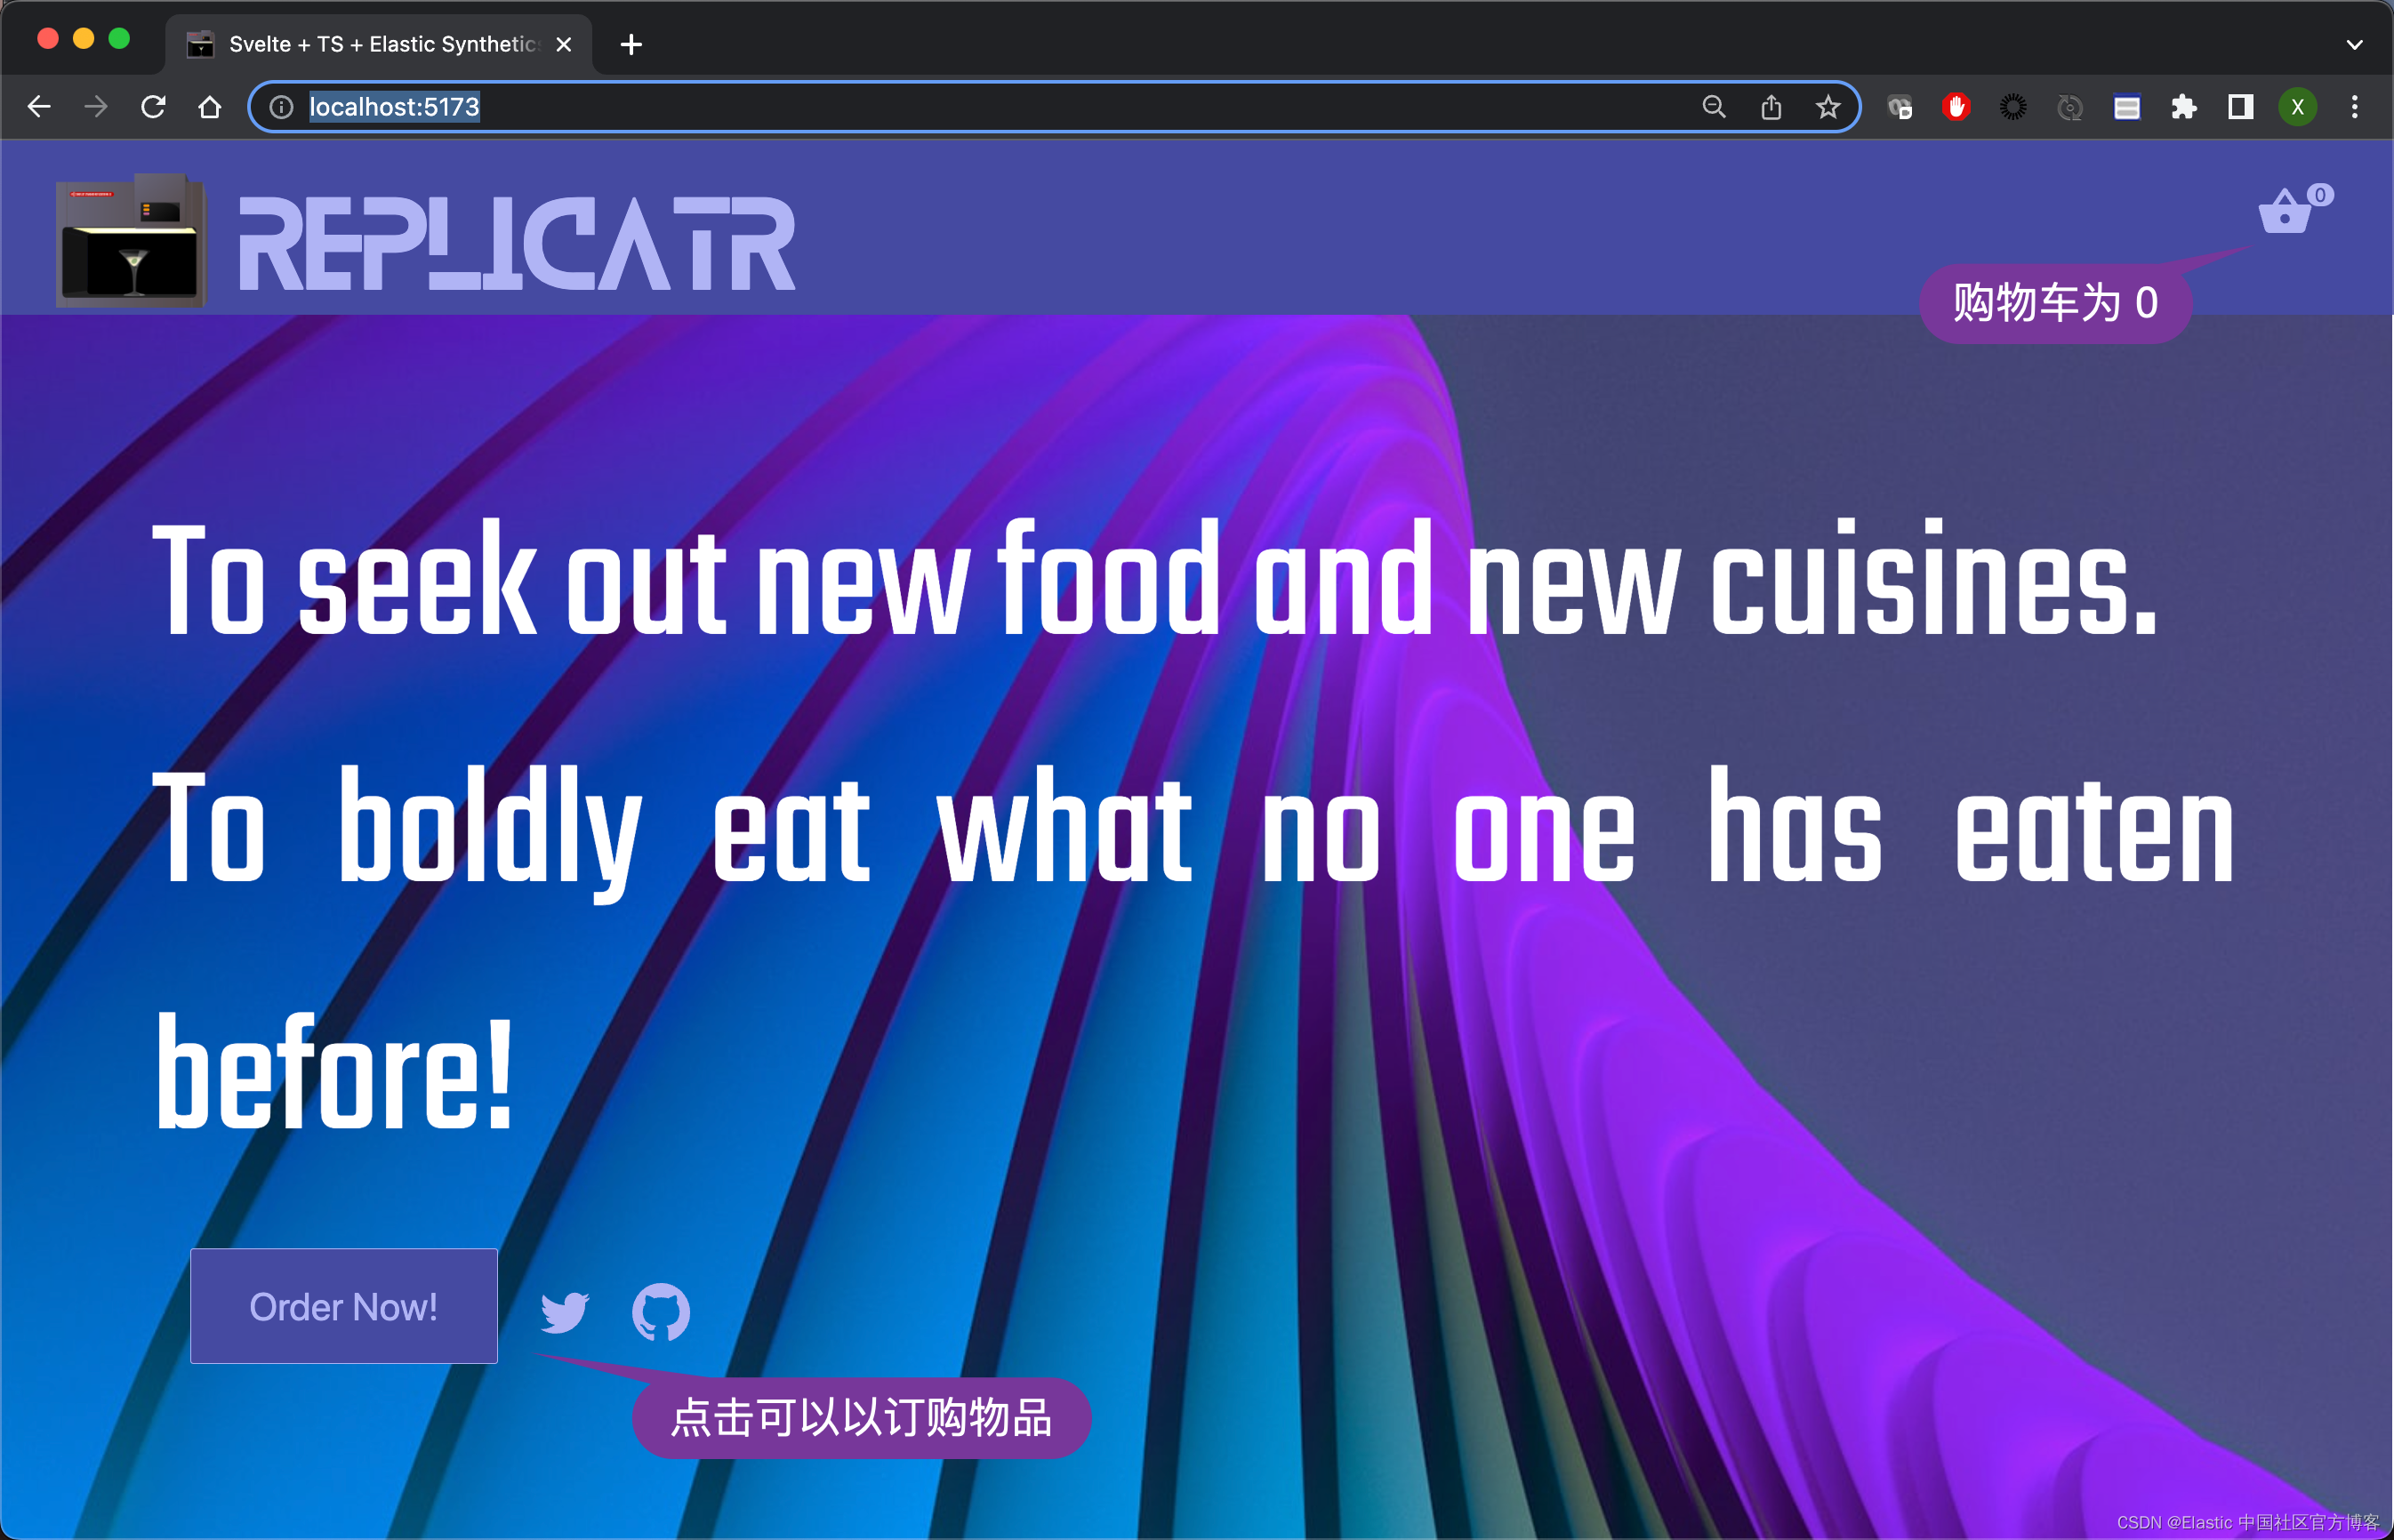
从上面的输出中,我们可以看到服务器运行于 http://localhost:5173/。我们可以在浏览器中打开:
在我们的 Fleet 及 Elastic Agent 的部署中,我们使用 docker 来进行部署的。Docker 里的容器只能访问外部地址。如果我们的服务运行于 localhost 上,那么容器会在自己的内部寻找这个服务器,而不会访问我们部署的这个 web 服务器。为此,我参照之前的文章 “Kibana:创建一个 webhook alert - Elastic Stack 8.2”,并运行如下的命令:
bore local 5173 --to bore.pub$ bore local 5173 --to bore.pub
2023-07-21T06:43:55.131881Z INFO bore_cli::client: connected to server remote_port=25086
2023-07-21T06:43:55.131970Z INFO bore_cli::client: listening at bore.pub:25086从上面的输出中,我们可以看到,服务器被置于一个外部可以访问的地址。我们可以通过浏览器来进行访问:
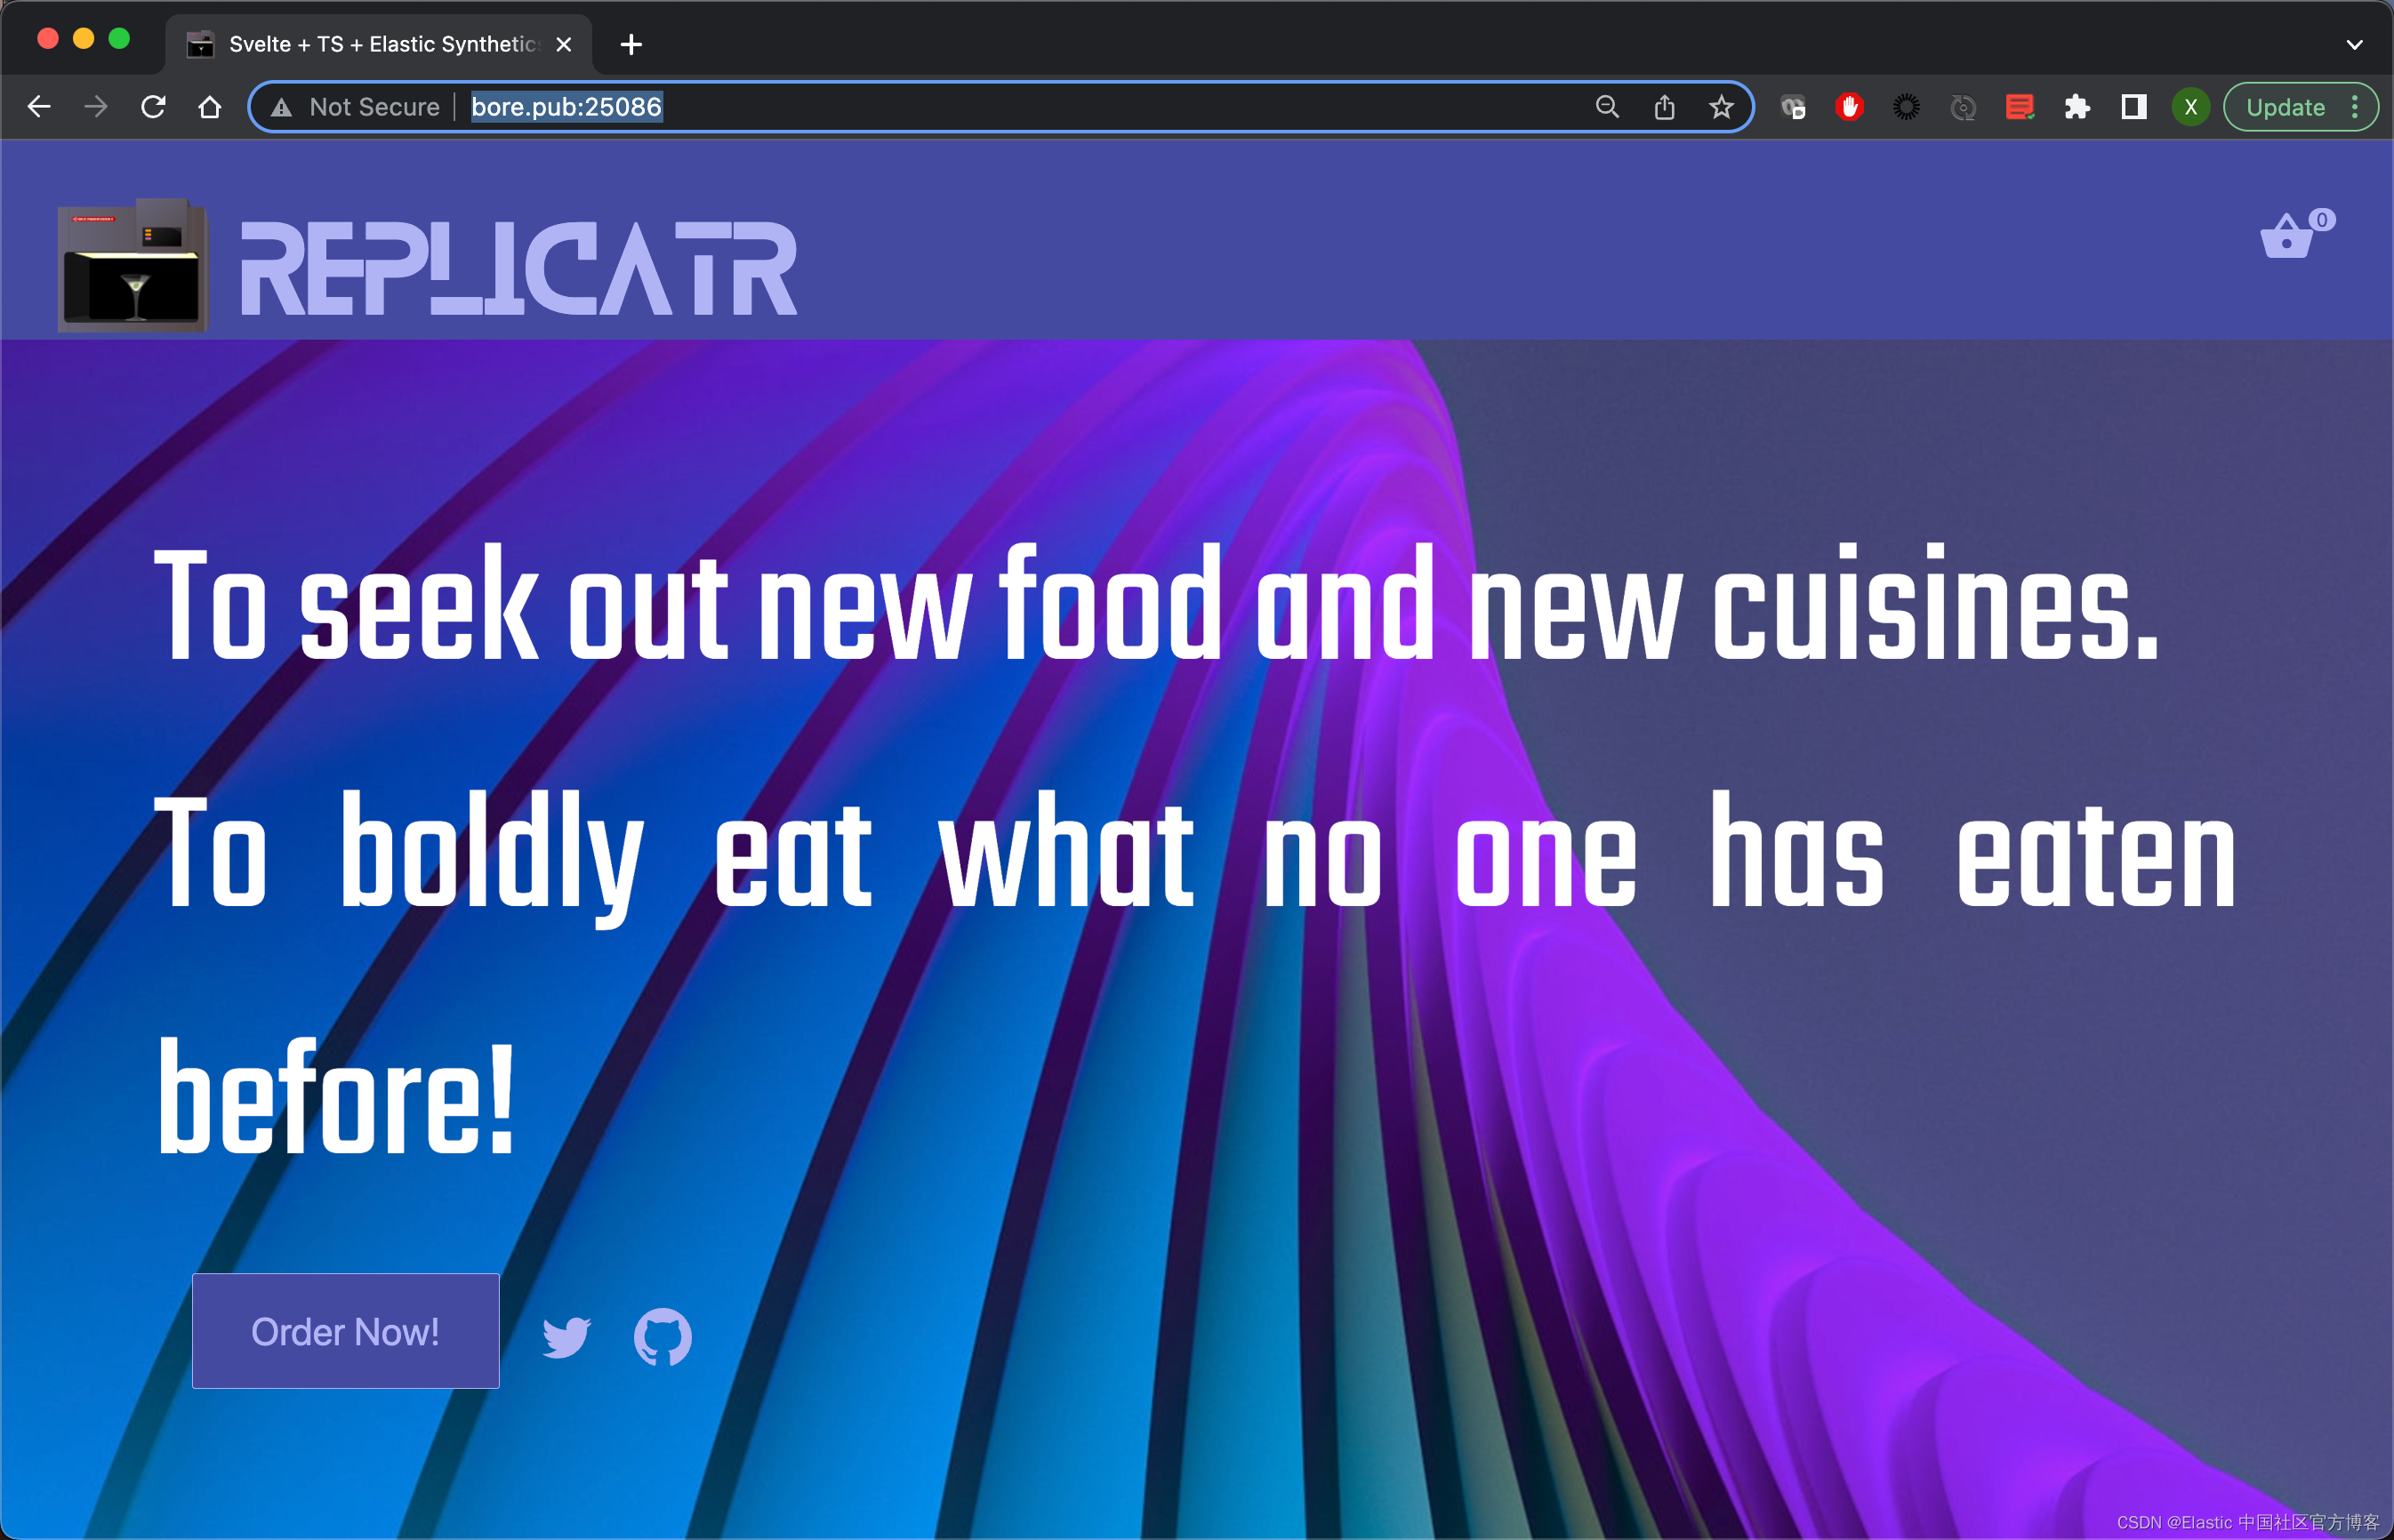
很显然,我们的服务器已经成功地运行起来了。
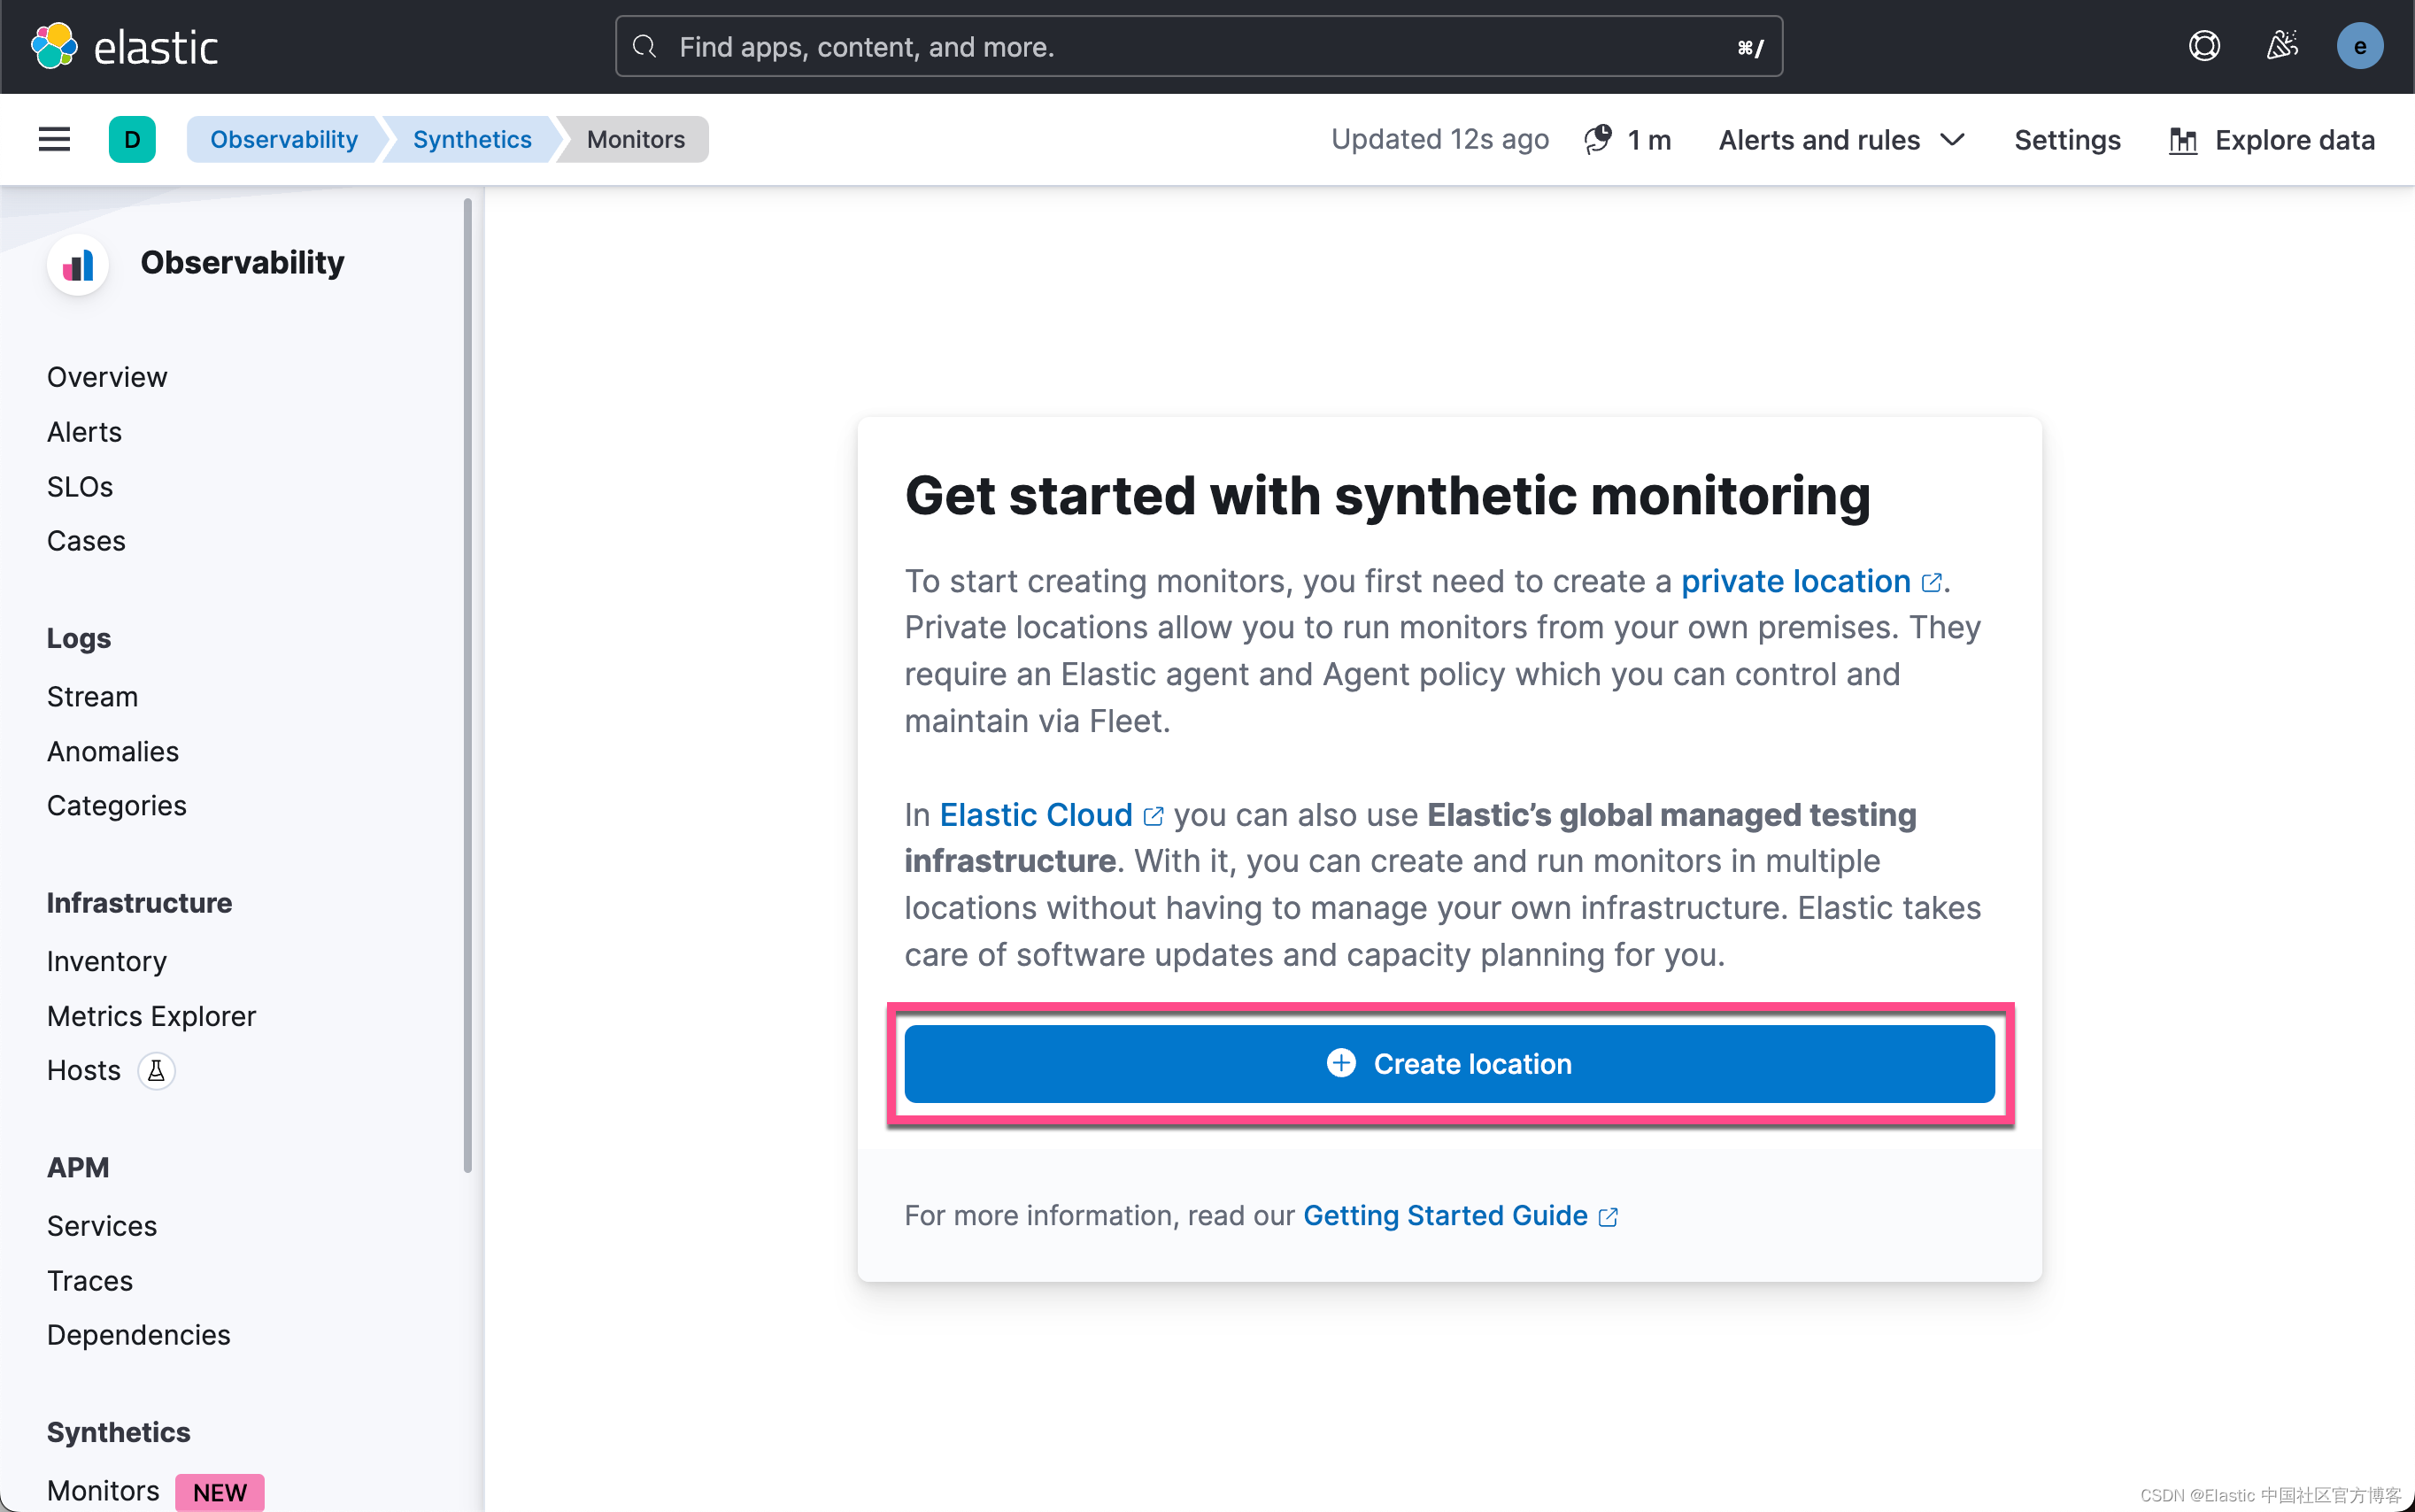
获取 Private API key
为了方便下面的操作,我们需要获得访问位置的 Private API key:


我们拷贝上面的 API key 以供下面进行使用。
运行监测器
在运行测试器之前,我们先针对 package.json 做一点小的改动:
package.json
...

  "scripts": {
    "start": "nx serve synthetics-replicator",
    "build": "nx build synthetics-replicator",
    "test": "cd apps/synthetics-replicator-tests && npm run test",
    "push": "cd apps/synthetics-replicator-tests && npx @elastic/synthetics push"
  },


...
我增加了一个 push 的指令。
我们可以检查配置文件:
$ pwd
/Users/liuxg/nodejs/synthetics-replicator/apps/synthetics-replicator-tests
$ ls
README.md            lightweight          package.json
journeys             package-lock.json    synthetics.config.ts
在上述的目录中,我们可以查看到文件 synthetics.config.ts。它的内容如下:
import type { SyntheticsConfig } from '@elastic/synthetics';

export default env => {
  const config: SyntheticsConfig = {
    params: {
      url: 'http://localhost:5173',
    },
    playwrightOptions: {
      ignoreHTTPSErrors: false,
    },
    /**
     * Configure global monitor settings
     */
    monitor: {
      schedule: 10,
      locations: ['united_kingdom'],
      privateLocations: [],
    },
    /**
     * Project monitors settings
     */
    project: {
      id: 'synthetics-replicator-tests',
      url: 'https://fe8f3eff95d246c6a166d76a9dff6090.uksouth.azure.elastic-cloud.com:443',
      space: 'default',
    },
  };
  if (env === 'production') {
    config.params = { url: 'https://synthetics-replicator.netlify.app/' }
  }
  return config;
};
从上面的配置中,我们可以看到针对 production 环境它配置是一个在云上运行的服务器,我们可以使用我们本地部署的服务器:
synthetics.config.ts
import type { SyntheticsConfig } from '@elastic/synthetics';

export default env => {
  const config: SyntheticsConfig = {
    params: {
      url: 'http://localhost:5173/',
    },
    playwrightOptions: {
      ignoreHTTPSErrors: false,
    },
    /**
     * Configure global monitor settings
     */
    monitor: {
      schedule: 3,
      locations: [],
      privateLocations: ['Beijing'],
    },
    /**
     * Project monitors settings
     */
    project: {
      id: 'synthetics-replicator-tests',
      url: 'http://127.0.0.1:5601',
      space: 'default',
    },
  };
  if (env === 'production') {
    config.params = { url: 'http://bore.pub:25086/' }
  }
  return config;
};
请注意在上面,我们修改了 monitor 部分的 location 部分。我们可以通过如下的命令来列出可用的位置:
elastic-synthetics locations --url http://127.0.0.1:5601 --auth MU5VZWQ0a0JXdWJyOWhDdXlQeS06U2txQmFBajZTODZqR2hMOXlXVFhCQQ==$ elastic-synthetics locations --url http://127.0.0.1:5601 --auth MU5VZWQ0a0JXdWJyOWhDdXlQeS06U2txQmFBajZTODZqR2hMOXlXVFhCQQ==
Available locations:
* Beijing(private)
Set default location for monitors via
- Synthetics config file 'monitors.locations' | 'monitors.privateLocations' field
- Monitor API 'monitor.use({ locations: ["japan"], privateLocations: ["custom-location"] }'上面表明,我们当地的 Kibana 中含有一个位置 Beijing。
接下来,我们运行本地测试。如果本地测试通过了的话,那么我们再上传到 Kibana 中进行测试:
$ pwd
/Users/liuxg/nodejs/synthetics-replicator/apps/synthetics-replicator-tests
$ npm install

added 158 packages, and audited 159 packages in 28s

18 packages are looking for funding
  run `npm fund` for details

1 moderate severity vulnerability

To address all issues, run:
  npm audit fix

Run `npm audit` for details.
$ cd ../../
$ npm run test

> [email protected] test
> cd apps/synthetics-replicator-tests && npm run test


> [email protected] test
> npx @elastic/synthetics journeys


Journey: Recorded Order journey
   ✓  Step: 'Go to order items page' succeeded (7956 ms)
   ✓  Step: 'Add item to cart successfully' succeeded (247 ms)
   ✓  Step: 'Add 2nd item to cart successfully' succeeded (68 ms)
   ✓  Step: 'Add 3rd item to cart successfully' succeeded (66 ms)

Journey: Replicator Order Journey
   ✓  Step: 'assert home page loads' succeeded (108 ms)
   ✓  Step: 'assert move to order page' succeeded (120 ms)
   ✓  Step: 'assert adding to order' succeeded (233 ms)

 7 passed (19801 ms)
很显然,我们的本地测试是成功的。这非常好!我们接下来把我们的测试上传到 Kibana 中。请注意在上面的本地测试中,我们使用的服务器地址是 http://localhost:5173/。为了能够使得传达 Kibana 中也能正常测试,我们必须使用地址 bore.pub:33741。为此,我们需要配置环境变量:
export NODE_ENV=production
export SYNTHETICS_API_KEY=MU5VZWQ0a0JXdWJyOWhDdXlQeS06U2txQmFBajZTODZqR2hMOXlXVFhCQQ==
为了能够对轻量级 HTTP/S、TCP 和 ICMP 监测器提供支持,我们需要修改如下的文件:
$ pwd
/Users/liuxg/nodejs/synthetics-replicator/apps/synthetics-replicator-tests/lightweight
$ ls
heartbeat.yml
我们需要把文件里的 urls 改成我们自己的。在这里,我们使用网上部署的网站来进行测试。
heartbeat.yml
heartbeat.monitors:
- type: http
  name: Replicator HTTP ping
  id: synthetics-replicator-monitor-http
  enabled: true
  urls: "https://synthetics-replicator.netlify.app/"
  schedule: '@every 3m'
timeout: 16s注意:可能是由于 bore 带来的问题。在上述配置中,如果我选择配 urls 为 bore.pub:25086 的话,返回的 HTTP 结果不完整而导致错误。另外一种方法是使用 nginx 把 http://localhost:5173/ 映射到电脑的私有地址,这样我们就不必使用 bore 来变为共有地址。
接下来,我们运行如下的命令:
npm run push
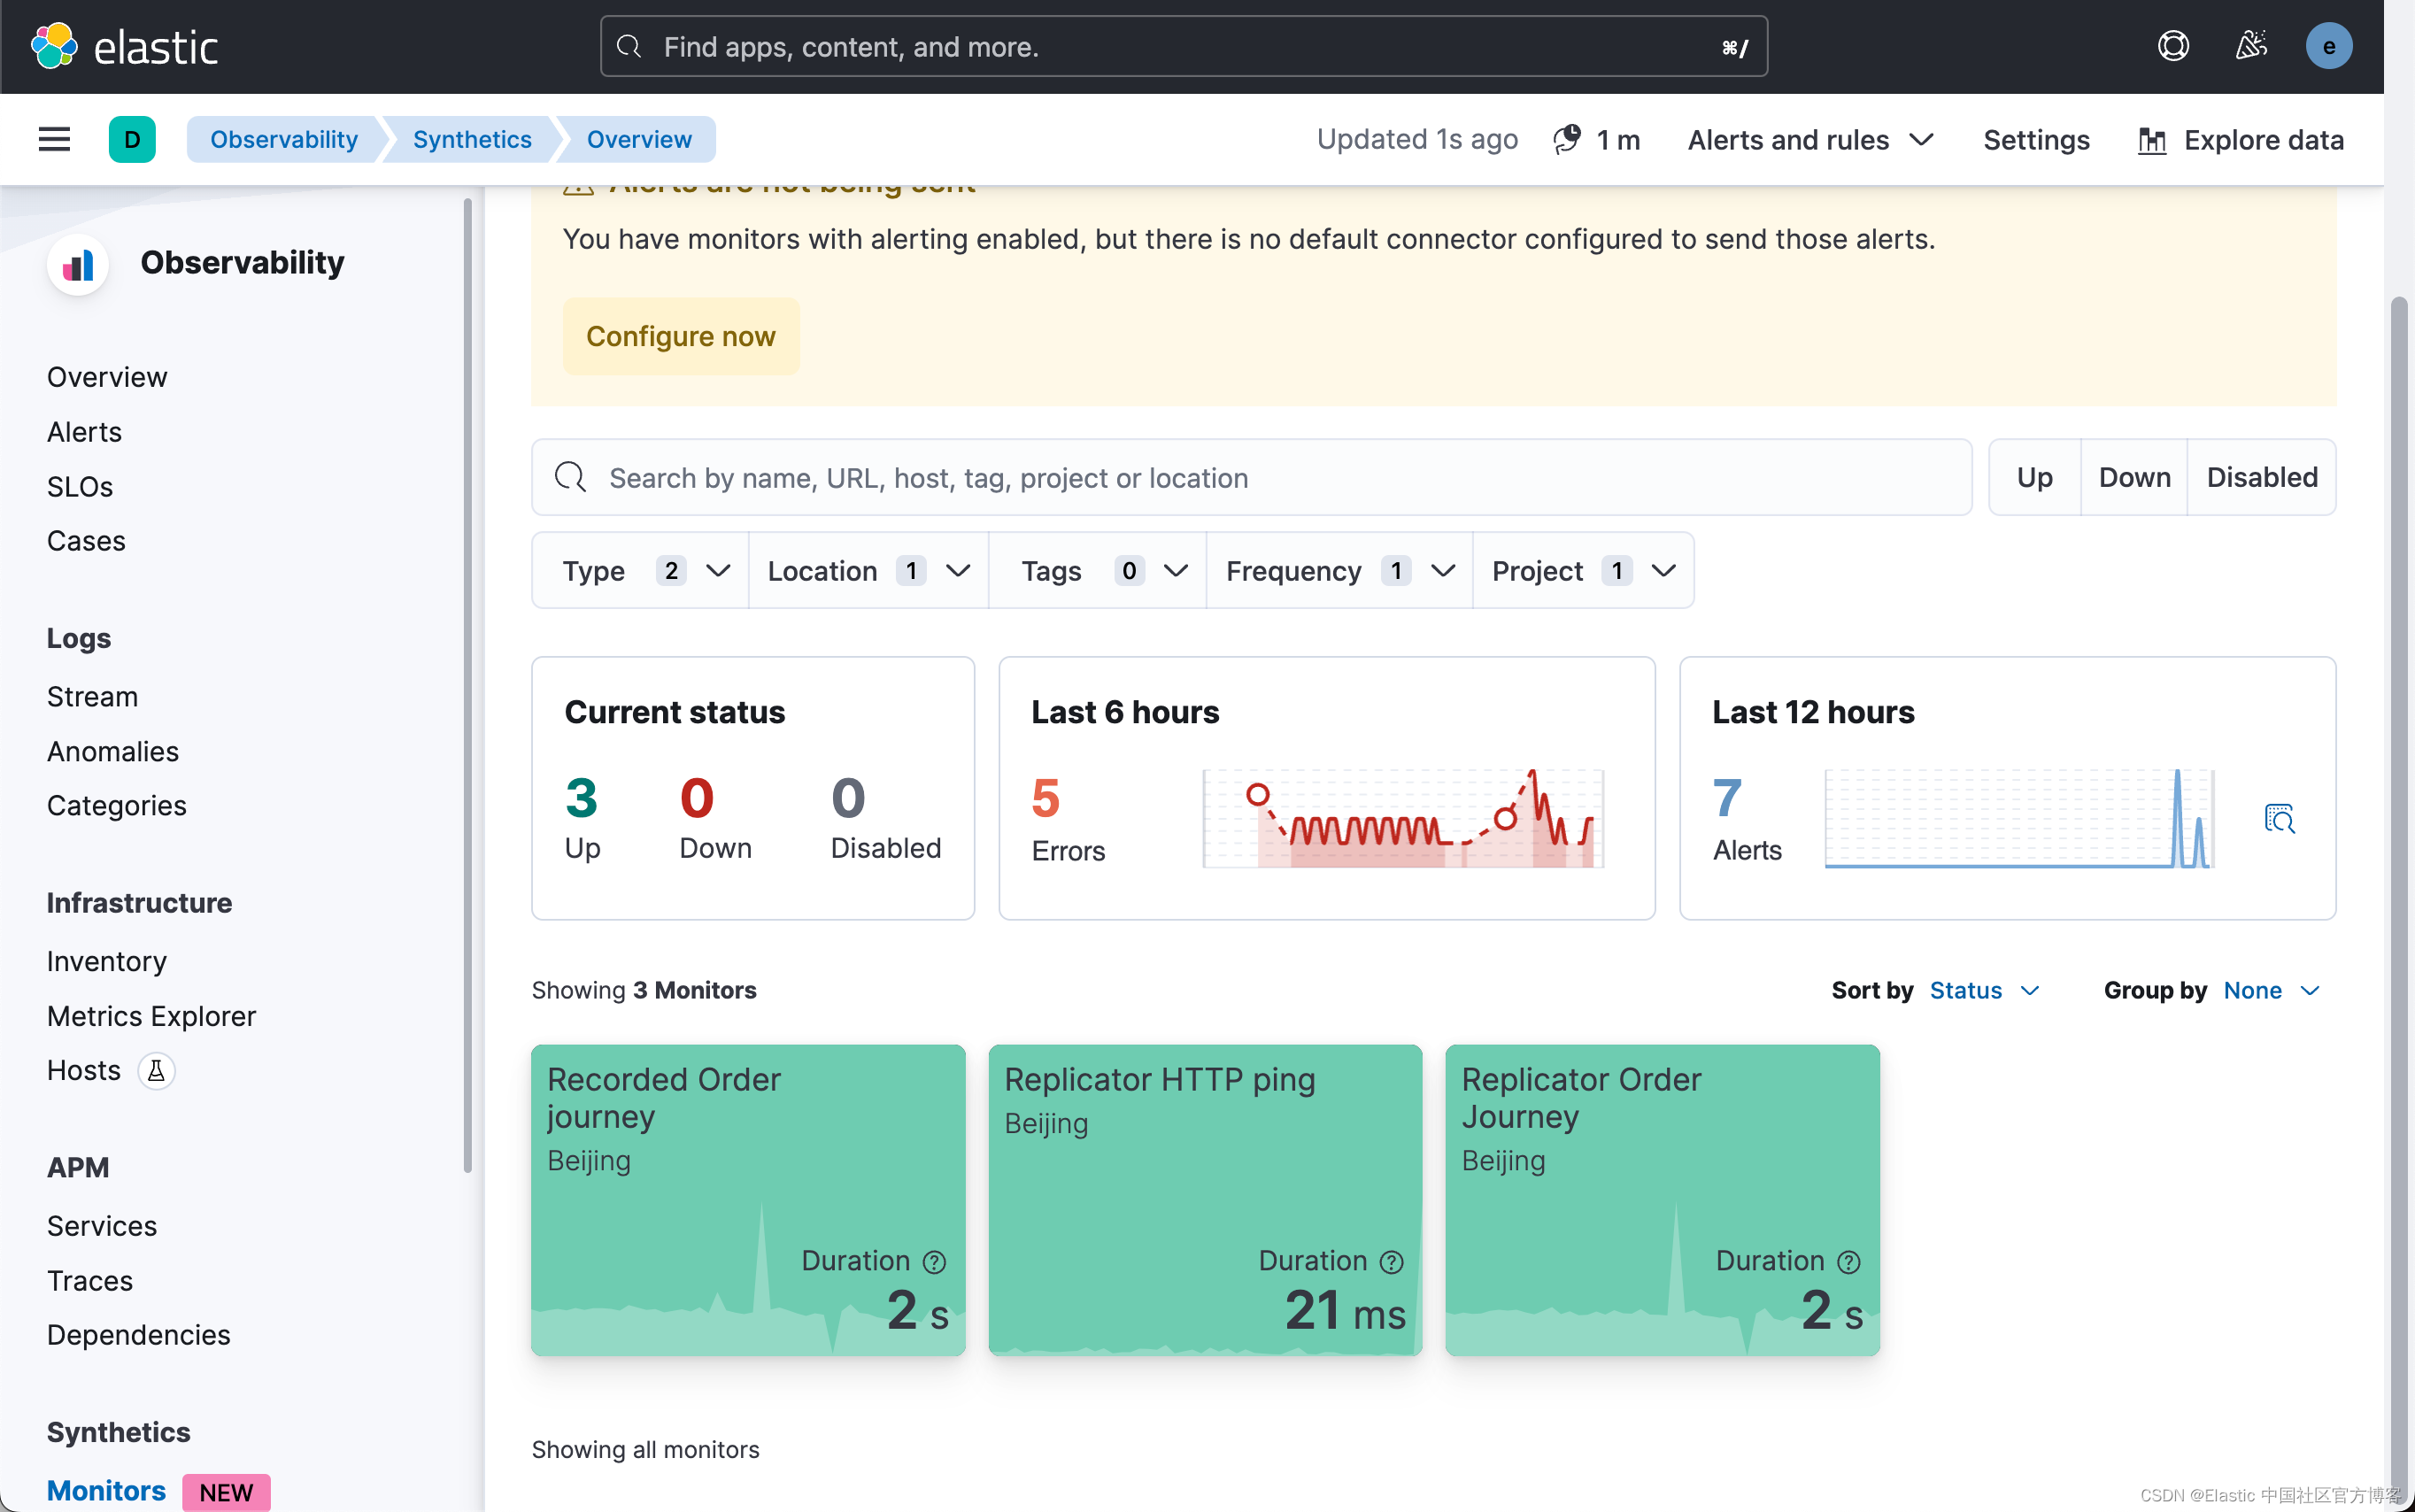
上面显示我们的上传是成功的。我们回到 Kibana 的界面:
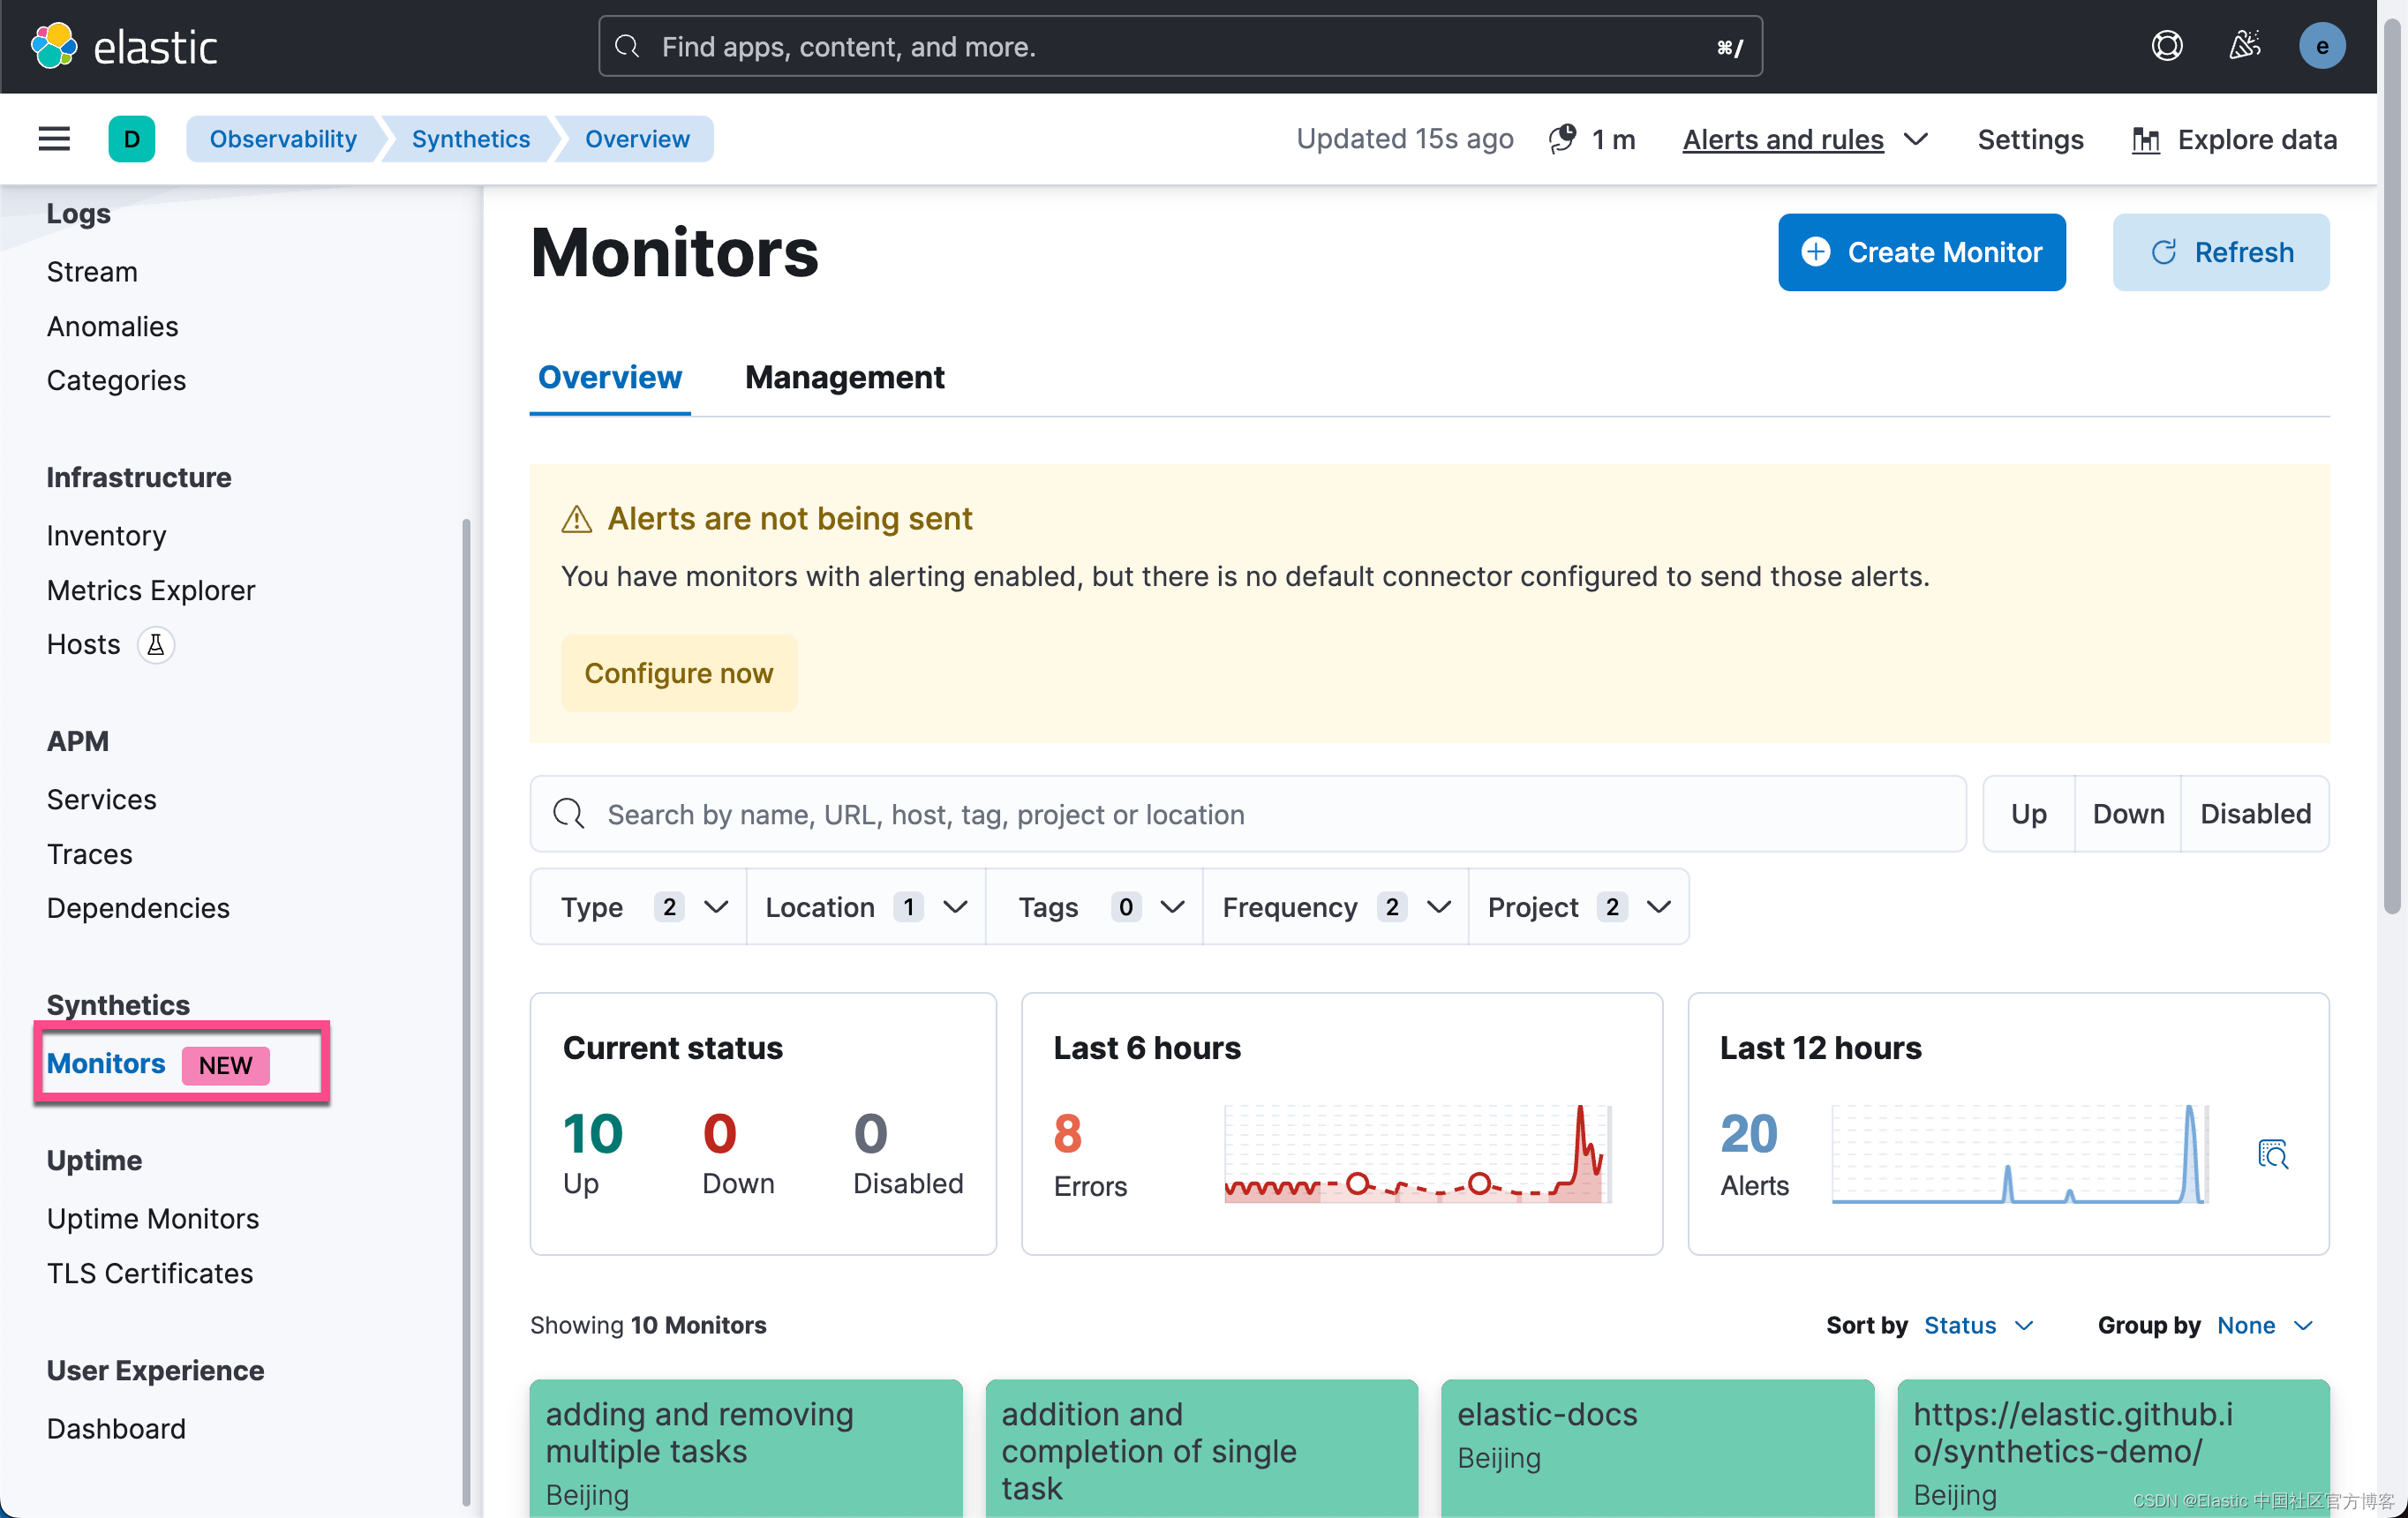

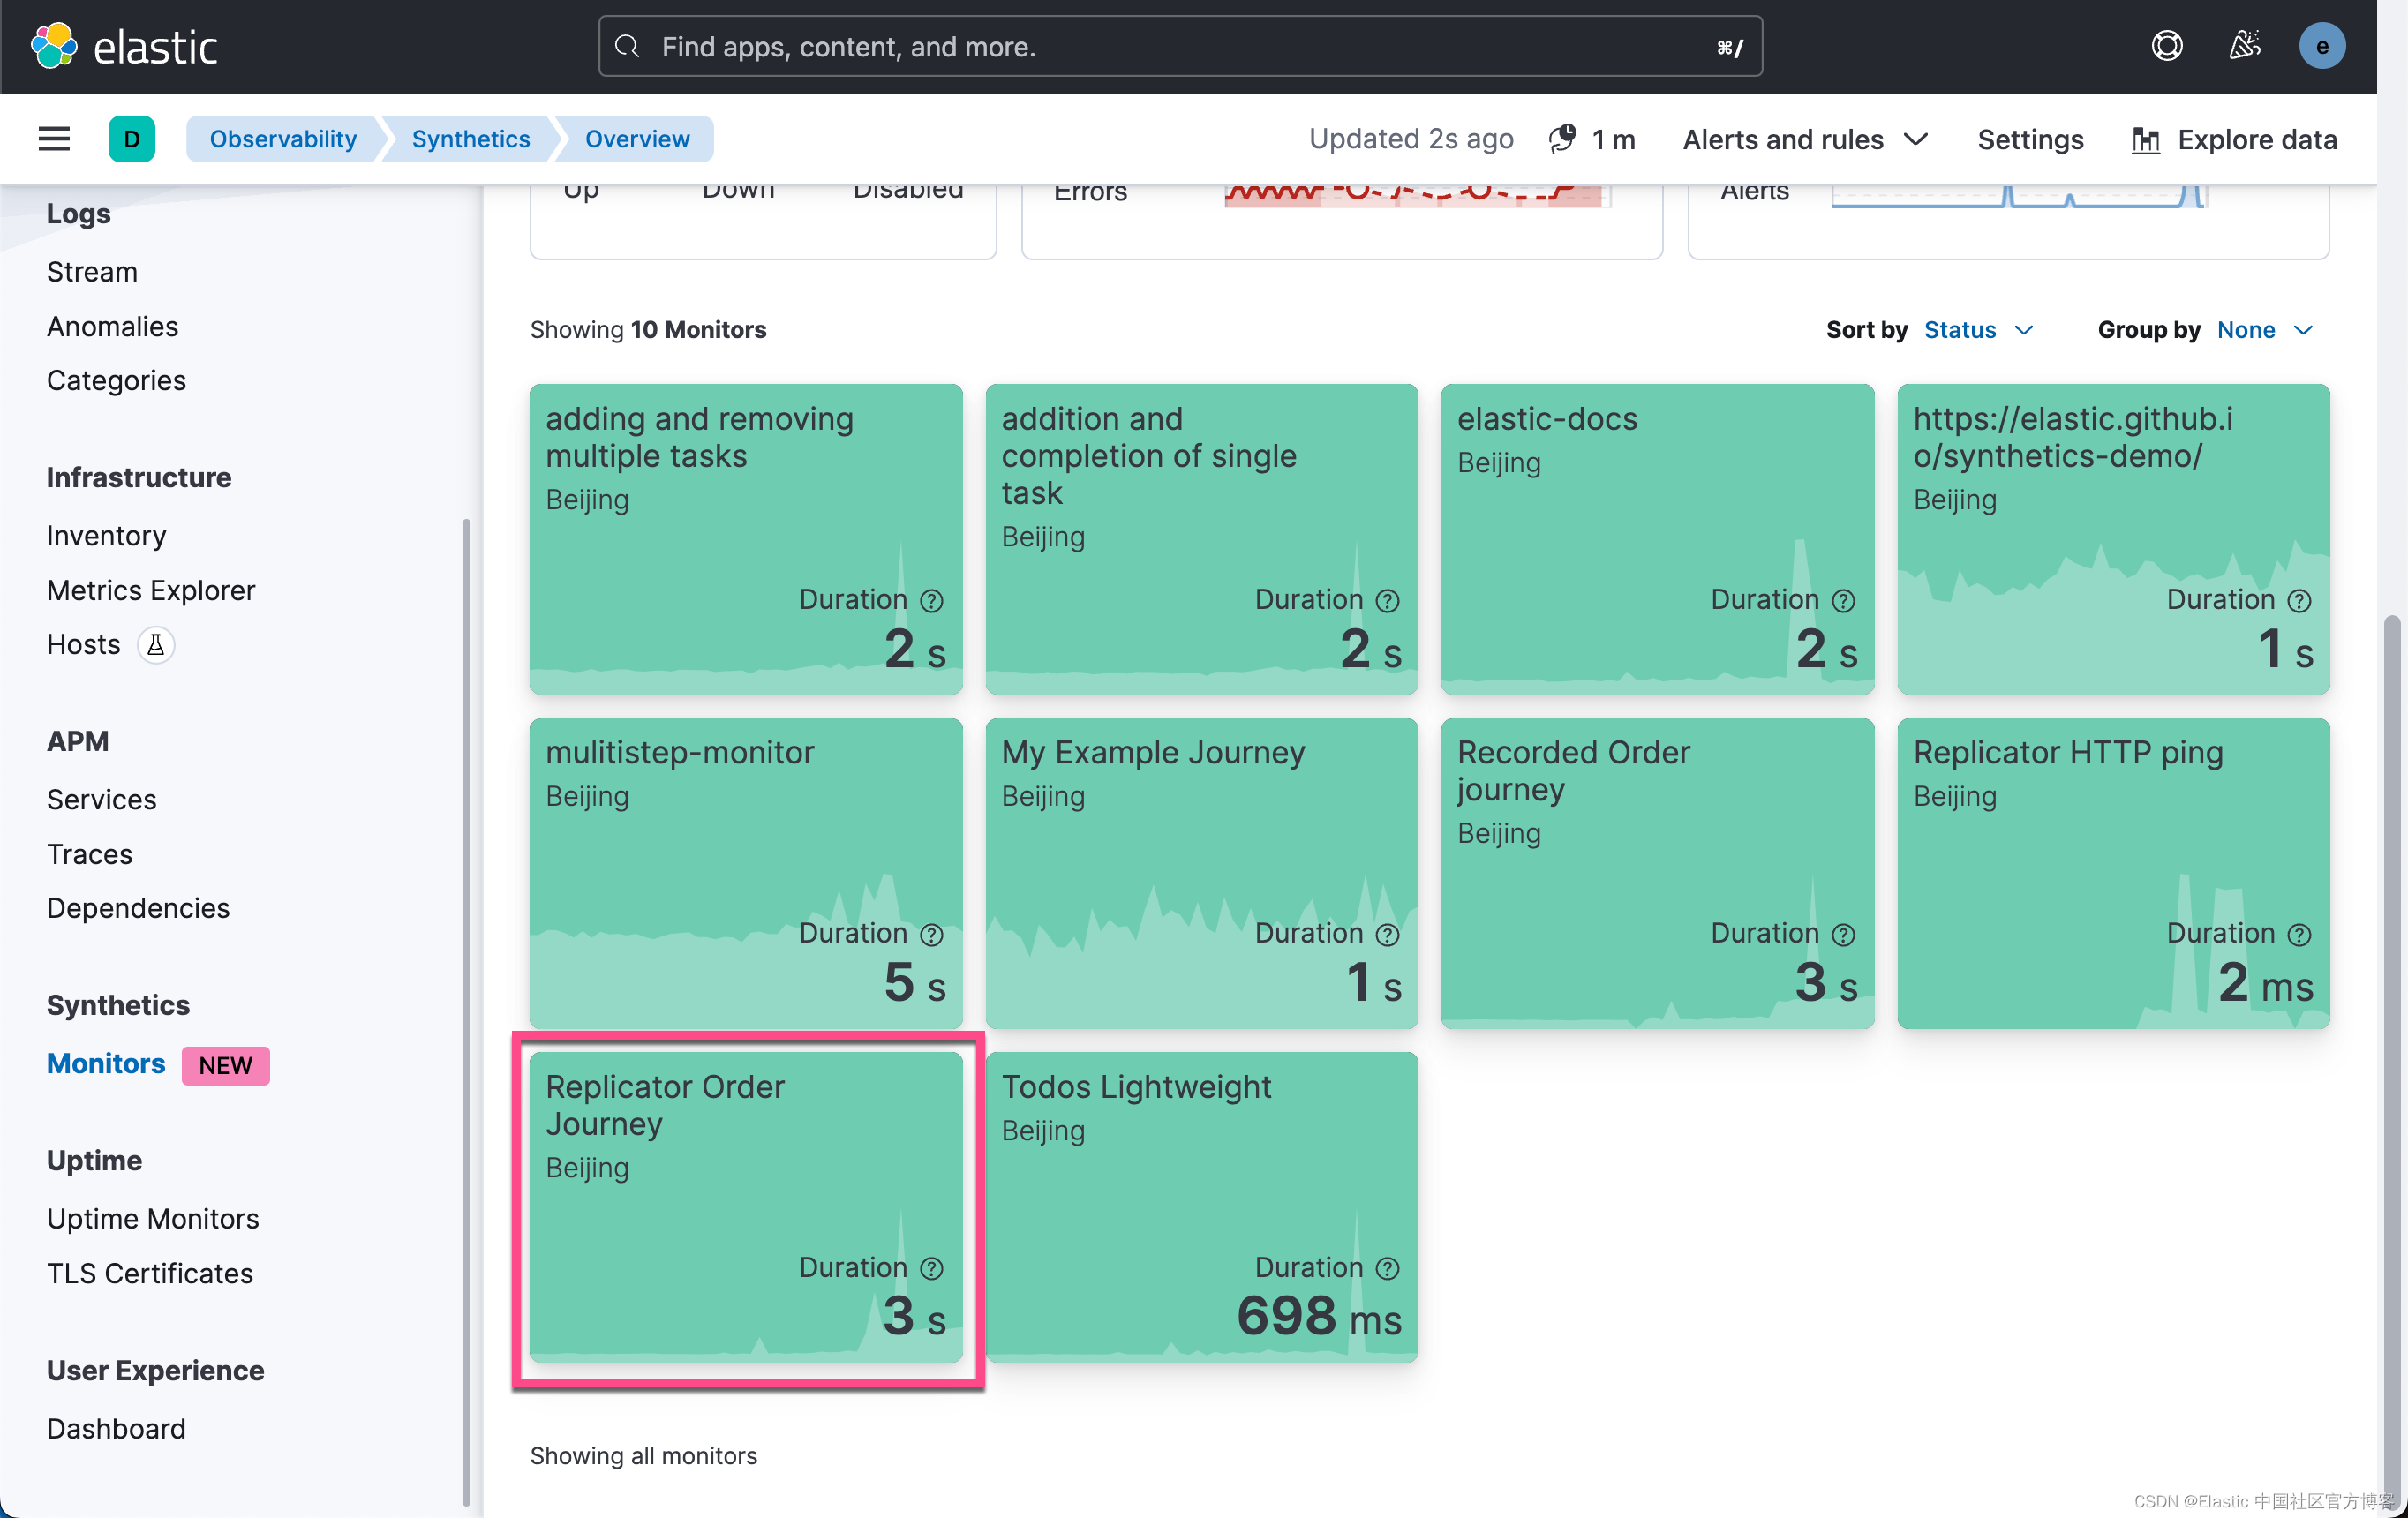
如上所示,当前的测试显示是绿色的。它表明所有的测试是成功的。我们可以点击进去其中的一个测试,比如 Replicator Order Journey:
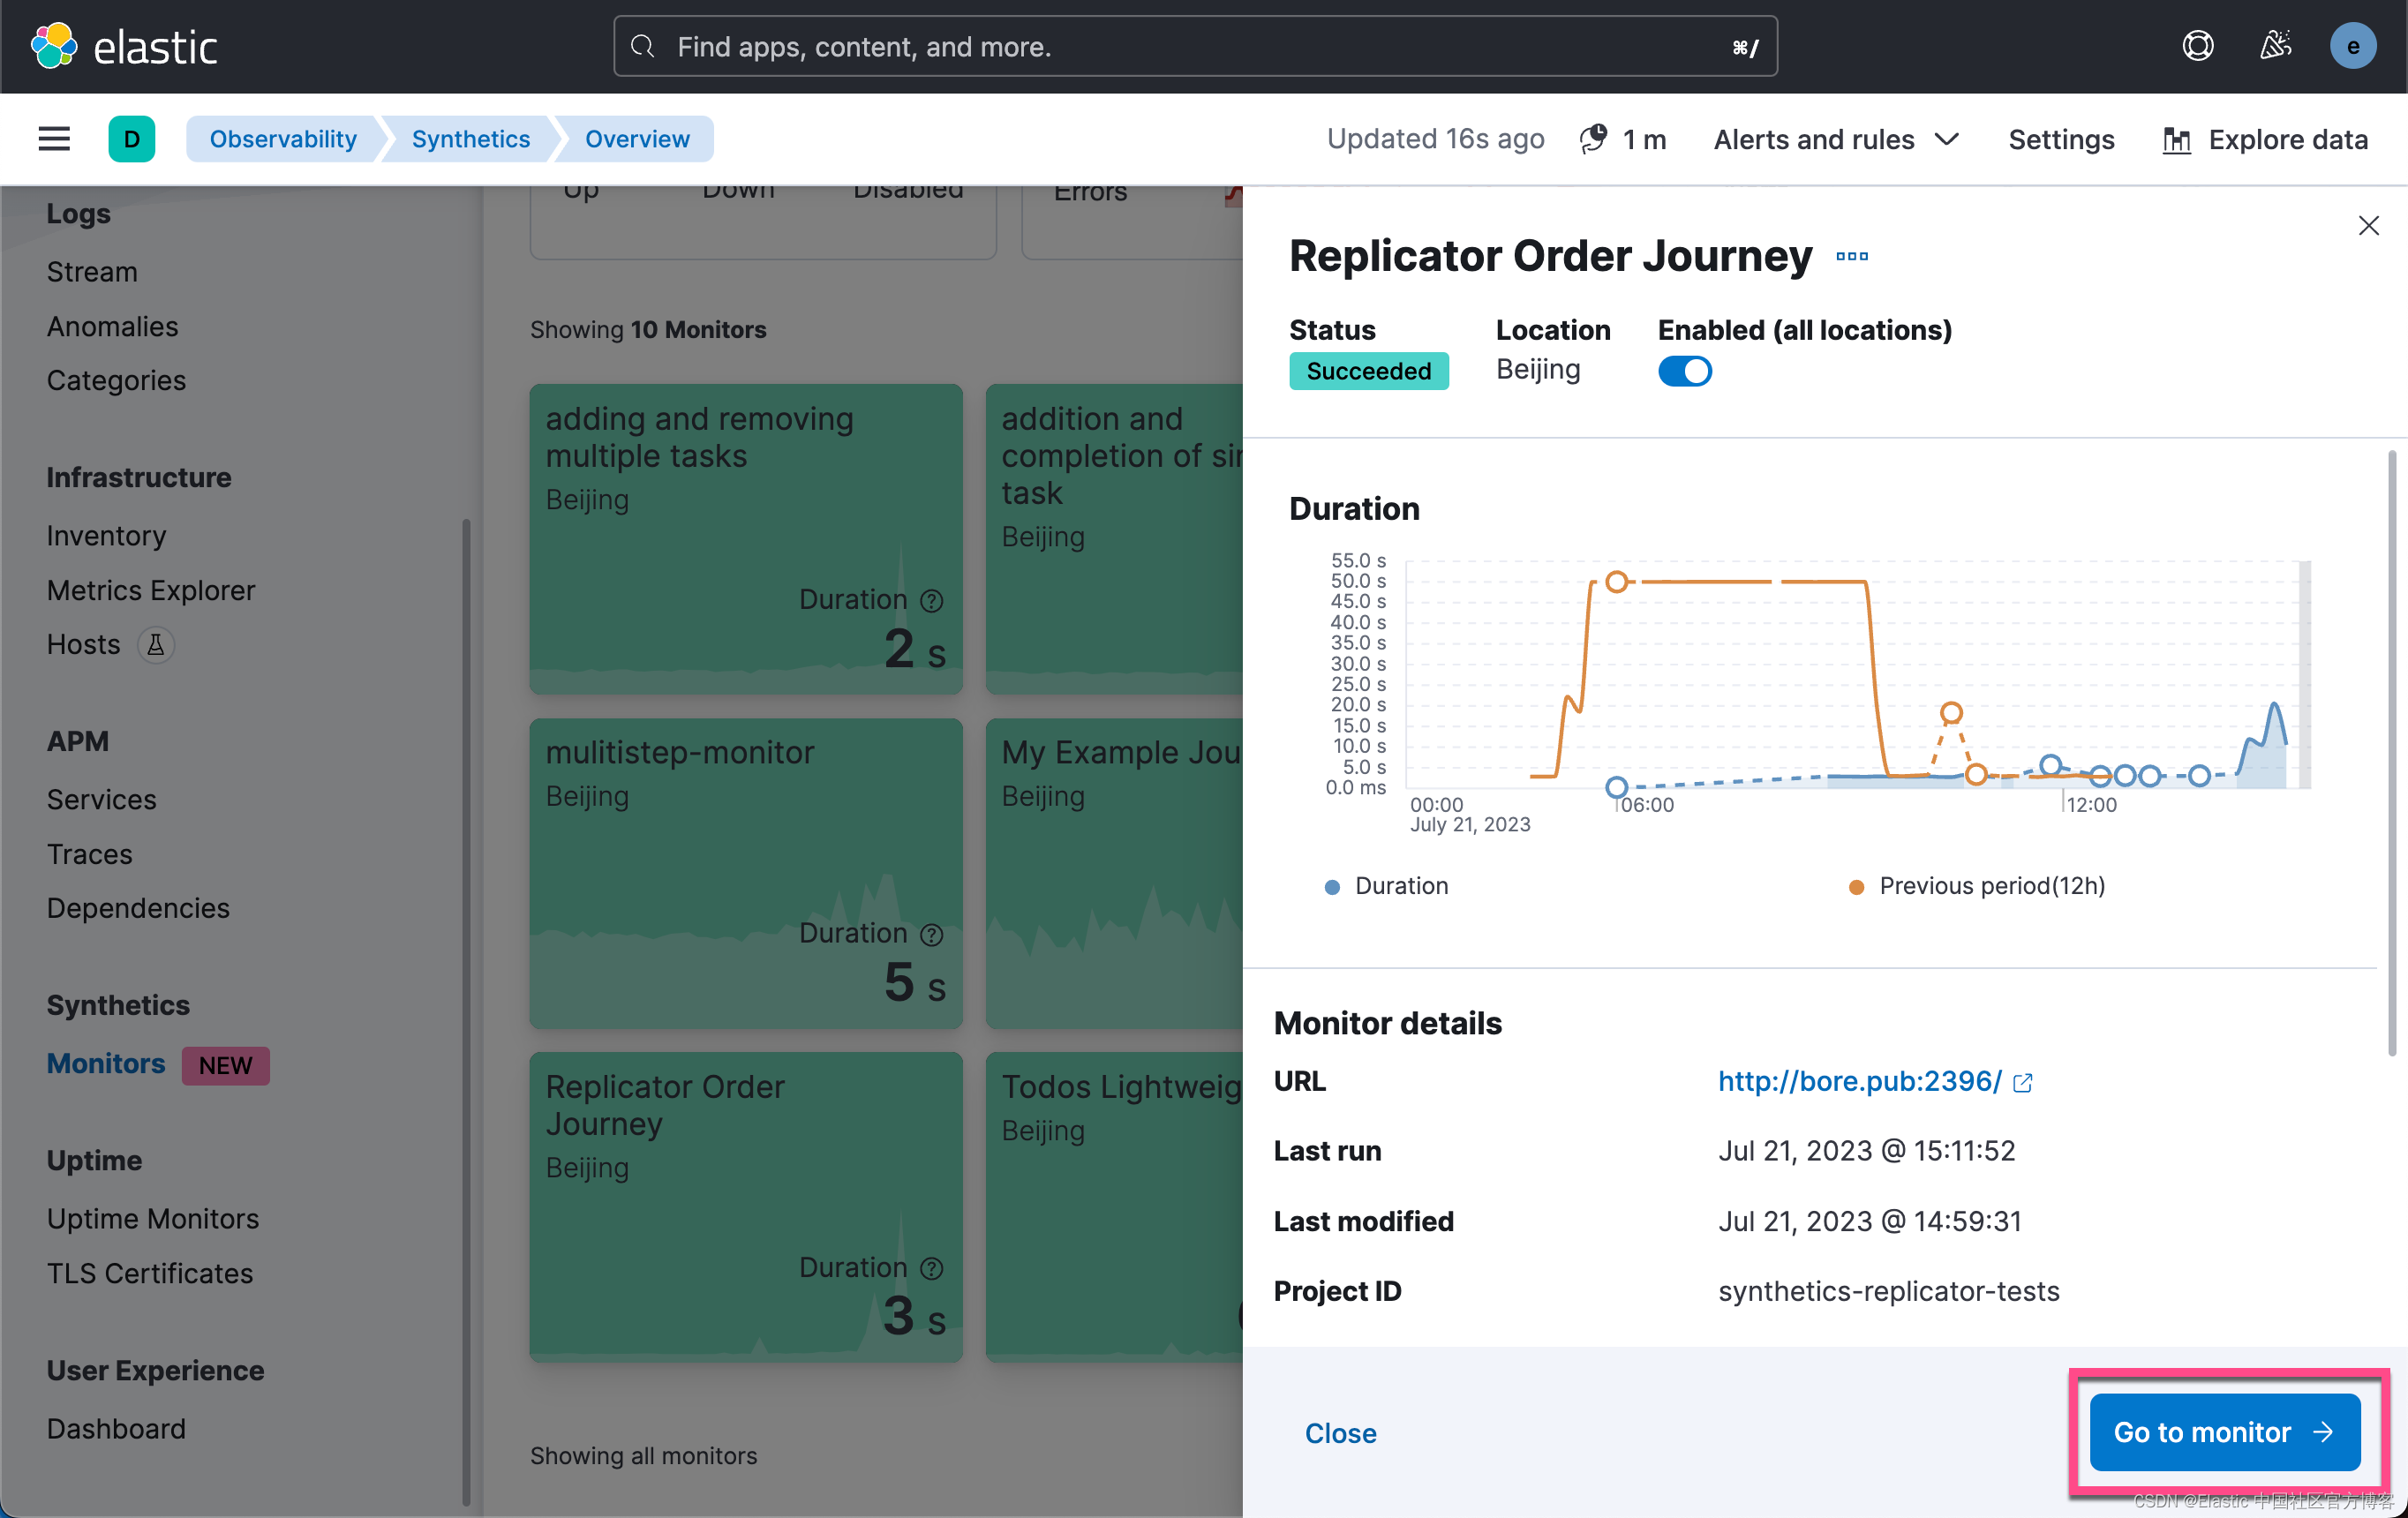
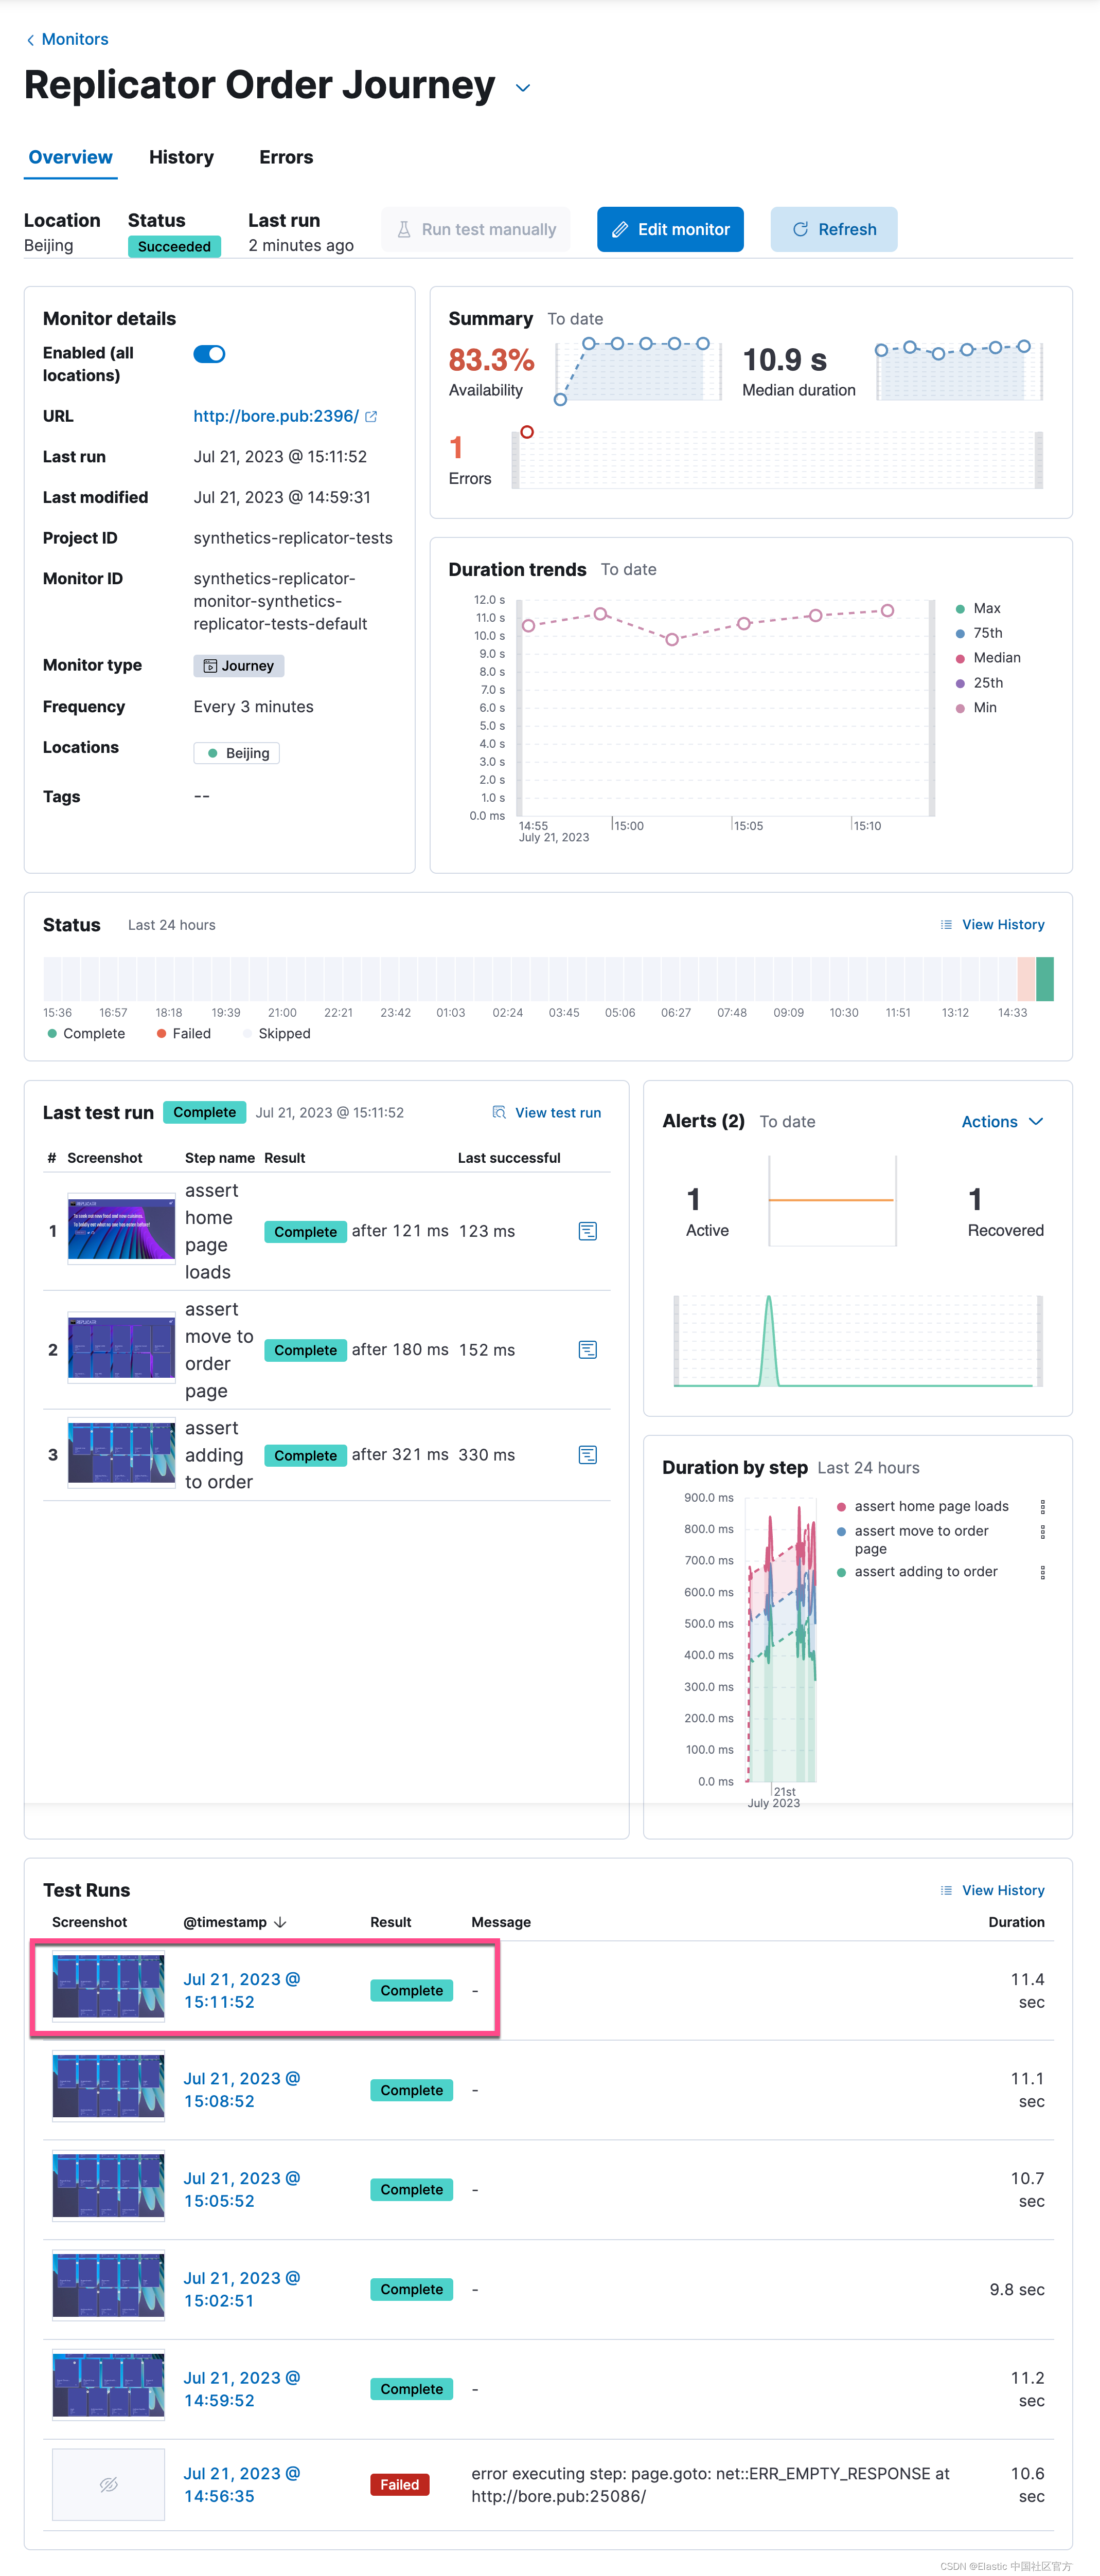
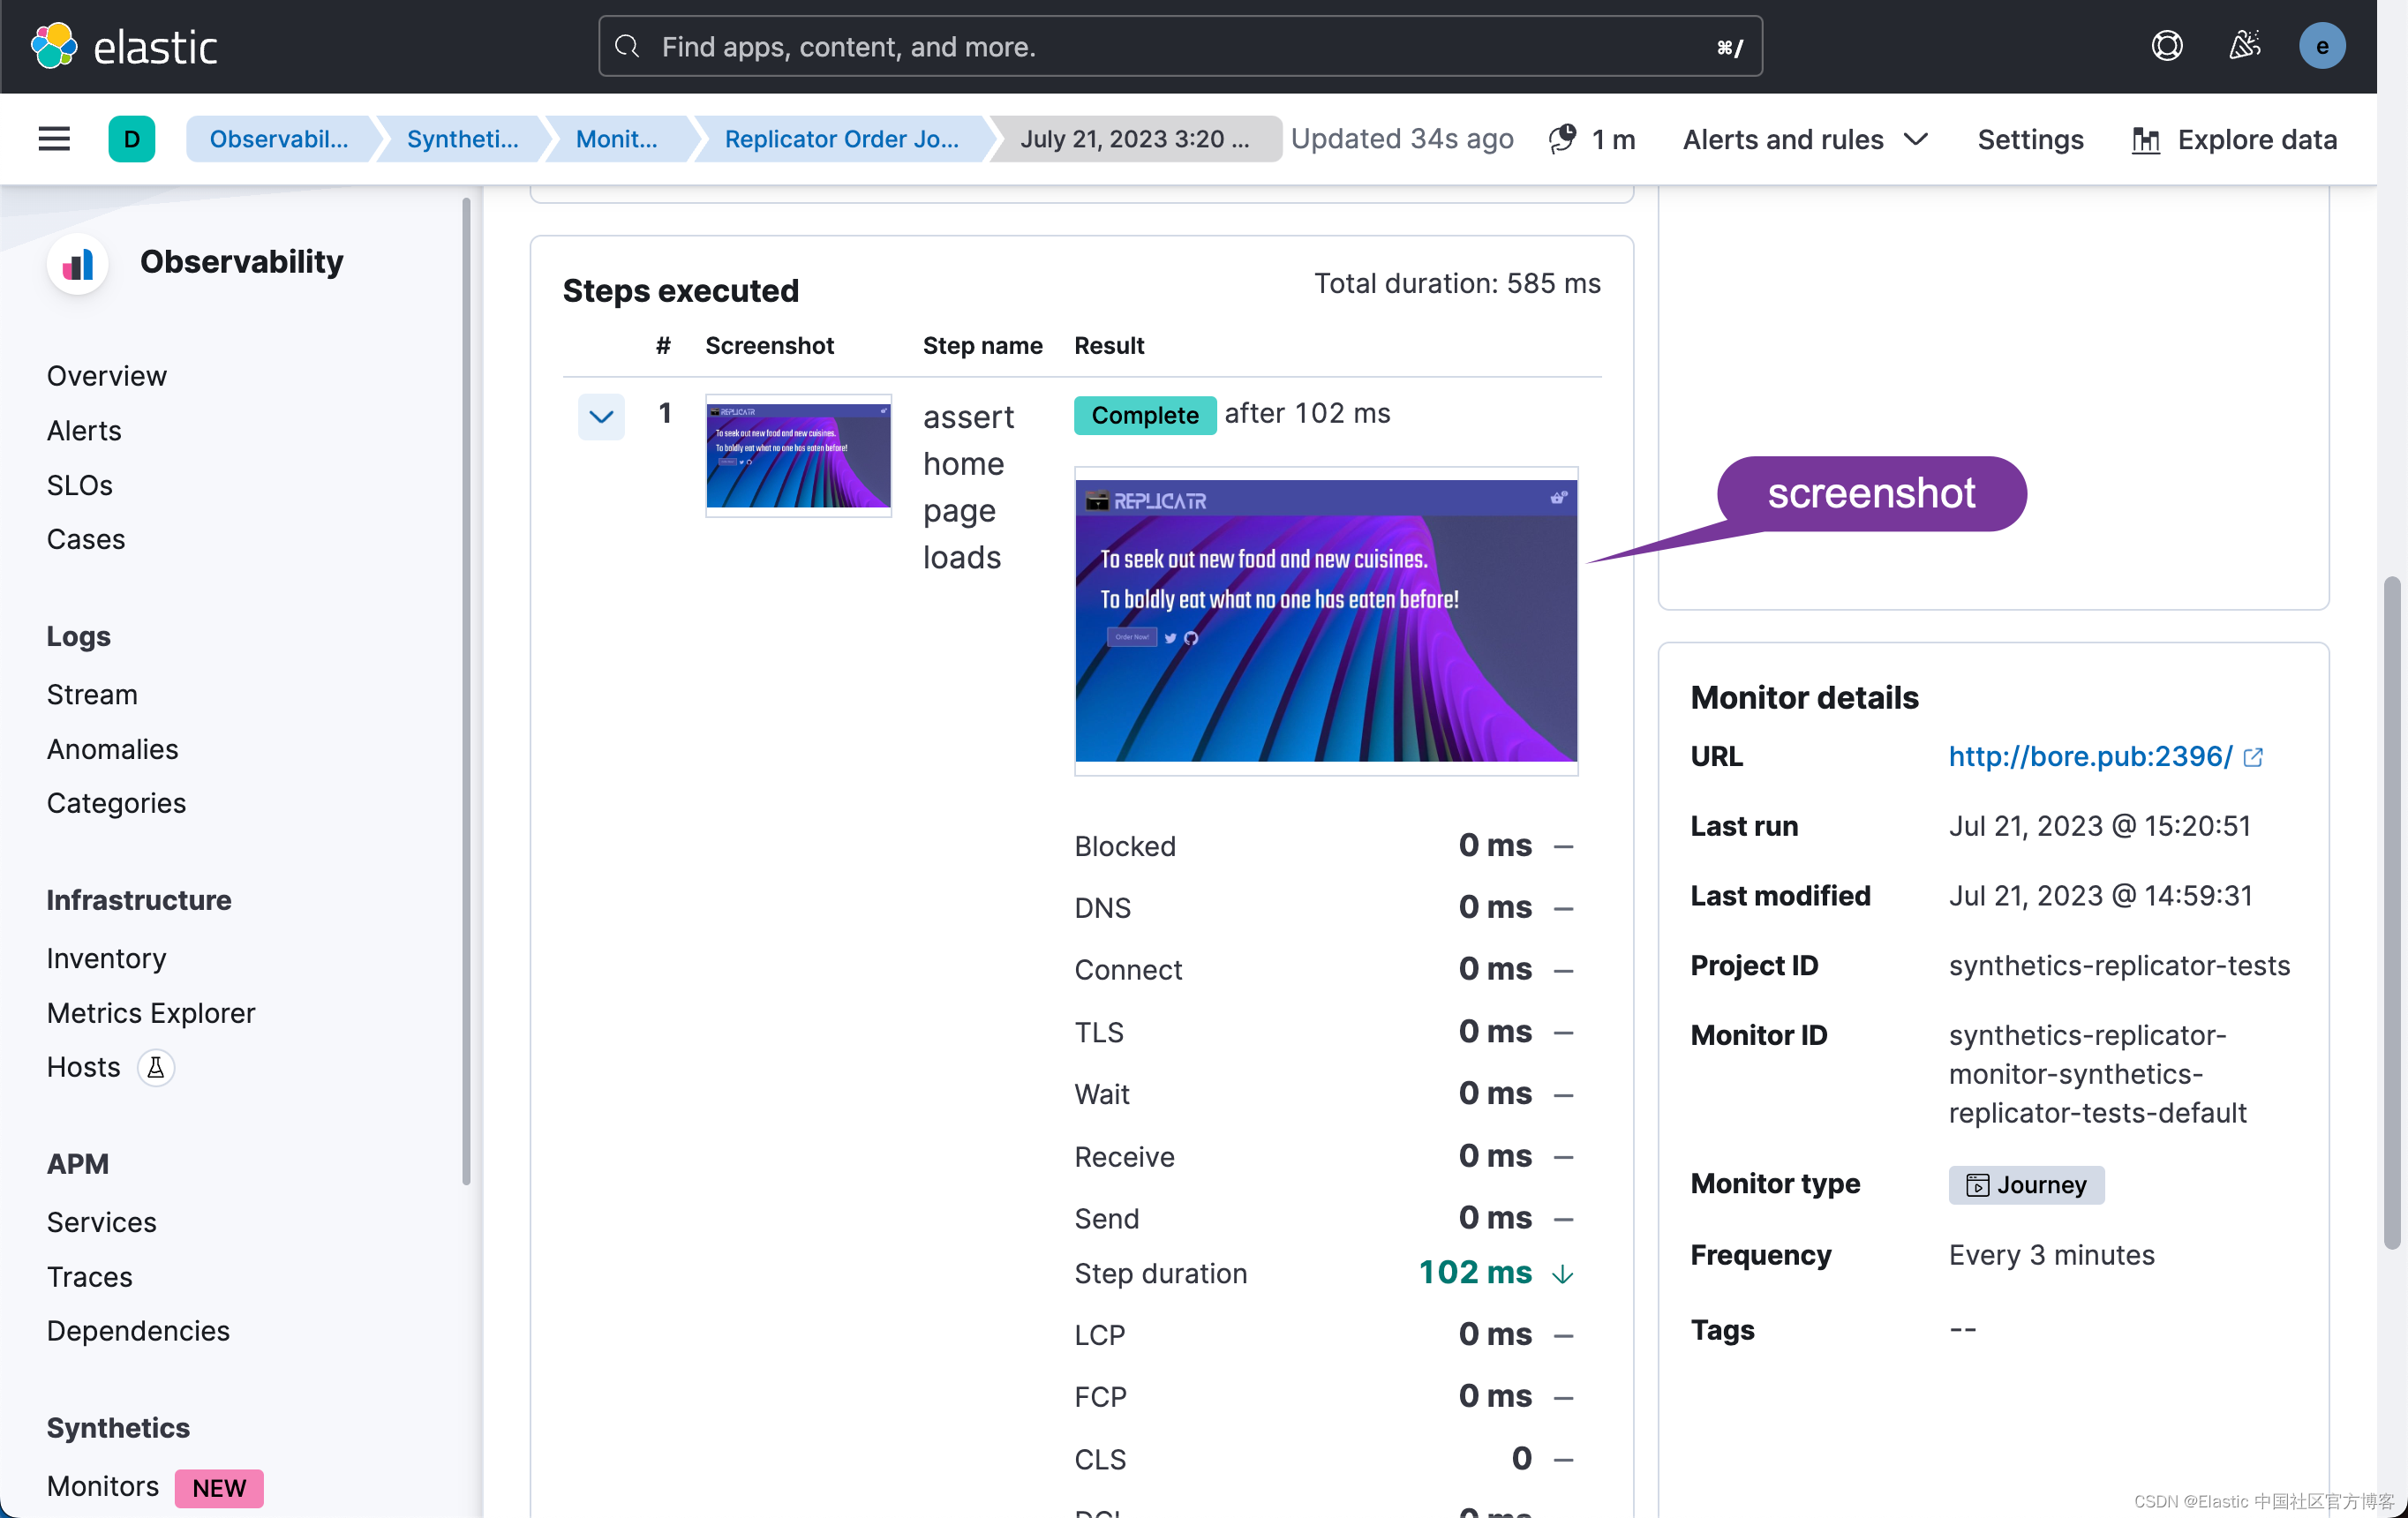
我们点击进去其中的一个 journey:

我们可以查看一下 journey 的具体写法:
$ pwd
/Users/liuxg/nodejs/synthetics-replicator/apps/synthetics-replicator-tests
$ ls
README.md            lightweight          package-lock.json    synthetics.config.ts
journeys             node_modules         package.json
$ cd journeys/
$ ls
orders-generated.journey.ts orders.journey.ts
orders.journey.ts
import { journey, step, monitor, expect, before } from '@elastic/synthetics';

journey('Replicator Order Journey', ({ page, params }) => {
  // Only relevant for the push command to create
  // monitors in Kibana
  monitor.use({
    id: 'synthetics-replicator-monitor',
    schedule: 3,
  });

  before(async ()=> {
    await page.goto(params.url);
  });

  step('assert home page loads', async () => {
    const header = await page.locator('h1');
    expect(await header.textContent()).toBe('Replicatr');
  });

  step('assert move to order page', async () => {
    const orderButton = await page.getByTestId('order-button');
    await orderButton.click();

    const url = page.url();
    expect(url).toContain('/order');

    const menuTiles = await page.getByTestId('menu-item-card');
    expect(await menuTiles.count()).toBeGreaterThan(2);
  });

  step('assert adding to order', async () => {
    const addItemButtons = await page.getByTestId('add-item-button');
    expect(await addItemButtons.count()).toBeGreaterThan(10);

    const cartCount = await page.getByTestId('cart-count-label');
    expect(await cartCount.innerText()).toBe('0');

    await addItemButtons.first().click();
    expect(await cartCount.innerText()).toBe('1');

    await addItemButtons.nth(4).click();
    await addItemButtons.last().click();
    expect(await cartCount.innerText()).toBe('3');
  });
});
从上面我们可以看出来:
- 该测试每隔 3 分钟做一次测试
- 首先它去首页,它显示的截图为:
- 紧接着查看 h1 里的文字是不是 Replicator:
  step('assert home page loads', async () => {
    const header = await page.locator('h1');
    expect(await header.textContent()).toBe('Replicatr');
  });
如果是成功的话,就点击去 order 页面:
- 点击进入 order 页面:
  step('assert move to order page', async () => {
    const orderButton = await page.getByTestId('order-button');
    await orderButton.click();

    const url = page.url();
    expect(url).toContain('/order');

    const menuTiles = await page.getByTestId('menu-item-card');
    expect(await menuTiles.count()).toBeGreaterThan(2);
  });

- 添加 order:
  step('assert adding to order', async () => {
    const addItemButtons = await page.getByTestId('add-item-button');
    expect(await addItemButtons.count()).toBeGreaterThan(10);

    const cartCount = await page.getByTestId('cart-count-label');
    expect(await cartCount.innerText()).toBe('0');

    await addItemButtons.first().click();
    expect(await cartCount.innerText()).toBe('1');

    await addItemButtons.nth(4).click();
    await addItemButtons.last().click();
    expect(await cartCount.innerText()).toBe('3');
  });
在上面的代码中个:检测添加 button 多于 10 个。
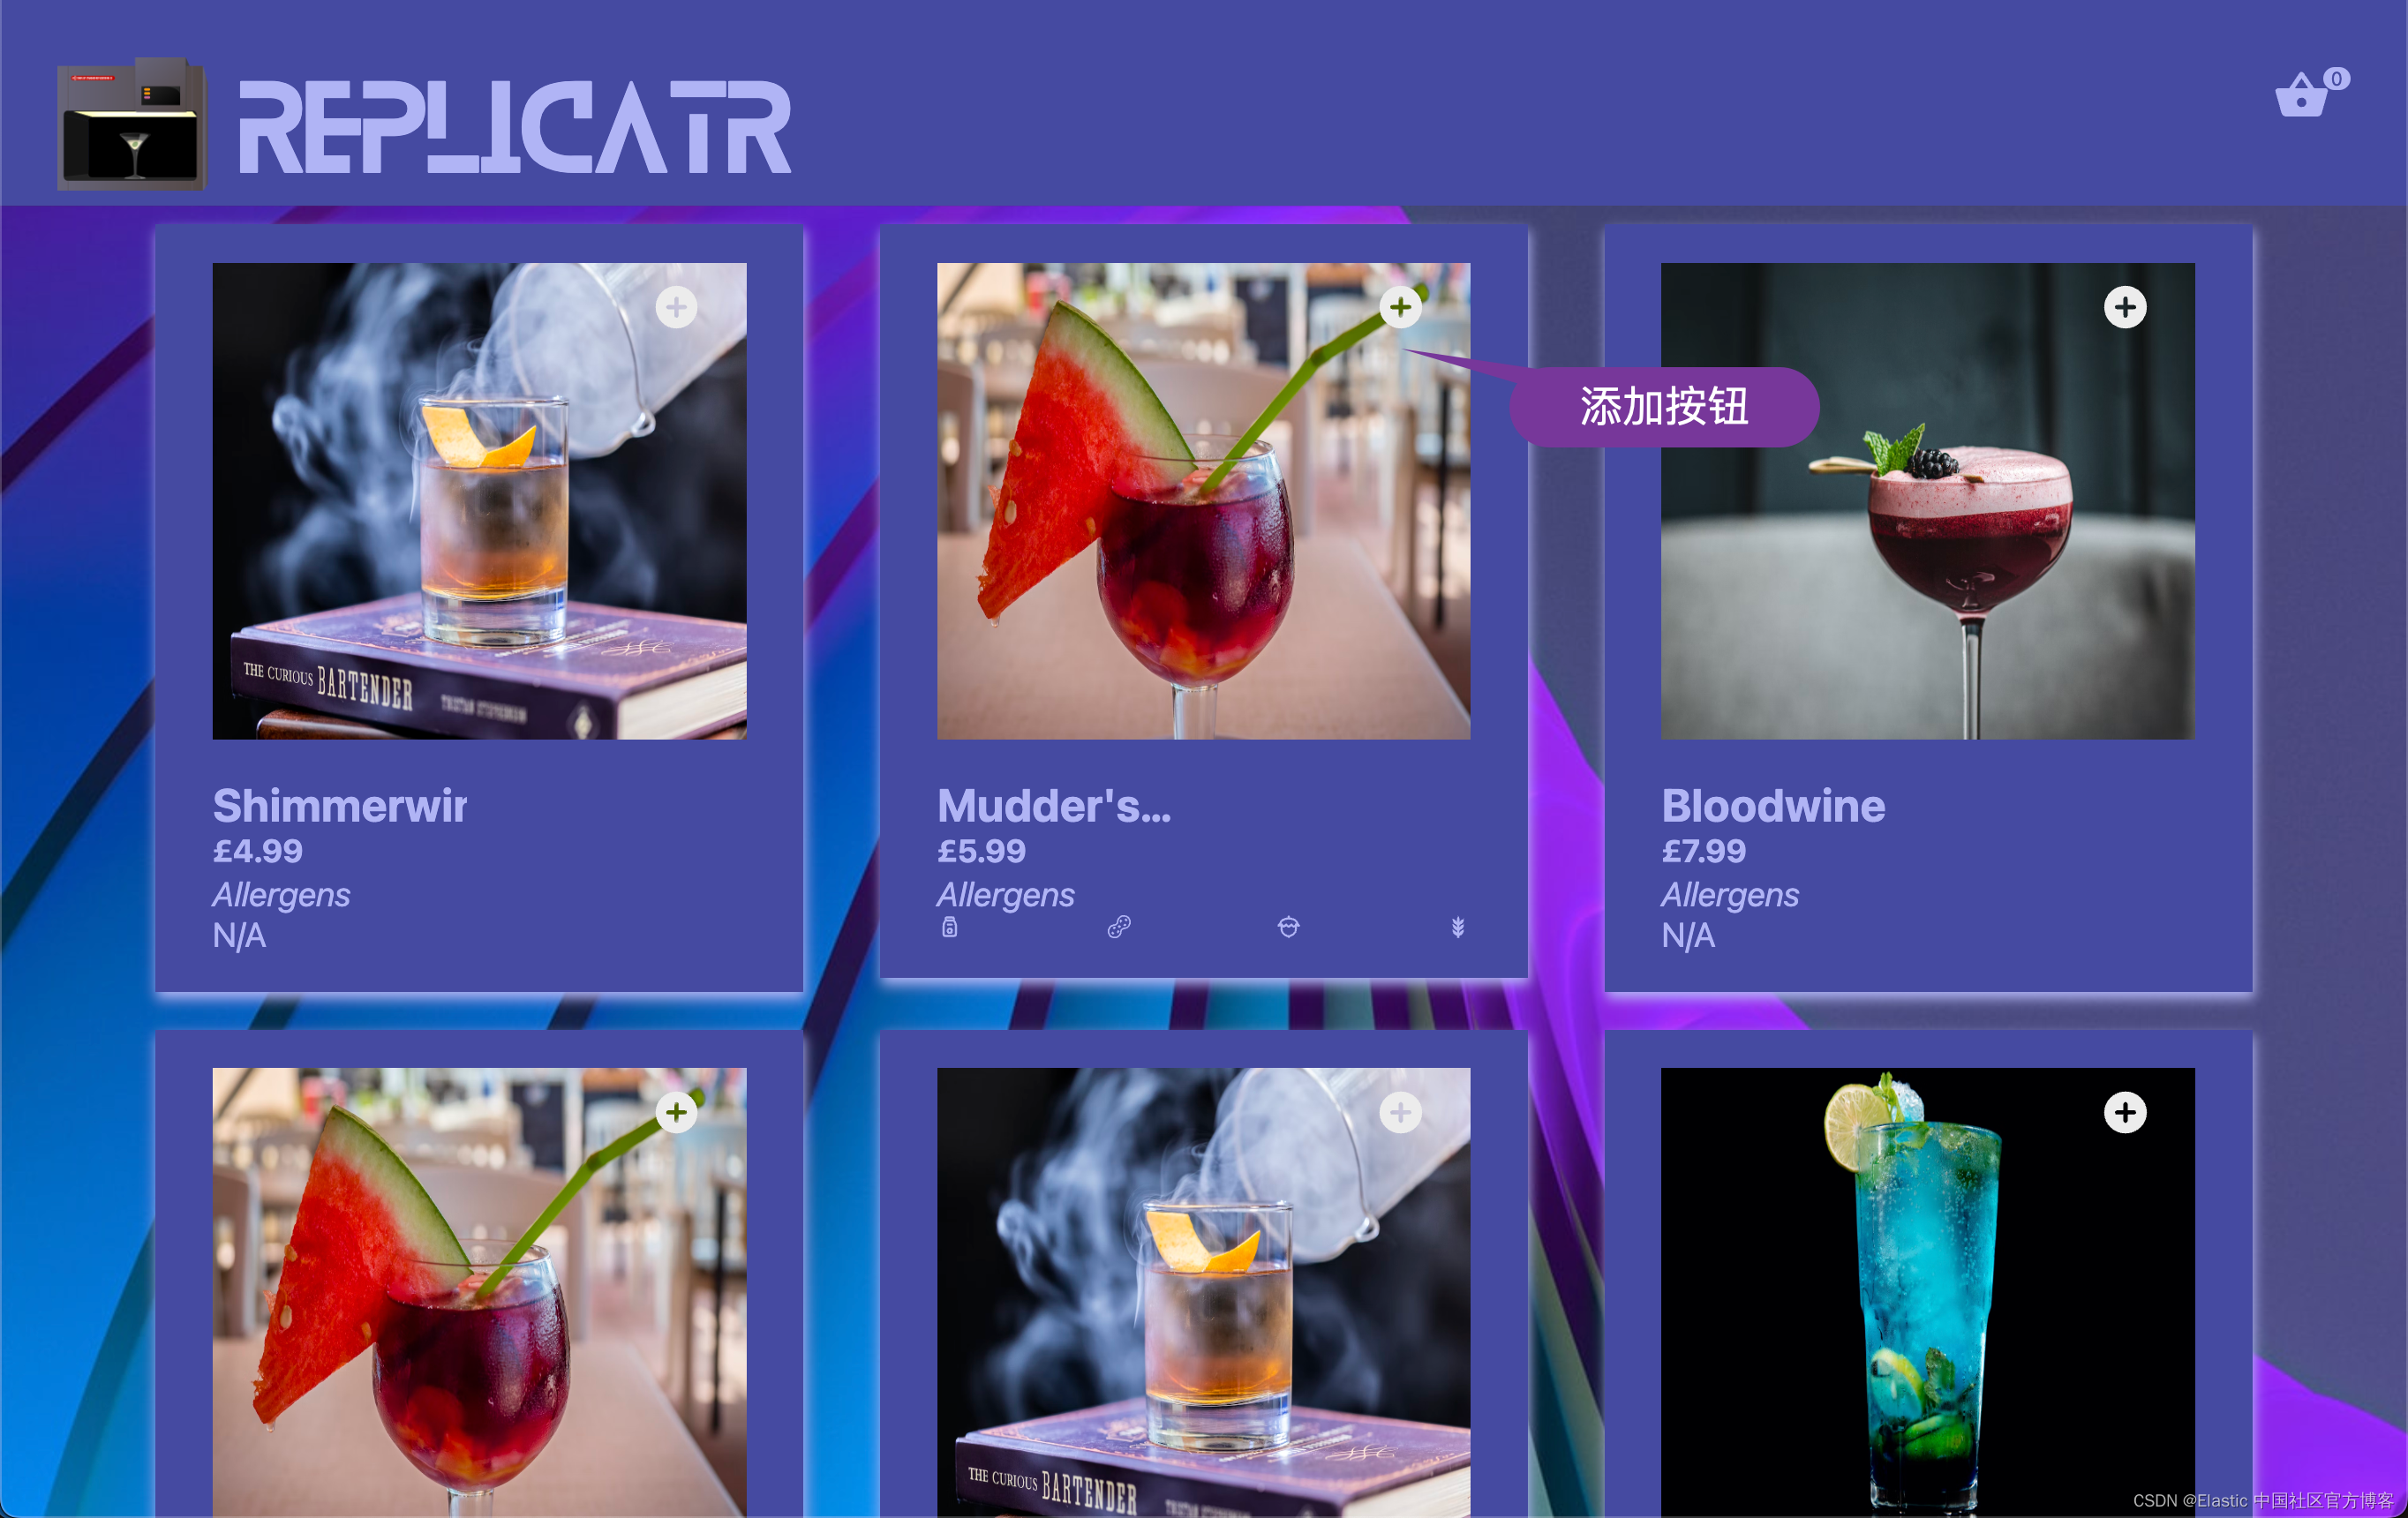
检查购物车里的数量为 0:

第一个物品的添加按钮:
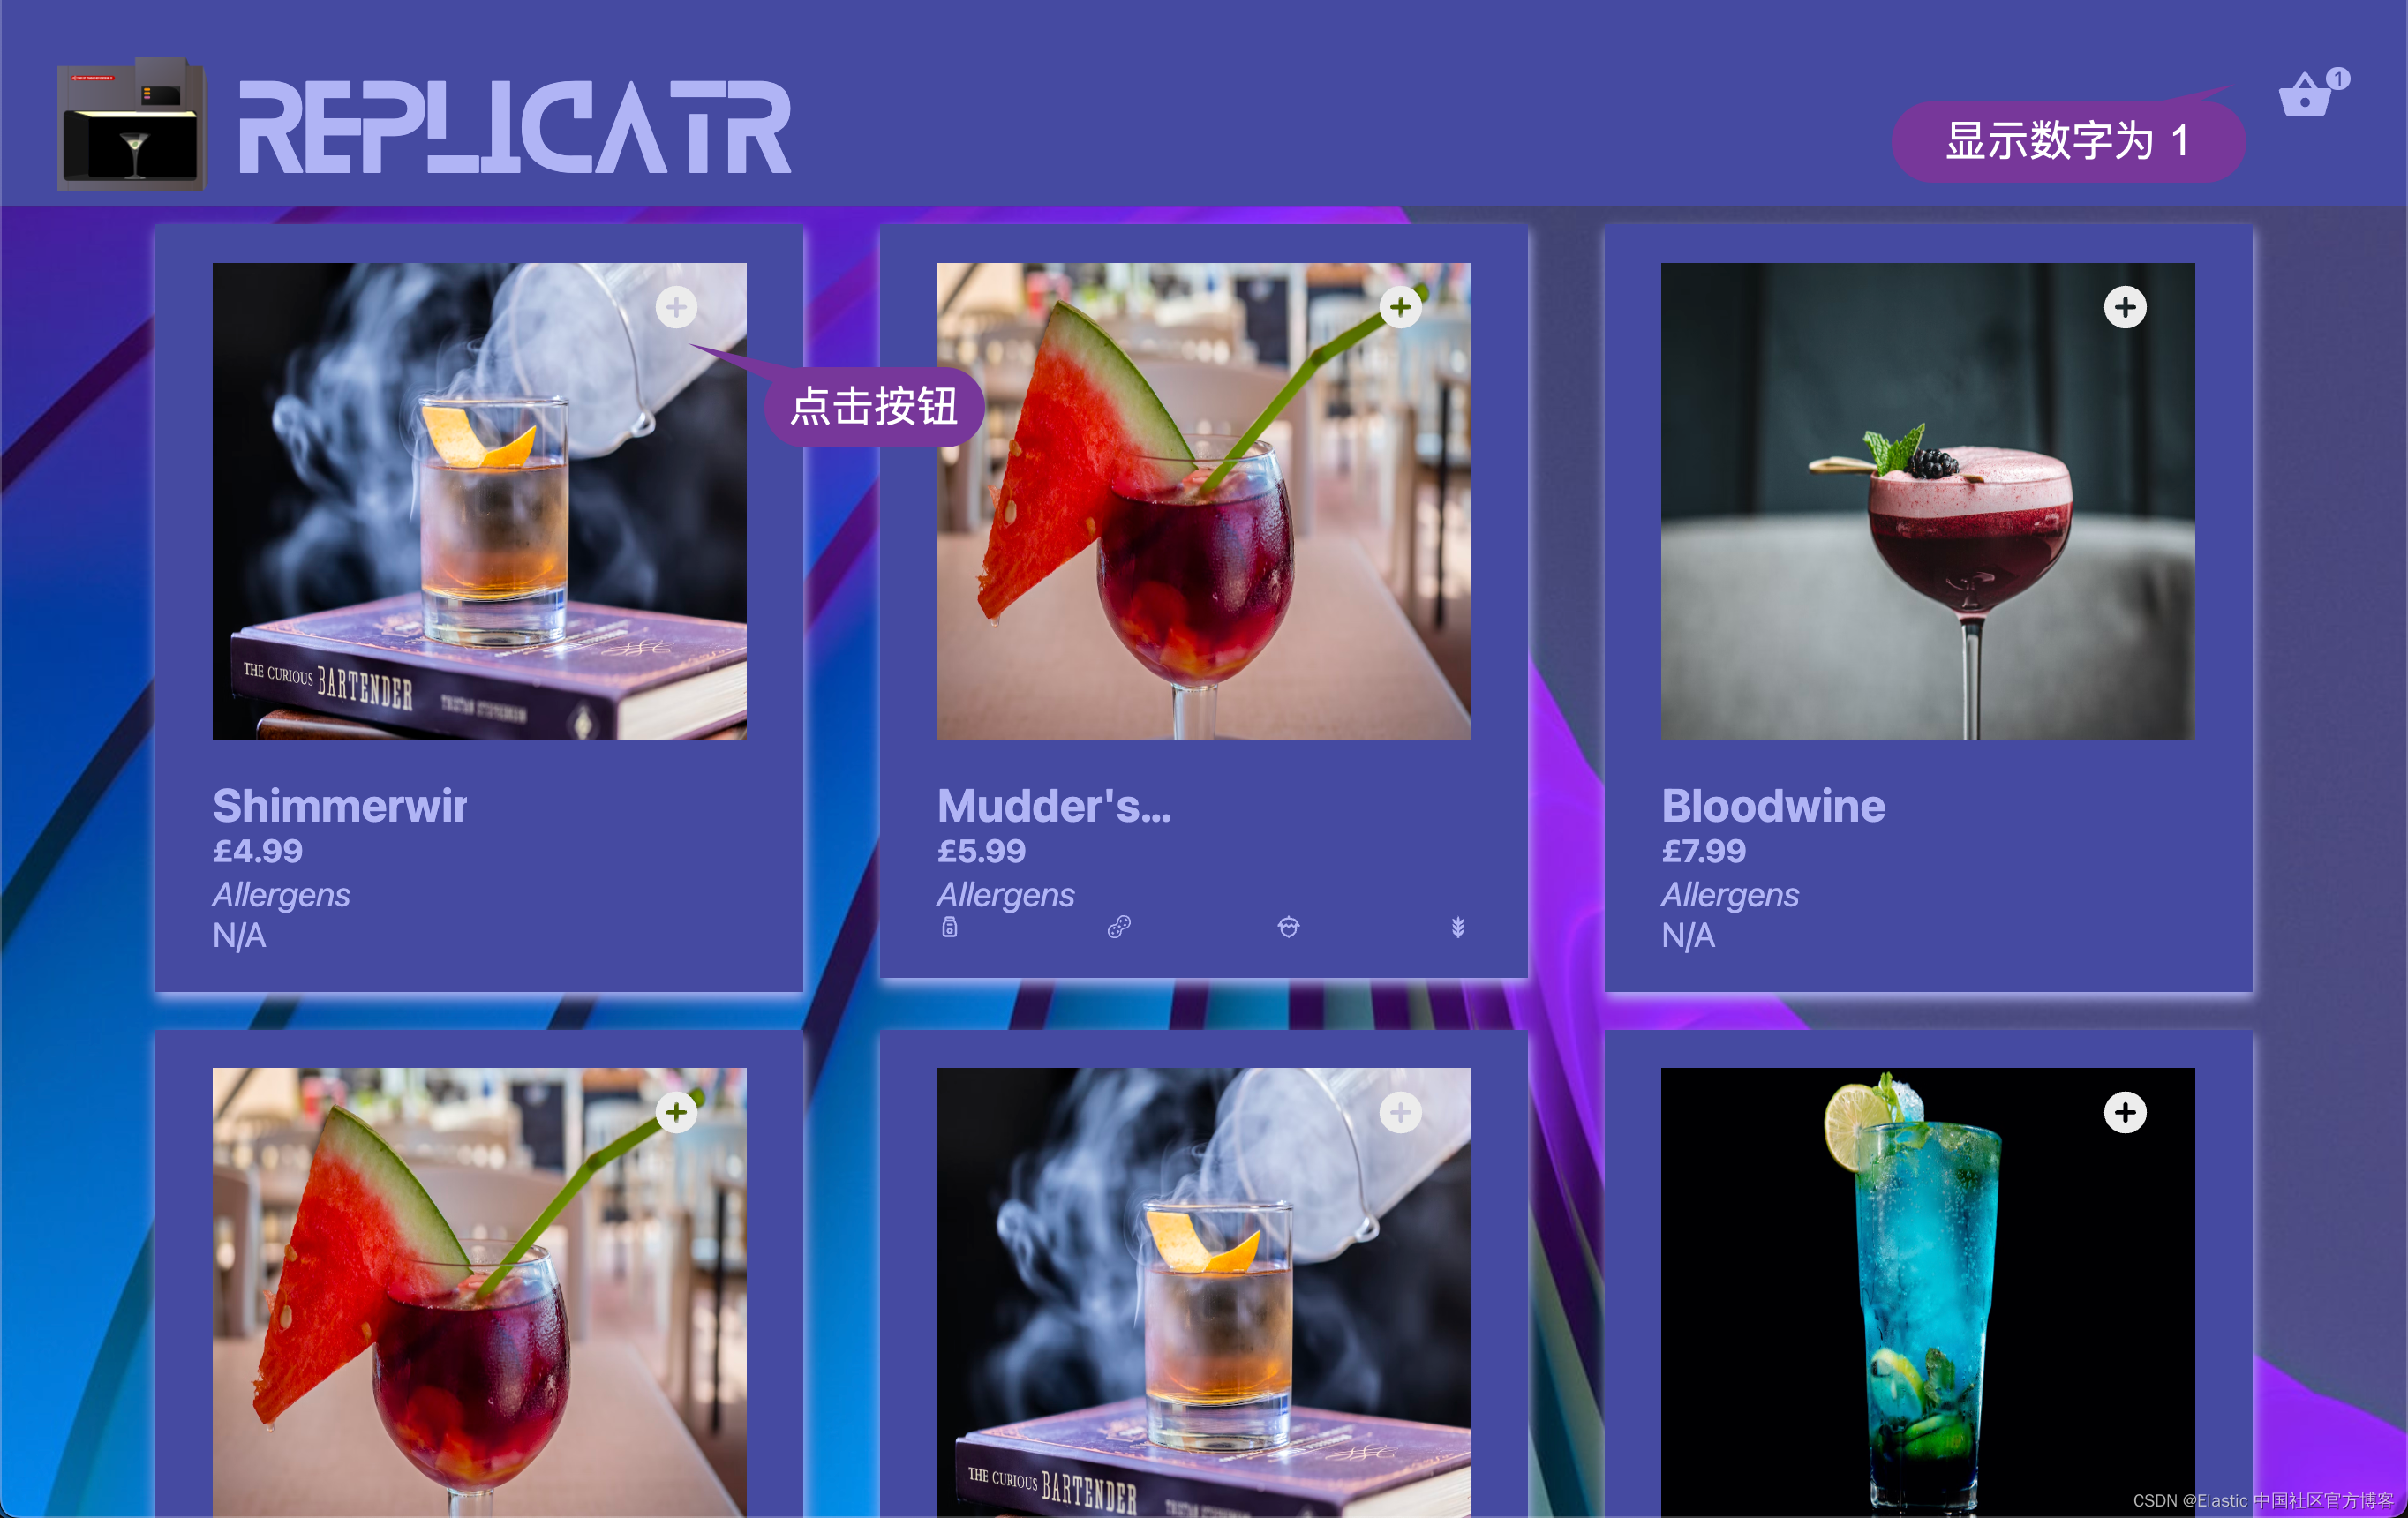
连续点击两次,那么购物车里的数值为 3:

至此这个 journey 的测试完毕。如果有异常就会报错。
使用 Nginx 来反向代理 web 服务器
在上面,我们使用 bore 来暴露私有地址,并可以在互联网上进行访问。在本地测试中,我们甚至可以使用 Nginx 来反向代理把 http://localhost:5173 的地址变为 http://private:5173 来进行访问。这样我们的 docker 里的服务器就可以访问这个地址了。
我们需要针对 Nginx 来进行配置:
nginx.conf
http {
    include       mime.types;
    default_type  application/octet-stream;

    #log_format  main  '$remote_addr - $remote_user [$time_local] "$request" '
    #                  '$status $body_bytes_sent "$http_referer" '
    #                  '"$http_user_agent" "$http_x_forwarded_for"';

    #access_log  logs/access.log  main;

    sendfile        on;
    #tcp_nopush     on;

    #keepalive_timeout  0;
    keepalive_timeout  65;

   server {
        listen *:5173;

        server_name $hostname localhost;
        location / {
            proxy_pass http://localhost:5173/;
        }
    }

  ..
}
在配置完上面的 nginx.conf 后,在 macOS 上,我们可以使用如下的命令来重新启动 Nginx 服务:
brew services restart nginx如果你使用 Linux 操作系统,你可以使用如下的命令:
sudo systemctl restart nginx或者:
sudo service nginx restart等启动完毕后,我们可以在浏览器中重新进行测试:

我们需要重新配置之前的一些文件:
synthetics.config.ts
import type { SyntheticsConfig } from '@elastic/synthetics';

export default env => {
  const config: SyntheticsConfig = {
    params: {
      url: 'http://localhost:5173/',
    },
    playwrightOptions: {
      ignoreHTTPSErrors: false,
    },
    /**
     * Configure global monitor settings
     */
    monitor: {
      schedule: 3,
      locations: [],
      privateLocations: ['Beijing'],
    },
    /**
     * Project monitors settings
     */
    project: {
      id: 'synthetics-replicator-tests',
      url: 'http://127.0.0.1:5601',
      space: 'default',
    },
  };
  if (env === 'production') {
    config.params = { url: 'http://192.168.0.3:5173/' }
  }
  return config;
};
如上所示,192.168.0.3 是我的电脑的私有地址。
在进行下面的操作之前,我们需要删除之前的所有的监控器及之前创建的 Beijing 私有地址。 我们重新创建私有位置 Beijng 地址:


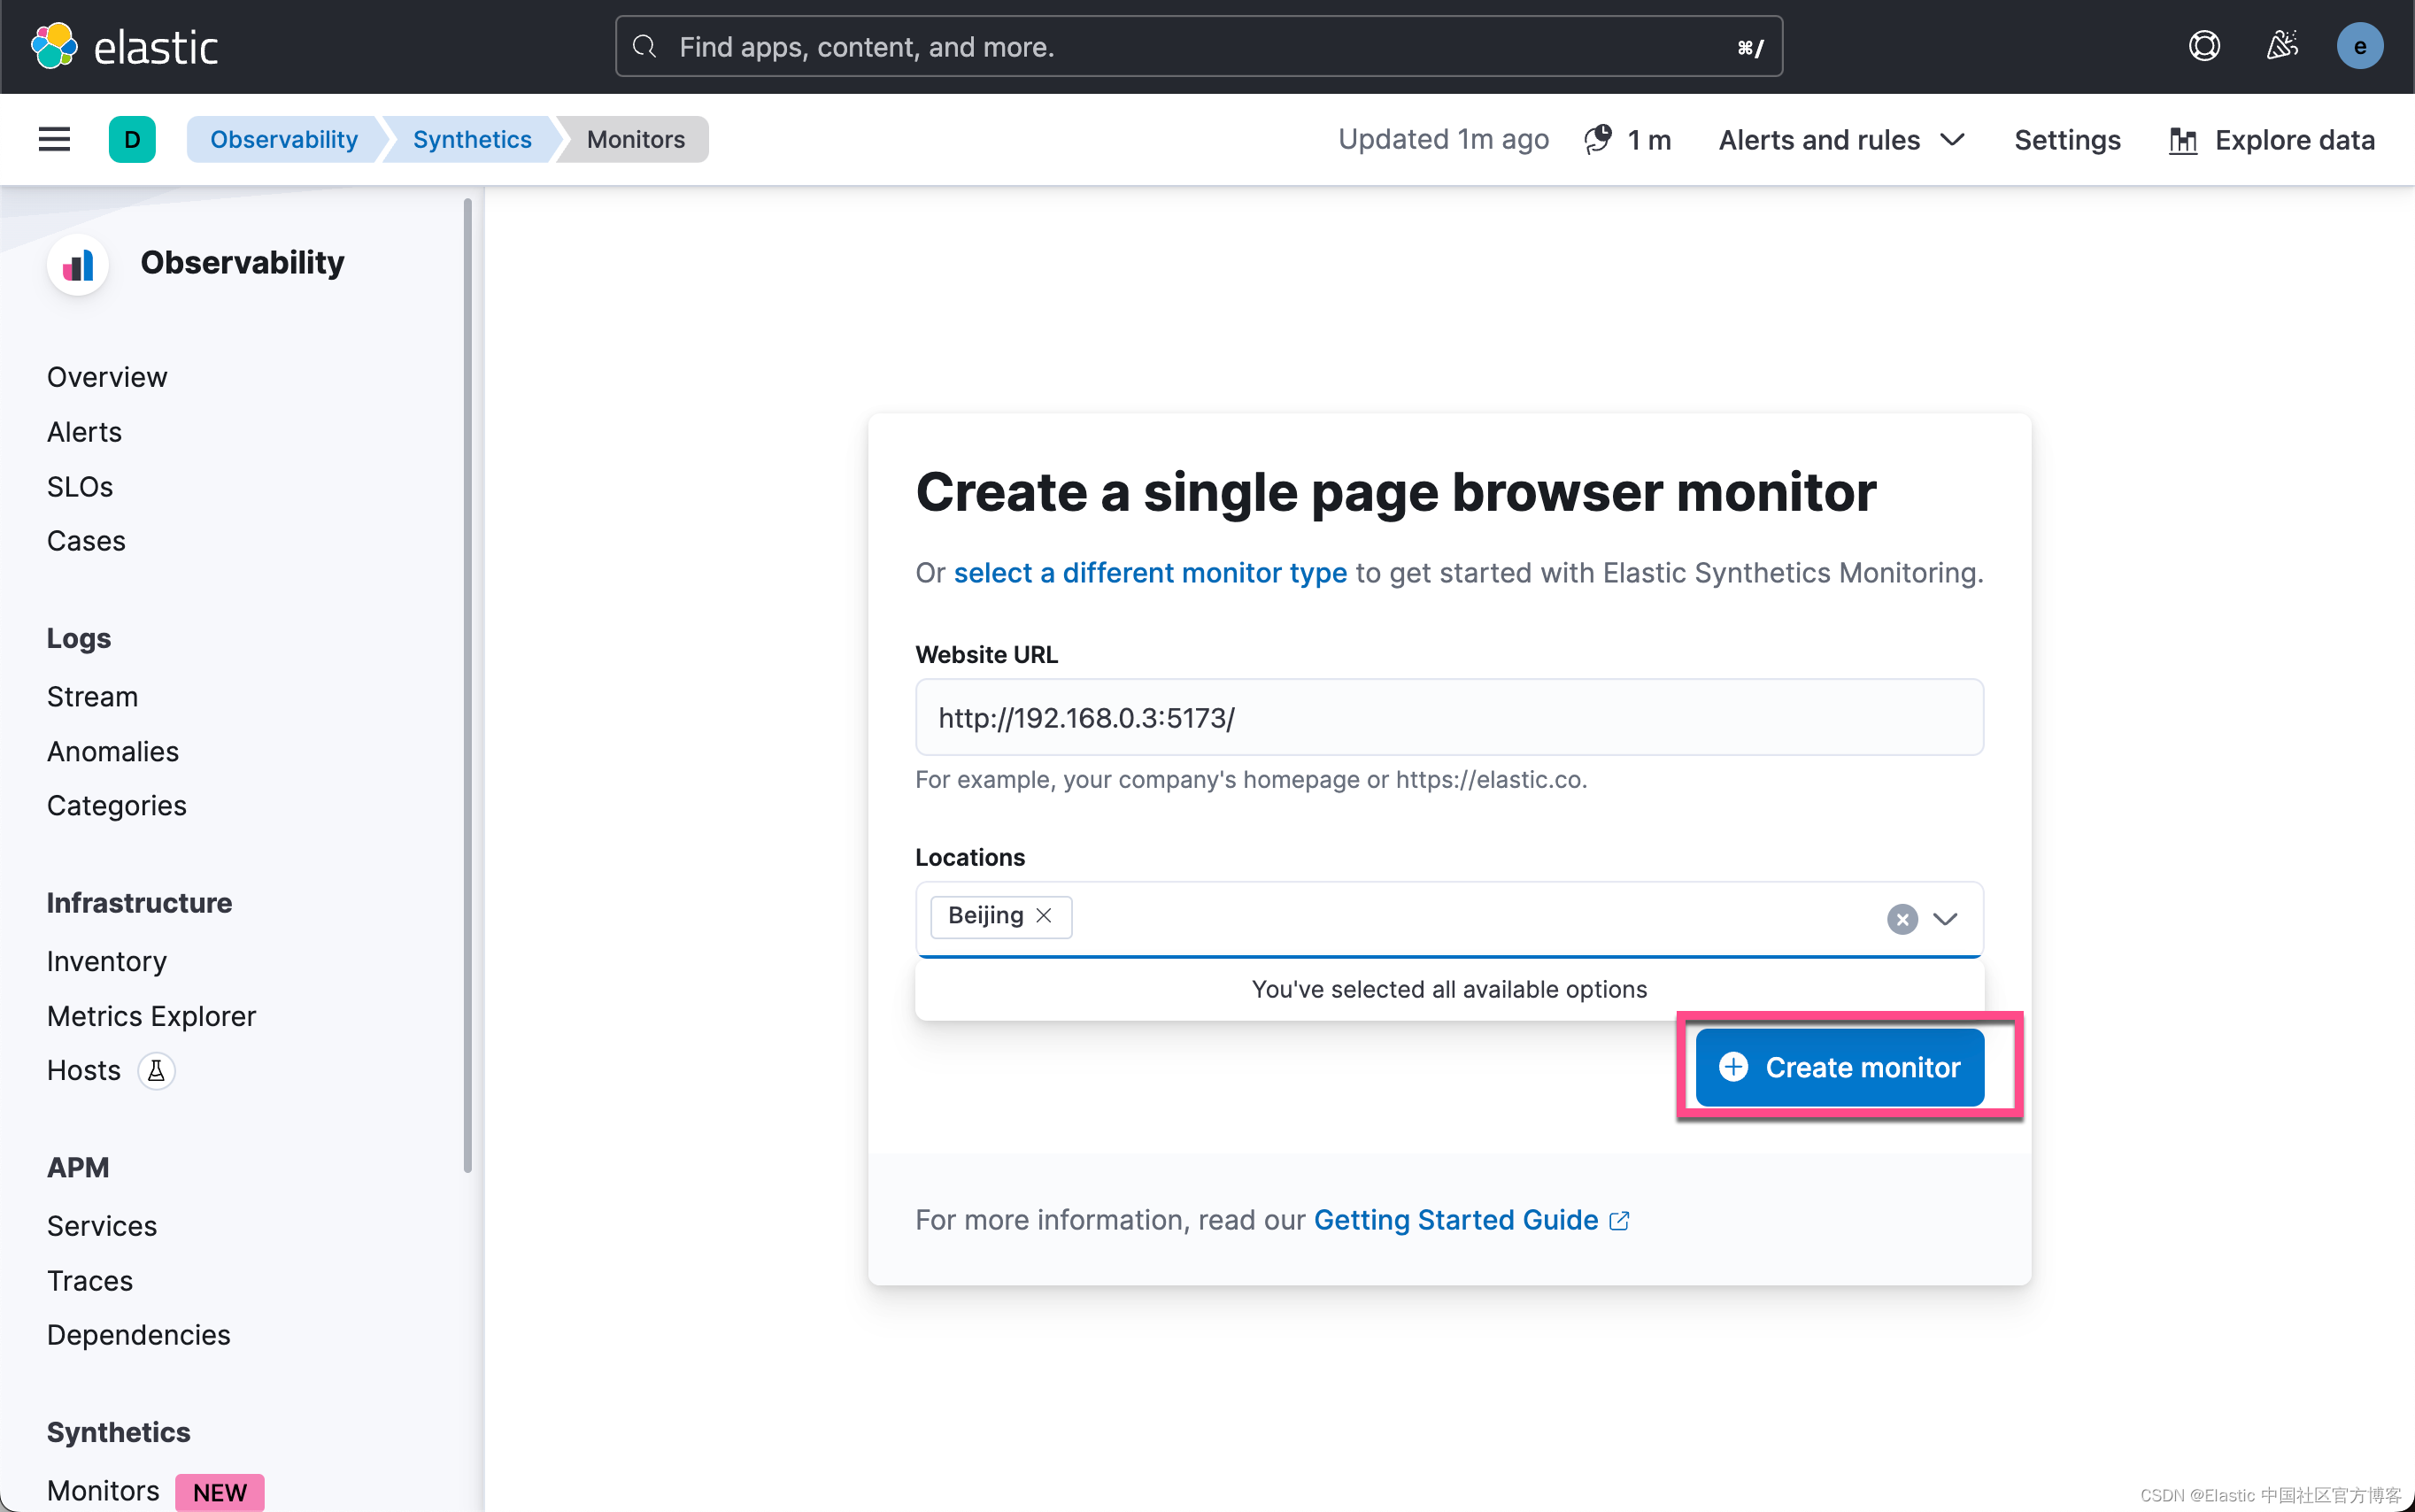

我们再次上传监测器:
$ pwd
/Users/liuxg/nodejs/synthetics-replicator
$ ls
LICENSE            jest.config.ts     nx.json            tsconfig.base.json
README.md          jest.preset.js     package-lock.json  vitest.config.ts
apps               libs               package.json
docs               node_modules       tools
$ npm run push

> [email protected] push
> cd apps/synthetics-replicator-tests && npx @elastic/synthetics push

⚠ Lightweight monitor schedules will be adjusted to their nearest frequency supported by our synthetics infrastructure.
> Pushing monitors for project: synthetics-replicator-tests
> Monitor Diff: Added(3) Updated(0) Removed(0) Unchanged(0)
> bundling 3 monitors
> creating or updating 3 monitors (6364ms)
✓ Pushed: http://127.0.0.1:5601/app/synthetics/monitors