Orange Pi 通过I2C总线连接LCD1602
前言
上一节通过Orange Pi gpio 直接控制1602,可以看出来缺点非常明显:Orange Pi IO 口占用过多
因为Orange Pi的GPIO口非常有限,所以这一章就来解决这个问题,采用 i2c转LCD1602的转接板( PCF85741)来减少Orange Pi 的GPIO占用
一、硬件及连线:
模块长这样子,网上找的图:

和1602连在一起是这样子,这个是焊接在一起的,也可以用杜邦线连接起来
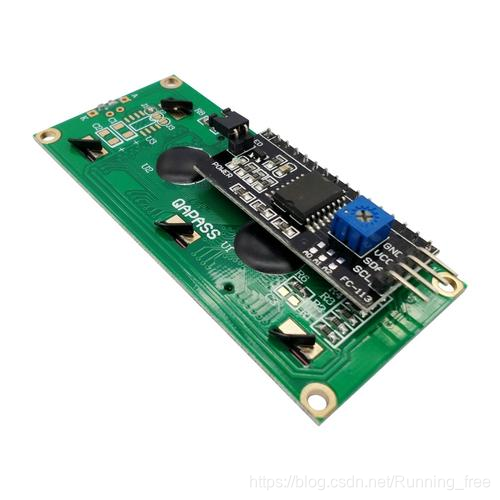
有了这货之后,连接香橙派就只需要两根数据线就可以了,如果不算电源线的话,加上电源线一共也才四根线,清爽多了
连线也是so easy,下面奉上接线方式(物理接口):
:---PCF85741---:   :---Orange Pi---:
    GND-------------06 GROUND
    VCC-------------04 5V
    SDA-------------03 SDA1
    SCL-------------05 SDA1
好了,完成上面的接线工作,就可以通电了。
连接电源打开树莓派,显示屏就会亮,同时在第一行显示一排黑方块。如果看不到黑方块或黑方块不明显,请调节i2c模块上的可调电阻,直到黑方块清晰显示。如果调节可调电阻还看不到方块,则可能你的连接有问题了,请检查连接,包括检查显示屏的引脚有没有虚焊。
二、使能I2C
由于我的系统是armbian的,比较方便,如果你装的是orangepi官网提供的ubuntu,建议你不要折腾了,换回armbian会让你省很多事。这是我含泪踩过的坑啊,内核都重新编译过了,心酸
废话不多说,先看看默认有没有使能i2c:
ls /dev | grep i2c
什么都没有,看来是没有使能i2c啊
接下来开启i2c,armbian有一个非常好用的工具,类似树莓派的raspi-config,它就是armbian-config
sudo armbian-config
忘了截图了,依次进入:system>>HardWare>>[ ]i2c0 ,按空格键选中i2c0,变成[* ]i2c0这样子,
然后选中save,reboot即可
再执行:
ls /dev | grep i2c
打印出 i2c-0 了,说明开启成功,接下来看一下i2c设备地址:
root@orangepi:~# sudo apt install i2c-tools

root@orangepi:~# i2cdetect -y 0
     0  1  2  3  4  5  6  7  8  9  a  b  c  d  e  f
00:          -- -- -- -- -- -- -- -- -- -- -- -- --
10: -- -- -- -- -- -- -- -- -- -- -- -- -- -- -- --
20: -- -- -- -- -- -- -- 27 -- -- -- -- -- -- -- --
30: -- -- -- -- -- -- -- -- -- -- -- -- -- -- -- --
40: -- -- -- -- -- -- -- -- -- -- -- -- -- -- -- --
50: -- -- -- -- -- -- -- -- -- -- -- -- -- -- -- --
60: -- -- -- -- -- -- -- -- -- -- -- -- -- -- -- --
70: -- -- -- -- -- -- -- --
可以看到我的i2c设备地址是0x27
这说明 已经成功连接了 LCD1602 。接下来就可以用 Python 控制 LCD1602 显示信息了。
三、驱动程序:
python驱动i2c需要python-smbus,先安装一下:
sudo apt-get install python3-smbus
接下来我们熟悉的套路,上代码,如下:
vim i2c_1602_test.py
#!/usr/bin/python
# coding:utf-8
'''
BIT     D7  D6  D5  D4  D3              D2  D1  D0
        |   |   |   |   |               |   |   |
LCD     D7  D6  D5  D4  BackLight       En  Rw  Rs

'''
import time
import smbus
import sys

Bl = 0B00001000  # backlight            0:off   1:on
En = 0B00000100  # Enable bit
Rw = 0B00000010  # Read/Write bit       0:write 1:read
Rs = 0B00000001  # Register select bit  0:cmd   1:data

LCD_WIDTH = 16    # Maximum characters per line
LCD_LINE_1 = 0x80 # LCD RAM address for the 1st line
LCD_LINE_2 = 0xC0 # LCD RAM address for the 2nd line

debug = 0

#创建一个smbus实例
BUS = smbus.SMBus(0)        # 0 代表 /dev/i2c-0, 1 代表 /dev/i2c-1 ,具体看使用的树莓派那个I2C来决定
LCD_ADDR = 0x27             #sudo i2cdetect -y -a 0

def main():
    global debug
    if len(sys.argv)>1:
        debug = 1
        print("turn on debug,welcom!")
    else:
        debug = 0
    init_lcd()
    while True:
        show_on_lcd(LCD_LINE_1, 0, '1234567890123456')
        show_on_lcd(LCD_LINE_2, 0, 'abcdefghijklmnop')
        time.sleep(3) # 3 second delay

        show_on_lcd(LCD_LINE_1, 0, 'blog.csdn.net')
        show_on_lcd(LCD_LINE_2, 0, 'Running_free')
        time.sleep(3) # 3 second delay

def send_command(comm):
    if debug:
        print("****************now send sommand******************")
        print("now send command >>>>>>>>>>>>>>>>>",hex(comm),"---",bin(comm))
    # Send bit7-4 firstly
    buf = comm & 0xF0 | Bl | En
    if debug:
        print(" high: ",bin(buf)),
#    buf |= (Bl | En)                                        # BL = 1, EN = 1, RW = 0, RS = 0
    BUS.write_byte(LCD_ADDR ,buf)
    time.sleep(0.002)
    buf &= 0xFB                                             # EN = 0
    if debug:
        print(" high_en: ",bin(buf)),
    BUS.write_byte(LCD_ADDR ,buf)

    # Send bit3-0 secondly
    buf = ((comm & 0x0F) << 4)| Bl | En
    if debug:
        print(" low: ",bin(buf)),
#    buf |= (Bl | En)                                        # BL = 1, EN = 1, RW = 0, RS = 0
    BUS.write_byte(LCD_ADDR ,buf)
    time.sleep(0.002)
    buf &= 0xFB                                             # EN = 0
    if debug:
        print(" low_en: ",bin(buf),"end<<<<<<<<<<<<<<<<<<<<<<")
    BUS.write_byte(LCD_ADDR ,buf)

def send_data(data):
    if debug:
        print("****************now send data******************")
        print("now send data --------------",hex(data),"---",bin(data))
    # Send bit7-4 firstly
    buf = data & 0xF0 | Bl | En | Rs
    if debug:
        print(" high: ",bin(buf)),
#    buf |= (Bl | En | Rs)                                   # BL = 1, EN = 1, RW = 0, RS = 1
    BUS.write_byte(LCD_ADDR ,buf)
    time.sleep(0.002)
    buf &= 0xFB                                             # EN = 0
    if debug:
        print(" high_en: ",bin(buf)),
    BUS.write_byte(LCD_ADDR ,buf)

    # Send bit3-0 secondly
    buf = ((data & 0x0F) << 4)| Bl | En | Rs
    if debug:
        print(" low: ",bin(buf)),
#    buf |= (Bl | En | Rs)                                   # BL = 1, EN = 1, RW = 0, RS = 1
    BUS.write_byte(LCD_ADDR ,buf)
    time.sleep(0.002)
    buf &= 0xFB                                             # EN = 0
    if debug:
        print(" low_en: ",bin(buf),"end------------------")
    BUS.write_byte(LCD_ADDR ,buf)

def init_lcd():
    if debug:
        print("****************now init******************")
    send_command(0x33) # Must initialize to 8-line mode at first
    time.sleep(0.005)
    send_command(0x32) # Then initialize to 4-line mode
    time.sleep(0.005)
    send_command(0x06) # Cursor move direction
    time.sleep(0.005)
    send_command(0x0C) # Enable display without cursor
    time.sleep(0.005)
    send_command(0x28) # 2 Lines & 5*7 dots
    time.sleep(0.005)
    send_command(0x01) # Clear Screen
    time.sleep(0.005)

def clear_lcd():
    if debug:
        print("****************now clear******************")
    send_command(0x01) # Clear Screen

def show_on_lcd(line,table,message):
    if debug:
        print("****************now show on lcd******************")
    # Send string to display
    message = message.ljust(LCD_WIDTH," ")
    send_command(line)
    for i in range(LCD_WIDTH):
        send_data(ord(message[i]))

if __name__ == '__main__':
    try:
        main()
    #except KeyboardInterrupt:
    except:
        pass
    finally:
        clear_lcd()
        show_on_lcd(LCD_LINE_1, 0, 'Goodbye!')
        BUS.close()
加了debug方便调试,运行python3 i2c_1602_test.py 后面不跟参数不打印debug信息,如果想打印debug信息,只需要后面跟一个参数即可,任何参数都ok,例:python3 i2c_1602_test.py 1 或者 python3 i2c_1602_test.py debug
#仅运行
python3 i2c_1602_test.py
#运行并打印debug信息
python3 i2c_1602_test.py debug

总结
如果1602没有显示,请检查线路是否有故障,杜邦线容易松动导致接触不良,传输数据就会出现问题,含着泪踩过的坑啊