一、配置文件优先级
在Springboot框架三s种配置文件的格式
- application.properties
- application.yml
- application.yaml
Springboot是支持多配置文件的,所以当我们使用两种配置文件配置相同参数时,Springboot会执行哪一个配置文件呢?这就是SpringBoot的配置优先级。
(一)另外的配置:
- Java系统属性配置
-Dserver.port=9000 - 命令行参数
--server.port=9001
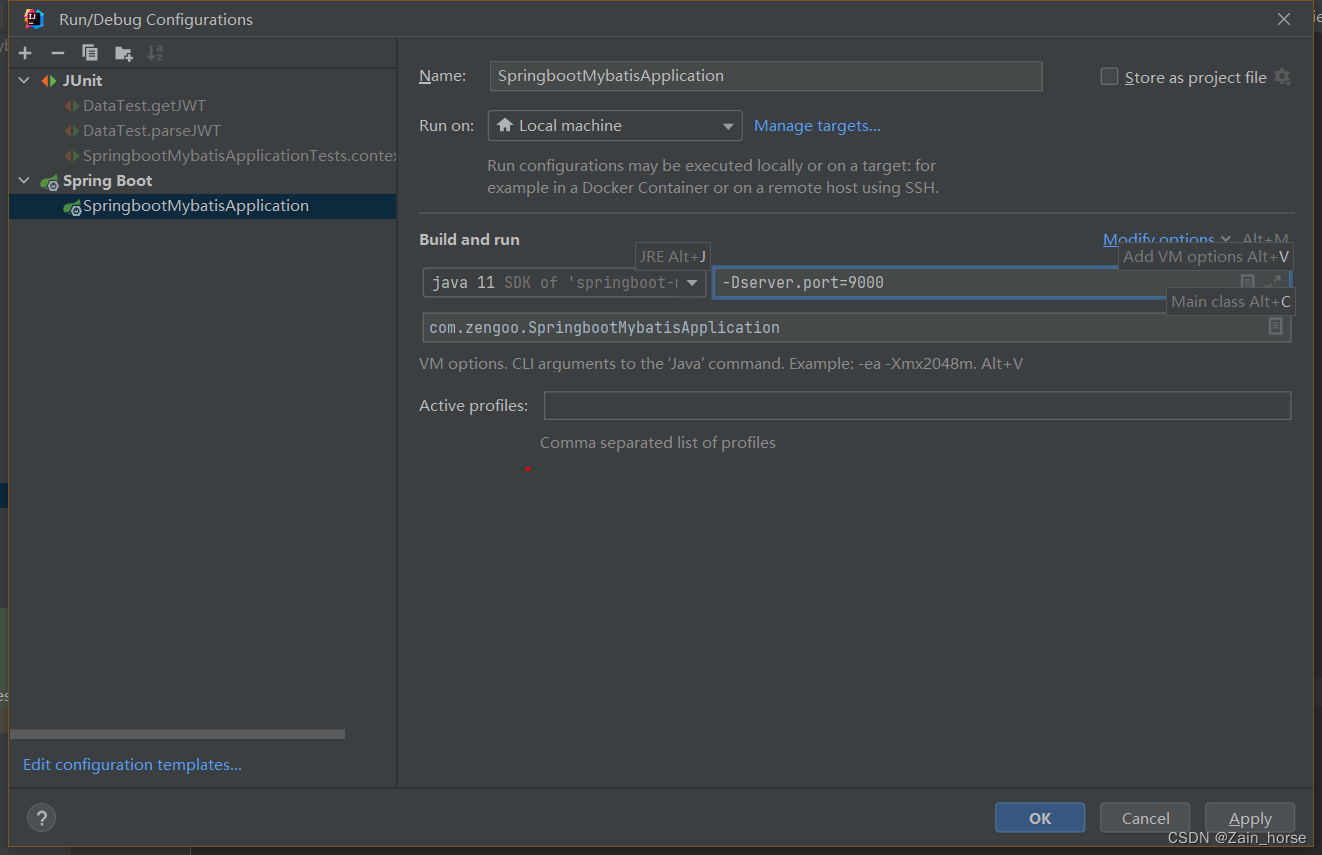
(二)配置优先级:命令行参数 > Java系统属性 > properties配置文件 > yml配置文件 > yaml配置文件
二、Bean管理
(一)获取Bean
前提: 默认情况下,Spring项目启动时,会把Bean都创建好放在IOC容器中。(主要针对于 默认的单例非延迟加载的bean而言)
- 获取方式一:根据name获取bean
Object getBean(String name) - 获取方式二:根据类型获取bean
<T> T getBean(Class<T> requiredType) - 获取方式三:根据name获取bean(带类型转换)
<T> T getBean(String name, Class<T> requiredType)
@SpringBootTest
public class GetBeanTest {


    //1、注入IOC容器
    @Autowired
    private ApplicationContext applicationContext;

    @Test
    public void getBeanTest(){


        //根据Bean对象的Name获取
        LoginController controller = (LoginController) applicationContext.getBean("loginController");
        System.out.println(controller);

        //根据类型进行获取
        LoginController controller1 = applicationContext.getBean(LoginController.class);
        System.out.println(controller1);

        //根据名称和类型进行获取
        LoginController controller2 = applicationContext.getBean("loginController",LoginController.class);
        System.out.println(controller2);
    }
}

打印输出结果:
com.zengoo.controller.LoginController@7e31062c
com.zengoo.controller.LoginController@7e31062c
com.zengoo.controller.LoginController@7e31062c
(二)Bean的作用域
1、Spring支持五种作用域,后三种在web环境生效
| 作用域 | 说明 |
|---|---|
| singleton | 容器内同名称的bean只有一个实例(默认) |
| prototype | 每次使用该 bean 时会创建新的实例(非单例) |
| request | 每个请求范围内会创建新的实例 |
| session | 每个会话范围内会创建新的实例 |
| application | 每个应用范围内会创建新的实例 |
2、配置作用域——使用注解 @Scope
@Scope("prototype")
@RestController
@RequestMapping("/api")
public class xxxController{


}
通过再一次多次获取Bean对象,可以预见每次取得的Bean对象是不同的。
//输出结果
com.zengoo.controller.LoginController@316d30ad
com.zengoo.controller.LoginController@3ea75b05
com.zengoo.controller.LoginController@30d5e37c
3、延迟Bean对象初始化 —— 使用 @Lazy
@Lazy这个注解可以延迟一个Bean对象初始化,一直到它第一次被使用才启动初始化方法。
@Lazy
@RestController
@RequestMapping("/api")
public class LoginController {


    @Autowired
    public UserService userService;

    @PostMapping("/login")
    public int login(@RequestBody User user){


        User u = userService.login(user);
        return u !=null?200:-1;
    }
}
4、注意事项
- 默认
singleton的bean,在容器启动时被创建,可以使用@Lazy注解来延迟初始化。 prototype的bean,每一次使用该bean的时候都会创建一个新的实例。- 实际开发中,绝大部分的Bean对象是单例的,也就是说绝大部分Bean不需要配置
scope属性。
(三)第三方Bean
1、概念: 如果要管理的bean对象来自第三方,是无法使用@Component及衍生注解声明bean的,就需要用到 @Bean注解。
2、使用方式
(1)直接定义在启动类中(不推荐)
@SpringBootApplication
public class SpringbooWebConfig2Application{


	//用代理的形式,返回新的Bean对象
	@Bean  //可以通过 name/value 属性重命名
	public SAXReader saxReader(){


		return new SAXReader;
	}
}
(2)定义配置类——集中管理
@Configuration
public class CommonConfig {


	@Bean
	public SAXReader saxReader(){


		return new SAXReader;
	}
}
3、注意事项
- 通过
@Bean注解的 name/valule 属性可以声明bean的名称,如果不指定,默认bean的名称就是方法名。 - 若第三方bean需要依赖其它bean对象,直接在bean定义方法中设置形参即可,容器根据类型自动装配。
三、SpringBoot原理
(一)起步依赖
- 实现原理: 依赖传递,一个起步依赖包含大多数都需要的依赖(例如spring-web,spring-webmvc等等)。
(二)自动配置
- 概念: SpringBoot的自动装配就是当spring容器启动后,一些配置类,bean对象自动存入IOC容器,不需要开发者手动声明。
- 实现原理:
- 实现方案一: 当我们引入第三方包时,IOC容器需要@Component注解并且开启注解扫描
@ComponentScan({"com.xx","com.xxxx}) - 实现方案二: 使用注解
@Import导入第三方包,该注解可以导入普通类,配置类,ImportSelector 接口实现类,使用@Enablexxxx注解获取bean对象,其中已经封装好了@Import
- 实现方案一: 当我们引入第三方包时,IOC容器需要@Component注解并且开启注解扫描
//1、@Import({TokenParser.class, HeaderConfig.class})
//2、@Import({MyImportSelector.class})
@SpringBootApplication
public class SpringbootWebConfig2Application{


}
普通类
public class TokenParser{


}
配置类
@Component
@Configuration
public class HeaderConfig{


}
ImportSelector类
//作用:将所有数组中的所有全类名匹配对象交给Spring容器管理
public class MyImportSelector implements ImportSelector {


	public String[] selectImports(AnnotationMetadata importingClassMetadata) {


		return new String[]{

    "xxx.xxx.xxxx"}
	}
}
- SpringBoot的自动配置原理
- 1、Springboot通过
@SpringBootApplication注解封装了@SpringBootConfiguration(封装了@Configuration,作用是声明当前类为配置类),@ComponentScan(组件扫描),@EnableAutoConfiguration(加载自动配置实现) - 2、
@EnableAutoConfiguration通过读取两个配置文件信息,通过@Import(AutoConfigurationImportSelector.class)加载到IOC容器中管理。 - 3、各个第三方bean会通过
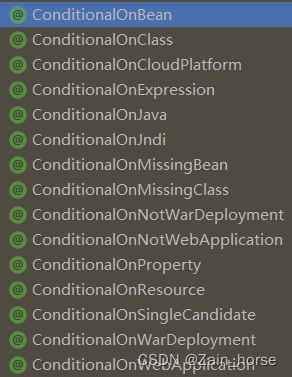
@Bean声明bean对象,通过Conditional衍生出的各子注解为bean对象加载到IOC容器增加条件。@ConditionalOnClass:判断环境中含有对应的类,才注册bean到IOC容器@ConditionalOnMissingBean:判断环境中没有对应的bean(根据 类型 — value 或 名称 — name 进行判断),才注册bean到IOC@ConditionalOnProperty:判断配置文件中有对应属性和值(属性名 —— name 和 havingValue —— 属性值),才注册bean到IOC容器- …
- 1、Springboot通过
关于@Conditional的衍生注解
读取的两个配置文件

(三)自定义起步依赖
1、自定义过程
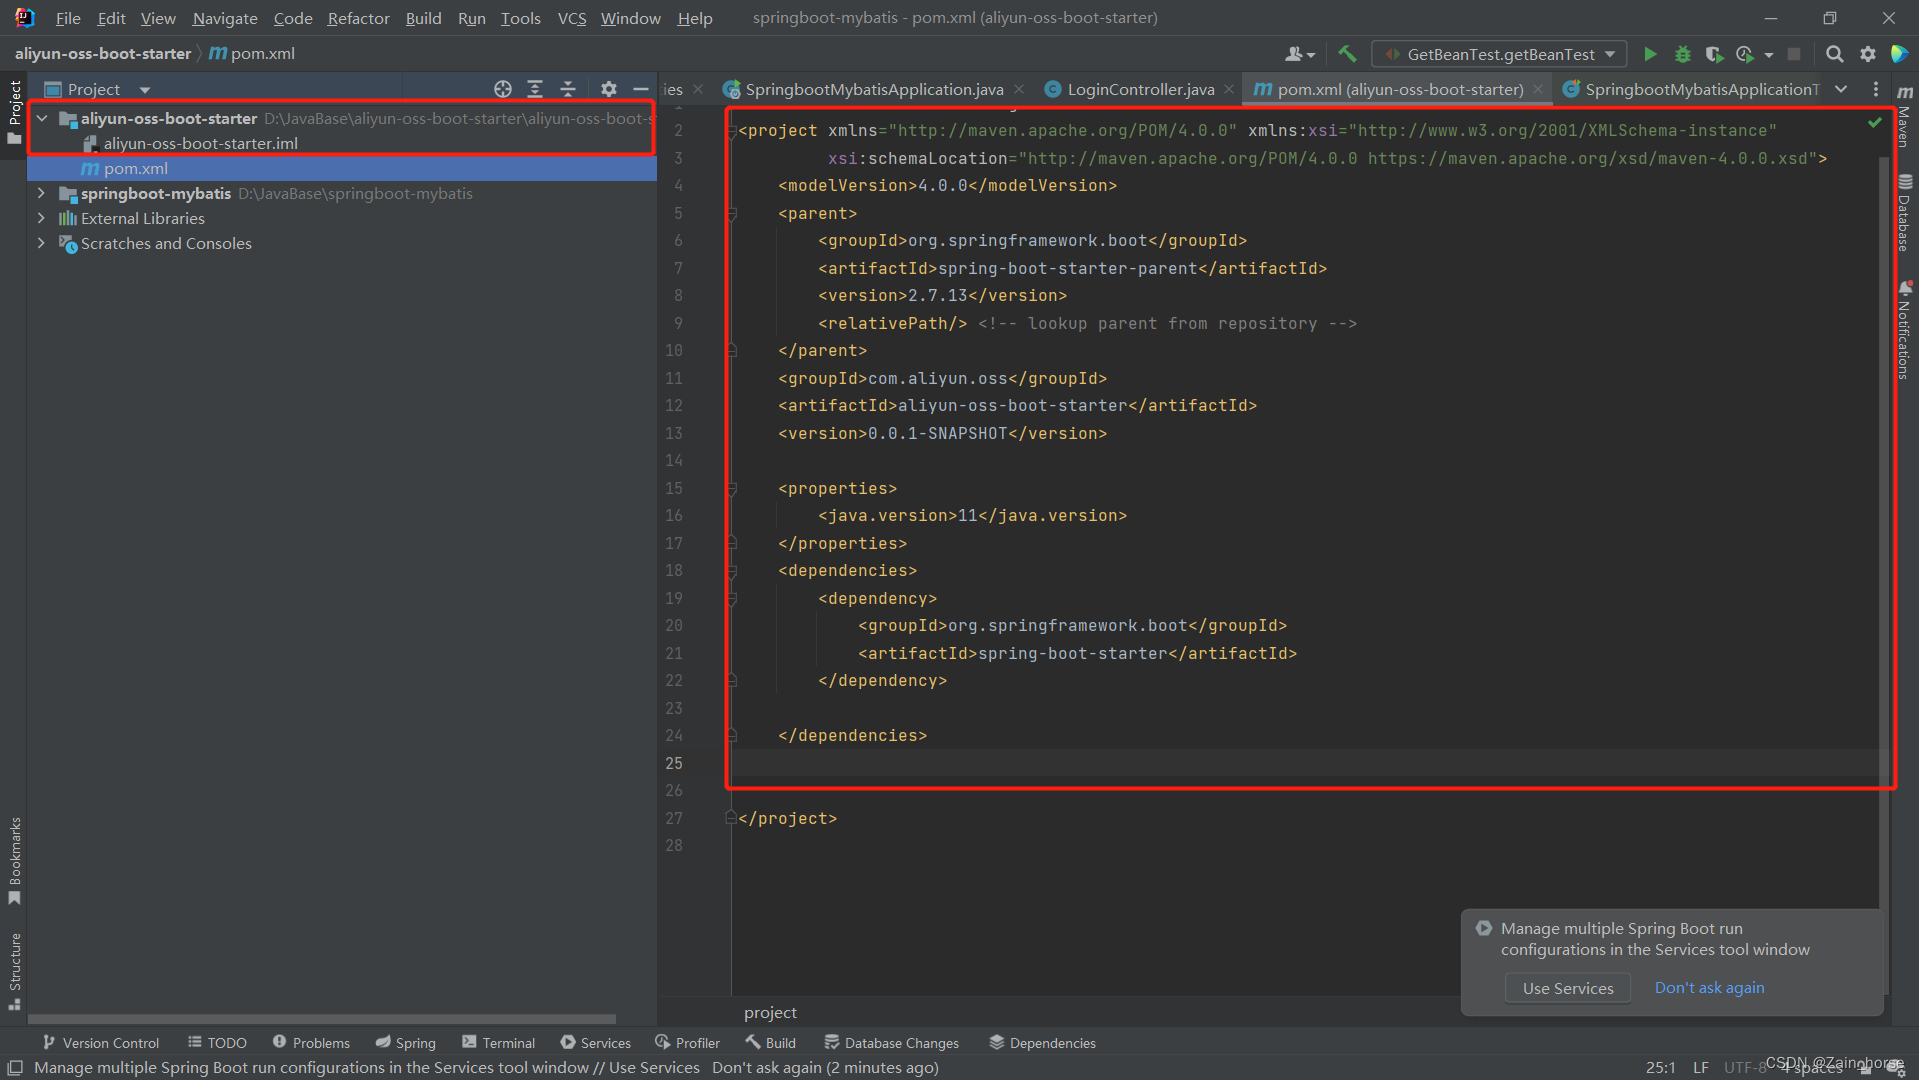
(1)创建新的依赖模块(仅支持管理依赖)
模块1:aliyun-oss-boot-starter
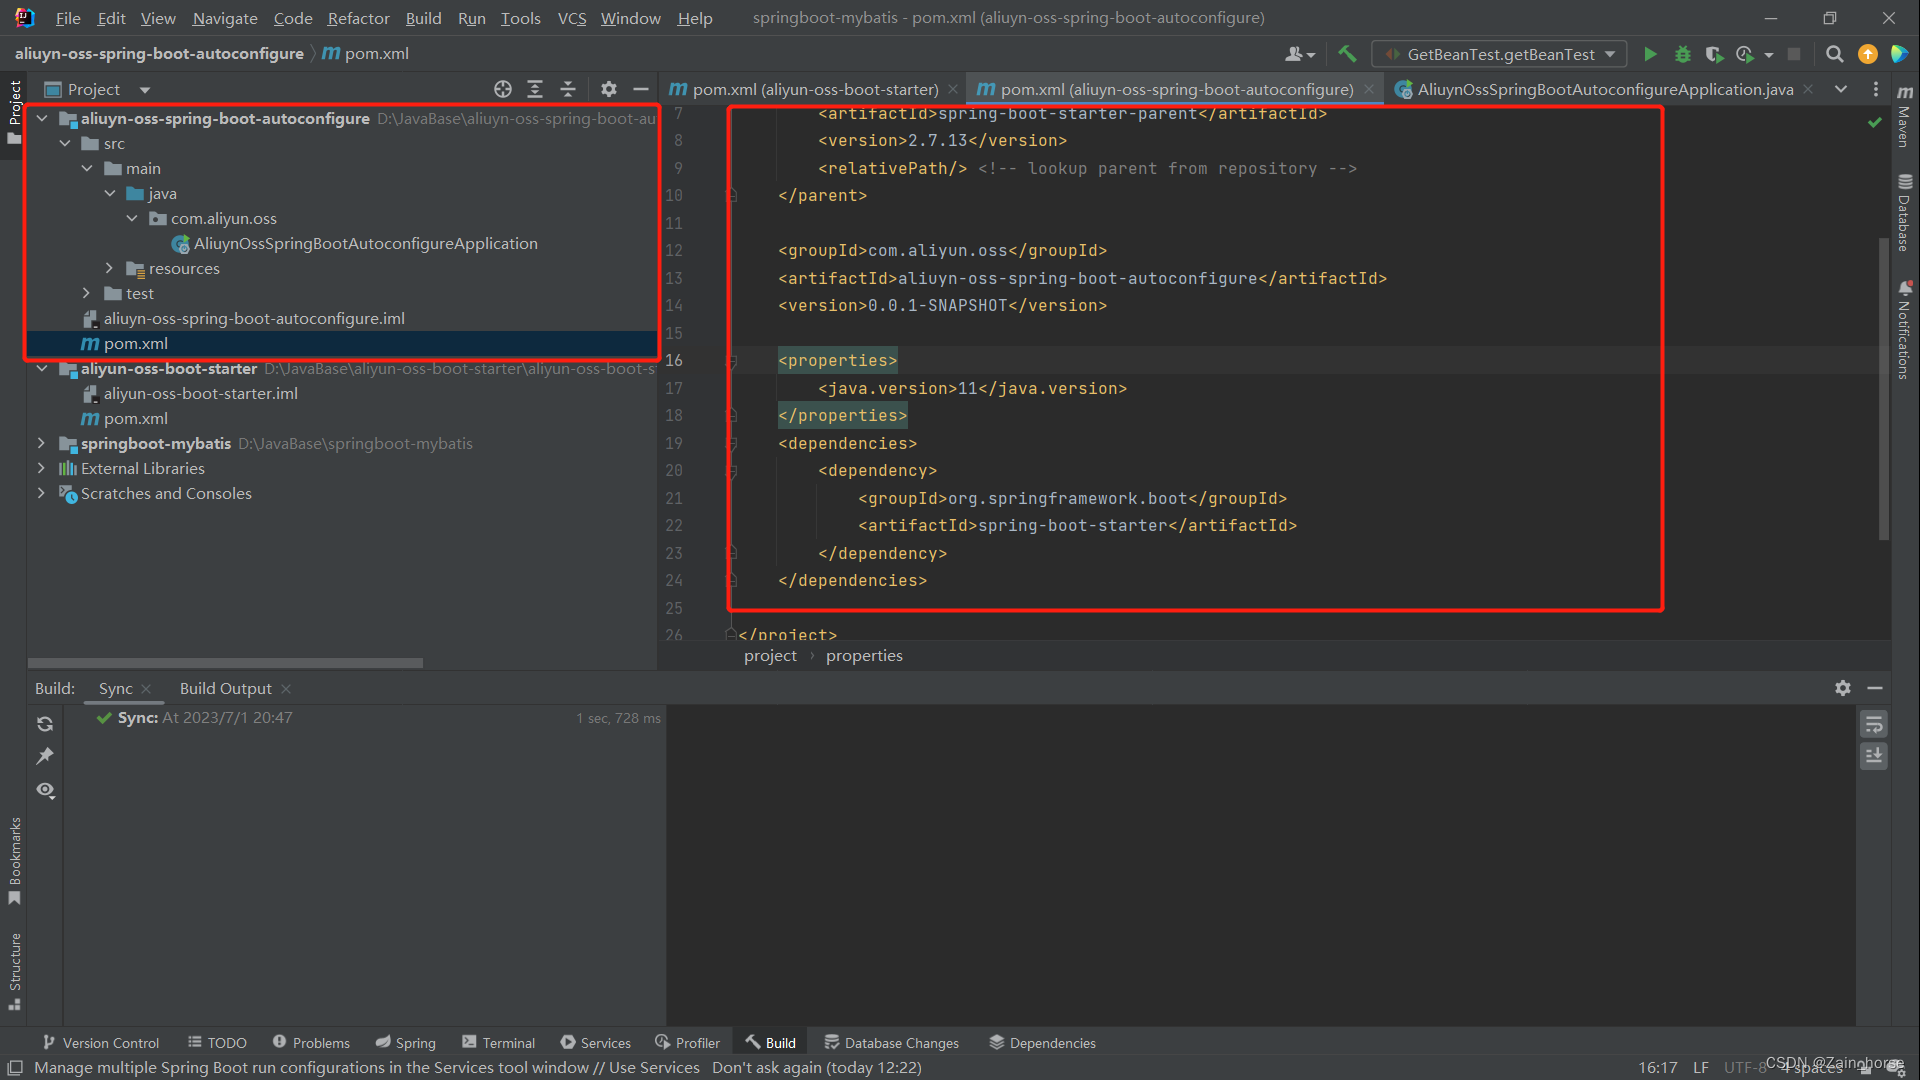
(2)自动配置模块
模块2:aliuyn-oss-spring-boot-autoconfigure
(3)启动依赖中加入自动配置类与其他依赖
        <dependency>
            <groupId>com.aliyun.oss</groupId>
            <artifactId>aliuyn-oss-spring-boot-autoconfigure</artifactId>
            <version>0.0.1-SNAPSHOT</version>
        </dependency>
        <!--        SpringWeb依赖-->
        <dependency>
            <groupId>org.springframework.boot</groupId>
            <artifactId>spring-boot-starter-web</artifactId>
        </dependency>

        <!--    lombok依赖-->
        <dependency>
            <groupId>org.projectlombok</groupId>
            <artifactId>lombok</artifactId>
            <version>1.18.26</version>
        </dependency>

        <dependency>
            <groupId>org.springframework.boot</groupId>
            <artifactId>spring-boot-configuration-processor</artifactId>
            <optional>true</optional>
        </dependency>
(4)自动配置模块中,引入阿里云OSS启动依赖
		<dependency>
            <groupId>com.aliyun.oss</groupId>
            <artifactId>aliyun-sdk-oss</artifactId>
            <version>3.15.1</version>
        </dependency>
        <dependency>
            <groupId>javax.xml.bind</groupId>
            <artifactId>jaxb-api</artifactId>
            <version>2.3.1</version>
        </dependency>
        <dependency>
            <groupId>javax.activation</groupId>
            <artifactId>activation</artifactId>
            <version>1.1.1</version>
        </dependency>
        <!-- no more than 2.3.3-->
        <dependency>
            <groupId>org.glassfish.jaxb</groupId>
            <artifactId>jaxb-runtime</artifactId>
            <version>2.3.3</version>
        </dependency>
(5)准备阿里云OSS工具类
@Data	//lombok方法,为成员变量添加get/set方法
public class AliOSSUtils {


    @Autowired
    private AliOSSProperties properties;

    public void upload(MultipartFile file) throws com.aliyuncs.exceptions.ClientException {


        String endpoint = properties.getEndpoint();
        String accessKey = properties.getAccessKey();
        String accessKeySecret = properties.getAccessKeySecret();
        String bucketName = properties.getBucketName();

        EnvironmentVariableCredentialsProvider credentialsProvider = CredentialsProviderFactory.newEnvironmentVariableCredentialsProvider();
        String objectName = "";

        // 创建OSSClient实例。
        OSS ossClient = new OSSClientBuilder().build(endpoint, credentialsProvider);

        try {


            String content = "Hello OSS";
            ossClient.putObject(bucketName, objectName, new ByteArrayInputStream(content.getBytes()));
        } catch (OSSException oe) {


            System.out.println("Caught an OSSException, which means your request made it to OSS, "
                    + "but was rejected with an error response for some reason.");
            System.out.println("Error Message:" + oe.getErrorMessage());
            System.out.println("Error Code:" + oe.getErrorCode());
            System.out.println("Request ID:" + oe.getRequestId());
            System.out.println("Host ID:" + oe.getHostId());
        } catch (ClientException ce) {


            System.out.println("Caught an ClientException, which means the client encountered "
                    + "a serious internal problem while trying to communicate with OSS, "
                    + "such as not being able to access the network.");
            System.out.println("Error Message:" + ce.getMessage());
        } finally {


            if (ossClient != null) {


                ossClient.shutdown();
            }
        }
    }
}
(6)准备阿里云OSS信息类
@Data
//扫描以 “aliyun.oss”为前缀的配置文件属性(是application.yml中的属性)
@ConfigurationProperties(prefix = "aliyun.oss")
public class AliOSSProperties {


    private String endpoint;
    private String accessKey;
    private String accessKeySecret;
    private String bucketName;
}
(7)准备阿里云OSS自动配置类
@Configuration	//声明配置类
@EnableConfigurationProperties(AliOSSProperties.class)	//声明自动配置的对象
public class AliOSSAutoConfiguration {


    public AliOSSUtils getAliOSSUtils(AliOSSProperties aliOSSProperties){


        AliOSSUtils aliOSSUtils = new AliOSSUtils();
        aliOSSUtils.setProperties(aliOSSProperties);
        return aliOSSUtils;
    }
}
(8)准备自动配置文件

(9)使用自定义的启动依赖
步骤一:引入起步依赖
        <dependency>
            <groupId>com.aliyun.oss</groupId>
            <artifactId>aliyun-oss-boot-starter</artifactId>
            <version>0.0.1-SNAPSHOT</version>
        </dependency>
步骤二:准备数据配置类
aliyun:
	oss:
		endpoint: xxx,
		accessKeyId: xxx,
		accessKeySecret: xxx,
		bucketName: xxx
步骤三: 直接使用阿里云OSS工具类
@Autowired
private AliOSSUtils aliOSSUtils;

@PostMapping("/upload")
public String upload(MultipartFile image) throws Exception{


	String url = aliOSSUtils.upload(image);
	return url;
}
总结自定义起步依赖
- 两个模块:starter模块 和 autoconfigure模块
- starter模块用来引入autoconfigure模块,不进行具体操作。
- autoconfigure模块