1 File 文件的常用基本操作
针对文件的操作, 主要以代码的形式演示, 比较简单, 记住即可;
public static void main(String[] args) {


        // 定义要操作的文件路径
        File file = new File("/Users/fuglee/Documents/TestIO");
        // 文件是否存在
        System.out.println("文件存在么? "+file.exists());
        // 查看文件是否是普通文件
        System.out.println("是普通文件么? " + file.isFile());
        // 查看文件是否是目录
        System.out.println("此文件是目录么? " + file.isDirectory());
    }
运行结果:
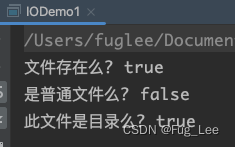
我建立的这个文件就是个目录文件, 常用指令如下:
- 判断文件是否存在:
file.exists; - 判断是否是普通文件:
file.isFile(); - 判断是否是目录文件:
file.isDirectory();
关于目录的有关操作;
- 创建一个目录文件:
file.mkdirs(); - 得到此目录文件的父路径:
file.getParent();
public static void main(String[] args) {


        File file = new File("/Users/fuglee/Documents/TestIO/test.dir");
        System.out.println("此目录文件是否存在? " + file.exists());
        // 创建目录文件
        file.mkdirs();
        System.out.println("此目录文件是否创建成功? " + file.exists());
        // 得到此目录文件的父路径
        System.out.println("父路径为: " + file.getParent());

    }
罗列出目录下的所有层级文件指令: file.listFiles(); 为了避免操作失败导致 main 方法不能够使用, 这里我们创建一个线程单独运行;
static class MyThread implements Runnable {


        @Override
        public void run() {


            File file = new File("/Users/fuglee/Documents/TestIO");
            listAllFiles(file);
        }
    }
    public static void main(String[] args) {


        // 加入一个线程防止此操作失败阻塞 main 方法
        Thread thread = new Thread(new MyThread());
        thread.start();
        System.out.println("开始文件的输出!");
    }

    // 递归的罗列出一个目录中的所有文件
    private static void listAllFiles(File file) {


        if (file.isDirectory()) {


            //如果是目录,就把目录中包含的文件都罗列出来.
            File[] files = file.listFiles();
            for (File f : files) {


                listAllFiles(f);
            }
        } else {


            // 把这个文件的路径直接打印出来
            System.out.println(file);
        }
    }

2 字符流和字节流
上面的操作只是针对于文件及目录的操作, 但是要想知道文件里面的内容, 就需要通过流的操作来完成; 网络传输或者是磁盘中我们保存数据的类型都是字节, 而所有磁盘中的数据必须先读取到内存后才能进行操作, 这时候内存就会把字节变成字符; 因此字节流和字符流最本质的区别: 字节流是原生的操作, 而字符流则是经过处理后的操作.
无论是字节流还是字符流其基本的操作流程是差不多的, 如下:
- 第一步: 根据文件路径创建 File 类对象;
- 第二步: 根据字节流或者字符流的子类实例化父类对象;
- 第三步: 进行数据的读取或写入操作;
- 第四步: close() 关闭流.
2.1 字节输出流与输入流
public static void outPut(String path) throws IOException {
File file = new File(path);
// 需要保证父目录存在, 如果不存在就创建
if(!file.getParentFile().exists()) {
file.getParentFile().mkdirs();
}
// OutputStream 是一个抽象类, 需要通过子类进行实例化
OutputStream outputStream = new FileOutputStream(file);
// 输出到文件的内容
String str = "今天天气不错";
// 将内容转换为字节并写入
outputStream.write(str.getBytes());
// 一定要记得关闭
outputStream.close();
}
public static void inPut(String path) throws IOException {
File file = new File(path);
// 判断文件是否存在, 存在才可以操作
if (file.exists()) {
InputStream inputStream = new FileInputStream(file);
// 1024 为每次最多读取的数量
byte[] msg = new byte[1024];
int len = inputStream.read(msg);
String result = new String(msg,0,len);
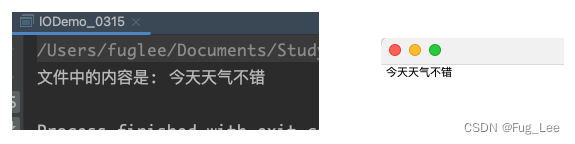
System.out.println("文件中的内容是: " + result);
inputStream.close();
}
}
public static void main(String[] args) throws IOException {
// 将内容写到文件中
String path = "/Users/fuglee/Documents/TestIO/1.txt";
outPut(path);
// 将文件中的内容读出来
inPut(path);
}
运行结果:
关于上面的代码做几点说明:
- 由于 OutputStream 是一个抽象类, 所以需要通过子类进行实例化, 这里只需要关心子类的构造方法; 如果是 OutputStream 就用 FileOutputStream 类来处理; 如果是 InputStream 就用 FileInputStream 类来处理;
- 在往文件中写入的时候要将内容转换成字节数组.
2.2 字符输出流与输入流
字符流和字节流的操作差不多, 基本流程几乎一致;
g result = new String(data, 0 , len);
            System.out.println("文件中的内容为: " + result);
            in.close();
        }
    }
    public static void myWriter(String path) throws IOException {


        File file = new File(path);
        // 要保证父目录存在
        if (!file.getParentFile().exists()) {


            // 如果不存在就创建
            file.getParentFile().mkdirs();
        }
        String mas = "明天去上班";
        Writer out = new FileWriter(file);
        out.write(mas);
        out.close();
    }
    public static void main(String[] args) throws IOException {


        String path = "/Users/fuglee/Documents/TestIO/1.txt";
        myWriter(path);
        // 读取内容
        myReader(path);
    }
运行结果:

Writer 和 Reader 同样也是一个抽象类, 需要通过子类进行实例化.
2.3 关于字节流和字符流的区别
- 通过上面的代码可以看得出字节流和字符流的实际使用步骤差不太多, 但是在实际开发过程中还是建议使用字节流进行数据的读或者取, 因为字符流针对的是处理中文, 只有在处理中文时才考虑字符流;
- 所有的字符都是通过内存缓冲区来进行处理, 所有字符流的操作, 无论是写入还是输出, 数据都是先保存在缓存中, 如果字符流不关闭, 数据就有可能保存在缓存区中而没有输出到目标源, 这种情况下必须强制刷新才能得到完整的数据;
- 如果要处理的是图片 / 音乐等都可以使用字节流, 而字符流就不可以;
- 字符流和字节流之间是可以转换的:
-
OutputStreamWriter: 可以将字节输出流变为字符输出流; InputStreamReader 可以将字节输入流转变为字符输入流.
3 文件的拷贝的几个版本
关于文件拷贝这里主要以字节流的形式展示, 实际开发使用字节流的频率要高, 毕竟字符流还是有局限性的;
版本一:
public static void main(String[] args) throws IOException {


        copyFIle();
    }
    private static void copyFIle() {


        try (FileInputStream fileInputStream = new FileInputStream("/Users/fuglee/Documents/TestIO/1.txt");
             FileOutputStream fileOutputStream = new FileOutputStream("/Users/fuglee/Documents/TestIO/2.txt")) {


            byte[] buffer = new byte[1024];
            int len = -1;
            while ((len = fileInputStream.read(buffer)) != -1) {


                fileOutputStream.write(buffer,0,len);
            }
        } catch ( IOException e) {


            e.printStackTrace();
        }
    }
关于字节流的操作步骤大体一致, 代码说明如下:
- 先打开文件才能够进行读写操作; 单词读取的内容是存在上限的, 要想把文件整个都读完, 需要搭配循环来使用;
- len 如果等于 -1, 就代表读取结束, 循环也就结束了;
- 读取成功后, 将读到的内容写入到另外一个文件中即可.
版本二:
public static void main(String[] args) throws IOException {


        copyFile();
    }

    private static void copyFile() {


        try( BufferedInputStream bufferedInputStream = new BufferedInputStream(new FileInputStream("/Users/fuglee/Documents/TestIO/1.txt"));
             BufferedOutputStream bufferedOutputStream = new BufferedOutputStream(new FileOutputStream("/Users/fuglee/Documents/TestIO/2.txt"))) {


            int len = -1;
            byte[] buffer = new byte[1024];
            while (( len = bufferedInputStream.read(buffer)) != -1) {


                bufferedOutputStream.write(buffer,0,len);
            }
        } catch (IOException e) {


            e.printStackTrace();
        }
    }
这里用到了缓冲区, 读取比较小的文件可能缓冲区看不出优势, 但是针对一个比较大的文件, 如果不使用缓冲区的话耗时会比较大, 因此加入缓冲区可以减少时间的消耗; 其它的步骤和版本一没什么差别.
附录: 关于字符流的文件拷贝代码如下:
版本一: 普通文件拷贝
public static void main(String[] args) {


        copyFile();
    }

    private static void copyFile() {


        try (BufferedReader bufferedReader = new BufferedReader(new FileReader("/Users/fuglee/Documents/TestIO/1.txt"));
             BufferedWriter bufferedWriter = new BufferedWriter(new FileWriter("/Users/fuglee/Documents/TestIO/2.txt"))) {


            char[] buffer = new char[1024];
            int len = -1;
            while ((len = bufferedReader.read(buffer)) != -1) {


                bufferedWriter.write(buffer, 0, len);
            }
        } catch (IOException e) {


            e.printStackTrace();
        }
    }
版本二: 按行读取方式 (可以用于限定只取前 n 行的数据)
public static void main(String[] args) {


        copyFile();
    }

    private static void copyFile() {


        try (BufferedReader bufferedReader = new BufferedReader(new FileReader("/Users/fuglee/Documents/TestIO/1.txt"));
             BufferedWriter bufferedWriter = new BufferedWriter(new FileWriter("/Users/fuglee/Documents/TestIO/2.txt"))) {


            String line = " ";
            while ((line = bufferedReader.readLine()) != null) {


                System.out.println("line: " + line);
                bufferedWriter.write(line + "\n");
            }
        } catch (IOException e) {


            e.printStackTrace();
        }
    }
运行结果:
