观看本文 首先 您需要做好Spring aop的准备工作 具体可以参考我的文章
java Spring aop入门准备工作
首先 我们创建一个包 我这里叫 Aop
然后在Aop包下创建一个类 叫 User
参考代码如下
package Aop;

public class User {


    public void add(){


        System.out.println("add......");
    }
}
这里 我们简单声明了一个add方法 然后 接下来 我们就要对他进行增强
然后 我们在User类的同目录下创建一个类 叫 UserProxy
参考代码如下
package Aop;

public class UserProxy {


    public void before() {


        System.out.println("before...");
    }
}
然后 我们在src目录下创建一个 bean.xml
参考代码如下
<?xml version="1.0" encoding="UTF-8"?>
<beans xmlns="http://www.springframework.org/schema/beans"
       xmlns:xsi="http://www.w3.org/2001/XMLSchema-instance"
       xmlns:context="http://www.springframework.org/schema/context"
       xmlns:aop="http://www.springframework.org/schema/aop"
       xsi:schemaLocation="http://www.springframework.org/schema/beans http://www.springframework.org/schema/beans/spring-beans.xsd
                           http://www.springframework.org/schema/context http://www.springframework.org/schema/context/spring-context.xsd
                           http://www.springframework.org/schema/aop http://www.springframework.org/schema/aop/spring-aop.xsd">
       <context:component-scan base-package="Aop"></context:component-scan>
</beans>
这里就一段 context:component-scan 指定目录 为 src下的 Aop目录 对这个包下开启注解扫描
然后 我们用之前的 Component 创建UserProxy和User的类对象
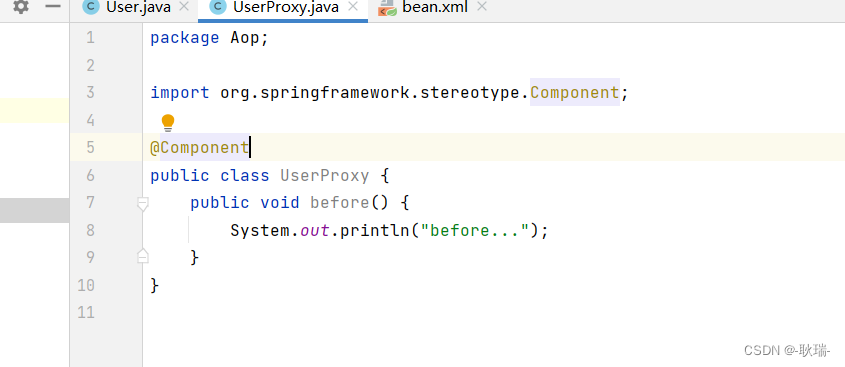
然后 我们给 UserProxy 类添加一个注解 Aspect
表示本类声明了代理
package Aop;

import org.aspectj.lang.annotation.Aspect;
import org.springframework.stereotype.Component;

@Component
@Aspect
public class UserProxy {


    public void before() {


        System.out.println("before...");
    }
}
然后修改 bean.xml
<?xml version="1.0" encoding="UTF-8"?>
<beans xmlns="http://www.springframework.org/schema/beans"
       xmlns:xsi="http://www.w3.org/2001/XMLSchema-instance"
       xmlns:context="http://www.springframework.org/schema/context"
       xmlns:aop="http://www.springframework.org/schema/aop"
       xsi:schemaLocation="http://www.springframework.org/schema/beans http://www.springframework.org/schema/beans/spring-beans.xsd
                           http://www.springframework.org/schema/context http://www.springframework.org/schema/context/spring-context.xsd
                           http://www.springframework.org/schema/aop http://www.springframework.org/schema/aop/spring-aop.xsd">
       <context:component-scan base-package="Aop"></context:component-scan>
       <aop:aspectj-autoproxy></aop:aspectj-autoproxy>
</beans>
加上了一行 aop:aspectj-autoproxy</aop:aspectj-autoproxy> 表示开启Aspect注解的扫描
然后我们修改 UserProxy 类代码如下
package Aop;

import org.aspectj.lang.annotation.Aspect;
import org.aspectj.lang.annotation.Before;
import org.springframework.stereotype.Component;

@Component
@Aspect
public class UserProxy {


    @Before(value = "execution(* Aop.User.add(..))")
    public void before() {


        System.out.println("before...");
    }
}
这里 我们将before方法 加上了Before注解 而这里就加了一个切入点表达式
规范为 execution 类型用*通用代替 然后 全路径 最后跟强化方法名 参数用…代替
然后 我们来测试一下效果
我们在src下创建测试类 参考代码如下
import Aop.User;
import org.springframework.context.ApplicationContext;
import org.springframework.context.support.ClassPathXmlApplicationContext;

public class text {


    public static void main(String args[]) {


        ApplicationContext context = new ClassPathXmlApplicationContext("bean.xml");
        User user = context.getBean("user", User.class);
        user.add();
    }
}
运行结果如下
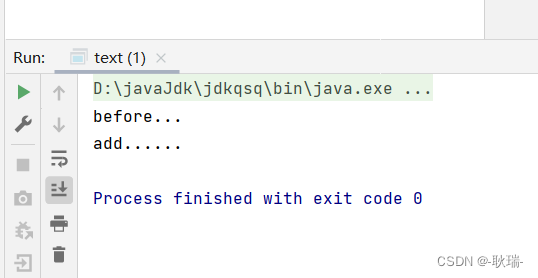
这里 我们测试类只是获取User 类对象 并调用了里面的 add方法
但当前这个add方法已经被before方法代理了
Before注解 表示在方法执行前执行 表示 被Before 代理的方法 执行前 Before注解声明的方法会先执行
其实相比于加强 我更愿意接受说这个是给方法加了个生命周期 执行前做什么 执行后做什么之类的
当然before注解指的就是被代理方法执行前执行 还有其他代理方式