1、vscode下载并安装。
Visual Studio Code - Code Editing. Redefined
2、安装插件。
在vscode中按ctrl+shift+x快捷键打开extension的界面。
输入python关键字,注意选择Micorosoft的。

3、创建python代码。
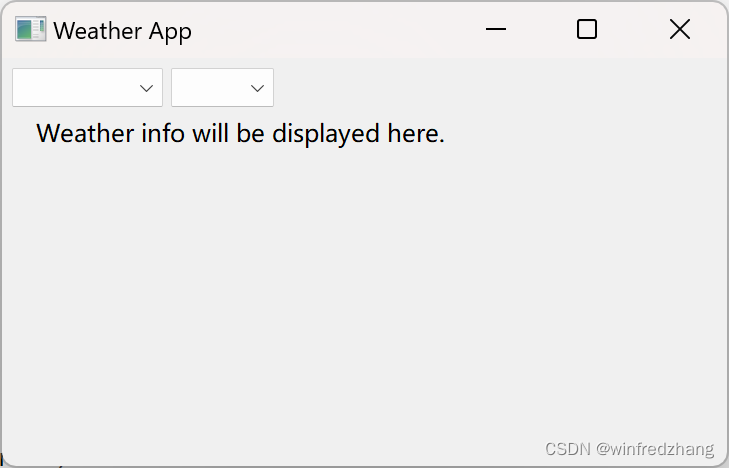
C:\pythoncode\weather.py
扫描二维码关注公众号,回复:
15649136 查看本文章

import wx
import requests

API_KEY = "your_openweathermap_api_key"

class WeatherApp(wx.Frame):
    def __init__(self, *args, **kw):
        super(WeatherApp, self).__init__(*args, **kw)
        self.init_ui()

    def init_ui(self):
        panel = wx.Panel(self)
        vbox = wx.BoxSizer(wx.VERTICAL)

        hbox1 = wx.BoxSizer(wx.HORIZONTAL)
        self.country_choice = wx.Choice(panel, choices=["Country1", "Country2"])
        hbox1.Add(self.country_choice, flag=wx.RIGHT, border=8)
        self.city_choice = wx.Choice(panel, choices=["City1", "City2"])
        hbox1.Add(self.city_choice, flag=wx.RIGHT, border=8)
        vbox.Add(hbox1, flag=wx.EXPAND | wx.LEFT | wx.RIGHT | wx.TOP, border=10)

        hbox2 = wx.BoxSizer(wx.HORIZONTAL)
        self.weather_icon = wx.StaticBitmap(panel)
        hbox2.Add(self.weather_icon, flag=wx.RIGHT, border=8)
        self.weather_text = wx.StaticText(panel, label="Weather info will be displayed here.")
        hbox2.Add(self.weather_text, flag=wx.RIGHT, border=8)
        vbox.Add(hbox2, flag=wx.EXPAND | wx.LEFT | wx.RIGHT | wx.TOP, border=10)

        panel.SetSizer(vbox)

        self.Bind(wx.EVT_CHOICE, self.on_city_selected, self.city_choice)

        self.SetSize((400, 200))
        self.SetTitle("Weather App")
        self.Centre()

    def on_city_selected(self, event):
        country = self.country_choice.GetStringSelection()
        city = self.city_choice.GetStringSelection()
        weather_data = self.get_weather_data(city, country)
        self.display_weather_data(weather_data)

    def get_weather_data(self, city, country):
        url = f"http://api.openweathermap.org/data/2.5/weather?q={city},{country}&appid={API_KEY}"
        response = requests.get(url)
        return response.json()

    def display_weather_data(self, weather_data):
        description = weather_data["weather"][0]["description"]
        icon_id = weather_data["weather"][0]["icon"]
        icon_url = f"http://openweathermap.org/img/wn/{icon_id}.png"
        response = requests.get(icon_url)

        weather_icon = wx.Image(io.BytesIO(response.content), wx.BITMAP_TYPE_ANY).ConvertToBitmap()
        self.weather_icon.SetBitmap(weather_icon)
        self.weather_text.SetLabel(description)

def main():
    app = wx.App()
    frame = WeatherApp(None)
    frame.Show()
    app.MainLoop()

if __name__ == "__main__":
    main()
安装wx和requests的模块,并升级pip的版本。
pip install wxPython requests结果:

python.exe -m pip install --upgrade pip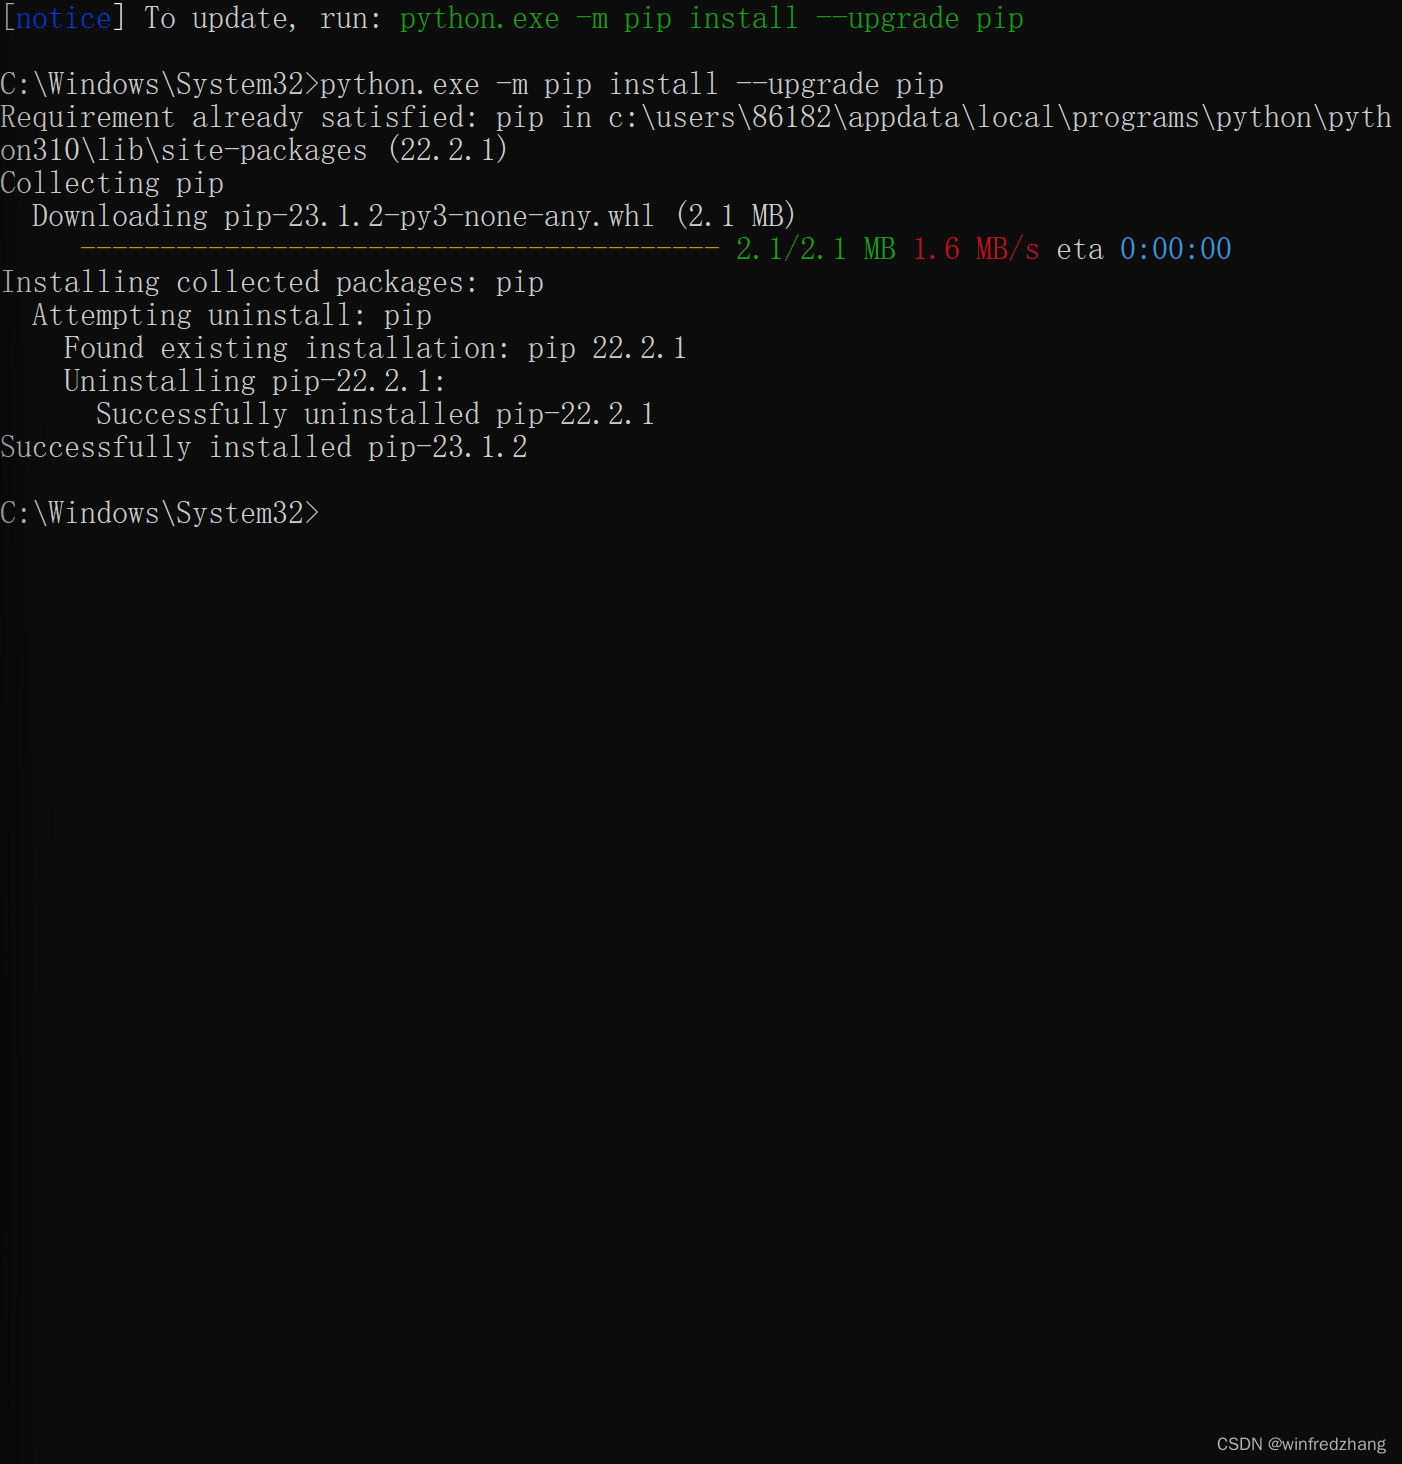
4、运行。