Vue组件的三要素
1. props参数
2. slot定制插槽
3. event自定义事件
基本组件开发
创建一个.vue文件,其中包含template、script以及style:
<template>
  <div class="headComponent">
    {

   { msg }}
  </div>
</template>

<script>
export default {
    props:['data','type'],
    inheritAttrs: false,
    data(){
        return{
            msg:'',
        }
    }
}
</script>
<style scoped>

</style>
至此就完成一个基本的组件了,要想使用这个组件,就需要在其他js文件中引入并注册:
import Head from '../components/headComponent.vue'如何封装一个公共组件?
- 首先在src目录下新建一个Components文件夹。
- 新建要封装的组件名为子级文件夹
- 子级文件夹下新建index.vue文件 存放要封装的公共组件部分
- 最后在Components文件夹下 新建index.js文件
- 并且注册公共组件到全局
import pageTools from './pageTools/index'

export default {
  install(Vue) {
    Vue.component('pageTools', pageTools)

  }
}
这样就可以在其它组件中不用导入组件就可使用公共组件
< pageTools></ pageTools>
组件之间的数据传递
*父子组件通信
子组件:
父组件:
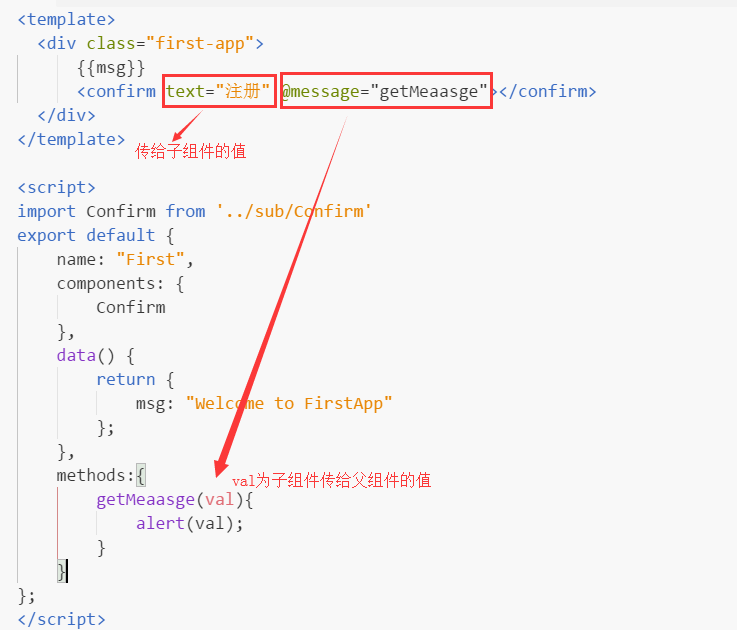
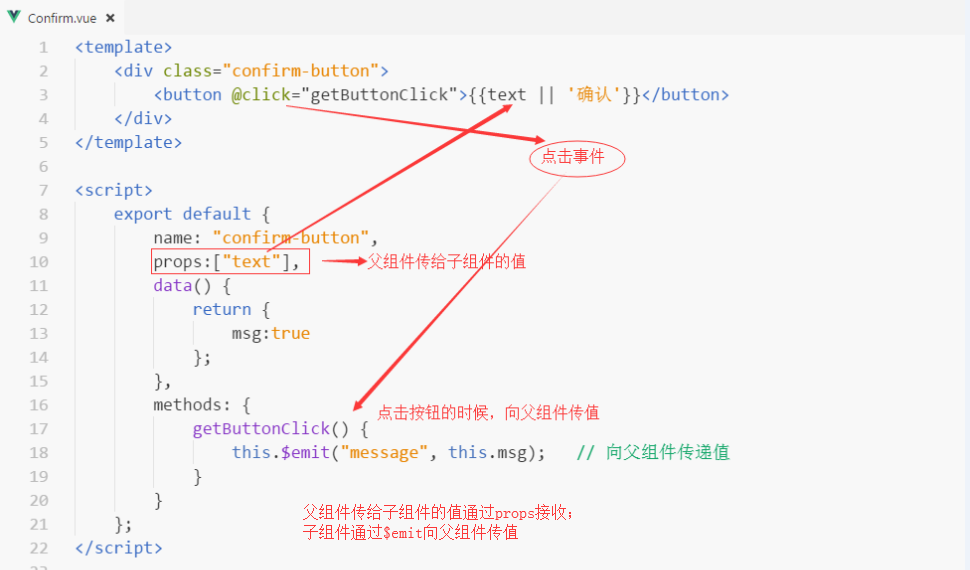
1. 父组件向子组件中传递数据
父组件通过属性的形式向子组件传递数据,子组件使用props接收数据,但是通用组件的应用场景比较复杂,对 props 传递的参数应该添加一些验证规则,即:
props: {
    propA: Number,  // 基础类型检测 (`null` 意思是任何类型都可以)
    propB: [String, Number],   // 多种类型
    propC: {  // 必传且是字符串
      type: String,
      required: true
    },
    propD: {   // 数字,有默认值
      type: Number,
      default: 100
    },
    propE: {   // 数组/对象的默认值应当由一个工厂函数返回
      type: Object,
      default: function () {
        return { message: 'hello' }
      }
    },
    propF: {   // 自定义验证函数
      validator: function (value) {
        return value > 10
      }
    }
  }
由于存在一个单项数据流的问题,父组件传递给子组件的数据不要直接修改,因为会将父组件中的数据也修改,当这个数据也传入其他组件的时候就会出问题了。vue2.5已经针对 props 做出优化,这个问题已经不存在了 如果一定需要有这样的操作,可以这么写:
let copyData = JSON.parse(JSON.stringify(this.data))为什么不直接写 let myData = this.data 呢? 因为直接赋值,对于对象和数组而言只是浅拷贝,指向的是同一个内存地址,其中一个改变另一个也会改变。而通过 JSON颠倒转换之后,实现了深拷贝,则可以互不影响。
2. 子组件向父组件中传递数据
子组件向父组件中传递数据:触发父组件方法,并传递参数data到父组件
handleSubmit(data){
    this.$emit('submitToParent', data)
}
父组件如何拿到子组件传递过来的数据?
<header @submitToParent="parentSubmit"></header>

methods: {
    parentSubmit(data){
        // 父组件的业务逻辑
    }
}
3、子组件改变父组件的数据
当我们把父元素的数据给子组件时,要传一个非基础类型,即传递对象or数组,子组件通过访问对象中的属性操作数据,因为对象和数组是传引用,所以在子组件中修改的时候,父组件也会同步改变,如下:
// 父组件要props传递给子组件的数据
data:{
    info:'父组件信息'
}

// 子组件
 <template id="tpl">
    <div>
        <button @click="change">change</button>
        <p>{

   {data.info}}</p>
    </div>
</template>
... 省略部分无关代码 ...
props:['data'],
methods:{
    change(){
        this.data.info = 'change info'
    }
}
当子组件点击change按钮改变数据的时候,父组件也会同步改变
4. 使用slot
一个通用组件,往往不能够适应所有应用场景,所以在封装组件的时候只需要完成组件 80% 的功能,剩下的 20% 让父组件通过 solt 解决。比如:某一个公共组件中有两个按钮,一个是“新增”,一个是“删除”,但是在另外的场景中使用这个组件时,两个按钮需要做的事情是不一样的,比如是“查看”和“修改”。所以,我们在封装组件的时候就不要直接写按钮了,而是在合适的位置放置一个slot,其实是一个占位的作用,给按钮的设置提前预留一个位置,然后在父组件中写入按钮即可。
子组件:
<div class="child-btn">
    <!-- 具名插槽 -->
    <slot name="button"></slot>
    <!-- 匿名插槽(每个组件只能有一个) -->
    <slot><slot>
</div>
父组件:
<child>
    <!-- 对应子组件中button的插槽 -->
    <button slot="button">slot按钮</button>
</child>
在开发通用组件的时候,只要不是独立性很强的组件最好是都加一个slot。并且,开发过程中,常常需要在子组件内添加新的内容,这时候可以在子组件内部留一个或者多个插口,然后在调用这个子组件的时候加入内容,添加的内容就会分发到对应的 slot 中:
子组件:
<template>
  <div class="headComponent">
    <h3>这是一个头部组件</h3>
    <slot></slot>
    <slot name="s1"></slot>
    <slot name="s2"></slot>
  </div>
</template>
父组件:
<head-component>
    <h2>不具名插槽</h2>
    <h2 slot="s1">这里对应的是s1插口</h2>
    <h2 slot="s2">这里对应的是s2插口</h2>
</head-component>
slot 中还可以作为一个作用域,在子组件中定义变量,然后在父组件中自定义渲染的方式:(项目中使用的比较多,vue+elementUI中ajax获取数据显示在表格中,很多时候每一条数据不是直接显示的,需要做一些额外的处理)
子组件:
<template>
  <div class="headComponent">
    <h3>这是一个头部组件</h3>
    <slot name="head" v-for="head in heads" :text="head.text"></slot>
  </div>
</template>
父组件:
<head-component>
    <template slot="head" scope="props">
        <li> {

   { props.text }} </li>
    </template>
</head-component>
上述例子中,首先在子组件添加 slot,并在子组件中定义了数组变量 heads 然后在父组件中以作用域 template 添加内容,其中 scope 是固有属性,它的值对应一个临时变量 props 而 props 将接收从父组件传递给子组件的参数 heads
**************************************************************************************
插槽具体使用方法:
什么是插槽?
- 插槽(Slot)是Vue提出来的一个概念,正如名字一样,插槽用于决定将所携带的内容,插入到指定的某个位置,从而使模板分块,具有模块化的特质和更大的重用性。
- 插槽显不显示、怎样显示是由父组件来控制的,而插槽在哪里显示就由子组件来进行控制
- 父组件拥有结构,子组件用slot占位
- 作用域插槽是一种子传父传参的方式,解决了普通slot在parent中无法访问child数据的去问题;
怎么用插槽?
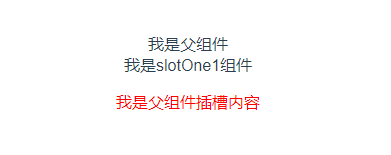
默认插槽
父组件
<template>
  <div>
    我是父组件
    <slotOne1>
      <p style="color:red">我是父组件插槽内容</p>
    </slotOne1>
  </div>
</template>
在父组件引用的子组件中写入想要显示的内容(可以使用标签,也可以不用)
子组件(slotOne1)
<template>
  <div class="slotOne1">
    <div>我是slotOne1组件</div>
    <slot></slot>
  </div>
</template>
在子组件中写入slot,slot所在的位置就是父组件要显示的内容
- 当然在父组件引用的子组件中也可以写入其他组件
父组件
<template>
  <div>
    我是父组件
    <slotOne1>
      <p style="color:red">我是父组件插槽内容</p>
      <slot-one2></slot-one2>
    </slotOne1>
  </div>
</template>
子组件(slotOne2)
<template>
  <div class="slotOne2">
    我是slotOne2组件
  </div>
</template>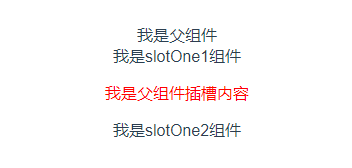
具名插槽
子组件
<template>
  <div class="slottwo">
    <div>slottwo</div>
    <slot name="header"></slot>
    <slot></slot>
    <slot name="footer"></slot>
  </div>
</template>
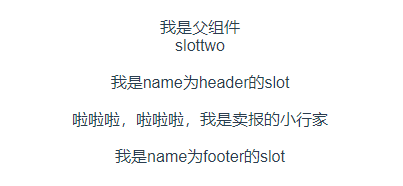
在子组件中定义了三个slot标签,其中有两个分别添加了name属性header和footer
父组件
<template>
  <div>
    我是父组件
    <slot-two>
      <p>啦啦啦,啦啦啦,我是卖报的小行家</p>
      <template slot="header">
          <p>我是name为header的slot</p>
      </template>
      <p slot="footer">我是name为footer的slot</p>
    </slot-two>
  </div>
</template>
在父组件中使用template并写入对应的slot值来指定该内容在子组件中现实的位置(当然也不用必须写到template),没有对应值的其他内容会被放到子组件中没有添加name属性的slot中
插槽的默认内容
父组件
<template>
  <div>
    我是父组件
    <slot-two></slot-two>
  </div>
</template>
子组件
<template>
  <div class="slottwo">
    <slot>我不是卖报的小行家</slot>
  </div>
</template>
可以在子组件的slot标签中写入内容,当父组件没有写入内容时会显示子组件的默认内容,当父组件写入内容时,会替换子组件的默认内容

编译作用域
父组件
<template>
  <div>
    我是父组件
    <slot-two>
      <p>{

   {name}}</p>
    </slot-two>
  </div>
</template>
<script>
export default {
  data () {
    return {
      name: 'Jack'
    }
  }
}
</script>
子组件
<template>
  <div class="slottwo">
    <slot></slot>
  </div>
</template>
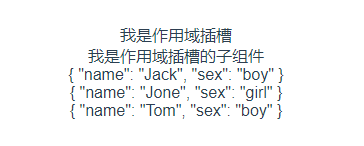
作用域插槽
- 作用域插槽是一种子传父传参的方式,解决了普通slot在parent中无法访问child数据的去问题;
子组件
<template>
  <div>
    我是作用域插槽的子组件
    <slot :data="user"></slot>
  </div>
</template>

<script>
export default {
  name: 'slotthree',
  data () {
    return {
      user: [
        {name: 'Jack', sex: 'boy'},
        {name: 'Jone', sex: 'girl'},
        {name: 'Tom', sex: 'boy'}
      ]
    }
  }
}
</script>
在子组件的slot标签上绑定需要的值
父组件
<template>
  <div>
    我是作用域插槽
    <slot-three>
      <template slot-scope="user">
        <div v-for="(item, index) in user.data" :key="index">
        {

  {item}}
        </div>
      </template>
    </slot-three>
  </div>
</template>
在父组件上使用slot-scope属性,user.data就是子组件传过来的值
综合,利用props属性传值,作用域插槽
父组件:
<template>
    <div>
        <p>vue 高级特性</p>
        <hr>

        <ScopedSlotDemo :url="website.url">
            <template slot-scope="slotProps">
                {

  {

  slotProps.slotData.title}}
            </template>
        </ScopedSlotDemo>
    </div>
</template>

<script>

import ScopedSlotDemo from './ScopedSlotDemo'
export default {
    data() {
        return {
            name:'小米',
             website: {
                url: 'http://imooc.com/',
                title: 'imooc',
                subTitle: '程序员的梦工厂'
            },
        };
    },
    components:{

        ScopedSlotDemo
    }

};
</script>

<style scoped lang="css">

</style>
子组件
<template>
    <a :href="url">
        <slot :slotData="website1">
            {

  {website1.subTitle}} <!-- 默认值显示 subTitle ,即父组件不传内容时 -->
        </slot>
    </a>
</template>

<script>
export default {
    props: ['url'],
    data() {
        return {
            website1: {
                url: 'http://wangEditor.com/',
                title: 'wangEditor',
                subTitle: '轻量级富文本编辑器'
            }
        }
    }
}
</script>