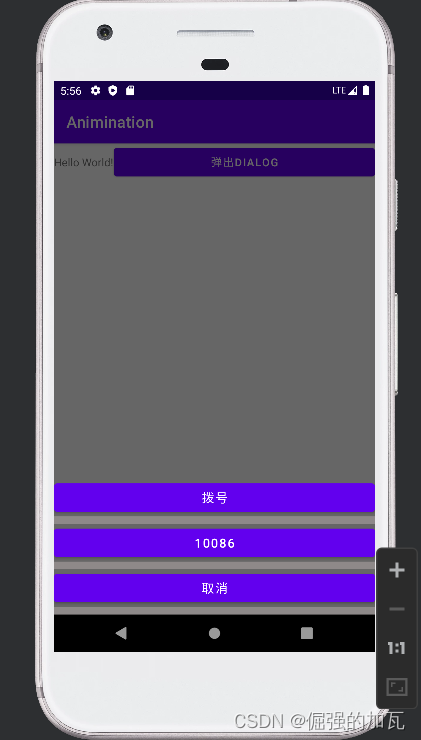
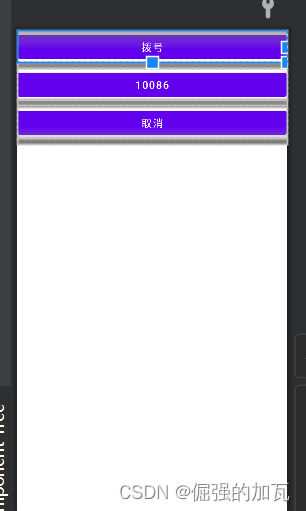
1定义弹出的dialog样式
<?xml version="1.0" encoding="utf-8"?>
<LinearLayout xmlns:android="http://schemas.android.com/apk/res/android"
    android:orientation="vertical"
    android:layout_width="match_parent"
    android:layout_height="wrap_content">
    <Button

        android:layout_width="match_parent"
        android:layout_height="wrap_content"
        style="@style/mbtn"
        android:text="拨号"/>
    <View
        android:layout_width="match_parent"
        android:layout_height="10sp"
        android:background="#8E8989"/>
    <Button

        android:layout_width="match_parent"
        android:layout_height="wrap_content"
        style="@style/mbtn"
        android:text="10086"/>
    <View
        android:layout_width="match_parent"
        android:layout_height="10sp"
        android:background="#8E8989"/>
    <Button

        android:layout_width="match_parent"
        android:layout_height="wrap_content"
        style="@style/mbtn"
        android:text="取消"/>
    <View
        android:layout_width="match_parent"
        android:layout_height="10sp"
        android:background="#8E8989"/>

</LinearLayout>
2自定义dialog类,继承自Dialog,并加载自定义dialog的布局
package com.njupt.animination

import android.app.Dialog
import android.content.Context
import android.os.Bundle
import android.view.Gravity
import android.view.ViewGroup

class MyDiaglog:Dialog {


    constructor(context: Context?):this(context,0){

    }

    constructor(context: Context?,themId:Int):super(context!!,themId){


        //在此方法里面加载布局
        setContentView(R.layout.my_dialog)
        //设置在下面弹出
        window?.setGravity(Gravity.BOTTOM)
        //设置弹出的大小
        window?.setLayout(ViewGroup.LayoutParams.MATCH_PARENT,ViewGroup.LayoutParams.WRAP_CONTENT)
    }

}
3在anim资源文件中定义出dialog的进出动画
入场位置dialog_enter.xml
<?xml version="1.0" encoding="utf-8"?>
<!--平移-->
<translate xmlns:android="http://schemas.android.com/apk/res/android"
    android:duration="400"
    android:fromYDelta="100%p"
    android:toYDelta="0">

</translate>
出场位置dialog_exit.xml
<?xml version="1.0" encoding="utf-8"?>
<translate xmlns:android="http://schemas.android.com/apk/res/android"
    android:duration="400"
    android:fromYDelta="0"
    android:toYDelta="100%p">

</translate>
4在style文件中指定这两种进出动画,并且将窗口的背景设为透明#00000000
<?xml version="1.0" encoding="utf-8"?>
<resources>

    <!--指定dialog的样式-->
    <style name="dialog" parent="@android:style/Theme.Dialog">
        <!--指定dialog的动画-->
        <item name="windowNoTitle">true</item>
        <item name="android:windowAnimationStyle">@style/dialog_anim</item>
        <item name="android:windowBackground">@drawable/transparent</item>
    </style>
    <!--动画的央视-->
    <style name="dialog_anim" parent="@android:style/Animation.Dialog">
        <item name="android:windowEnterAnimation">@anim/dialog_enter</item>
        <item name="android:windowExitAnimation">@anim/dialog_exit</item>
    </style>
    <style name="mbtn">
        <item name="android:textColor">@color/white</item>
        <item name="android:textSize">16sp</item>
    </style>
</resources>
其中透明颜色在color.xml布局中
<resources>
    <drawable name="transparent">#00000000</drawable>
</resources>
5在主程序中调用显示dialog
package com.njupt.animination

import androidx.appcompat.app.AppCompatActivity
import android.os.Bundle
import android.widget.Button

class MainActivity : AppCompatActivity() {


    private val mdialog:MyDiaglog by lazy {


        MyDiaglog(this,R.style.dialog)
    }
    override fun onCreate(savedInstanceState: Bundle?) {


        super.onCreate(savedInstanceState)
        setContentView(R.layout.activity_main)

        val btn=findViewById<Button>(R.id.btn1)
        btn.setOnClickListener(){


            mdialog.show()
        }
    }
}