安装所需文件
安装mysql5.7
- 下载MySQL的yum源配置
wget http://dev.mysql.com/get/mysql57-community-release-el7-11.noarch.rpm
- 安装MySQL的yum源
yum -y install mysql57-community-release-el7-11.noarch.rpm
- 使用yum方式安装MySQL5.7(下载需要点时间,我们可以在网速比较好的地方下载)
yum -y install mysql-server --nogpgcheck --nogpgcheck #不校验数字签名
- MySQL5.7的开启关闭和开机自启命令
systemctl start mysqld.service
systemctl status mysql.service
- 登录mysql前需找到mysql的默认密码 cat /var/log/mysqld.log| grep password
cat /var/log/mysqld.log| grep password
# 2022-11-02T15:01:52.976608Z 1 [Note] A temporary password is generated for root@localhost: !Th7<vMBA2w_
- 登录mysql
mysql -uroot -p'!Th7<vMBA2w_'
- 登录进mysql,要求更改密码(密码需要一定的复杂度),并且给其他机器授权可以登录mysql
# 密码要数字、字母大写、小写、特殊字母
ALTER USER USER() IDENTIFIED BY '3133030Liu,';

# (立即刷新配置)
flush privileges;

grant all privileges on . to 'root'@'%' identified by '3133030Liu,' with grant option;

# (立即刷新配置)
flush privileges;
- 修改MySQL默认的密码策略(使MySQL可以设置简单的密码)
set global validate_password_policy=0;
set global validate_password_length=1;
flush privileges;
- 这时我们可以给mysql设置简单的密码,再授权
alter user 'root'@'localhost' identified by '123456';
# grant all privileges on . to 'root'@'%' identified by '123456' with grant option;
flush privileges;
- 再次登录
exit  #退出MySQL
mysql -uroot -p123456  #使用刚设置的简单密码登录一下MySQL
安装nginx
- 安装epel-release 因为Nginx并不在官方的yum源中,需要第三方的yum源
# 我们在Centos下使用yum安装时往往找不到rpm的情况,官方的rpm repository提供的rpm包也不够丰富,
# 很多时候需要自己编译很痛苦,而EPEL恰恰可以解决这两方面的问题
yum -y install epel-release

# 更新yum源
yum -y update
- 安装Nginx
yum install -y nginx
- 验证nginx安装是否成功
# 查看nginx安装版本,-V可以看到nginx的安装的文件路径
nginx -V

# 查看安装的nginx的版本
rpm -qa | grep nginx
- Nginx启动、设置开机自启、查看运行状态、停止命令
systemctl start nginx
systemctl enable nginx
systemctl status nginx
systemctl stop nginx
- 相关文件路径
#编辑Nginx配置文件
vim /etc/nginx/nginx.conf

#检测配置文件语法是否正确
nginx -t

#重新加载Nginx配置
nginx -s reload

# 日志路径
/var/log/nginx
安装redis
- 安装redis数据库
# 上面已经  yum install epel-release 过了一次,直接就可以安装redis
yum install -y redis
- 安装完毕后,使用下面的命令启动redis服务
# 启动redis
service redis start

# 停止redis
service redis stop

# 查看redis运行状态
service redis status

# 查看redis进程
ps -ef | grep redis
- 设置redis为开机自动启动
chkconfig redis on
- 进入redis服务
# 进入本机redis
redis-cli

# 列出所有key
keys *
安装java
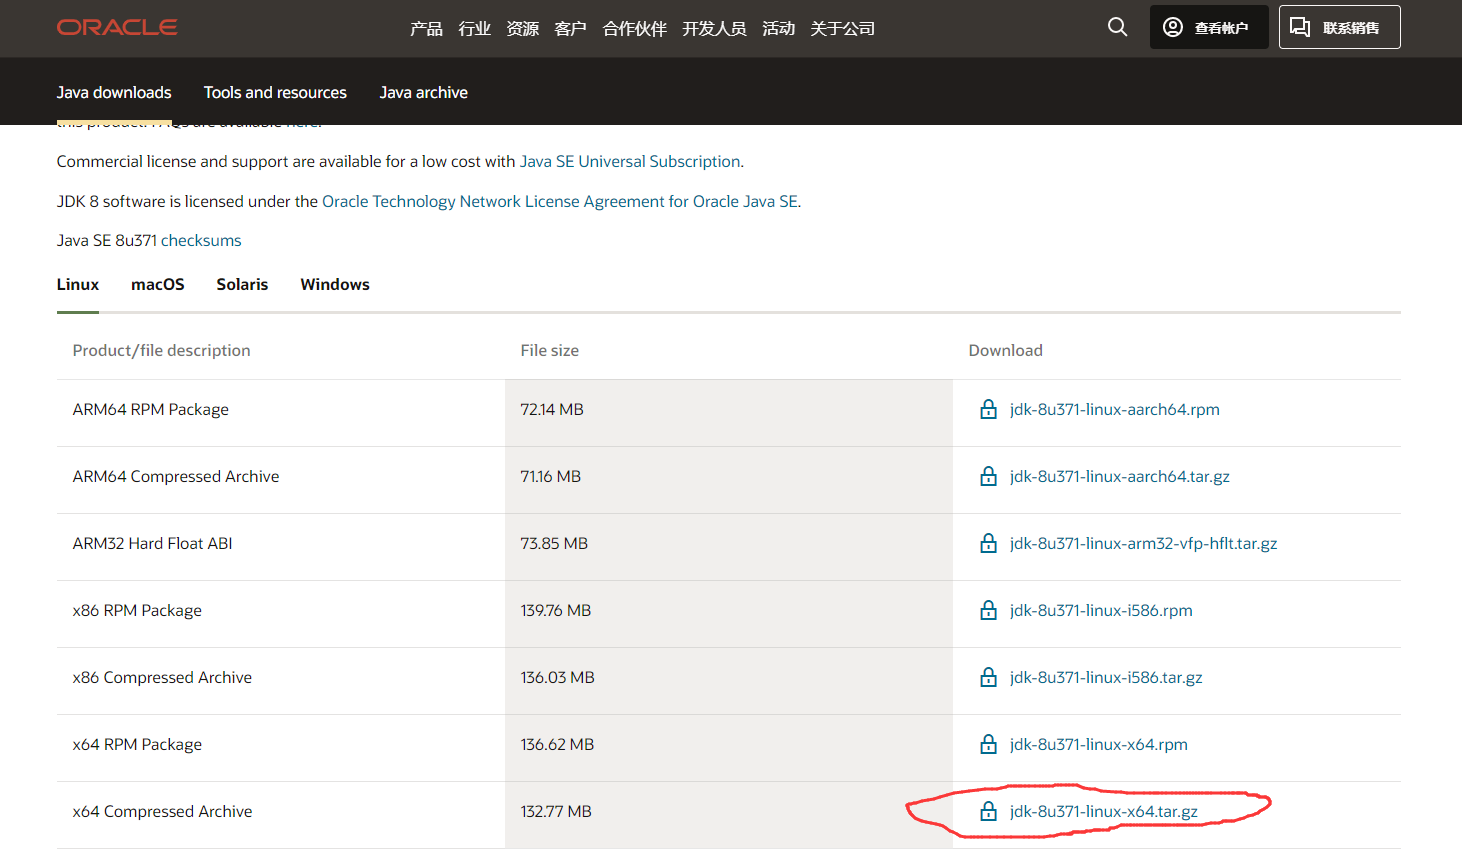
- 下载
下载jdk地址:https://www.oracle.com/cn/java/technologies/downloads/
下载账号:
// 自己搜:Oracle官网登录用户名密码分享
账号:1971159263@qq.com
密码:Jia19981203
- 上传
下载并使用FinalShell工具上传文件 - 解压
# 解压
tar -zxvf jdk-8u371-linux-x64.tar.gz

# 移动
mv jdk1.8.0_371 /home/jdk8

# 到此目录下
cd /home/jdk8/bin

# 运行此命令可以查看,刚安装好后的版本号
./java -version
- 配置全局的环境变量
写入配置文件
vim /etc/profile
在配置文件最后面加上这一句
JAVA_HOME=/home/jdk8
PATH=$JAVA_HOME/bin:$PATH
重新加载profile文件,使更改的配置立即生效
source /etc/profile
- 检查安装是否成功
java -version
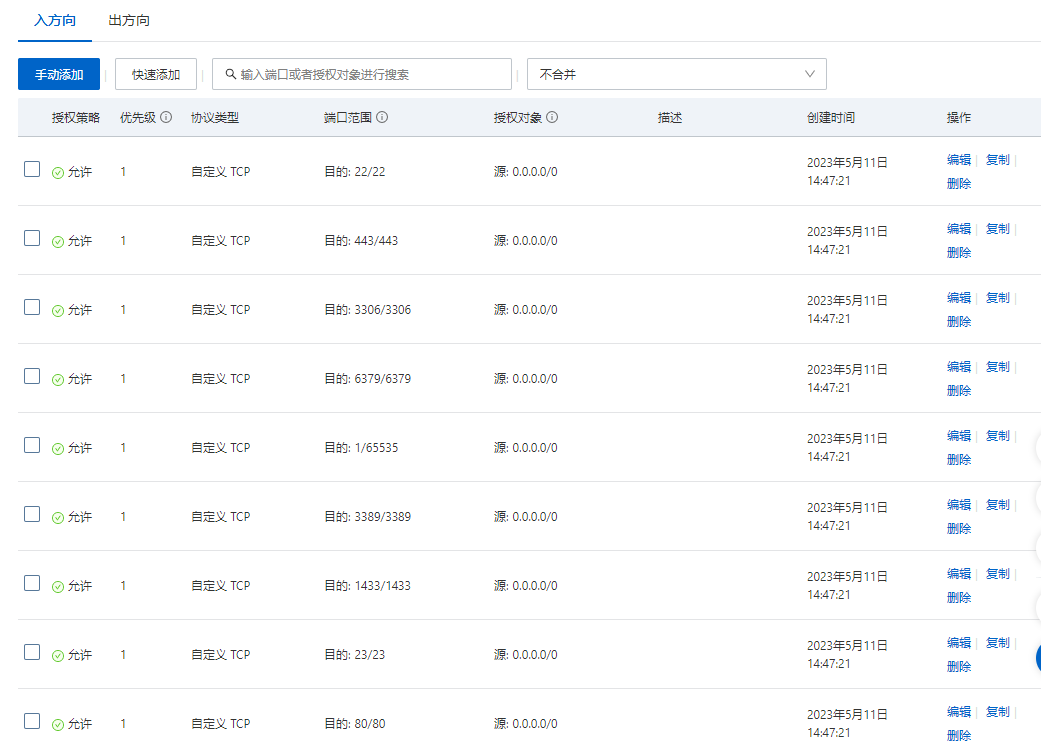
开放防火墙接口
mysql的端口为3306
redis的端口为6379
CentOS 7.9 防火墙开放端口
- 开放固定端口(我比较懒直接关闭防火墙)
# 开放5672端口
firewall-cmd --zone=public --add-port=5672/tcp --permanent

#关闭5672端口
firewall-cmd --zone=public --remove-port=5672/tcp --permanent

# 配置立即生效
firewall-cmd --reload
- 查看防火墙所有开放的端口
firewall-cmd --zone=public --list-ports
- 防火墙操作
# 查看防火墙状态
systemctl status firewalld.service

# 本次访问关闭防火墙
systemctl stop firewalld.service

# 从下次开始关闭防火墙
systemctl disable firewalld.service

# 打开防火墙
systemctl enable firewalld.service

# 重启防火墙
systemctl restart network
阿里云开放安全组端口
准备配置
nginx
在/etc/nginx/conf.d建立一个子配置文件
cd /etc/nginx/conf.d
vim airport.conf
文件内容
    server {


        listen       80;
        server_name  localhost;

        #charset koi8-r;

        #access_log  logs/host.access.log  main;

        location / {


            root   /mnt/www/airport; # 前端工程文件放置的位置
            index  index.html index.htm;
        }

        #error_page  404              /404.html;

        # redirect server error pages to the static page /50x.html
        #
        error_page   500 502 503 504  /50x.html;
        location = /50x.html {


            root   html;
        }

    }
重启nginx
nginx -s reload
创建项目目录放置文件夹
cd /mnt
mkdir -p www/airport
cd www/airport
# 随便写点什么,看看是否能访问
vim index.html
访问:http://8.134.93.xxx/(你自己的阿里云地址)

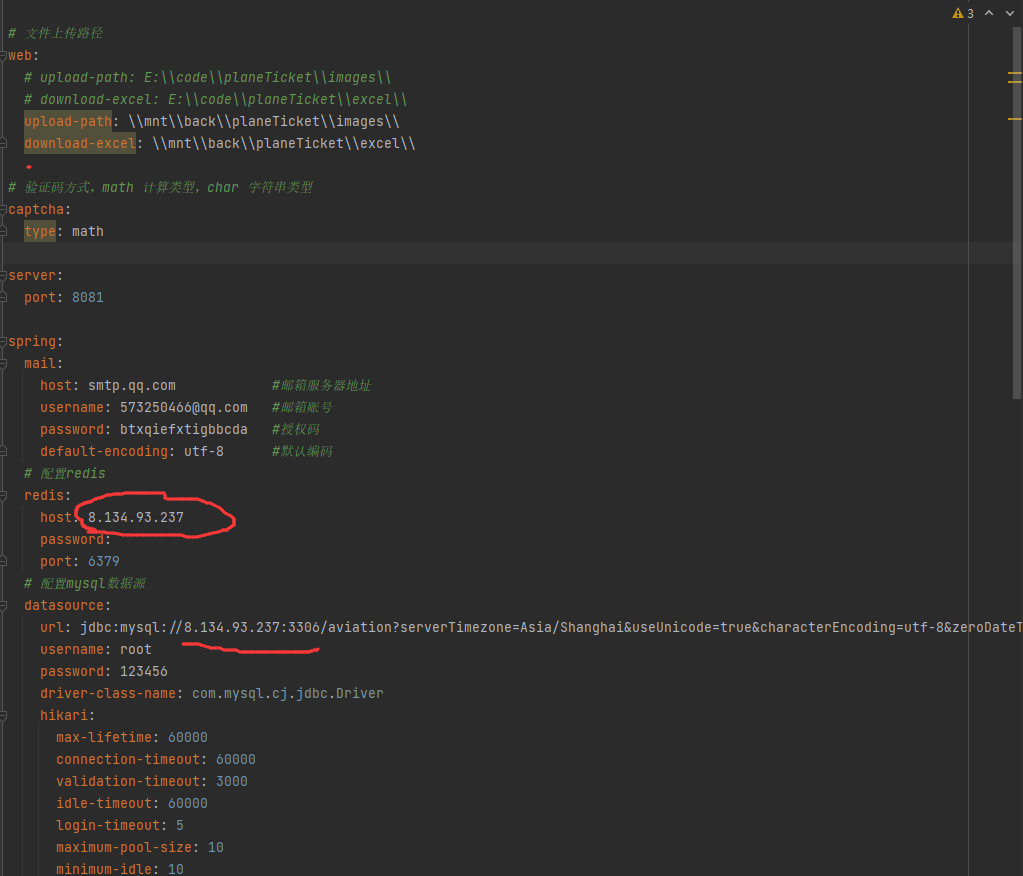
redis
vim /etc/redis.conf
把bind 127.0.0.1改成bind 0.0.0.0,让外网可以访问(有黑客攻击的风险)
把notify-keyspace-events改成notify-keyspace-events Ex(30分钟未支付出发支付过期方案)
注意:改了配置要重启Redis
# redis-server /etc/redis.conf
# 停止redis
service redis stop
# 启动redis
service redis start
mysql
让外网可以访问
登入mysql
mysql -uroot -p123456
# 首先先进入mysql的服务,选择mysql这个库,然后查看user用户的host属性,会发现其host属性值是localhost,意思是只准许本地的连接访问。此时我们要对他修改为谁都可以访问的。
# 修改的sql语句如下:
use mysql;
update user set host="%" where user="root";
flush privileges;
外网就能访问了
项目上传
先把数据库表创建出来
springboot项目打包上传
修改配置文件(上传文件路径、mysql地址账号、redis地址密码等要修改)
打包

打包后的地址
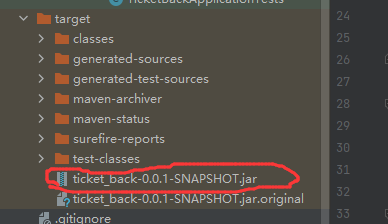
上传jar包到阿里云服务器

启动服务
nohup java -jar ticket_back-0.0.1-SNAPSHOT.jar > ticket_back.log 2>&1 &
前端
- 项目配置修改
vite.config.js
import {

     defineConfig } from 'vite'
import vue from '@vitejs/plugin-vue'
import path from "path"

import AutoImport from 'unplugin-auto-import/vite'
import Components from 'unplugin-vue-components/vite'
import {

     ElementPlusResolver } from 'unplugin-vue-components/resolvers'

// https://vitejs.dev/config/
export default defineConfig({


  //基本路径 文件打包后放的位置
  publicPath: './',

  //默认输出文件夹为dist,填入的名字为打包后的文件名
  outputDir: 'name',

  // 放置生成的静态资源 (js、css、img、fonts) 的 (相对于 outputDir 的) 目录。资源放的目录
  assetsDir: './static',

  // 指定生成的 index.html 的输出路径 (相对于 outputDir)。也可以是一个绝对路径 index的路劲和名字
  indexPath: './index.html',

  //打包后是否生成map文件,map文件能看到错误代码位置,设置为false不生成map文件,打包体积缩小
  productionSourceMap: false,
  plugins: [
    AutoImport({


      resolvers: [ElementPlusResolver()],
    }),
    Components({


      resolvers: [ElementPlusResolver()],
    }),
    vue()
  ],
  resolve: {


    alias: {


      "~": path.resolve(__dirname, "src")
    }
  },
  server: {


    // host设置为true才可以使用network的形式,以ip访问项目
    host: true,
    // 端口号
    port: 3100,
    // 自动打开浏览器
    open: true,
    // 跨域设置允许
    cors: true,
    // 如果端口已占用直接退出
    strictPort: true,
    // 接口代理
    proxy: {


      '/api': {


        target: 'http://8.134.93.xxx:8081',
        // 允许跨域
        changeOrigin: true,
        // 重写地址
        rewrite: (path) => path.replace('/api/', '/')
      }
    }
  },
  build: {


    // 在生产环境移除console.log
    terserOptions: {


      compress: {


        drop_console: true,
        drop_debugger: true
      },
    },
  },
  css: {


    preprocessorOptions: {


      // 全局样式引入
      scss: {


        additionalData: '@import "./src/assets/scss/common.scss";',
        javascriptEnabled: true
      }
    }
  }
})
- 打包
npm run build - nginx 配置修改(主要文件路径和vue代理修改了)
    server {


        listen       80;
        server_name  localhost;

        #charset koi8-r;

        #access_log  logs/host.access.log  main;

        location / {


            root   /mnt/www/airport/dist;
            index  index.html index.htm;

            # 添加下面的几行 vue项目刷新不会404
            try_files $uri $uri/ @router;
        }

        # 添加下面的几行 vue项目刷新不会404
        location @router {


            rewrite ^.*$ /index.html last;
        }

        # 设置反向代理,因为前台是通过代理访问的  记得加上 最后的/不然无效。
        location /api/ {


            proxy_pass      http://8.134.93.xxx:8081;
            proxy_cookie_path / /api;
            proxy_redirect default;
            rewrite ^/api/(.*) /$1 break;
            client_max_body_size 500m;
        }

        #error_page  404              /404.html;

        # redirect server error pages to the static page /50x.html
        #
        error_page   500 502 503 504  /50x.html;
        location = /50x.html {


            root   html;
        }
    }
重启
nginx -s reload
可以访问项目了