Hi I’m Shendi
在之前学过Redis后,便可以使用SpringBoot来整合Redis了,使用起来非常简单
简介
之前用Java操作Redis使用的Jedis,在SpringBoot中,2.x版本后就换成了使用Lettuce
Jedis是线程不安全的,想要安全的,需要使用 jedis pool 连接池,像BIO
Lettuce基于Netty实现,是线程安全的,更像NIO
Spring Data
是Spring中数据操作的模块,包含对各种数据库的集成

对于Redis,则使用 Spring Data Redis,它提供了 RedisTemplate 来操作Redis
除了通用命令,Redis类型对应函数如下
| 函数 | 描述 |
|---|---|
| opsForValue | 操作String类型 |
| opsForHash | 操作Hash类型 |
| opsForList | 操作List类型 |
| opsForSet | 操作Set类型 |
| opsForZSet | 操作ZSet类型 |
引入依赖
使用 Spring Data Redis
Maven
<dependency>
    <groupId>org.springframework.boot</groupId>
    <artifactId>spring-boot-starter-data-redis</artifactId>
</dependency>
需要注意的是,SpringBoot版本2.5或者以下还需要引入连接池
实测2.5.1版本不引入以下依赖运行就报错,2.6.1版本没问题
<dependency>
    <groupId>org.apache.commons</groupId>
    <artifactId>commons-pool2</artifactId>
</dependency>
配置
需要注意的是,2.x版本后spring data redis使用的 lettuce,之前使用jedis,所以在配置连接池2.x之后使用 spring.redis.lettuce
application.properties
# 服务器地址
spring.redis.host=localhost
# 端口
spring.redis.port=6379
# 使用哪个数据库,默认有16个数据库,从0开始,0-15
spring.redis.database=0
# 密码
spring.redis.password="admin"

# 连接池配置部分
# 最大连接数,负数代表没有限制
spring.redis.jedis.pool.max-active=30
# 最大阻塞时间,负数代表没有限制,单位毫秒,加上ms更加明确
spring.redis.jedis.pool.max-wait=3000ms
# 最大空闲连接
spring.redis.jedis.pool.max-idle=10
# 最小空闲连接
spring.redis.jedis.pool.min-idle=1
# 连接超时时间,单位毫秒
spring.redis.timeout=6000
使用
首先需要获取 RedisTemplate 对象,可以直接使用 @Autowirted 注入
例如简单的设置一个值,使用Junit测试
import org.junit.jupiter.api.Test;
import org.springframework.beans.factory.annotation.Autowired;
import org.springframework.boot.test.context.SpringBootTest;
import org.springframework.data.redis.core.RedisTemplate;

@SpringBootTest
public class TestRedis {


	@Autowired RedisTemplate<String, String> rt;

	@Test
	public void test() {


		rt.opsForValue().set("name", "Shendi");
	}

}
进入 redis-cli 查看是否有 name 的值

使用方法和之前jedis类似,但是这样设置中文时会出现问题,例如
rt.opsForValue().set("name2", "砷碲");
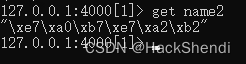
使用的redis-cli,解决办法是设置命令行编码为UTF-8,并启动时带上 --raw 参数
# 设置utf-8编码
chcp 65001
redis-cli -p 6379 --raw

自定义序列化方式
对于特别需求,例如直接将一个对象(Bean)存入Redis,就需要自定义序列化方式。
JSON序列化
编写一个配置类
import org.springframework.context.annotation.Bean;
import org.springframework.context.annotation.Configuration;
import org.springframework.data.redis.connection.RedisConnectionFactory;
import org.springframework.data.redis.core.RedisTemplate;
import org.springframework.data.redis.serializer.GenericJackson2JsonRedisSerializer;
import org.springframework.data.redis.serializer.RedisSerializer;

@Configuration
public class RedisConfig {


    @Bean
    public RedisTemplate<String, Object> redisTemplate(RedisConnectionFactory rcf) {


        RedisTemplate<String, Object> rt = new RedisTemplate<>();
        rt.setConnectionFactory(rcf);

        Jackson2JsonRedisSerializer<Object> jsonrs = new Jackson2JsonRedisSerializer<>(Object.class);
        ObjectMapper om = new ObjectMapper();
        om.setVisibility(PropertyAccessor.ALL, JsonAutoDetect.Visibility.ANY);
        om.enableDefaultTyping(ObjectMapper.DefaultTyping.NON_FINAL);
        jsonrs.setObjectMapper(om);

        // 键 key,hashKey 用String序列化
        rt.setKeySerializer(RedisSerializer.string());
        rt.setHashKeySerializer(RedisSerializer.string());

        // 值 value,hashValue 用JSON序列化
        rt.setValueSerializer(jsonrs);
        rt.setHashValueSerializer(jsonrs);

        return rt;
    }

}
这里我踩了个坑,新建的测试项目,没有引入web依赖,所以启动测试案例就报错
Error creating bean with name ‘redisTemplate’ defined in class path
…浪费我好多时间,搜百度都是加什么common,jedis依赖…最后误打误撞把web依赖加上就能跑了
<dependency>
    <groupId>org.springframework.boot</groupId>
    <artifactId>spring-boot-starter-web</artifactId>
</dependency>
测试代码如下,需要注意 bean 要实现 Serializable 接口,内部类需要静态或者实用无参构造创建对象
import java.io.Serializable;

import org.junit.jupiter.api.Test;
import org.springframework.beans.factory.annotation.Autowired;
import org.springframework.boot.test.context.SpringBootTest;
import org.springframework.data.redis.core.RedisTemplate;


@SpringBootTest
public class TestRedis {


	@Autowired RedisTemplate<String, Object> rt;

	static class Info implements Serializable {


		String name;
		String name2;
		String web;

		public Info() {

    }

		public Info(String name, String name2, String web) {


			this.name = name;
			this.name2 = name2;
			this.web = web;
		}

	}

	@Test
	public void test() {


		rt.opsForValue().set("name2", "砷碲");
		rt.opsForValue().set("info", new Info("Shendi", "砷碲", "sdpro.top"));

		Object name2 = rt.opsForValue().get("name2");
		Info info = (Info) rt.opsForValue().get("info");

		System.out.println(name2);
		System.out.println(info);
	}

}
代码执行输出如下


简单的例子
下面展示一下SpringBoot+Redis 用户登录的例子,加深下印象,仅供参考
页面就不做了,单纯做接口,突出Redis的使用
Redis是 key-value 数据库,一般是用 前缀+内容做key,可以做个类保存管理所有的key
Application
@SpringBootApplication
public class Application {


	/** SpringBoot环境 */
	private static ConfigurableApplicationContext context;

	public static void main(String[] args) {


		context = SpringApplication.run(Application.class, args);
	}

	/** @return SpringBoot运行环境 */
	public static ConfigurableApplicationContext getContext() {

     return context; }

}
这里将context提供出去,用于 getBean,需要注意的是,使用Junit拿不到context
因为是以key前缀来区分内容,所以可以封装Redis的操作,例如对于用户登录存储的临时信息
/**
 * 关于Redis登录信息的操作.<br>
 * <br>
 * @author Shendi <a href='tencent://AddContact/?fromId=45&fromSubId=1&subcmd=all&uin=1711680493'>QQ</a>
 */
@Component
public class RedisLogin {


	/** key 前缀 */
	public static final String PREFIX = "login:";

	public void set(String key, String value) {


		// 存入的数据一小时后过期
		RedisUtil.RT.opsForValue().set(PREFIX + key, value, 1, TimeUnit.HOURS);
	}

	public String get(String key) {


		return RedisUtil.RT.opsForValue().get(PREFIX + key);
	}

}
标上 @Component,就可以在其他类上使用 @Autowired 获取了
上面的 RedisUtil.RT 是我将 RedisTemplate 作为一个静态对象用了,当然也可以直接在类里面定义对象然后注入
RedisUtil
public class RedisUtil {


	/** Redis */
	public static final StringRedisTemplate RT;

	public static final RedisLogin LOGIN;

	static {


		RT = Application.getContext().getBean(StringRedisTemplate.class);

		LOGIN = Application.getContext().getBean(RedisLogin.class);
	}

}
UserControl
@RestController
public class UserControl {


	private String account = "admin";
	private String pwd = "admin";

	@GetMapping("/login")
	public String login(String account, String pwd) {


		if (this.account.equals(account) && this.pwd.equals(pwd)) {


			String token = String.valueOf(System.currentTimeMillis());

			// 存入Redis
			RedisUtil.LOGIN.set(account, token);

			return "登陆成功, token=" + token;
		}

		return "登陆失败";
	}

	@GetMapping("/info")
	public String info(String account, String token) {


		// 有效登录则获取信息
		String t = RedisUtil.LOGIN.get(account);
		if (t == null || !t.equals(token)) {


			return "未登录或登陆失效";
		}

		return "信息为xxx";
	}

}
有两个接口,一个login,一个info
login通过账号密码获取token信息,info通过账号和token获取用户信息
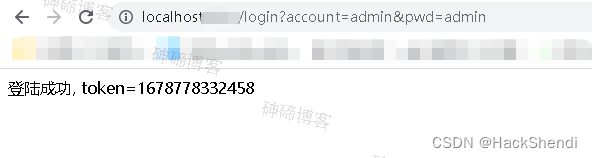
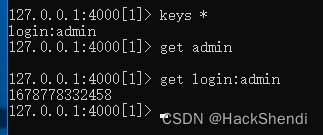
登陆成功后可以在redis里看到数据
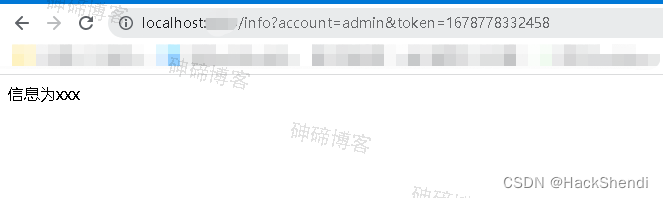
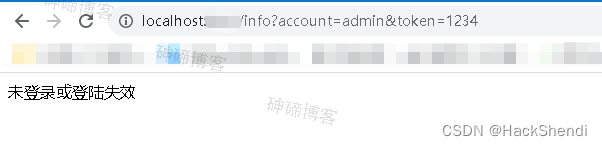
使用错误的信息也就获取不成功
数据存储在Redis上,这样就算SpringBoot重启,也不会丢失登录信息
因为设置了过期时间,使用 ttl 命令可以查看key的剩余时间(秒)
END