基于QQ邮箱实现验证码
qq邮箱市场占有率挺高的。而且邮箱获取验证码也是比较方便的。
而且qq邮箱验证码是不收费的对于小白和初级开发者是比较友好的,而且是比较好上手的。
1.开发
1.进入qq邮箱点击设置。
2.点击账户

3.找到如下
没开启的需要开启一下,开启的话点击管理服务

4.点击管理服务

5.发送短信

6.生成授权码

2.创建springboot项目
2.1关键依赖导入
<dependency>
    <groupId>org.springframework.boot</groupId>
    <artifactId>spring-boot-starter-mail</artifactId>
</dependency>
2.2配置文件
application.properties填写如下信息。
改成自己的
# 应用服务 WEB 访问端口
server.port=8080

# 此处使用的是qq邮箱进行邮件发送
spring.mail.host = smtp.qq.com
[email protected] #自己qq邮箱
spring.mail.password=xxx #授权码
spring.mail.default-encoding=UTF-8
2.3编写控制器代码
@RestController
public class EmailController {
    @Autowired(required = false)
    private JavaMailSender sender; // 引入Spring Mail依赖后,会自动装配到IOC容器。用来发送邮件

    //发送验证码
    @PostMapping("/test")
    public String test1(String mail, HttpServletRequest request){
       try{
           // 生成 6 位数字验证码
           Random random = new Random();
           String code = random.nextInt(8999) + 1000+"";// 验证码
           // 当前时间
           LocalDateTime currentTime = LocalDateTime.now();

           //2min有效时间
           LocalDateTime expireTime = currentTime.plusMinutes(2);

           //存储到session
           request.getSession().setAttribute("expireTime", expireTime);

           SimpleMailMessage message = new SimpleMailMessage();
           message.setSubject("【测试验证码】验证消息"); // 发送邮件的标题
           message.setText("登录操作,验证码:"+ code + ",切勿将验证码泄露给他人,本条验证码有效期2分钟。"); // 发送邮件的内容
           message.setTo(mail); // 指定要接收邮件的用户邮箱账号
           message.setFrom("[email protected]"); // 发送邮件的邮箱账号,注意一定要和配置文件中的一致!

           sender.send(message); // 调用send方法发送邮件即可

           //先用的session可以采用security
           request.getSession().setAttribute("qq",mail);
           request.getSession().setAttribute("code",code);
           request.getSession().setAttribute("expireTime",expireTime);
           request.getSession().setMaxInactiveInterval(60*2);
           return "发送成功";
       }
       catch (Exception e){
           return "发送失败";
       }
    }
    //验证验证码
    @PostMapping("/test2")
    public String test2(@RequestBody  Map<String,String> map, HttpServletRequest request){

        String vqq=map.get("qq");
        String vcode=map.get("code");
        HttpSession session=request.getSession();
        //先用的session可以采用security
        String qq= (String) session.getAttribute("qq");
        String code=   (String)session.getAttribute("code");
        LocalDateTime expireTime = (LocalDateTime) session.getAttribute("expireTime");
        LocalDateTime currentTime = LocalDateTime.now();
        // 检查验证码是否过期
        if (expireTime != null && currentTime.isBefore(expireTime)) {
            // 验证码有效,执行相应逻辑
            // return "验证码过期了!";
            if (vqq.equals(qq)&&vcode.equals(code)){
                return "验证成功";
            }
            else {
                return "验证失败";
            }
        } else {
            // 验证码已过期,执行相应逻辑
            session.removeAttribute("qq");
            session.removeAttribute("code");
            return "验证码已过期";
        }


    }


}
3.测试
1.发送验证码

2.邮箱接收到的

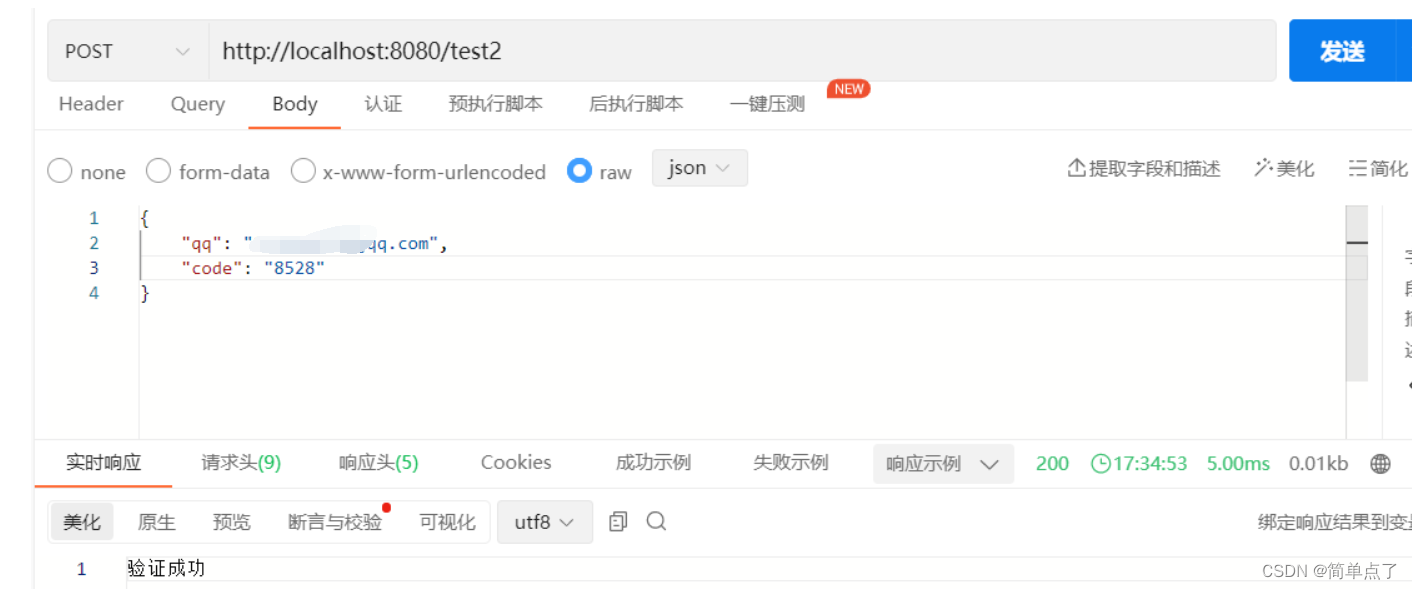
3.验证
4.过期了
