水平属于彩笔级别,自己开发的项目基本一步一个坑,这次记录开发紧急联系人模块遇到的一些坑。
紧急联系人功能概要:
-
创建联系人
-
修改联系人信息
-
删除联系人
-
拨打电话
紧急联系人功能实质就是通讯录,而通讯录,总所周知都是基于数据库实现的,这里使用的是Android内置的sqllite数据库。
创建DatabaseHelper:
主要是建表和增删改查的查询语句。这个问题不大,没学过也只需要记住有这么一个东西就行.
public class DatabaseHelper extends SQLiteOpenHelper {
    //建表操作,固定的格式
    private static final String DB_NAME="Contact";
    private static final String TABLE_NAME="Relation";
    private static final String CREATE_TABLE="create table relation(_id integer primary key autoincrement, "
            +"name text, "
            +"tel text);";


    private SQLiteDatabase db;
    public DatabaseHelper(Context context){
        super(context,DB_NAME,null,2);

    }
    //添加
    public void insert(ContentValues values)
    {
        SQLiteDatabase db=getWritableDatabase();
        db.insert(TABLE_NAME,null,values);
        db.close();
    }
    //删除
    public void del(int id)
    {   //如果数据库不存在,创建一个新的数据库
        if(db==null)
            db=getWritableDatabase();
        db.delete(TABLE_NAME,"_id = ?",new String[]{String.valueOf(id)});
    }
    //查询
    public Cursor query()
    {
        SQLiteDatabase db=getWritableDatabase();
        Cursor cursor=db.query(TABLE_NAME,null,null,null,null,null,null);
        return cursor;
    }
    //修改
    public void update(ContentValues values,String tp)
    {
        SQLiteDatabase db=getWritableDatabase();
        db.update(TABLE_NAME,values,"name=?",new String[]{tp});
    }

    public void close()
    {//数据库不为空,关闭数据库
        if(db!=null)
        {
            db.close();
        }
    }

    @Override
    public void onCreate(SQLiteDatabase db) {
    this.db=db;
    db.execSQL(CREATE_TABLE);
    }

    @Override
    public void onUpgrade(SQLiteDatabase db, int oldVersion, int newVersion) {

    }
}
主界面还是ListView,RecyclerView也可以,以后可以考虑用用RecyclerView.
联系人relationlist_item的xml文件
<?xml version="1.0" encoding="utf-8"?>
<LinearLayout xmlns:android = "http://schemas.android.com/apk/res/android"
    android:layout_width="match_parent"
    android:layout_height="wrap_content"
    android:orientation="vertical"
    android:layout_marginRight="10dp"
    android:layout_marginLeft="10dp"
    android:padding="10dp"
    android:background="@drawable/contactlistitem">
    <LinearLayout
        android:layout_width="match_parent"
        android:layout_height="wrap_content"
        android:layout_below="@+id/dialog_title"
        android:layout_alignParentStart="true"

        android:orientation="horizontal">

        <TextView
            android:layout_width="50dp"
            android:layout_height="wrap_content"
            android:layout_margin="10dp"
            android:text="姓名:"
            android:textColor="@color/alpha_75_colorPrimary"
            android:textSize="16dp" />

        <TextView
            android:id="@+id/name"
            android:layout_width="275dp"
            android:layout_height="wrap_content"
            android:layout_gravity="center_vertical"
            android:textSize="16dp" />
    </LinearLayout>

    <LinearLayout
        android:layout_width="match_parent"
        android:layout_height="wrap_content"
        android:layout_alignParentTop="true"

        android:orientation="horizontal">

        <TextView
            android:layout_width="50dp"
            android:layout_height="wrap_content"
            android:layout_margin="10dp"
            android:text="电话:"
            android:textColor="@color/alpha_75_colorPrimary"
            android:textSize="16dp" />

        <TextView
            android:id="@+id/tel"
            android:layout_width="match_parent"
            android:layout_height="wrap_content"
            android:layout_gravity="center_vertical"
            android:textSize="16dp"
            />
    </LinearLayout>

    <LinearLayout
        android:layout_width="match_parent"
        android:layout_height="30dp"
        android:orientation="horizontal">
       <ImageView
           android:layout_weight="1"
           android:id="@+id/update"
           android:layout_width="wrap_content"
           android:layout_height="wrap_content"
           android:layout_gravity="center_horizontal"
           android:src="@drawable/update"/>
        <ImageView
            android:layout_weight="1"
            android:id="@+id/delete"
            android:layout_width="wrap_content"
            android:layout_height="wrap_content"
            android:layout_gravity="center_horizontal"
            android:src="@drawable/delete"/>
    </LinearLayout>
</LinearLayout>
效果图
: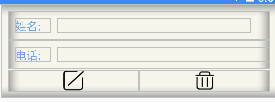
我在实现创建联系人这一功能的时候就遇到问题了,点击添加按钮,弹出对话框,在对话框内输入联系人姓名和电话.这个因为没有实现过Dialog的自定义样式,所以我也查了很多的博客,关于自定义dialog,我已经专门写过一篇博客来记录,这里不赘述.
我不会的是如何将对话框中的内容投射到listView中,解决办法是使用SimpleCursorAdapter,这也是我第一次使用这个适配器.
官方解释是:一个简单的适配器,将游标中的数据映射到布局文件中的TextView控件或者ImageView控件中。
具体怎么用,点击这个链接https://blog.csdn.net/yhaolpz/article/details/51635860.
最后实现了功能.
        //建立映射集
        final String[] from={"name","tel"};
        int[] to={R.id.name,R.id.tel};
        //设置适配器
        SimpleCursorAdapter scadapter=new
        SimpleCursorAdapter(getContext(),R.layout.relationlist,cursor,from,to);
        listView.setAdapter(scadapter);
手动创建映射方法 getRelationFromDB
private void getRelationFromDB()
    {
        final DatabaseHelper dbHelper=new DatabaseHelper(getContext());
        final Cursor cursor=dbHelper.query();

        //建立映射集
        final String[] from={"name","tel"};
        int[] to={R.id.name,R.id.tel};
        //设置适配器
        SimpleCursorAdapter scadapter=new SimpleCursorAdapter(getContext(),R.layout.relationlist,cursor,from,to);
        listView.setAdapter(scadapter);
        listView.setOnItemClickListener(new AdapterView.OnItemClickListener() {
            @Override
            public void onItemClick(AdapterView<?> parent, View view, int position, long id) {

                //初始化操作
                Update=view.findViewById(R.id.update);
                Delete=view.findViewById(R.id.delete);
                name=view.findViewById(R.id.name);
                tel=view.findViewById(R.id.tel);

                //Log.e("YT:",name.toString());
                final long temp=id;
                //删除信息
                Delete.setOnClickListener(new View.OnClickListener() {
                    @Override
                    public void onClick(View v) {
                        AlertDialog.Builder adBuilder=new AlertDialog.Builder(getActivity());
                        adBuilder.setMessage("确认要删除联系人吗?").setPositiveButton("确认", new DialogInterface.OnClickListener() {
                            @Override
                            public void onClick(DialogInterface dialog, int which) {
                                dbHelper.del((int) temp);
                                Cursor cursor = dbHelper.query();
                                String[] from = { "name", "tel"};
                                int[] to={ R.id.name,R.id.tel};
                                SimpleCursorAdapter scadapter = new SimpleCursorAdapter(getActivity().getApplicationContext(),R.layout.relationlist,cursor,from,to);
                                listView.setAdapter(scadapter);

                            }
                        }).setNegativeButton("取消", new DialogInterface.OnClickListener() {
                            @Override
                            public void onClick(DialogInterface dialog, int which) {

                            }
                        });
                        AlertDialog alertDialog=adBuilder.create();
                        alertDialog.show();
                    }
                });
                //修改联系人信息
                Update.setOnClickListener(new View.OnClickListener() {
                    @Override
                    public void onClick(View v) {
                        dialogshow(name.getText().toString(),tel.getText().toString());
                    }
                });
                //点击电话号码,跳转到拨打页面
                tel.setOnClickListener(new View.OnClickListener() {
                    @Override
                    public void onClick(View v) {
                        Intent intent = new Intent(Intent.ACTION_DIAL);
                        intent.setData(Uri.parse("tel: "+tel.getText().toString()));
                        startActivity(intent);
                    }
                });

            }
        });
        dbHelper.close();

    }
这一段代码里实现了删除,修改,拨打电话三个功能.其中,拨打电话是最简单的,直接intent调用拨号就行,其他的就不是那么容易了.
创建和修改联系人这两个功能,都要弹出对话框,所以这两个功能可以一个方法实现,使用的时候传入两个值,分别为联系人姓名和电话,如果传入的为 " ",那么就是创建新的,如果不为空,则是修改,两种功能的不同之处就是数据库操作不同.上代码
 private void dialogshow(final String Name, final String Tel) {

        LayoutInflater inflater = LayoutInflater.from(getContext());
        //加载自定义的格式
        View v=inflater.inflate(R.layout.addrelstion,null);
        //确定,取消

        Button btn_save = v.findViewById(R.id.dialog_btn_save);
        Button btn_cancel = v.findViewById(R.id.dialog_btn_cancel);

        final Dialog dialog=new MyDialog(getContext(),0,0,v,R.style.DialogTheme);
        dialog.setCancelable(true);
        dialog.show();
        //解决dialog中EditText不能弹出键盘的问题
        /*dialog.getWindow().clearFlags(WindowManager.LayoutParams.FLAG_ALT_FOCUSABLE_IM);*/
        dialog.getWindow().setSoftInputMode(WindowManager.LayoutParams.SOFT_INPUT_STATE_ALWAYS_VISIBLE);

        addName=(EditText)v.findViewById(R.id.addName);
        Log.e("Editext",addName.getText().toString());
        addTel=(EditText) v.findViewById(R.id.addTel);

        dialog.getWindow().setContentView(v);//自定义布局应该在这里添加,要在dialog.show()的后面
        //dialog.getWindow().setGravity(Gravity.CENTER);//可以设置显示的位置
        final ContentValues values = new ContentValues();

        final DatabaseHelper dbHelper = new DatabaseHelper(getContext().getApplicationContext());

        //在弹出的对话框中显示联系人信息,如果之前未创建过,则显示为空,若创建过,则显示.
        addName.setText(Name.toCharArray(),0,Name.length());
        addTel.setText(Tel.toCharArray(),0,Tel.length());
        //保存按钮点击事件
            btn_save.setOnClickListener(new View.OnClickListener() {
                @Override
                public void onClick(View v) {

                    values.put("name", addName.getText().toString());
                    values.put("tel", addTel.getText().toString());
                    //创建新的联系人
                    if(Name=="")
                    {
                        dbHelper.insert(values);

                    }
                    //修改信息
                    else if(Name!="")
                    {
                        dbHelper.update(values,Name);
                    }
                    getRelationFromDB();
                    dialog.dismiss();
                }
            });
            btn_cancel.setOnClickListener(new View.OnClickListener() {
                @Override
                public void onClick(View v) {
                    dialog.dismiss();
                }
            });
    }
这样基本实现功能,后期可以对输入的电话进行格式判断,加个正则表达式什么的.