Nginx系列-7.配置Nginx使用uwsgi支持web.py框架
目录 - Nginx系列
Nginx系列-1.Linux下安装Nginx
Nginx系列-2.配置LNMP(Linux、Nginx、MySQL、PHP)架构
Nginx系列-3.配置Nginx虚拟主机
Nginx系列-4.Nginx日志配置及日志切割
Nginx系列-5.配置Nginx的防盗链
Nginx系列-6.配置Nginx的HTTPS
Nginx系列-7.配置Nginx使用uwsgi支持web.py框架
Nginx系列-8.配置Nginx+Apache实现动静分离
Nginx系列-9.配置NFS实现Nginx实现动静分离
Nginx系列-10.采用Nginx搭建正向代理服务
Nginx系列-11.配置Nginx反向代理和负载均衡
实验环境
一台最小化的 CentOS 7.3 虚拟机
ip: 192.168.204.133
一、安装基本环境
-
安装基本环境
yum install -y epel*
yum install -y nginx python-pip python-devel \
pcre-devel libxml2-devel gcc vim tree psmisc
pip安装uwsgi时需要
gcc
uwsgi进程管理时需要psmisc -
安装python库文件
pip install web.py pip install uwsgi -
创建网站根目录
mkdir /var/wwwroot cd /var/wwwroot -
编写测试网页
创建并编辑/var/wwwroot/main.py#!/usr/bin/python #coding=utf-8 import web urls = ( '/(.*)', 'hello' ) app = web.application(urls, globals()) class hello: def GET(self, name): if not name: name = 'World' return 'Hello, ' + name + '!' if __name__ == "__main__": app.run() # 使用nginx作web服务时,注意添加下面这句话 application = app.wsgifunc()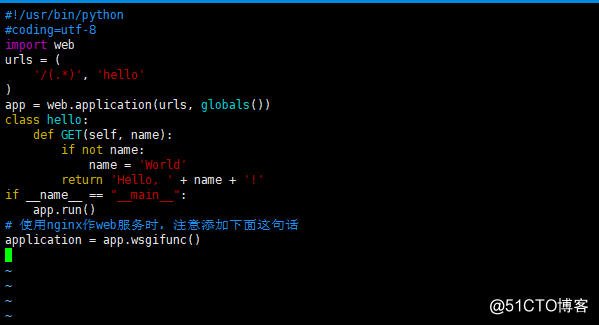
-
对
main.py添加可执行权限chmod +x /var/wwwroot/main.py - 关闭防火墙
setenforce 0
systemctl stop firewalld
systemctl disable firewalld
二、配置nginx和uwsgi
-
修改nginx的配置文件
修改server下的root为网站根目录
修改location中的配置如下location / { include uwsgi_params; uwsgi_pass 127.0.0.1:9090; #此套接字为uwsgi监听的地址和端口 uwsgi_param UWSGI_CHDIR $document_root; #此处代表网站根目录 uwsgi_param UWSGI_SCRIPT main; #此处为应用的入口文件 }
-
启动
nginxsystemctl start nginx netstat -anpt | grep nginx -
配置
uwsgi
创建并编辑/ect/uwsgi.ini[uwsgi] socket = 127.0.0.1:9090 workers = 4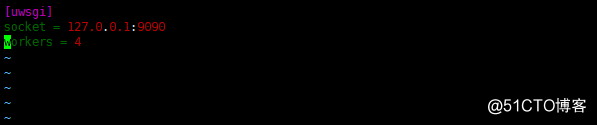
-
启动
uwsgi
开启一个 新终端! 新终端!! 新终端!!! 执行以下命令uwsgi --ini /etc/uwsgi.ini 2>&1 & exit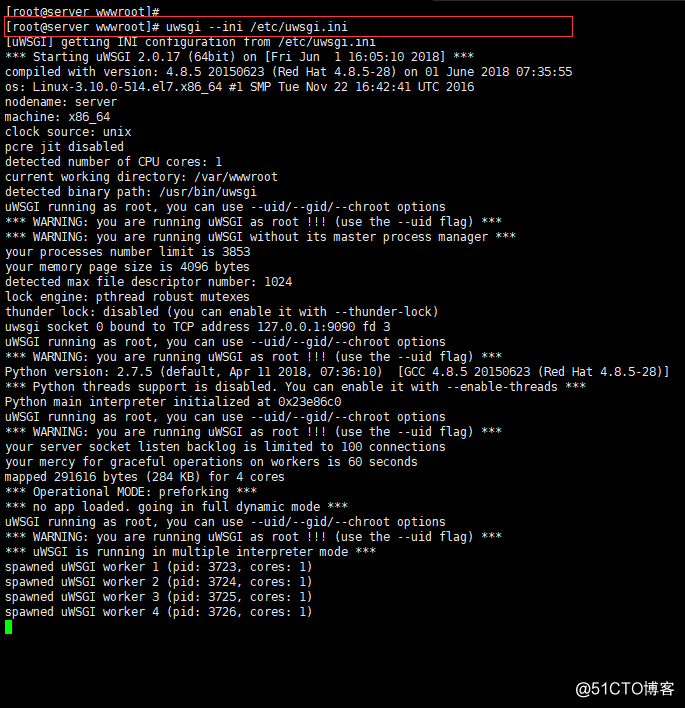
-
回到之前的终端,查看
uwsgi是否正常启动netstat -antp | grep -E "9090|uwsgi"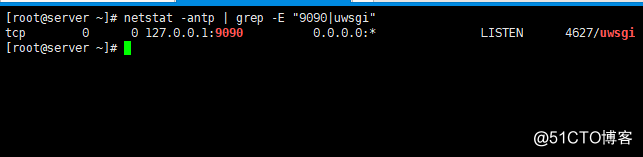
- 停止
uwsgikillall uwsgi netstat -antp | grep -E "9090|uwsgi"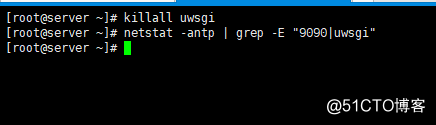
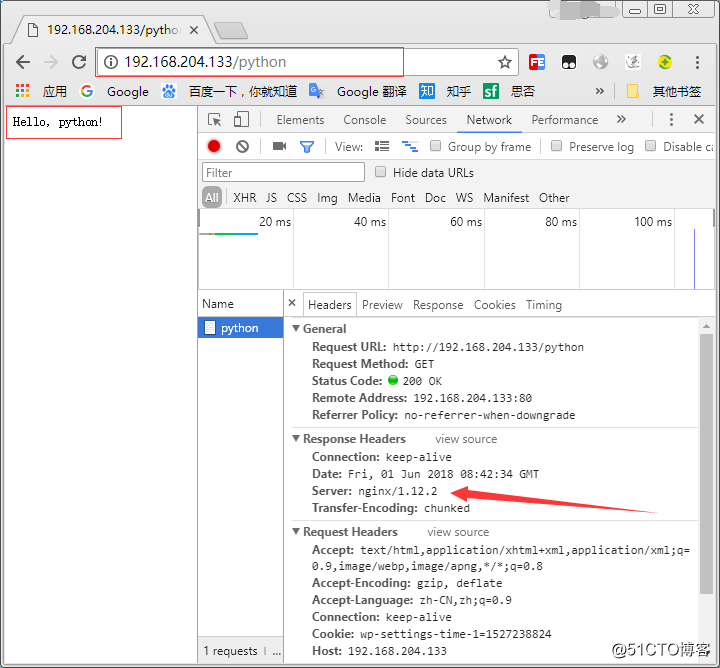
三、测试
- 在宿主机访问
四、一键部署脚本
#!/bin/bash
# 关闭防火墙
setenforce 0
systemctl stop firewalld
systemctl disable firewalld
# 安装基础软件包
yum install -y epel*
yum install -y nginx python-pip python-devel \
pcre-devel libxml2-devel gcc vim tree psmisc
# 安装python模块
pip install web.py
pip install uwsgi
# 建立网站根目录
mkdir /var/wwwroot
cd /var/wwwroot
# 建立测试网页
echo -e "#!/usr/bin/python
#coding=utf-8
import web
urls = (
'/(.*)', 'hello'
)
app = web.application(urls, globals())
class hello:
def GET(self, name):
if not name:
name = 'World'
return 'Hello, ' + name + '!'
if __name__ == \"__main__\":
app.run()
# 使用nginx作web服务时,注意添加下面这句话
application = app.wsgifunc()
" > /var/wwwroot/main.py
# 添加可执行权限
chmod +x /var/wwwroot/main.py
# 修改nginx配置文件
NGINX_CONF_PATH=/etc/nginx/nginx.conf
sed -i 's/^[^#].*root.*/ root \/var\/wwwroot;/g' ${NGINX_CONF_PATH}
sed -i "47 a \ include uwsgi_params;" ${NGINX_CONF_PATH}
sed -i "48 a \ uwsgi_pass 127.0.0.1:9090;" ${NGINX_CONF_PATH}
sed -i "49 a \ uwsgi_param UWSGI_CHDIR \$document_root;" ${NGINX_CONF_PATH}
sed -i "50 a \ uwsgi_param UWSGI_SCRIPT main;
" ${NGINX_CONF_PATH}
# 启动nginx
systemctl start nginx
netstat -anpt | grep nginx
# 配置uwsgi
echo -e "[uwsgi]
socket = 127.0.0.1:9090
workers = 4
" > /etc/uwsgi.ini
# 启动uwsgi
echo -e "uwsgi starting..."
uwsgi --ini /etc/uwsgi.ini 2>&1 &