前言
这是一个利用hog+svm检测行人的例程
一、获取数据集
一般来说,数据集的获取是整个过程中最费时也是最重要的一步,因为这是一个学习例子,重点在于掌握如何用svm检测行人,所以数据集直接使用MIt人物数据集,数据下载地址
二、代码
1.训练模型
from cv2 import cv2
import numpy as np
import matplotlib.pyplot as plt
from sklearn import datasets
import random
import os
from sklearn import model_selection as ms
from sklearn import metrics


def train_svm(X_train, y_train):
    '''
    封装svm训练函数,返回训练好的svm。
    参数说明。
    x_train:训练样本特征向量
    y_train:训练样本标签
    '''
    svm = cv2.ml.SVM_create()
    svm.train(X_train, cv2.ml.ROW_SAMPLE, y_train)
    return svm

def score_svm(svm, X, y):
    '''
    封装模型评价函数,返回准确率
    参数说明。
    svm:训练好的svm模型,
    x:验证集样本特征向量
    y:验证集真实标签
    '''
    _, y_pred = svm.predict(X)
    return metrics.accuracy_score(y, y_pred)
#  文件所在地址
datadir = "data of pedes"
dataset = "pedestrians128x64"
extractdir = "%s/%s"%(datadir,dataset)
#  查看加载文件图片
# for i in range(5):
#     filename = "%s/per0010%d.ppm" %(extractdir,i)
#     img = cv2.imread(filename)
#     plt.subplot(1,5,i+1)
#     plt.imshow(cv2.cvtColor(img,cv2.COLOR_BGR2RGB))
# plt.show()
#  定义hog描述子所需的参数
win_size = (48, 96)
block_size = (16, 16)
block_stride = (8, 8)
cell_size = (8, 8)
num_bins = 9
hog = cv2.HOGDescriptor(win_size, block_size, block_stride, cell_size, num_bins)
#  定义随机数种子,确保每一次运行的随机数都一样
random.seed(42)
x_pos = []
#  从900个样本中随机截取400个样本。sample函数:随机截取列表指定长度值
for i in random.sample(range(900),400):
    filename = "%s/per%05d.ppm"%(extractdir,i)
    img = cv2.imread(filename)
    if img is None:
        print("could not find image")
        continue
    x_pos.append(hog.compute(img,(64,64)))
#  opencv中要求数据类型为np.float32
x_pos = np.array(x_pos,dtype=np.float32)
y_pos = np.ones(x_pos.shape[0],dtype=np.int32)
# print(x_pos.shape)
# print(y_pos.shape)
#  制作负样本
negdir = "%s/pedestrians_neg" % datadir
#  负样本尺寸定为64X128
h = 128
w = 64
x_neg = []

for negfile in os.listdir(negdir):
    filename = "%s/%s"%(negdir,negfile)
    img = cv2.imread(filename)
    #  使图像与行人图像比例相同,对其尺寸调整
    img = cv2.resize(img,(512,512))
    #  随机截取五次,扩充负样本数量集
    for j in range(5):
        rand_y = random.randint(0, img.shape[0] - h)
        rand_x = random.randint(0, img.shape[1] - w)
        roi = img[rand_y:rand_y + h, rand_x:rand_x + w, :]
        x_neg.append(hog.compute(roi, (64, 64)))
#  转换数据格式为32位浮点型,同时生成负样本标签
x_neg = np.array(x_neg, dtype=np.float32)
y_neg = -np.ones(x_neg.shape[0], dtype=np.int32)
#print(x_neg.shape)
#  concatenate函数:对数组进行拼接,默认axis=0,按行拼
x = np.concatenate((x_pos, x_neg))
y = np.concatenate((y_pos, y_neg))
#  将80%用作训练集
x_train, x_test, y_train, y_test = ms.train_test_split(
    x, y, test_size=0.2, random_state=42
)
#  开始训练
svm = train_svm(x_train, y_train)
#  计算训练集和测试集准确率
c=score_svm(svm, x_train, y_train)
d=score_svm(svm, x_test, y_test)
# print(c)
# print(d)

#  采用自举法提高模型性能
score_train = []
score_test = []
#  自举三次即可
for j in range(3):
    svm = train_svm(x_train,y_train)
    score_train.append(score_svm(svm,x_train,y_train))
    score_test.append(score_svm(svm,x_test,y_test))

    _,y_pred = svm.predict(x_test)
    #  logical_and函数:对列表对应位置进行按位与操作,如[1,0],[0,1],将得到[false,false].
    #  此处返回的列表中,假正的例子都将是true,为后面对列表进行逻辑索引做准备
    false_pos = np.logical_and((y_test.ravel() == -1),
                               (y_pred.ravel() == 1))
    #  any:判断参数是否全为false,全是false则返回false,否则返回true 。当列表中全为false,说明没有假正了
    if not np.any(false_pos):
        print('no more false positive')
        break
    #  把假正的例子重新加到训练集中进行训练,此处是按逻辑索引
    x_train = np.concatenate((x_train,
                              x_test[false_pos,:]),axis=0)
    y_train = np.concatenate((y_train,
                             y_test[false_pos]),axis=0)
#  查看模型自举后的准确率
# print('-------------------')
# print(score_train)
# print(score_test)
2.检测行人
上面利用数据训练得到一个用于检测行人的svm模型,下面就是如何利用该模型检测测试集上的行人。有三种方法
2.1方法一
运用opencv内置的多尺度检测
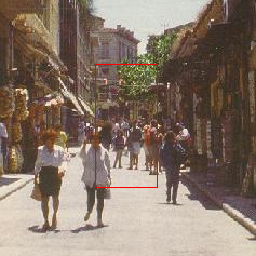
测试集图片

#  利用opencv内置的多尺度检测来检测行人
rho, _, _ = svm.getDecisionFunction(0)
sv = svm.getSupportVectors()
hog.setSVMDetector(np.append(sv[0, :].ravel(), rho))
found, _ = hog.detectMultiScale(img_test)
for rec in found:
    print(rec)
    cv2.rectangle(img_test,(rec[0],rec[1]),(rec[0]+rec[2],rec[1]+rec[3]),(0,0,255),1)

cv2.imshow('a',img_test)
cv2.waitKey()
cv2.destroyAllWindows()
结果

可以发现,检测效果并不好
2.2方法二
利用滑动窗口来检索测试图片中有没有行人,这种方法对于尺度改变的行人检测不到
#  这是用滑动窗口的方法来检测训练集中的行人,但这种方法无法检测改变了大小的行人,因为截取roi时,截取区域固定了
for ystart in np.arange(0,img_test.shape[0],stride):
    for xstart in np.arange(0,img_test.shape[1],stride):
        #  确保图像不会超出边界
        if ystart + h > img_test.shape[0]:
            continue
        if xstart + w > img_test.shape[1]:
            continue
        #  切出感兴趣区域,对它预处理并分类
        roi = img_test[ystart:ystart +h,xstart:xstart + w,:]
        feat = np.array([hog.compute(roi,(64,64))])
        _,ypred = svm.predict(feat)
        print(y_pred.shape)
        #  allclose函数:判断两个向量是否相近,相近返回true,默认相对误差rtol = 10e-5

        if np.allclose(ypred,1):
            found.append((ystart,xstart,h,w))
for rec in found:
    print(rec)
    cv2.rectangle(img_test,(rec[0],rec[1]),(rec[0]+rec[2],rec[1]+rec[3]),(0,0,255),1)
cv2.imshow('akk',img_test)
cv2.waitKey()
cv2.destroyAllWindows()
结果

效果更不好
2.3方法三
这种方法就直接用opencv训练好的模型来进行检测了
#  方法三。直接用opencv训练好的分类器,效果最好
hogdef = cv2.HOGDescriptor()
hogdef.setSVMDetector(cv2.HOGDescriptor_getDefaultPeopleDetector())
found, _ = hogdef.detectMultiScale(img_test)
fig = plt.figure(figsize=(10, 6))
ax = fig.add_subplot(111)
ax.imshow(cv2.cvtColor(img_test, cv2.COLOR_BGR2RGB))
from matplotlib import patches
for f in found:
    ax.add_patch(patches.Rectangle((f[0], f[1]), f[2], f[3], color='y', linewidth=3, fill=False))
plt.savefig('detected1.png')
结果

果然,官方出品,必属佳品。
总结
对于方法一和方法二还需再研究一下,争取将其泛化到检测其他目标上去。