一、安装matplotlib
- 在cmd环境下,按照自己安装的python位置进入Scripts目录下,输入命令:pip install matplotlib
- 或者在pyCharm中安装包
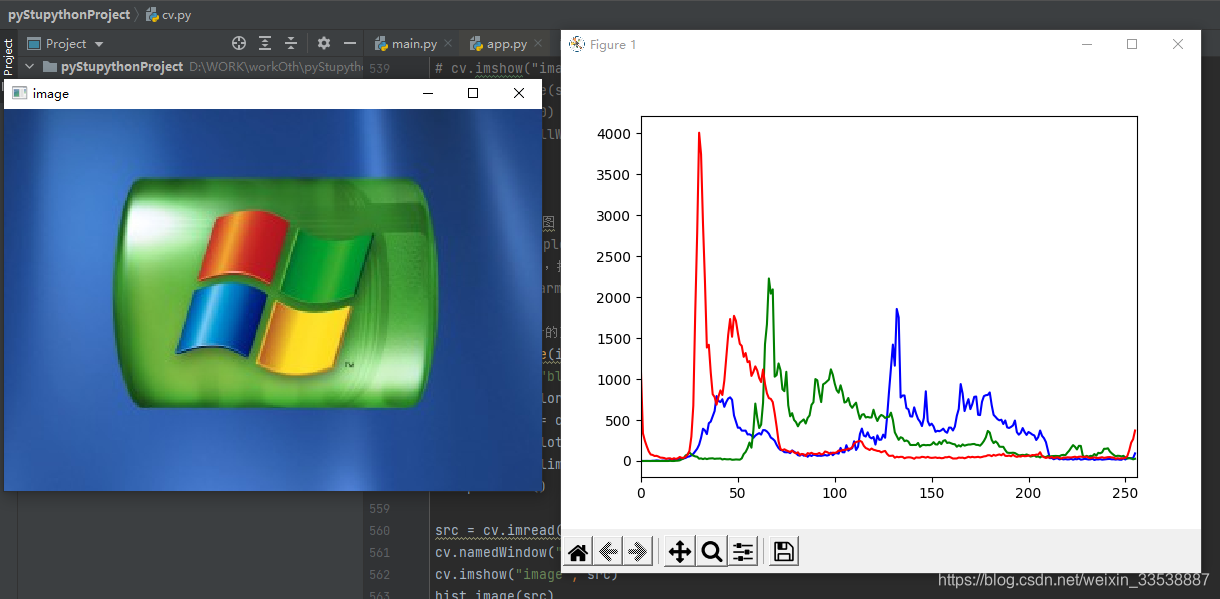
二、绘出图片的直方图
代码如下:
import cv2 as cv
from matplotlib import pyplot as plt

def hist_image(image):
    color = ("blue", "green", "red")
    for i, color in enumerate(color):
        hist = cv.calcHist([image], [i], None, [256], [0, 256])
        plt.plot(hist, color=color)
        plt.xlim([0, 256])
    plt.show()

src = cv.imread("./static/image/windows.jpg")
cv.namedWindow("image", cv.WINDOW_NORMAL)
cv.imshow("image", src)
hist_image(src)
cv.waitKey(0)
cv.destroyAllWindows()
运行结果:
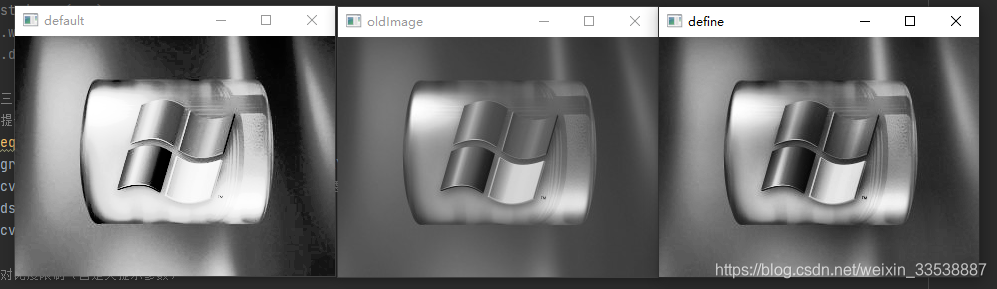
三、直方图应用
代码如下:
import cv2 as cv
from matplotlib import pyplot as plt

def equalHist_image(image):
    gray = cv.cvtColor(image, cv.COLOR_BGR2GRAY)
    cv.imshow("oldImage", gray) # 因为只能处理灰度图像,所以输出原图的灰度图像用于对比
    dst = cv.equalizeHist(gray)
    cv.imshow("default",dst)

#   对比度限制(自定义提示参数)
def clahe_image(image):
    gray = cv.cvtColor(image, cv.COLOR_BGR2GRAY)
    clahe = cv.createCLAHE(clipLimit=2.0, tileGridSize=(4, 4))#clipLimit是对比度的大小,tileGridSize是每次处理块的大小
    dst = clahe.apply(gray)
    cv.imshow("define", dst)

src = cv.imread('./static/image/windows.jpg')
equalHist_image(src)
clahe_image(src)
cv.waitKey(0)
cv.destroyAllWindows()
运行效果: