目录

一、前言与效果展示
最近在做一个账本,里面有个功能需要“拖拽排序”,网上的代码我也看不太懂,打算自己写一个。微信小程序官方给了一个可移动的盒子 movable-view ,基于这个我们来实现一个简单的拖拽排序功能
效果: 可以自定义一行展示多少个图标,下面演示一行五个的情况
二、源码
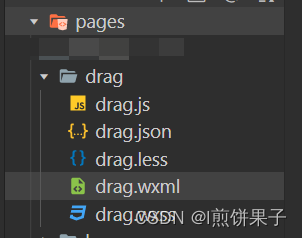
1.目录结构
我起名为drag,你们可以自己选择起名
2.drag.wxml文件
(1)使用了wxs定义了parseInt函数 (因为在模板中不能直接使用parseInt(),需要借助wxs)
(2)movable-view中,除了class为showLine的元素不要动,其它的比如icon和name可以自定义样式删除或修改 (showLine是用于元素拖拽时的位置提示)
(3)movable-view标签的 style 里,有个background-color,你们可以自己选择颜色,用于“被拖拽的元素”的背景颜色
<wxs module="m1">
  var parseIntNumber = function (num) {
    return parseInt(num)
  }
  module.exports.parseIntNumber = parseIntNumber;
</wxs>
<view class="list">
  <movable-area class="moveList" style="height: {

   {(m1.parseIntNumber(positionList.length/drag.countOneLine)+1) * (drag.height)}}rpx;width: {

   {drag.outWidth}}rpx;">
    <movable-view wx:for="{

   {positionList}}" wx:key="id" out-of-bounds direction="all" style="height: {

   {drag.height}}rpx;width: calc({

   {drag.outWidth}}rpx / {

   {drag.countOneLine}});background-color: {

   {nowDragIndex == index ? '#bbbbbb90':''}};" class="moveItem" x="{

   {positionList[index].left}}rpx" y="{

   {positionList[index].boxTop}}rpx" bindchange="drag" bindtouchend="dragEnd" data-myindex="{

   {index}}">
      <!-- 蓝色边边的出现条件:当前轮到index这个索引显示了 且 当前拖动的元素的索引不是index -->
      <view class="showLine" wx:if="{

   { showLine === index && nowDragIndex!==index}}"></view>
      <view class="icon">图标</view>
      <view class="name">{

   {item.name}}</view>
    </movable-view>
  </movable-area>
</view>
3.drag.wxss文件
我是使用less写的样式文件,所以这里会放less 的源代码,不会使用less 的请看 (2)drag.less
movable-view自动具有绝对定位属性,只能通过标签里的x和y来定位,无法使用flex布局
(1)drag.less
.list {
  display: flex;
  flex-wrap: wrap;

  .moveList {
    width: 100%;

    .moveItem {
      display: flex;
      flex-direction: column;
      align-items: center;
      justify-content: center;
      background-color: #ececec00;

      .icon {
        height: 60rpx;
        width: 60rpx;
        line-height: 60rpx;
        text-align: center;
        font-size: 20rpx;
        background-color: aqua;
        border-radius: 50%;
      }

      .showLine {
        position: absolute;
        left: 0;
        transform: translate(-50%);
        width: 10rpx;
        height: 100%;
        background-color: blue;
      }
    }

  }
}
(2)drag.wxss 不会使用less的就用这个
.list {
  display: flex;
  flex-wrap: wrap;
}
.list .moveList {
  width: 100%;
}
.list .moveList .moveItem {
  display: flex;
  flex-direction: column;
  align-items: center;
  justify-content: center;
  background-color: #ececec00;
}
.list .moveList .moveItem .icon {
  height: 60rpx;
  width: 60rpx;
  line-height: 60rpx;
  text-align: center;
  font-size: 20rpx;
  background-color: aqua;
  border-radius: 50%;
}
.list .moveList .moveItem .showLine {
  position: absolute;
  left: 0;
  transform: translate(-50%);
  width: 10rpx;
  height: 100%;
  background-color: blue;
}
4.drag.js文件
在data里的drag对象中,可以自定义 盒子的高度、每一行展示的个数、可移动区域的宽度
想拖拽排序的数据放在 list 里面,注意需要有id,用于wx:for的key值
注:movable-view 的拖拽事件 bindchange 的e.detail中的数据,单位是px,需要转为rpx才能和我们写的单位匹配
// pages/drag/drag.js
Page({

  /**
   * 页面的初始数据
   */
  data: {
    drag: { //控制拖拽部分的盒子大小,在这里输入初始数据
      outWidth: 750, //可移动区域的宽度,单位rpx,750rpx是屏幕宽度
      height: 120, //盒子的高度,单位rpx
      countOneLine: 5, //一行盒子的个数,这个决定盒子宽度 (outWidth / countOneLine)
    },
    list: [ //列表,在这里输入想展示的数据,最后将会修改这里的顺序
      {
        id: 0, // id
        name: '餐饮', //名称
      },
      {
        id: 1, // id
        name: '交通', //名称
      },
      {
        id: 2, // id
        name: '住房', //名称
      },
      {
        id: 3, // id
        name: '美容', //名称
      },
      {
        id: 4, // id
        name: '服饰', //名称
      },
      {
        id: 5, // id
        name: '运动', //名称
      },
      {
        id: 6, // id
        name: '旅行', //名称
      },
      {
        id: 7, // id
        name: '娱乐', //名称
      },
      {
        id: 8, // id
        name: '生活', //名称
      },
      {
        id: 9, // id
        name: '医疗', //名称
      },
      {
        id: 10, // id
        name: '通讯', //名称
      },
      {
        id: 11, // id
        name: '学习', //名称
      },
      {
        id: 12, // id
        name: '礼物', //名称
      },
      {
        id: 13, // id
        name: '亲属', //名称
      },
      {
        id: 14, // id
        name: '数码', //名称
      },
      {
        id: 15, // id
        name: '零食', //名称
      },
      {
        id: 16, // id
        name: '购物', //名称
      },
      {
        id: 17, // id
        name: '其它', //名称
      },
      {
        id: 18, // id
        name: '转换', //名称
      },
      {
        id: 19, // id
        name: '出门', //名称
      },
      {
        id: 20, // id
        name: '红包', //名称
      },
      {
        id: 21, // id
        name: '食堂', //名称
      },
      {
        id: 22, // id
        name: '外卖', //名称
      },
      {
        id: 23, // id
        name: 'AA', //名称
      },
      {
        id: 24, // id
        name: '超市', //名称
      },
      {
        id: 25, // id
        name: '水电', //名称
      },
      {
        id: 26, // id
        name: '早餐', //名称
      },
      {
        id: 27, // id
        name: '水果', //名称
      },
      {
        id: 28, // id
        name: '借款', //名称
      },
    ],
    positionList: [], //把list转化后,具有定位数据的列表(展示在页面上)
    //下面的是一些动态的索引
    showLine: -1, //显示哪个索引的蓝色线
    nowDragIndex: -1, //当前拖动的索引
  },

  //拖拽时触发
  drag(e) {
    if (e.detail.source == '') return //如果这个值为空,说明不是手动拖拽的,不要进行下面的操作
    // console.log(e.detail);


    let myindex = e.currentTarget.dataset.myindex //当前拖动的图标的index
    if (this.data.nowDragIndex !== myindex) { //设置当前拖动的图标
      console.log('当前拖动的图标序号为', myindex);
      this.setData({
        nowDragIndex: myindex
      })
    }

    // e.detail单位是px,需要转为rpx
    let x = this.pxToRpx(e.detail.x) //转为rpx的x
    let y = this.pxToRpx(e.detail.y) //转为rpx的y
    let box = {}
    let drag = this.data.drag //拖拽部分的变量 宽 高 个数等
    box.leftX = x //正在拖动的盒子的左侧x值
    box.rightX = x + drag.outWidth / drag.countOneLine //正在拖动的盒子的右侧x值
    box.topY = y //正在拖动的盒子的顶部y值
    box.bottomY = y + drag.height //正在拖动的盒子的底部y值

    //使用for循环判断现在正在哪个位置 - 性能问题,如何防抖?
    for (let i = 0; i < this.data.positionList.length; i++) {
      const element = this.data.positionList[i];
      //判断拖拽的盒子,在哪个蓝色模块的位置
      if (box.leftX < element.left && box.rightX > element.left && element.boxTop - 20 < box.topY && element.boxBottom + 20 > box.bottomY) {
        this.setData({
          showLine: i
        })
        break
      }
    }

  },

  //拖拽的结束,判断是否应该移动,还是回复原位
  dragEnd(e) {
    let newIndex = this.data.showLine //即将挪动到的位置
    let nowDragIndex = this.data.nowDragIndex //原本的位置
    if (newIndex >= 0 && nowDragIndex !== newIndex) { //给showline赋值了且不是自己,说明需要变化位置
      console.log('需要变化位置');
      let newList = this.data.list //改变的是list,而不是页面展示的positionList
      let item = newList.splice(nowDragIndex, 1) // 删除指定的元素,给item
      newList.splice(newIndex, 0, item[0]) // 把item添加到指定位置

      this.setData({
        list: newList, //data的list修改,方便接下来重新计算位置
      })
      //然后刷新页面,重新计算position
      this.countPosition()

    } else {
      console.log('拖了但没完全拖,回复原位');
      setTimeout(() => {//使用定时器,防止拖拽到边缘时,无法正常归位(等待边缘动画结束后再回复原位,这个好像是微信小程序这个组件的bug,搜到了三个月前的bug,到现在还没解决)
        this.setData({
          positionList: this.data.positionList, //回复原位
        })
      }, 300);
    }
    //重置索引
    this.setData({
      showLine: -1,
      nowDragIndex: -1,
    })
    console.log(this.data);
  },


  //计算list里每个数据的坐标,放到positionList里
  countPosition() {
    let positionList = [] //装着列表的坐标数据
    let list = this.data.list
    for (let i = 0; i < list.length; i++) {
      let element = list[i]
      positionList.push({
        ...element,
        index: i,
        left: (i % this.data.drag.countOneLine) * (this.data.drag.outWidth / this.data.drag.countOneLine),
        boxTop: parseInt(i / this.data.drag.countOneLine) * this.data.drag.height,
        boxBottom: (parseInt(i / this.data.drag.countOneLine) + 1) * this.data.drag.height,
      })
    }
    this.setData({
      positionList
    })
  },
  /**
   * 生命周期函数--监听页面加载
   */
  onLoad(options) {

    //#region 定义 px转rpx 函数
    wx.getSystemInfo({
      success: (result) => {
        this.windowWidth = result.windowWidth
      },
    })
    this.pxToRpx = function (v_px) {
      let onePxToRpx = 750 / this.windowWidth
      return v_px * onePxToRpx
    }
    //#endregion

    //#region 计算列表的坐标, 装着列表的数据,包含坐标
    this.countPosition()
    //#endregion

  },

  /**
   * 生命周期函数--监听页面初次渲染完成
   */
  onReady() {

  },

  /**
   * 生命周期函数--监听页面显示
   */
  onShow() {

  },

  /**
   * 生命周期函数--监听页面隐藏
   */
  onHide() {

  },

  /**
   * 生命周期函数--监听页面卸载
   */
  onUnload() {

  },

  /**
   * 页面相关事件处理函数--监听用户下拉动作
   */
  onPullDownRefresh() {

  },

  /**
   * 页面上拉触底事件的处理函数
   */
  onReachBottom() {

  },

  /**
   * 用户点击右上角分享
   */
  onShareAppMessage() {

  }
})
5.drag.json文件
无需改动,是默认的即可
{
  "usingComponents": {}
}
三、结语
本次源码分享到这里结束,由于这是我花三个小时写出来的,肯定存在很多不足,比如在拖拽函数中,判断元素应该被挪动到的位置,我用了for循环来一个个判断,这必定会影响到性能 (因为微信提供的这个拖拽函数,只要盒子稍微移动一点点,都会触发很多次,再加上里面还有for循环,会造成短时间内有多个for循环在运行) 所以建议在数据量不大的时候可以使用这个源码,数据量很大的时候会卡顿。
除此之外,微信小程序这个组件有个自带的bug,当拖拽到边缘时,想动态设置x和y值,此时x可以被正常设置,但是y值不可以。就会出现:本来拖拽到无效区域,应该跑回原本的位置的,但是x值回去了,y值没回去,导致这样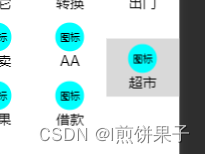 。这是页面显示效果的问题,不影响排序功能。
如果你有更好的解决方式,欢迎在评论区里不吝赐教!