裁剪是为了从图像中删除所有不需要的物体或区域。甚至突出显示图像的特定功能。
使用OpenCV裁剪没有特定的功能,NumPy数组切片是工作。读取的每个图像都存储在2D数组中(对于每个颜色通道)。只需指定要裁剪区域的高度和宽度(以像素为单位),就可以完成
使用OpenCV裁剪图像
1.使用OpenCV裁剪
以下代码片段展示了如何使用Python和C++裁剪图像。在例子的进一步,您将详细了解这些。
Python
# Import packages
import cv2
import numpy as np

img = cv2.imread('test.jpg')
print(img.shape) # Print image shape
cv2.imshow("original", img)

# Cropping an image
cropped_image = img[400:1200, 350:700]

# Display cropped image
cv2.imshow("cropped", cropped_image)

# Save the cropped image
cv2.imwrite("Cropped Image.jpg", cropped_image)

cv2.waitKey(0)
cv2.destroyAllWindows()
C++
// Include Libraries
#include<opencv2/opencv.hpp>
#include<iostream>

// Namespace nullifies the use of cv::function();
using namespace std;
using namespace cv;

int main()
{


  // Read image
  Mat img = imread("test.jpg");
  cout << "Width : " << img.size().width << endl;
  cout << "Height: " << img.size().height << endl;
  cout<<"Channels: :"<< img.channels() << endl;
  // Crop image
  Mat cropped_image = img(Range(400,1200), Range(350,700));

  //display image
  imshow(" Original Image", img);
  imshow("Cropped Image", cropped_image);

  //Save the cropped Image
  imwrite("Cropped Image.jpg", cropped_image);

  // 0 means loop infinitely
  waitKey(0);
  destroyAllWindows();
  return 0;
}
上面的代码读取并显示图像及其尺寸。尺寸不仅包括二维矩阵的宽度和高度,还包括通道的数量(例如,RGB图像有3个通道——红色、绿色和蓝色)。
让我们尝试裁剪图像中包含美女的部分。
Python
cropped_image = img[400:1200, 350:700] # Slicing to crop the image

# Display the cropped image
cv2.imshow("cropped", cropped_image)
cv2.waitKey(0)
cv2.destroyAllWindows()
C++
Mat crop = img(Range(400,1200),Range(350,700)); // Slicing to crop the image

// Display the cropped image
imshow("Cropped Image", crop);

waitKey(0);
destroyAllWindows();
return 0;

在Python中,您可以使用与NumPy数组切片相同的方法裁剪图像。要切片数组,您需要指定第一维和第二维的开始和结束索引。
- 第一个维度总是行数或图像的高度。
- 第二个维度是列数或图像的宽度。
如何剪切图像的NumPy数组?查看此示例中的语法:
cropped = img[start_row:end_row, start_col:end_col]
在C++中,我们使用Range()函数裁剪图像。
- Python同理一样,它也应用切片。
- 在这里,图像也按照上述相同的约定作为二维矩阵读取。
以下是裁剪图像的C++语法:
img(Range(start_row, end_row), Range(start_col, end_col))
2.使用裁剪功能对图像进行划分
在OpenCV中裁剪的一个实际应用可以是将图像划分为大小相同图像块。使用循环从图像中裁剪片段。首先从图像的形状中获取所需图像块的高度和宽度
Python
img =  cv2.imread("test_cropped.jpg")
image_copy = img.copy()
imgheight=img.shape[0]
imgwidth=img.shape[1]
C++
Mat img = imread("test_cropped.jpg");
Mat image_copy = img.clone();
int imgheight = img.rows;
int imgwidth = img.cols;
加载高度和宽度,以指定需要裁剪较小图像块的范围。为此,使用Python中的range()函数。现在,使用两个循环裁剪:
- 宽度范围
- 高度范围
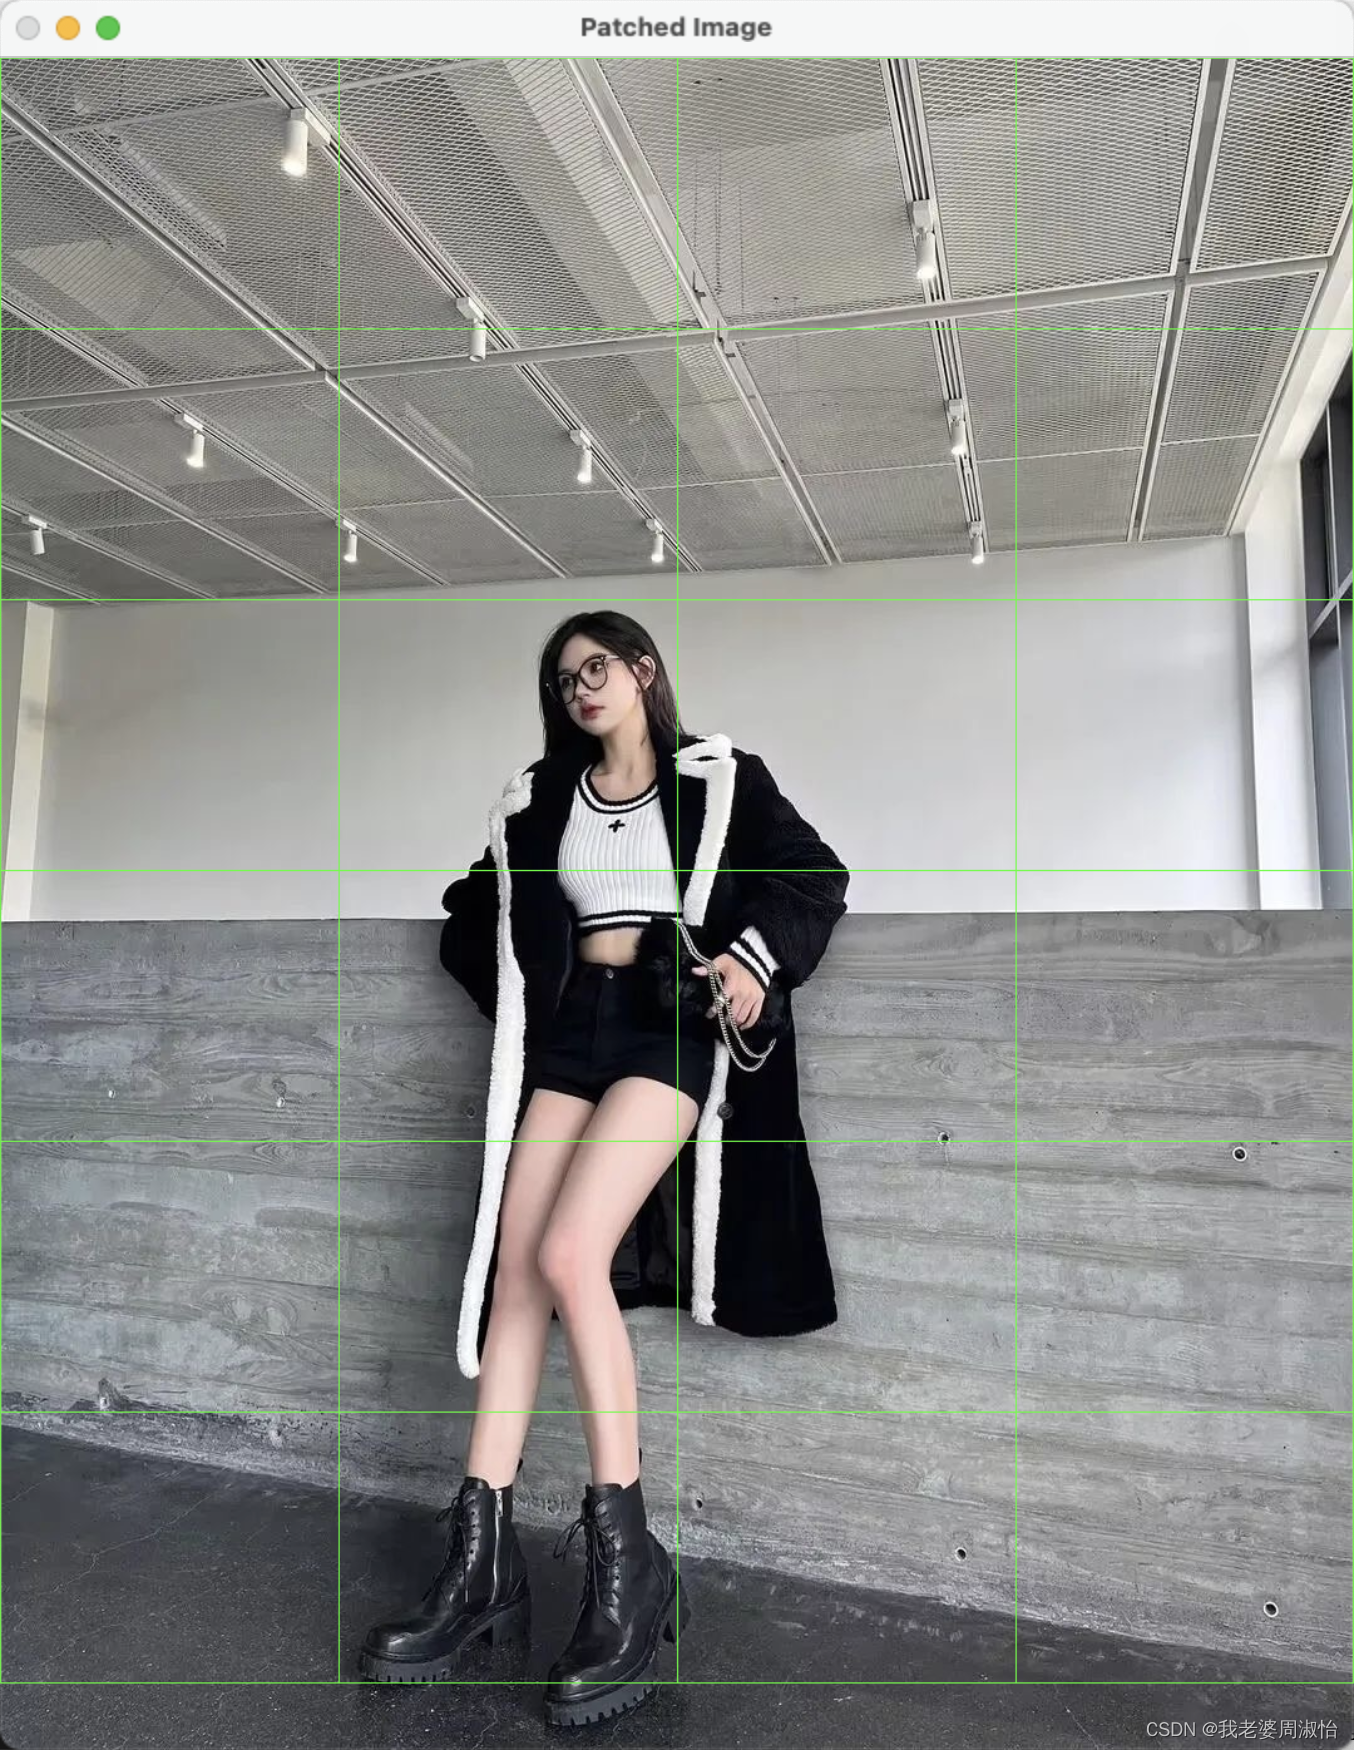
已知原图像瘩高度宽度为(1350,1080),我们使用的图像块的高度和宽度分别为(270,216)。内外循环的步幅(我们在图像中移动的像素数)也就是划分下来,有25个图像块。(拼图一样)
Python
M = 216
N = 270
x1 = 0
y1 = 0

for y in range(0, imgheight, M):
    for x in range(0, imgwidth, N):
        if (imgheight - y) < M or (imgwidth - x) < N:
            break

        y1 = y + M
        x1 = x + N

        # check whether the patch width or height exceeds the image width or height
        if x1 >= imgwidth and y1 >= imgheight:
            x1 = imgwidth - 1
            y1 = imgheight - 1
            # Crop into patches of size MxN
            tiles = image_copy[y:y + M, x:x + N]
            # Save each patch into file directory
            cv2.imwrite(str(x) + '_' + str(y) + '.jpg', tiles)
            cv2.rectangle(img, (x, y), (x1, y1), (0, 255, 0), 1)
        elif y1 >= imgheight:  # when patch height exceeds the image height
            y1 = imgheight - 1
            # Crop into patches of size MxN
            tiles = image_copy[y:y + M, x:x + N]
            # Save each patch into file directory
            cv2.imwrite(str(x) + '_' + str(y) + '.jpg', tiles)
            cv2.rectangle(img, (x, y), (x1, y1), (0, 255, 0), 1)
        elif x1 >= imgwidth:  # when patch width exceeds the image width
            x1 = imgwidth - 1
            # Crop into patches of size MxN
            tiles = image_copy[y:y + M, x:x + N]
            # Save each patch into file directory
            cv2.imwrite(str(x) + '_' + str(y) + '.jpg', tiles)
            cv2.rectangle(img, (x, y), (x1, y1), (0, 255, 0), 1)
        else:
            # Crop into patches of size MxN
            tiles = image_copy[y:y + M, x:x + N]
            # Save each patch into file directory
            cv2.imwrite(str(x) + '_' + str(y) + '.jpg', tiles)
            cv2.rectangle(img, (x, y), (x1, y1), (0, 255, 0), 1)
C++
int M = 216;
int N = 270;

int x1 = 0;
int y1 = 0;
for (int y = 0; y<imgheight; y=y+M)
{


    for (int x = 0; x<imgwidth; x=x+N)
    {


        if ((imgheight - y) < M || (imgwidth - x) < N)
        {


            break;
        }
        y1 = y + M;
        x1 = x + N;
        string a = to_string(x);
        string b = to_string(y);

        if (x1 >= imgwidth && y1 >= imgheight)
        {


            x = imgwidth - 1;
            y = imgheight - 1;
            x1 = imgwidth - 1;
            y1 = imgheight - 1;

            // crop the patches of size MxN
            Mat tiles = image_copy(Range(y, imgheight), Range(x, imgwidth));
            //save each patches into file directory
            imwrite("saved_patches/tile" + a + '_' + b + ".jpg", tiles);
            rectangle(img, Point(x,y), Point(x1,y1), Scalar(0,255,0), 1);
        }
        else if (y1 >= imgheight)
        {


            y = imgheight - 1;
            y1 = imgheight - 1;

            // crop the patches of size MxN
            Mat tiles = image_copy(Range(y, imgheight), Range(x, x+N));
            //save each patches into file directory
            imwrite("saved_patches/tile" + a + '_' + b + ".jpg", tiles);
            rectangle(img, Point(x,y), Point(x1,y1), Scalar(0,255,0), 1);
        }
        else if (x1 >= imgwidth)
        {


            x = imgwidth - 1;
            x1 = imgwidth - 1;

            // crop the patches of size MxN
            Mat tiles = image_copy(Range(y, y+M), Range(x, imgwidth));
            //save each patches into file directory
            imwrite("saved_patches/tile" + a + '_' + b + ".jpg", tiles);
            rectangle(img, Point(x,y), Point(x1,y1), Scalar(0,255,0), 1);
        }
        else
        {


            // crop the patches of size MxN
            Mat tiles = image_copy(Range(y, y+M), Range(x, x+N));
            //save each patches into file directory
            imwrite("saved_patches/tile" + a + '_' + b + ".jpg", tiles);
            rectangle(img, Point(x,y), Point(x1,y1), Scalar(0,255,0), 1);
        }
    }
}
接下来,使用imshow()函数显示图像块拼图。使用imwrite()函数将其保存到文件目录中。
Python
#Save full image into file directory
cv2.imshow("Patched Image",img)
cv2.imwrite("patched.jpg",img)

cv2.waitKey()
cv2.destroyAllWindows()
C++
imshow("Patched Image", img);
imwrite("patched.jpg",img);
waitKey();
destroyAllWindows();
Python
C++