这里我的vue3+vite项目已经有了,在这基础上使用electron转换成桌面应用。
1、获取electron配置文件
首先可以执行以下命令,从electron的官网下载案例,下载会比较慢,可以直接访问git仓库,下载代码。
git clone https://github.com/electron/electron-quick-start
- 下载以后主要是要用到代码里的main.js和preload.js两个文件。如果不下载,直接复制下面的两个文件代码即可。
- main.js
// Modules to control application life and create native browser window
const {

    app, BrowserWindow} = require('electron')
const path = require('path')

function createWindow () {


  // Create the browser window.
  const mainWindow = new BrowserWindow({


    width: 800,
    height: 600,
    webPreferences: {


      preload: path.join(__dirname, 'preload.js')
    }
  })

  // and load the index.html of the app.
  mainWindow.loadFile('index.html')

  // Open the DevTools.
  // mainWindow.webContents.openDevTools()
}

// This method will be called when Electron has finished
// initialization and is ready to create browser windows.
// Some APIs can only be used after this event occurs.
app.whenReady().then(() => {


  createWindow()

  app.on('activate', function () {


    // On macOS it's common to re-create a window in the app when the
    // dock icon is clicked and there are no other windows open.
    if (BrowserWindow.getAllWindows().length === 0) createWindow()
  })
})

// Quit when all windows are closed, except on macOS. There, it's common
// for applications and their menu bar to stay active until the user quits
// explicitly with Cmd + Q.
app.on('window-all-closed', function () {


  if (process.platform !== 'darwin') app.quit()
})

// In this file you can include the rest of your app's specific main process
// code. You can also put them in separate files and require them here.
- preload.js
// All of the Node.js APIs are available in the preload process.
// It has the same sandbox as a Chrome extension.
window.addEventListener('DOMContentLoaded', () => {


  const replaceText = (selector, text) => {


    const element = document.getElementById(selector)
    if (element) element.innerText = text
  }

  for (const type of ['chrome', 'node', 'electron']) {


    replaceText(`${

     type}-version`, process.versions[type])
  }
})
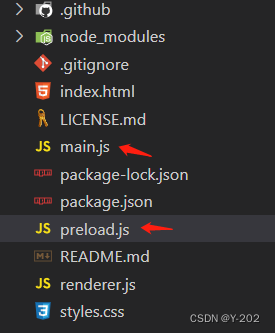
- 把以上两个文件放到自己的vue项目文件目录下
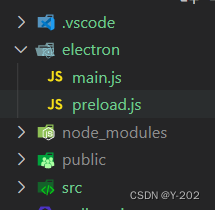
在根目录下新建了一个electron文件夹,里面放两个js文件
2、项目配置
- 安装依赖
electron不多说。concurrently和 wait-on解释一下。
开发环境的运行条件是,先运行vite启动服务,然后electron去加载本地服务url。这里需要安装两个依赖。
concurrently:阻塞运行多个命令,-k参数用来清除其它已经存在或者挂掉的进程
-wait-on:等待资源,此处用来等待url可访问
npm install electron --save-dev
npm install concurrently wait-on --save-dev
- electron/main.js
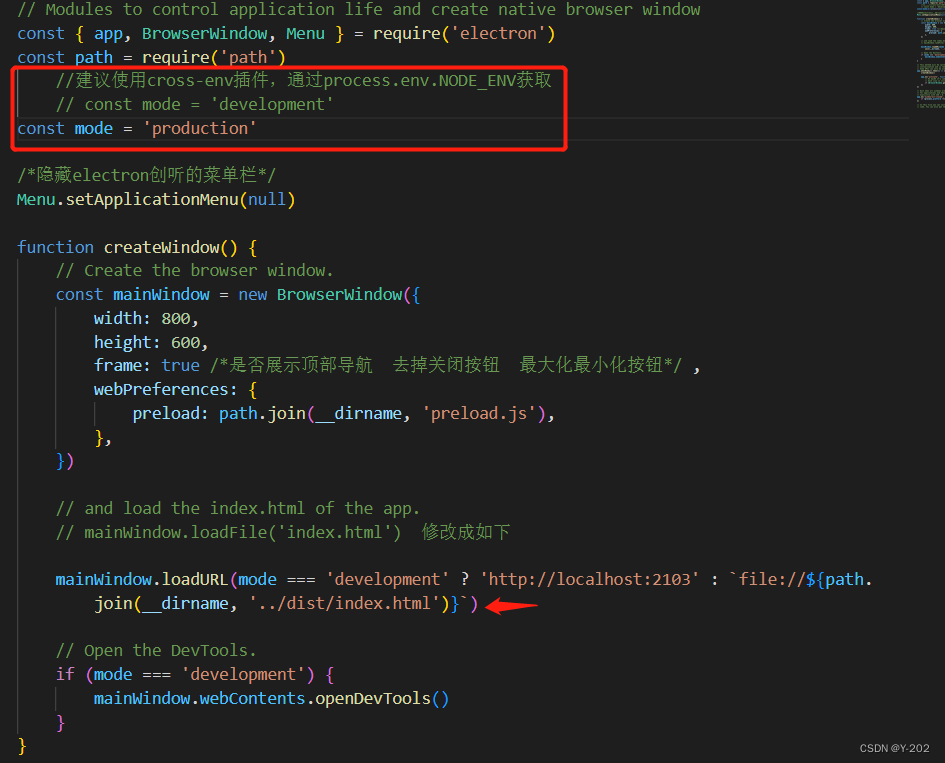
根据需求,我添加了Menu.setApplicationMenu(null)隐藏菜单栏,frame是否展示顶部导航的配置,默认为true。mainWindow.loadFile(‘index.html’)修改成了mainWindow.loadURL(关键),具体配置如下。
// Modules to control application life and create native browser window
const {

     app, BrowserWindow, Menu } = require('electron')
const path = require('path')

//这里的配置手动写的,也可以使用cross-env插件配置
const mode = 'development'

/*隐藏electron创听的菜单栏*/
Menu.setApplicationMenu(null)

function createWindow() {


    // Create the browser window.
    const mainWindow = new BrowserWindow({


        width: 800,
        height: 600,
        frame: true /*是否展示顶部导航  去掉关闭按钮  最大化最小化按钮*/ ,
        webPreferences: {


            preload: path.join(__dirname, 'preload.js'),
        },
    })

    // and load the index.html of the app.
    // mainWindow.loadFile('index.html')  修改成如下

    mainWindow.loadURL(mode === 'development' ? 'http://localhost:2103' : `file://${

     path.join(__dirname, '../dist/index.html')}`)

    // Open the DevTools.
    if (mode === 'development') {


        mainWindow.webContents.openDevTools()
    }
}

// This method will be called when Electron has finished
// initialization and is ready to create browser windows.
// Some APIs can only be used after this event occurs.
app.whenReady().then(() => {


    createWindow()

    app.on('activate', function() {


        // On macOS it's common to re-create a window in the app when the
        // dock icon is clicked and there are no other windows open.
        if (BrowserWindow.getAllWindows().length === 0) createWindow()
    })
})

// Quit when all windows are closed, except on macOS. There, it's common
// for applications and their menu bar to stay active until the user quits
// explicitly with Cmd + Q.
app.on('window-all-closed', function() {


    if (process.platform !== 'darwin') app.quit()
})

// In this file you can include the rest of your app's specific main process
// code. You can also put them in separate files and require them here.
- vite.config.js
配置base: ‘./’

- package.json
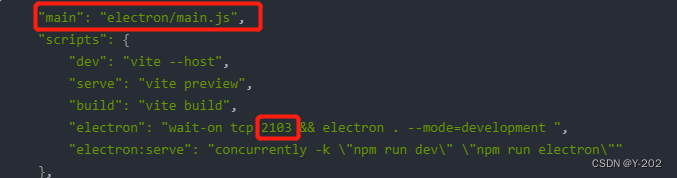
main:main.js修改成main:electron/main.js。添加electron和electron:serve指令
    "main": "electron/main.js",
    "scripts": {


        "dev": "vite --host",
        "serve": "vite preview",
        "build": "vite build",
        "electron": "wait-on tcp:2103 && electron . --mode=development ",
        "electron:serve": "concurrently -k \"npm run dev\" \"npm run electron\""
    },
- 运行项目
npm run electron:serve
如果运行不成功或者成功之后白屏,可查看以下几个关键配置
端口一致

3、打包生成桌面应用
- 安装打包插件 electron-builder
npm install electron-builder --save-dev
- package.json添加electron:build命令,和build配置
    "main": "electron/main.js",
    "scripts": {


        "dev": "vite --host",
        "serve": "vite preview",
        "build": "vite build",
        "electron": "wait-on tcp:2103 && electron . --mode=development ",
        "electron:serve": "concurrently -k \"npm run dev\" \"npm run electron\"",
        "electron:build": "npm run build && electron-builder"
    },
     "build": {


        "appId": "8a06282fb08c48eeacb15bfbe4d3a35b",
        "productName": "ElectronApp",
        "copyright": "Copyright © 2022 <项目名称>",
        "mac": {


            "category": "public.app-category.utilities"
        },
        "nsis": {


            "oneClick": false,
            "allowToChangeInstallationDirectory": true
        },
        "files": [
            "dist/**/*",
            "electron/**/*"
        ],
        "directories": {


            "buildResources": "assets",
            "output": "dist_electron"
        }
    }
- 注意electron/main.js里的配置
- 执行打包命令
npm run electron:build
出现报错Error: Cannot find module ‘fs/promises’
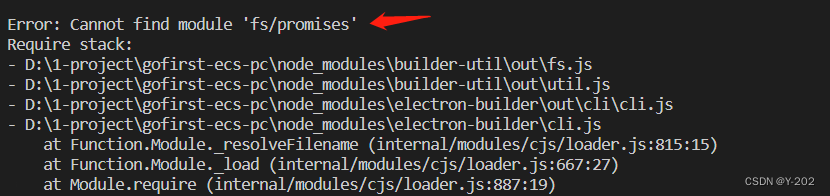
搜索了下是node版本太低,目前是12.22.7,换成16.15.0再次打包成功。
成功后当前项目下出现dist_electron文件夹,即为桌面应用安装包。
提示:多次打包如果报错,可删除dist_electron文件夹,再进行打包。