本文按我实际操作步骤编写,有些文字描述直接转自简书一篇文章。
步骤
安装GitLab-CI
Gitlab字段,无须安装安装GitLab-Runner
1、下载安装包并设置执行权限
sudo wget -O /usr/local/bin/gitlab-runner https://gitlab-ci-multi-runner-downloads.s3.amazonaws.com/latest/binaries/gitlab-ci-multi-runner-linux-amd64
sudo chmod +x /usr/local/bin/gitlab-runner
2、创建Gitlab CI用户
sudo useradd --comment 'GitLab Runner' --create-home gitlab-runner --shell /bin/bash3、注册runner
https://docs.gitlab.com/runner/register/index.html
这样就装好了gitlab-ci-multi-runner,然而我们只是装好gitlab-runner,当然我们要接着向gitlab-CI注册这个runner,不然gitlab-CI在push事件到来的时候怎么知道要调用谁呢?这里也可以发现和webhook方式的区别,webhook方式是我们主动配置了一个连接给Gitlab;gitlab-runner只要注册一下就好。
参考我的注册步骤如下图所示,其中URL和token在Gitlab的后台能找到【访问需要自动更新代码的项目,settings—>CI/CD—>expand Runners settings】
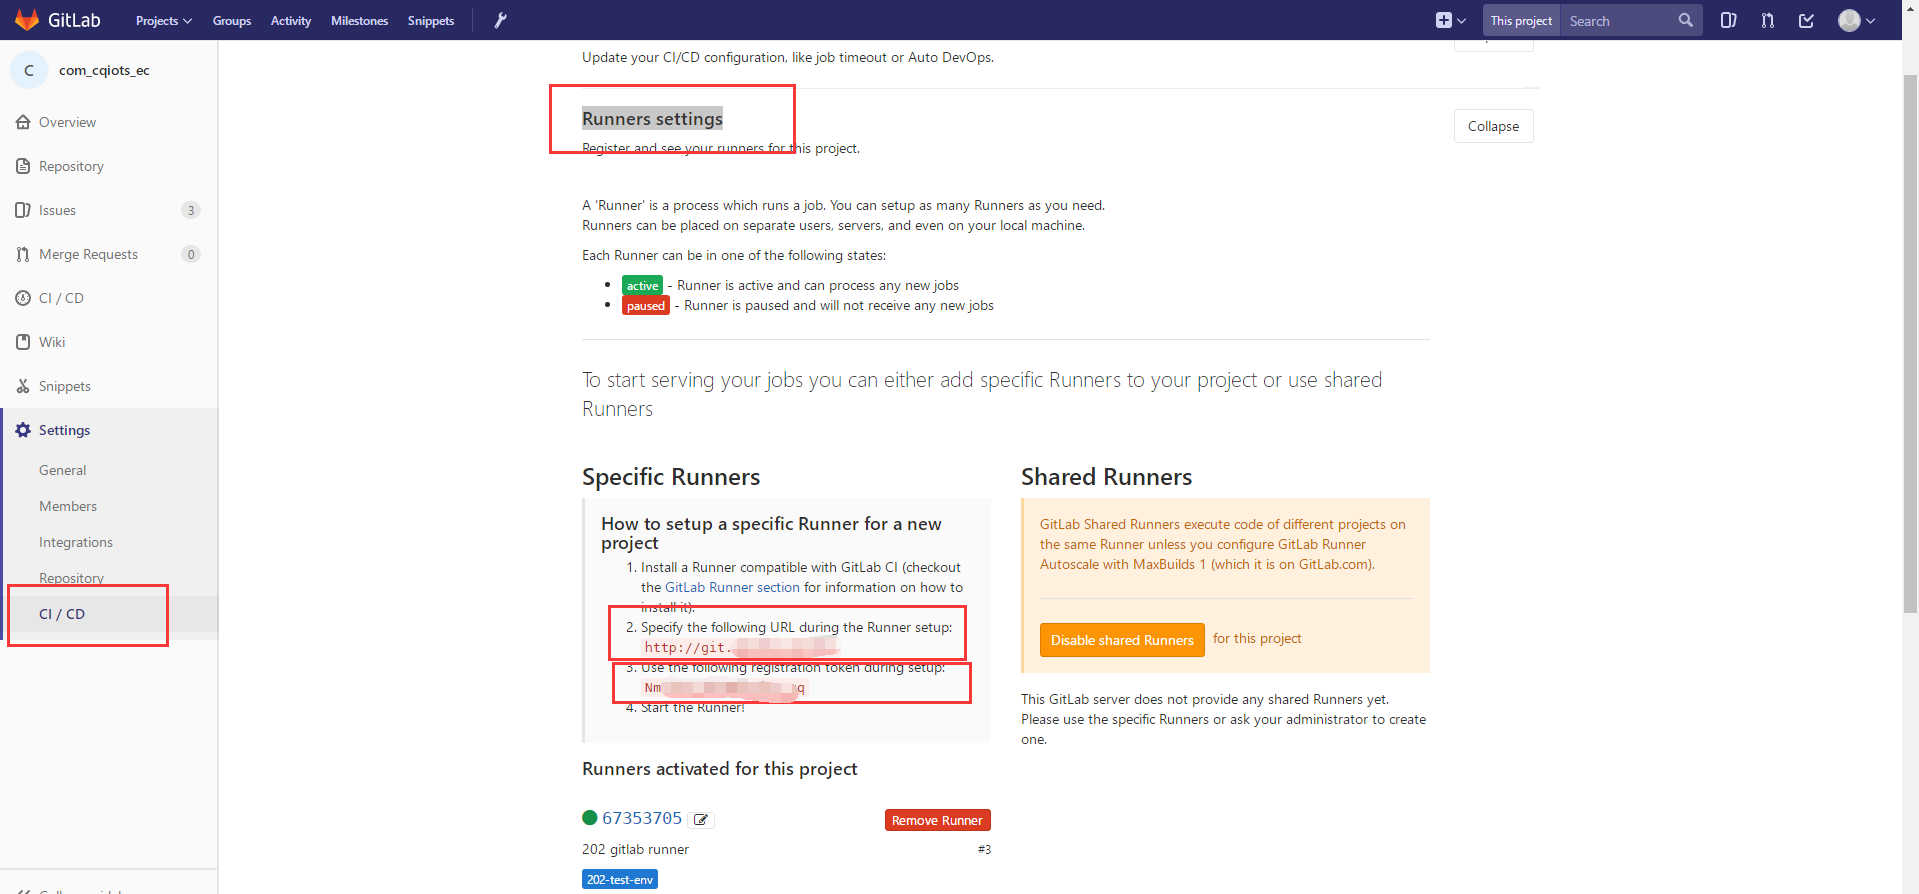

注册好后,在runners settings中可以看到注册好的runner信息,其中你输入的tag在yml文件中会填写,最好是一个有一定意义的名称,我这里就是用于测试环境的部署。
4、安装并启动服务
sudo gitlab-runner install --user=gitlab-runner --working-directory=/home/gitlab-runner
sudo gitlab-runner start- 编写.gitlab-ci.yml
在项目根目录下编写.gitlab-ci.yml这样在push之后,gitlab-ci就会自动识别来解析了。
stages:
  - deploy
deploy:
    stage: deploy
    script:
      - ~/.local/bin/deploy
    only:
      - test
    tags:
      - 202-test-env
我这里只有一个stage是deploy。only指定了只有在test分支push的时候才会被执行。tags是为注册runner的时候的tags。
最重要的script部分~/.local/bin/deploy,这里是一条shell指令。
- 编写deploy脚本
在gitlab-runner的~/.local/bin/目录下新建deploy文件
$ su gitlab-runner
$ mkdir ~/.local/bin
$ cd ~/.local/bin
$ touch deploy
并编辑成如下内容
#!/bin/bash
#!/bin/bash
cd /home/webs/cqiots.com/com_cqiots_ec
git pull origin test
因为我在pull之前已经在目录执行过git clone命令了,脚本中只需要当有代码push时,进行pull操作,因为我不太会写shell脚本 ,就写了必须的部分,看下图运行界面
加上执行权限,然后把这个脚本放在gitlab-runner的~/.local/bin下就可以生效了
$ chmod +x ~/.local/bin/deploy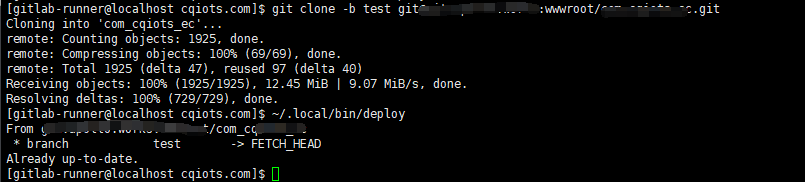
- 配置ssh登录
上面的deploy脚本是用ssh方式来和gitlab联系的。所以要给gitlab-runner这个用户配置一个gitlab上能ssh的用户。首先在gitlab-runner下生成一个密钥对
$ mkdir ~/.ssh
$ cd ~/.ssh
$ ssh-keygen
# 提示输入一直按回车默认就可以了
$ cat id_rsa.pub
用cat查看公钥,然后复制这一串公钥。用你自己的Gitlab账号登录,在这个账号的user_profile里面,把公钥粘贴进去就好了。总之就是把这个账号配置成能用ssh登录的。
- 移交部署目录权限
$ sudo chown -R gitlab-runner:gitlab-runner /home/webs/cqiots.com/- 若用户gitlab-runner无git的权限需要加上,否则会提示permission denied
sudo chown -R gitlab-runner:gitlab-runner .git
sudo chmod -R 777 FETCH_HEAD
可以在服务器上手工deploy XX XX一次进行测试,若能运行成功则说明没有问题。一旦有代码提交,并成功更新,Gitlab CI页面会出现下图所示。
