目录

1、连接池
1.1、什么是连接池?
概念:其实就是一个容器(集合),存放数据库连接的容器。
1.2、连接池的好处
1、节约资源。
2、减少连接数据库的次数。
3、用户访问高效。
1.3、连接池的实现
标准接口:DataSource javax.sql包下的
获取连接:getConnection()
归还连接:Connection.close()。如果连接对象Connection是从连接池中获取的,那么调用Connection.close()方法,则不会再关闭连接了。而是归还连接
1.4、厂商实现
一般我们不去实现它,有数据库厂商来实现
1、C3P0:数据库连接池技术。
2、Druid:数据库连接池实现技术,由阿里巴巴提供的。
1.5、相关jar包
链接:https://pan.baidu.com/s/1Qo5BEjeGa4ikuxTetiiY5A
提取码:mlni
2、C3P0连接池技术
2.1、实现步骤
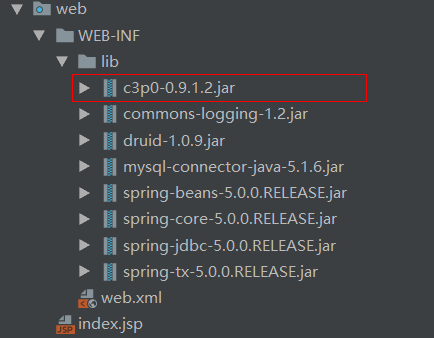
1、新建web工程。
2、导入出c3p0的jar包,以及mysql驱动包。
3、定义配置文件c3p0-config.xml,直接将文件放在src目录下即可。
4、获取连接:getConnection。
创建数据库
注意:这里我方便用的是之前事务里面的表,也可以自习创建表进行填写数据进行测试。
CREATE TABLE `account` (
  `name` varchar(20) NOT NULL,
  `money` int(255) DEFAULT NULL,
  PRIMARY KEY (`name`)
) ENGINE=InnoDB DEFAULT CHARSET=utf8;
导入jar包
2.2、代码实现
把配置文件c3p0-config.xml放入src目录下
注意:配置文件中的数据库表名和密码自习修改。
<?xml version="1.0" encoding="UTF-8"?>
<c3p0-config>
    <!-- 我们希望在配置文件中,出现链接的参数信息 -->
    <default-config>
        <!-- name 属性定义 链接参数的key 标签的内容 代表值-->
    <property name="driverClass">com.mysql.jdbc.Driver</property>
    <property name="jdbcUrl">jdbc:mysql://localhost:3306/test6</property>
    <property name="user">root</property>
    <property name="password">xxx</property>

    <!-- 连接池参数 -->
    <property name="initialPoolSize">5</property>
    <property name="maxPoolSize">10</property>
    <property name="checkoutTimeout">3000</property>

</default-config>

</c3p0-config>
新建c3p0Util工具类
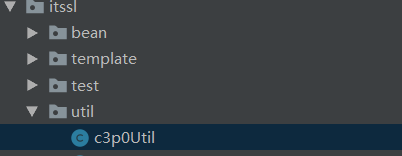
c3p0Util工具类
public class c3p0Util {
    //默认加载src 下面c3p0-config.xml加载
    private static ComboPooledDataSource ds = new ComboPooledDataSource();

    //创建连接
    public static Connection getConnection() {
        Connection conn = null;
        try {
            conn = ds.getConnection();
        } catch (SQLException e) {
            e.printStackTrace();
        }
        return conn;
    }

    //关闭方法
    public static void close(ResultSet rs, Statement stmt, Connection conn) {
        try {
            if (rs != null) {
                rs.close();
                rs = null;
            }
        } catch (SQLException e) {
            e.printStackTrace();
        }
        try {
            if (stmt != null) {
                stmt.close();
                stmt = null;
            }
        } catch (SQLException e) {
            e.printStackTrace();
        }
        try {
            if (conn != null) {
                conn.close();
                conn = null;
            }
        } catch (SQLException e) {
            e.printStackTrace();
        }
    }
    public void close(Statement stmt, Connection conn) {
        try {
            if (stmt != null) {
                stmt.close();
                stmt = null;
            }
        } catch (SQLException e) {
            e.printStackTrace();
        }
        try {
            if (conn != null) {
                conn.close();
                conn = null;
            }
        } catch (SQLException e) {
            e.printStackTrace();
        }
    }
}
新建test包,创建c3p0Test类进行测试

c3p0Test类
public class c3p0Test {
    @Test
    public void test1() {
        Connection conn = c3p0Util.getConnection();
        PreparedStatement pstmt = null;
        ResultSet rs = null;
        try {
            pstmt = conn.prepareStatement("select * from account");
            rs = pstmt.executeQuery();
            while (rs.next()) {
                String name = rs.getString("name");
                int money = rs.getInt("money");
                System.out.println(name + ":" + money);
            }
        } catch (SQLException e) {
            e.printStackTrace();
        } finally {
            c3p0Util.close(rs, pstmt, conn);
        }
    }

}
3、Druid连接池技术
3.1、实现步骤
1、 导入jar包 druid-1.0.9.jar。
2、 定义配置文件:是xx.properties形式的,可以叫任意名称,可以放在任意目录下, 一般都放在src。
3、加载配置文件Properties。
4、获取数据库连接池对象:通过工厂来来获取 DruidDataSourceFactory。
5、 获取连接:getConnection。
导入jar包

3.2、代码实现
导入druid.properties配置文件到src目录
driverClassName=com.mysql.jdbc.Driver
url=jdbc:mysql:///test6
username=root
password=ssl0528

# 初始化连接数量
initialSize=5
# 最大连接数
maxActive=10
# 最大等待时间
maxWait=3000
druidUtil类
public class druidUtil {
    //定义成员变量 DataSource ds
   private static DataSource dataSource;
    static {
        Properties pro = new Properties();
        InputStream is = null;
        try {
           //通过反射读取配置文件
            is = druidUtil.class.getClassLoader().getResourceAsStream("druid.properties");
            pro.load(is);
            dataSource= DruidDataSourceFactory.createDataSource(pro);
        } catch (IOException e) {
            e.printStackTrace();
        } catch (Exception e) {
            e.printStackTrace();
        }finally {
            try {
                is.close();
            } catch (IOException e) {
                e.printStackTrace();
            }
        }
    }
    //获取连接
    public static Connection getConnection(){
        Connection conn = null;
        try {
            conn = dataSource.getConnection();
        } catch (SQLException e) {
            e.printStackTrace();
        }
        return  conn;
    }
    //获取DataSource对象  给JDBCTemplate提供
    public static DataSource getDataSource(){
        return  dataSource;
    }

    //关闭方法
    public static void close(ResultSet rs, Statement stmt,Connection conn){
        try {
            if(rs != null){
                rs.close();
                rs =null;//关闭连接,给赋值null,gc垃圾回收回机制会优先处理这些对象
            }
        } catch (SQLException e) {
            e.printStackTrace();
        }
        try {
            if(stmt != null){
                stmt.close();
                stmt=null;
            }
        } catch (SQLException e) {
            e.printStackTrace();
        }
        try {
            if(conn != null){
                conn.close();
                conn = null;
            }
        } catch (SQLException e) {
            e.printStackTrace();
        }
    }
    public static void close(Statement stmt,Connection conn){
        try {
            if(stmt != null){
                stmt.close();
                stmt=null;
            }
        } catch (SQLException e) {
            e.printStackTrace();
        }
        try {
            if(conn != null){
                conn.close();
                conn = null;
            }
        } catch (SQLException e) {
            e.printStackTrace();
        }
    }

}
druidTest类测试
public class druidTest {
    @Test
    public void test1() {
        Connection conn = druidUtil.getConnection();
        PreparedStatement pstmt = null;
        ResultSet rs = null;
        try {
            pstmt = conn.prepareStatement("select * from account");
            rs = pstmt.executeQuery();
            while (rs.next()) {
                String name = rs.getString("name");
                int money = rs.getInt("money");
                System.out.println(name + ":" + money);
            }
        } catch (SQLException e) {
            e.printStackTrace();
        } finally {
            druidUtil.close(rs, pstmt, conn);
        }

    }
}
4、JDBCTemplate模版
JDBCTemplate模版就是JDBC的一个框架,该框架及其方便,减少了大量的代码就能实现连接数据库。Spring JDBC,Spring框架对JDBC的简单封装。
1、创建数据库表user
CREATE TABLE `user` (
  `id` int(11) NOT NULL AUTO_INCREMENT,
  `name` varchar(255) DEFAULT NULL,
  `age` int(11) DEFAULT NULL,
  PRIMARY KEY (`id`)
) ENGINE=InnoDB AUTO_INCREMENT=5 DEFAULT CHARSET=utf8;
自行添加数据

2、创建实体类

User实体类
public class User {
    private int id;
    private String name;
    private int age;

    public User() {
    }

    public User(int id, String name, int age) {
        this.id = id;
        this.name = name;
        this.age = age;
    }

    public int getId() {
        return id;
    }

    public void setId(int id) {
        this.id = id;
    }

    public String getName() {
        return name;
    }

    public void setName(String name) {
        this.name = name;
    }

    public int getAge() {
        return age;
    }

    public void setAge(int age) {
        this.age = age;
    }

    @Override
    public String toString() {
        return "User{" +
                "id=" + id +
                ", name='" + name + '\'' +
                ", age=" + age +
                '}';
    }
}
4.1、实现步骤
1. 导入jar包 4 + 1
2. 创建JdbcTemplate对象。依赖于数据源DataSource
JdbcTemplate template = new JdbcTemplate(ds);3. 调用JdbcTemplate的方法来完成CRUD的操作

创建一个template包,里面创建一个templateTest测试类

public class templateTest {
    private JdbcTemplate template = new JdbcTemplate(druidUtil.getDataSource());

    @Test
    public void save() {
        int i = template.update("insert into user(name,age) value('zhaoliu',27)");
        System.out.println(i);
    }

    @Test
    public void delete() {
        String sql = "delete from user where id=?";
        int i = template.update(sql, 3);
        System.out.println(i);
    }

    @Test
    public void update() {
        String sql = "update user set name='xiaomi',age=18 where id=?";
        int i = template.update(sql, 2);
        System.out.println(i);
    }

    //查询数据返回list
    public List<User> query_list() {
        String sql = "select * from user";
        List<User> query = template.query(sql, new BeanPropertyRowMapper<>(User.class));
        return query;
    }

    @Test
    public void test1() {
        List<User> list = query_list();
        for (User user : list) {
            System.out.println(user.getId());
            System.out.println(user.getName());
            System.out.println(user.getAge());
        }
    }
    //查询条数
    public Integer query_count(){
        String sql="select count(*) from user";
        Integer i = template.queryForObject(sql, Integer.class);
        return i;
    }
    @Test
    public void test2(){
        Integer i = query_count();
        System.out.println(i);
    }


    //查询数据返回map
    @Test
    public void query_map(){
        String sql="select * from user where id=?";
        Map<String, Object> stringObjectMap = template.queryForMap(sql,1);
        Set<String> set = stringObjectMap.keySet();
        for (String s : set) {
            Object o = stringObjectMap.get(s);
            System.out.println(s+":"+o);
        }
    }

}