文章目录
- ls 指令( list directory contents)
- pwd命令(Print Working Directory)
- cd 命令 (change directory)
- touch指令
- mkdir指令
- tree
- rmdir指令(Remove directory)
- rm (Remove )指令
- * (通配符)
- man指令
- echo
- cp(copy)指令
- cat (concatenate)
- mv (move)
- ^C
- 指令和可执行程序
- which
- more
- less指令
- head指令
- tail指令
- date指令
- cal指令
- find指令
- which(搜索指令的路径)
- whereis
- alias指令
- grep
- 添加与删除用户
- zip指令
- unzip指令
- tar指令
- bc指令
- uname指令

ls 指令( list directory contents)
功能:对于目录,该命令列出该目录下的所有子目录与文件。对于文件,将列出文件名以及其他信息
常用:
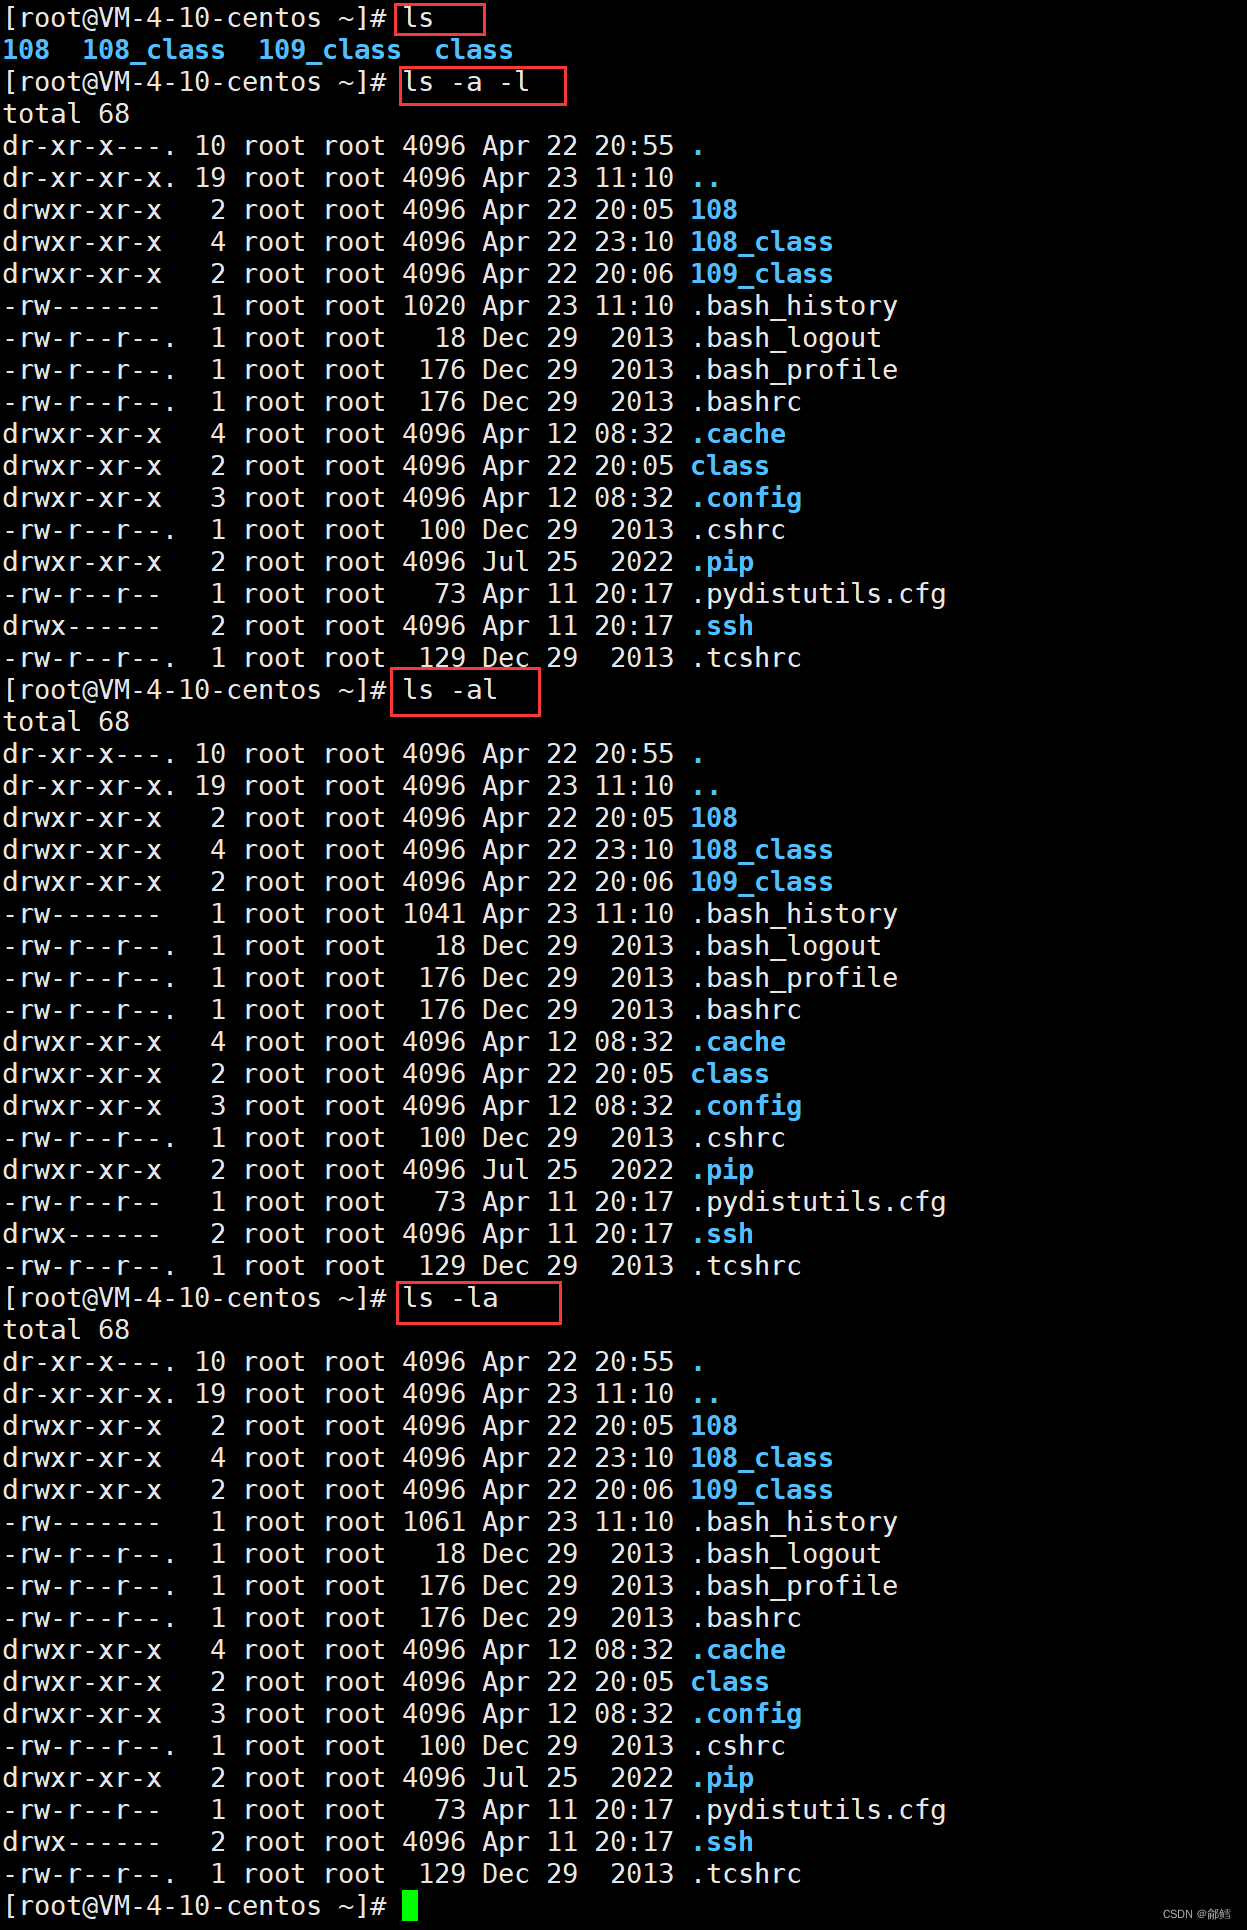
ls -a
-a 列出目录下的所有文件,包括以 . 开头的隐含文件。

ls -al
ls -a -l 和 ls -al 、 ls -la 这三者是一样的
显示所有的文件 ,包括隐藏文件
ls -dl
-d 将目录象文件一样显示,而不是显示其下的文件。 如:ls –d 指定目录
如果没有-d选项,我们会列出108_class目录中的子目录以及文件的详细信息,但如果加上-d,我们就不会进入目录,直接列出108_class的详细信息
[root@VM-4-10-centos ~]# ls
108  108_class  109_class  class  dir1  dir2
[root@VM-4-10-centos ~]# ls 108_class
dir1  dir2  test.txt
[root@VM-4-10-centos ~]# ls -al 108_class
total 16
drwxr-xr-x   4 root root 4096 Apr 22 23:10 .
dr-xr-x---. 13 root root 4096 Apr 23 15:15 ..
drwxr-xr-x   2 root root 4096 Apr 22 23:09 dir1
drwxr-xr-x   2 root root 4096 Apr 22 23:09 dir2
-rw-r--r--   1 root root    0 Apr 22 23:10 test.txt
[root@VM-4-10-centos ~]# ls -dl 108_class
drwxr-xr-x 4 root root 4096 Apr 22 23:10 108_class
-i 输出文件的 i 节点的索引信息。 如 ls –ai 指定文件
-k 以 k 字节的形式表示文件的大小。ls –alk 指定文件
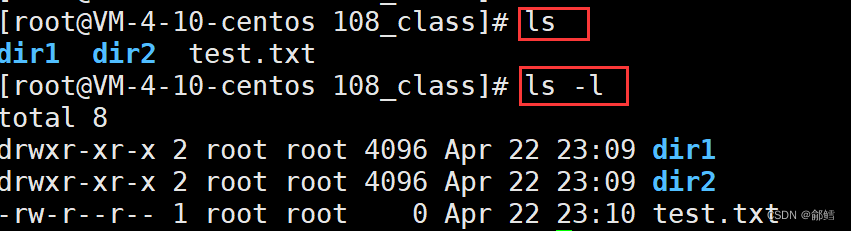
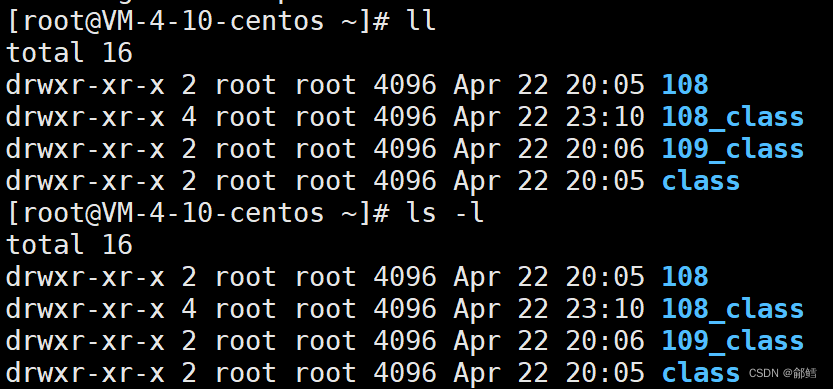
ls -l (ll)
-l ,显示更多的文件属性
ls -l 可以写成ll ,这两者是等价的
-n 用数字的 UID,GID 代替名称。 (介绍 UID, GID)
ls -alF
-F 在每个文件名后附上一个字符以说明该文件的类型,
“*”表示可执行的普通文件;
“/”表示目录
“@”表示符号链接;
“|”表示FIFOs;
“=”表示套接字(sockets)。(目录类型识别)
[root@VM-4-10-centos ~]# cd 108_class
[root@VM-4-10-centos 108_class]# pwd
/root/108_class
[root@VM-4-10-centos 108_class]# ls -la
total 16
drwxr-xr-x   4 root root 4096 Apr 22 23:10 .
dr-xr-x---. 13 root root 4096 Apr 23 15:15 ..
drwxr-xr-x   2 root root 4096 Apr 22 23:09 dir1
drwxr-xr-x   2 root root 4096 Apr 22 23:09 dir2
-rw-r--r--   1 root root    0 Apr 22 23:10 test.txt
[root@VM-4-10-centos 108_class]# ls -alF
total 16
drwxr-xr-x   4 root root 4096 Apr 22 23:10 ./
dr-xr-x---. 13 root root 4096 Apr 23 15:15 ../
drwxr-xr-x   2 root root 4096 Apr 22 23:09 dir1/
drwxr-xr-x   2 root root 4096 Apr 22 23:09 dir2/
-rw-r--r--   1 root root    0 Apr 22 23:10 test.txt
-r 对目录反向排序。
-t 以时间排序。
-s 在l文件名后输出该文件的大小。(大小排序,如何找到目录下最大的文件)
-R 列出所有子目录下的文件。(递归)
-1 一行只输出一个文件。
补充: 指令是可以携带选项的
文件的类型 :
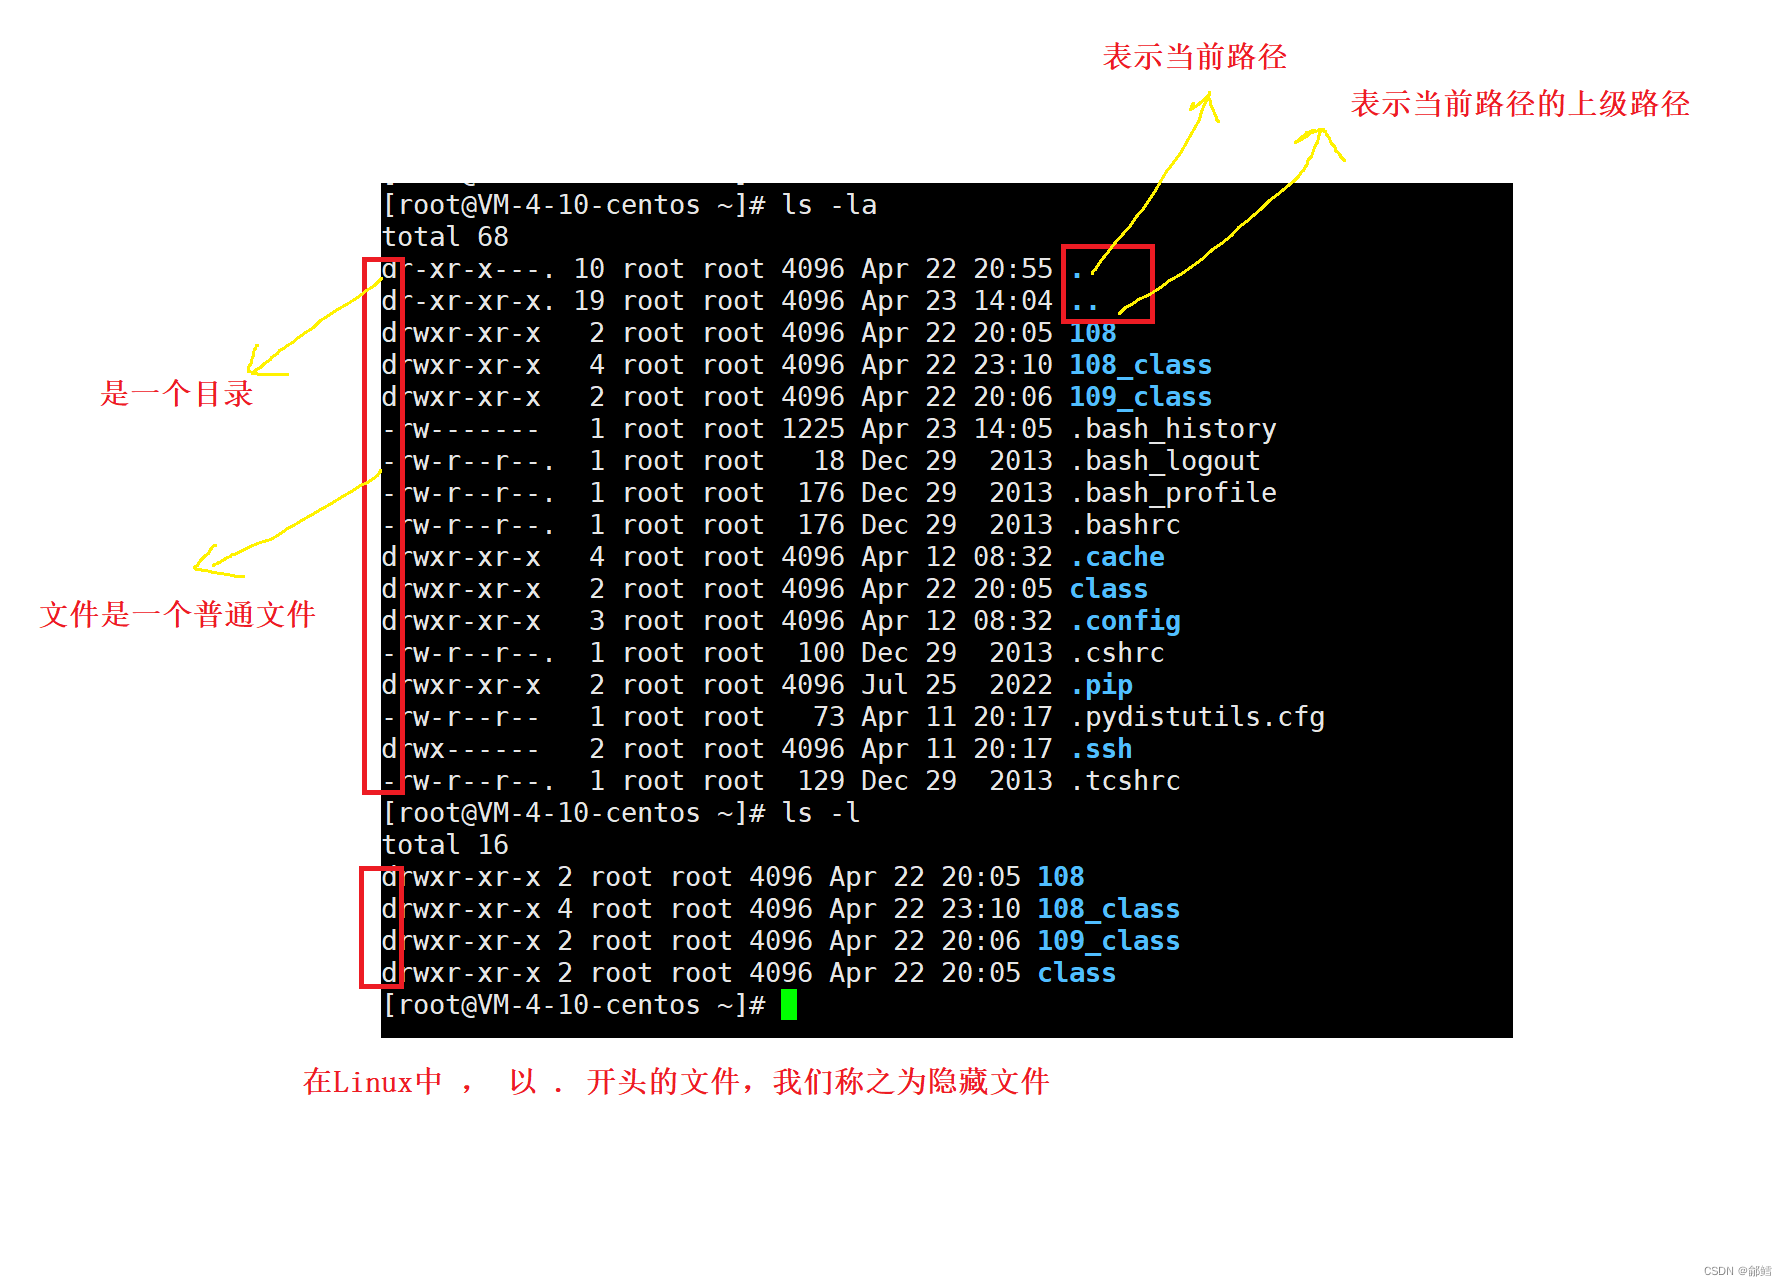
左边:
d : 是一个目录
— : 文件是一个普通文件
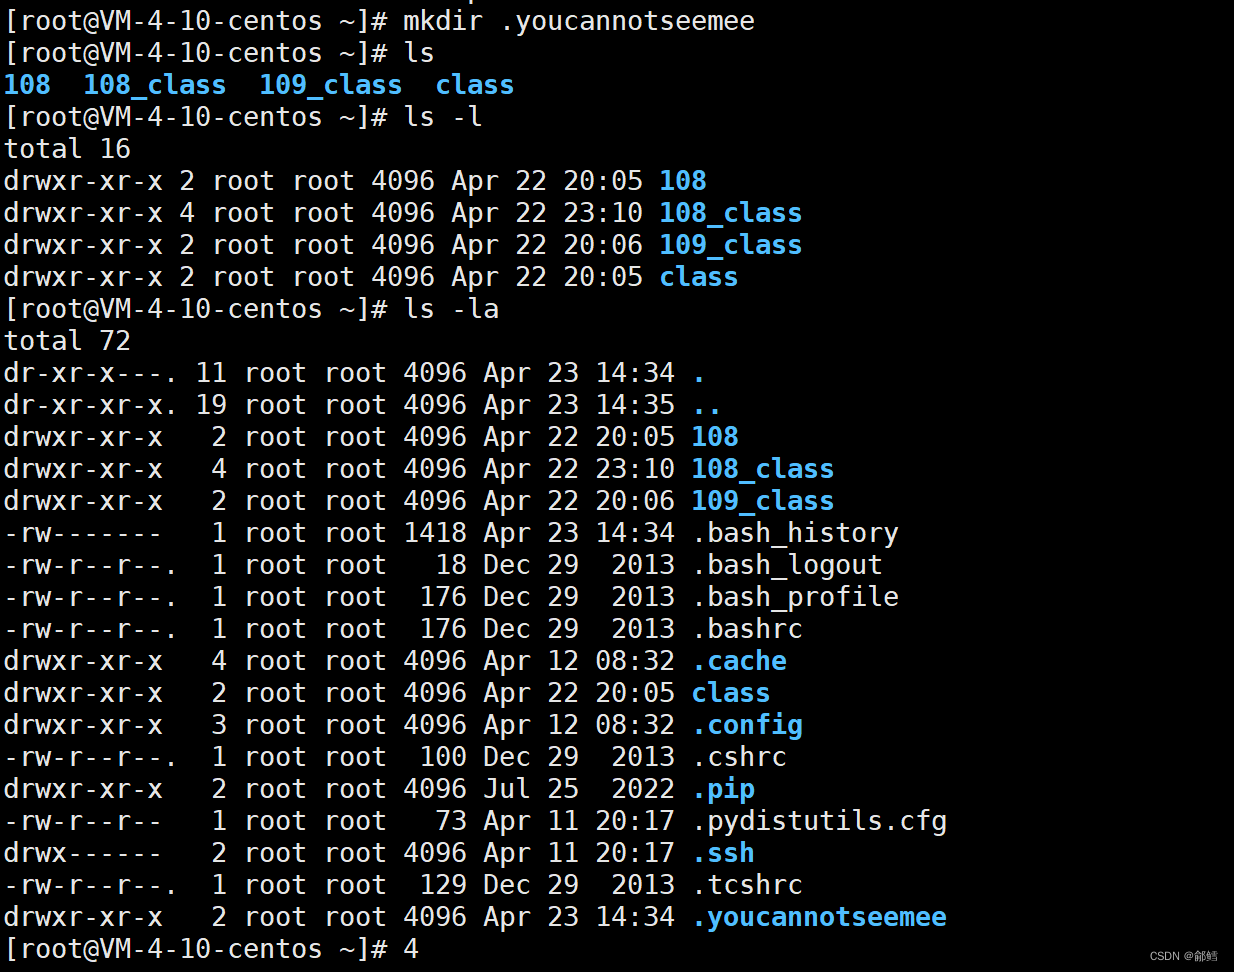
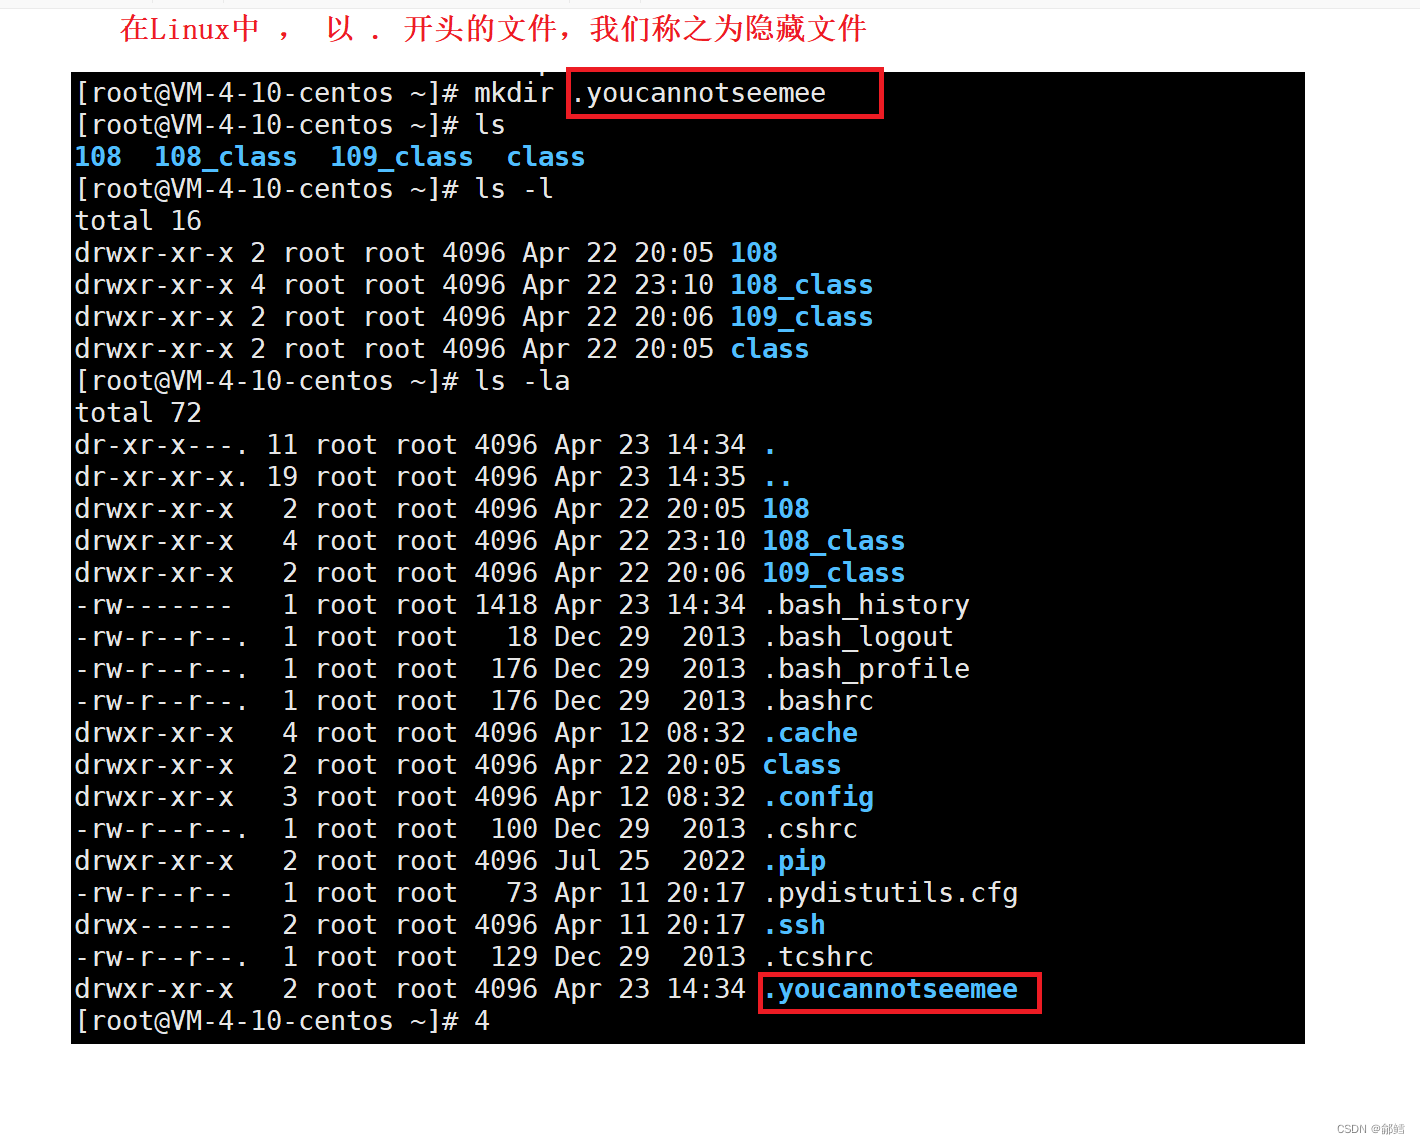
在Linux中 , 以 . 开头的文件 ,我们称之为隐藏文件
Linux任何一个目录下面都有两个隐藏文件 . / . .
举例:
[root@VM-4-10-centos ~]# cd dir1
[root@VM-4-10-centos dir1]# pwd
/root/dir1
[root@VM-4-10-centos dir1]# ls
[root@VM-4-10-centos dir1]# ls -al
total 8
drwxr-xr-x   2 root root 4096 Apr 23 15:15 .
dr-xr-x---. 13 root root 4096 Apr 23 15:15 ..
补充:
文件 = 文件内容+ 而文件属性 ,我们对文件的操作 ,就是对文件内容的操作或者是对文件属性的操作
. 表示当前路径 ,如何证明?
cd . 进入当前路径 ,如果 . 表示当前路径 ,pwd显示的不会发生变化 ,事实证明并没有发生变化
[root@VM-4-10-centos 108]# pwd
/root/108
[root@VM-4-10-centos 108]# cd .
[root@VM-4-10-centos 108]# pwd
/root/108
. 存在的意义是什么?
帮助我们用户定位当前目录下的一个文件
举例:
[root@VM-4-10-centos ~]# mkdir .youcannotseemee
[root@VM-4-10-centos ~]# ls
108  108_class  109_class  class
[root@VM-4-10-centos ~]# ls -l
total 16
drwxr-xr-x 2 root root 4096 Apr 22 20:05 108
drwxr-xr-x 4 root root 4096 Apr 22 23:10 108_class
drwxr-xr-x 2 root root 4096 Apr 22 20:06 109_class
drwxr-xr-x 2 root root 4096 Apr 22 20:05 class
[root@VM-4-10-centos ~]# ls -la
total 72
dr-xr-x---. 11 root root 4096 Apr 23 14:34 .
dr-xr-xr-x. 19 root root 4096 Apr 23 14:35 ..
drwxr-xr-x   2 root root 4096 Apr 22 20:05 108
drwxr-xr-x   4 root root 4096 Apr 22 23:10 108_class
drwxr-xr-x   2 root root 4096 Apr 22 20:06 109_class
-rw-------   1 root root 1418 Apr 23 14:34 .bash_history
-rw-r--r--.  1 root root   18 Dec 29  2013 .bash_logout
-rw-r--r--.  1 root root  176 Dec 29  2013 .bash_profile
-rw-r--r--.  1 root root  176 Dec 29  2013 .bashrc
drwxr-xr-x   4 root root 4096 Apr 12 08:32 .cache
drwxr-xr-x   2 root root 4096 Apr 22 20:05 class
drwxr-xr-x   3 root root 4096 Apr 12 08:32 .config
-rw-r--r--.  1 root root  100 Dec 29  2013 .cshrc
drwxr-xr-x   2 root root 4096 Jul 25  2022 .pip
-rw-r--r--   1 root root   73 Apr 11 20:17 .pydistutils.cfg
drwx------   2 root root 4096 Apr 11 20:17 .ssh
-rw-r--r--.  1 root root  129 Dec 29  2013 .tcshrc
drwxr-xr-x   2 root root 4096 Apr 23 14:34 .youcannotseemee
pwd命令(Print Working Directory)

功能:显示用户当前所在的目录
在windows操作系统中通过该路径找到对应的文件夹的这一过程 等价于Linux 中使用pwd命令所看到的当前路径

cd 命令 (change directory)

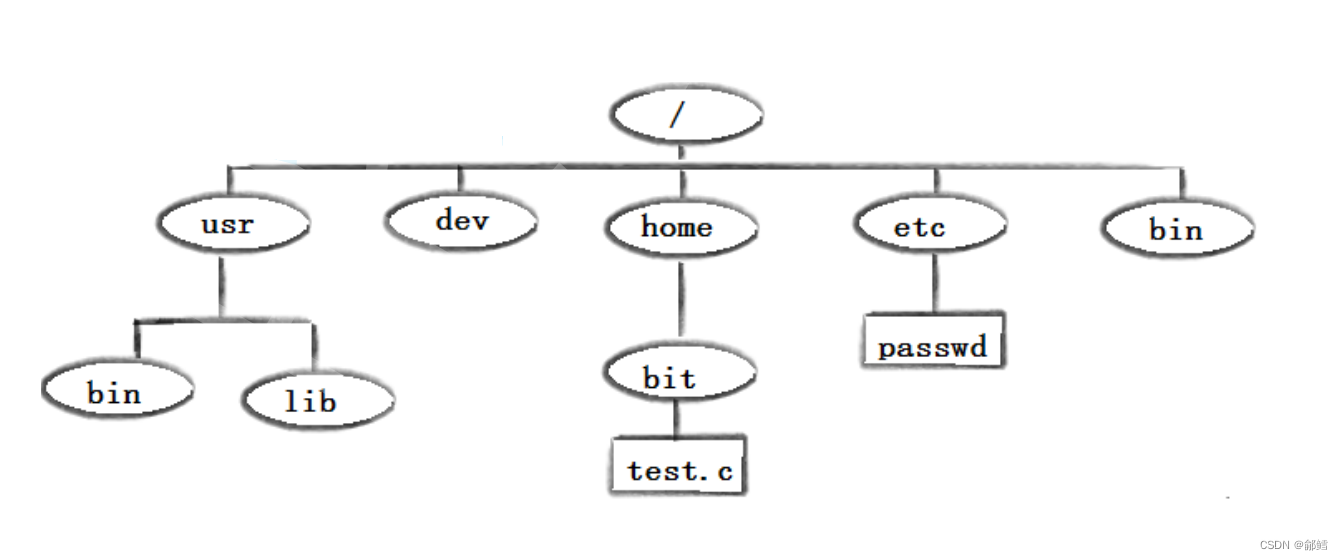
Linux系统中,磁盘上的文件和目录被组成一棵目录树,每个节点都是目录或文件

功能:改变工作目录。将当前工作目录改变到指定的目录下
常用:
cd …
cd . . : 返回上级目录
[root@VM-4-10-centos dir1]# pwd
/root/dir1
[root@VM-4-10-centos dir1]# cd ..
[root@VM-4-10-centos ~]# pwd
/root
[root@VM-4-10-centos ~]# cd ..
[root@VM-4-10-centos /]# pwd
/
[root@VM-4-10-centos /]# cd ..
[root@VM-4-10-centos /]# pwd
/
一个目录可以放可以再放一个目录或者放普通文件,也就意味着,Linux的整个目录结构一定是一个多叉树的样子
Linux的目录结构整体上是一个多叉树,他的叶子节点,一定是空目录或者或者非空目录,路上节点一定是一个非空目录 ,所以对所有文件或者目录的增删查改,本质上就是对这个多叉树进行增删查改
cd /home/litao/linux/ : 绝对路径
cd …/day02/ : 相对路径
所以我们定位一个文件 ,通常用路径来定位 为什么?
因为任何一个节点都只有一个父节点,也就是说路径定位具有唯一性
我们把从 / 开始定位到指定位置,具有唯一性的路径,称为绝对路径
举例:
[root@VM-4-10-centos /]# pwd
/
[root@VM-4-10-centos /]# cd /root/108_class/dir1
[root@VM-4-10-centos dir1]# pwd
/root/108_class/dir1
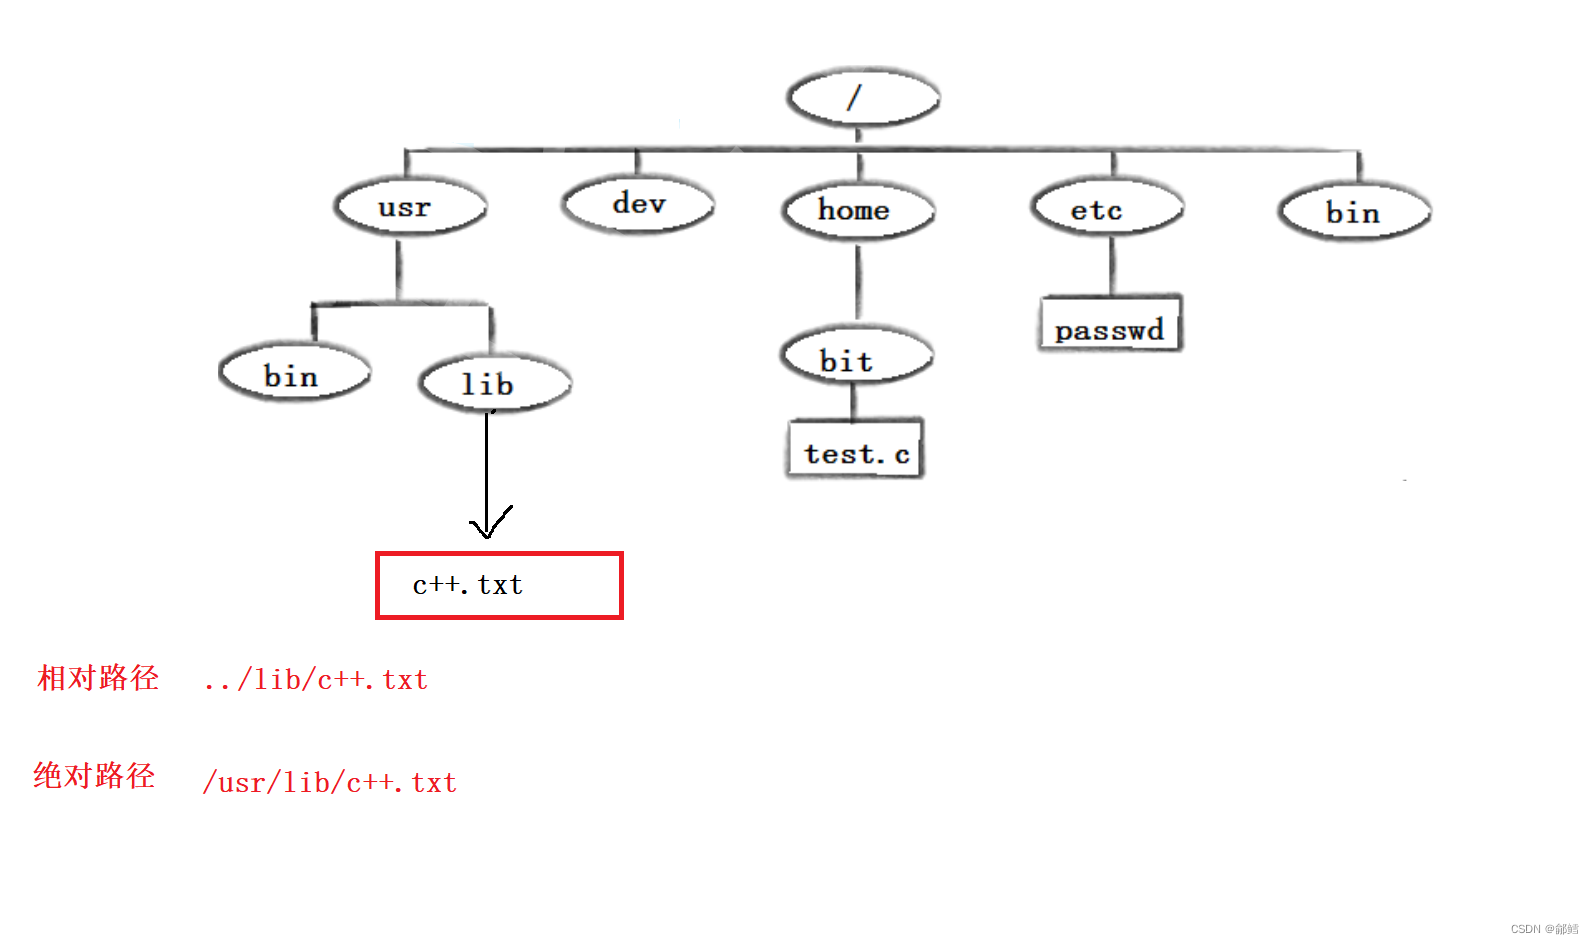
我们以自己当前所处的路径为起始参照位置,来进行特定文件的定位,我们称为相对路径
如果所处的路径发生变化 ,相对路径可能就失效了,绝对路径,无论在哪个位置,都能通过路径找到
一般从根目录开始的是绝对路径 ,反之就是相对路径
绝对路径往往比较长 ,但是不变 ,所以使用场合一般在一些固定场景 ,比如配置文件中使用
一般命令行输入,比价常用相对路径
cd ~
cd ~:进入用户家目
[root@VM-4-10-centos /]# cd ~
[root@VM-4-10-centos ~]# pwd
/root
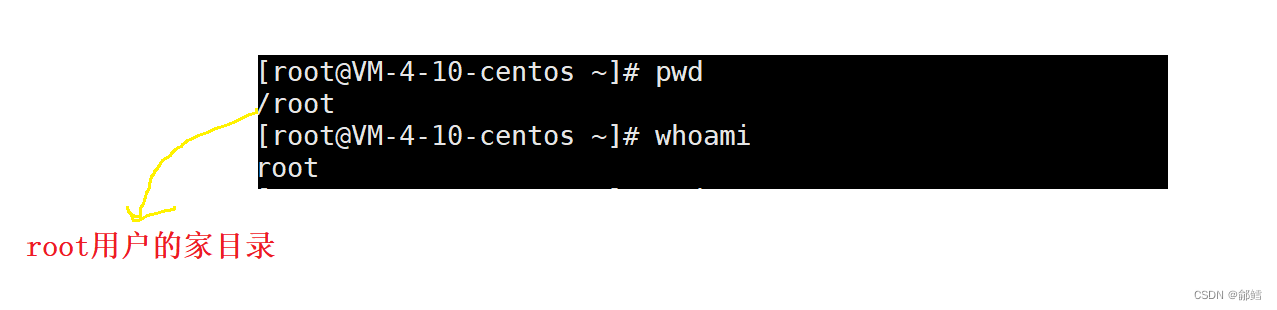
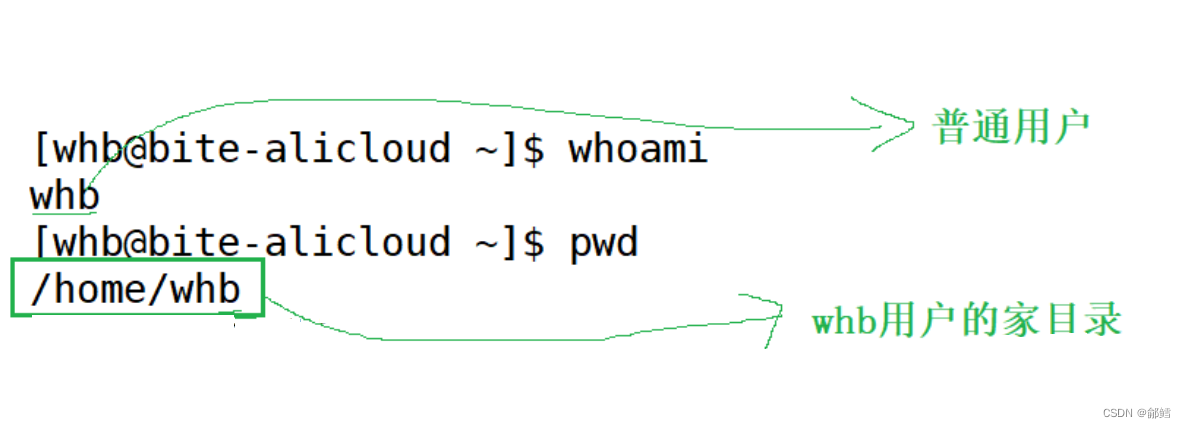
超级用户root ,其他(普通用户)
centos系统中,所有的普通用户,用户账号都统一放在/home
cd -
cd -:回到上一次所在的路径
[root@VM-4-10-centos ~]# pwd
/root
[root@VM-4-10-centos ~]# ls
108  108_class  109_class  class  dir1  dir2
[root@VM-4-10-centos ~]#  cd /root/108_class/dir1
[root@VM-4-10-centos dir1]# pwd
/root/108_class/dir1
[root@VM-4-10-centos dir1]# ls
[root@VM-4-10-centos dir1]# ls -al
total 8
drwxr-xr-x 2 root root 4096 Apr 22 23:09 .
drwxr-xr-x 4 root root 4096 Apr 22 23:10 ..
[root@VM-4-10-centos dir1]# cd -
/root
touch指令

类似windows系统中在桌面上新建一个文本文档
功能:touch命令参数可更改文档或目录的日期时间,包括存取时间和更改时间,或者新建一个不存在的文件
常用选项:
- -a 或–time=atime或–time=access或–time=use只更改存取时间。
- -c 或–no-create 不建立任何文档。
- -d 使用指定的日期时间,而非现在的时间。
- -f 此参数将忽略不予处理,仅负责解决BSD版本touch指令的兼容性问题。
- -m 或–time=mtime或–time=modify 只更改变动时间。
- -r 把指定文档或目录的日期时间,统统设成和参考文档或目录的日期时间相同。
- -t 使用指定的日期时间,而非现在的时间。
mkdir指令
功能:在当前目录下创建一个名为 “dirname”的目录

mkdir -p ( parents)
-p, --parents 可以是一个路径名称。此时若路径中的某些目录尚不存在,加上此选项后,系统将自动建立好那些尚不存在的目录,即一次可以建立多个目录
[root@VM-4-10-centos 108_class]# mkdir -p dd1/dd2/dd3/dd4/dd5
[root@VM-4-10-centos 108_class]# tree .
.
|-- d1
|   `-- d2
|       `-- d3
|-- dd1
|   `-- dd2
|       `-- dd3
|           `-- dd4
|               `-- dd5
|-- dir1
|-- dir2
`-- test.txt
tree
tree命令以树状形式列出当前目录下的所有文件和子目录,并且告诉我们当前路径下,还有几个目录和文件
[root@VM-4-10-centos 108_class]# tree .
.
|-- d1
|   `-- d2
|       `-- d3
|-- dir1
|-- dir2
`-- test.txt
[root@VM-4-10-centos 108_class]# tree d1
d1
`-- d2
    `-- d3
rmdir指令(Remove directory)
rmdir只能删除空目录
[root@VM-4-10-centos ~]# tree .
.
|-- 108
|-- 108_class
|   |-- d1
|   |   `-- d2
|   |       `-- d3
|   |-- dd1
|   |   `-- dd2
|   |       `-- dd3
|   |           `-- dd4
|   |               `-- dd5
|   |-- dir1
|   |-- dir2
|   `-- test.txt
|-- 109_class
|-- class
|-- dir1
|-- dir2
|-- test.bin
|-- test.c
`-- test.txt

16 directories, 4 files
[root@VM-4-10-centos ~]# rmdir dir1
[root@VM-4-10-centos ~]# tree .
.
|-- 108
|-- 108_class
|   |-- d1
|   |   `-- d2
|   |       `-- d3
|   |-- dd1
|   |   `-- dd2
|   |       `-- dd3
|   |           `-- dd4
|   |               `-- dd5
|   |-- dir1
|   |-- dir2
|   `-- test.txt
|-- 109_class
|-- class
|-- dir2
|-- test.bin
|-- test.c
`-- test.txt

15 directories, 4 files
rm (Remove )指令
rm可以删除文件和非空目录,但是不能删除空目录。要删除空目录,可以使用rmdir指令
[root@VM-4-10-centos ~]# tree .
.
|-- 108
|-- 108_class
|   |-- d1
|   |   `-- d2
|   |       `-- d3
|   |-- dd1
|   |   `-- dd2
|   |       `-- dd3
|   |           `-- dd4
|   |               `-- dd5
|   |-- dir1
|   |-- dir2
|   `-- test.txt
|-- 109_class
|-- class
|-- test.bin
`-- test.txt

14 directories, 3 files
[root@VM-4-10-centos ~]# rm test.txt
rm: remove regular empty file ‘test.txt’? n
[root@VM-4-10-centos ~]# tree .
.
|-- 108
|-- 108_class
|   |-- d1
|   |   `-- d2
|   |       `-- d3
|   |-- dd1
|   |   `-- dd2
|   |       `-- dd3
|   |           `-- dd4
|   |               `-- dd5
|   |-- dir1
|   |-- dir2
|   `-- test.txt
|-- 109_class
|-- class
|-- test.bin
`-- test.txt

14 directories, 3 files
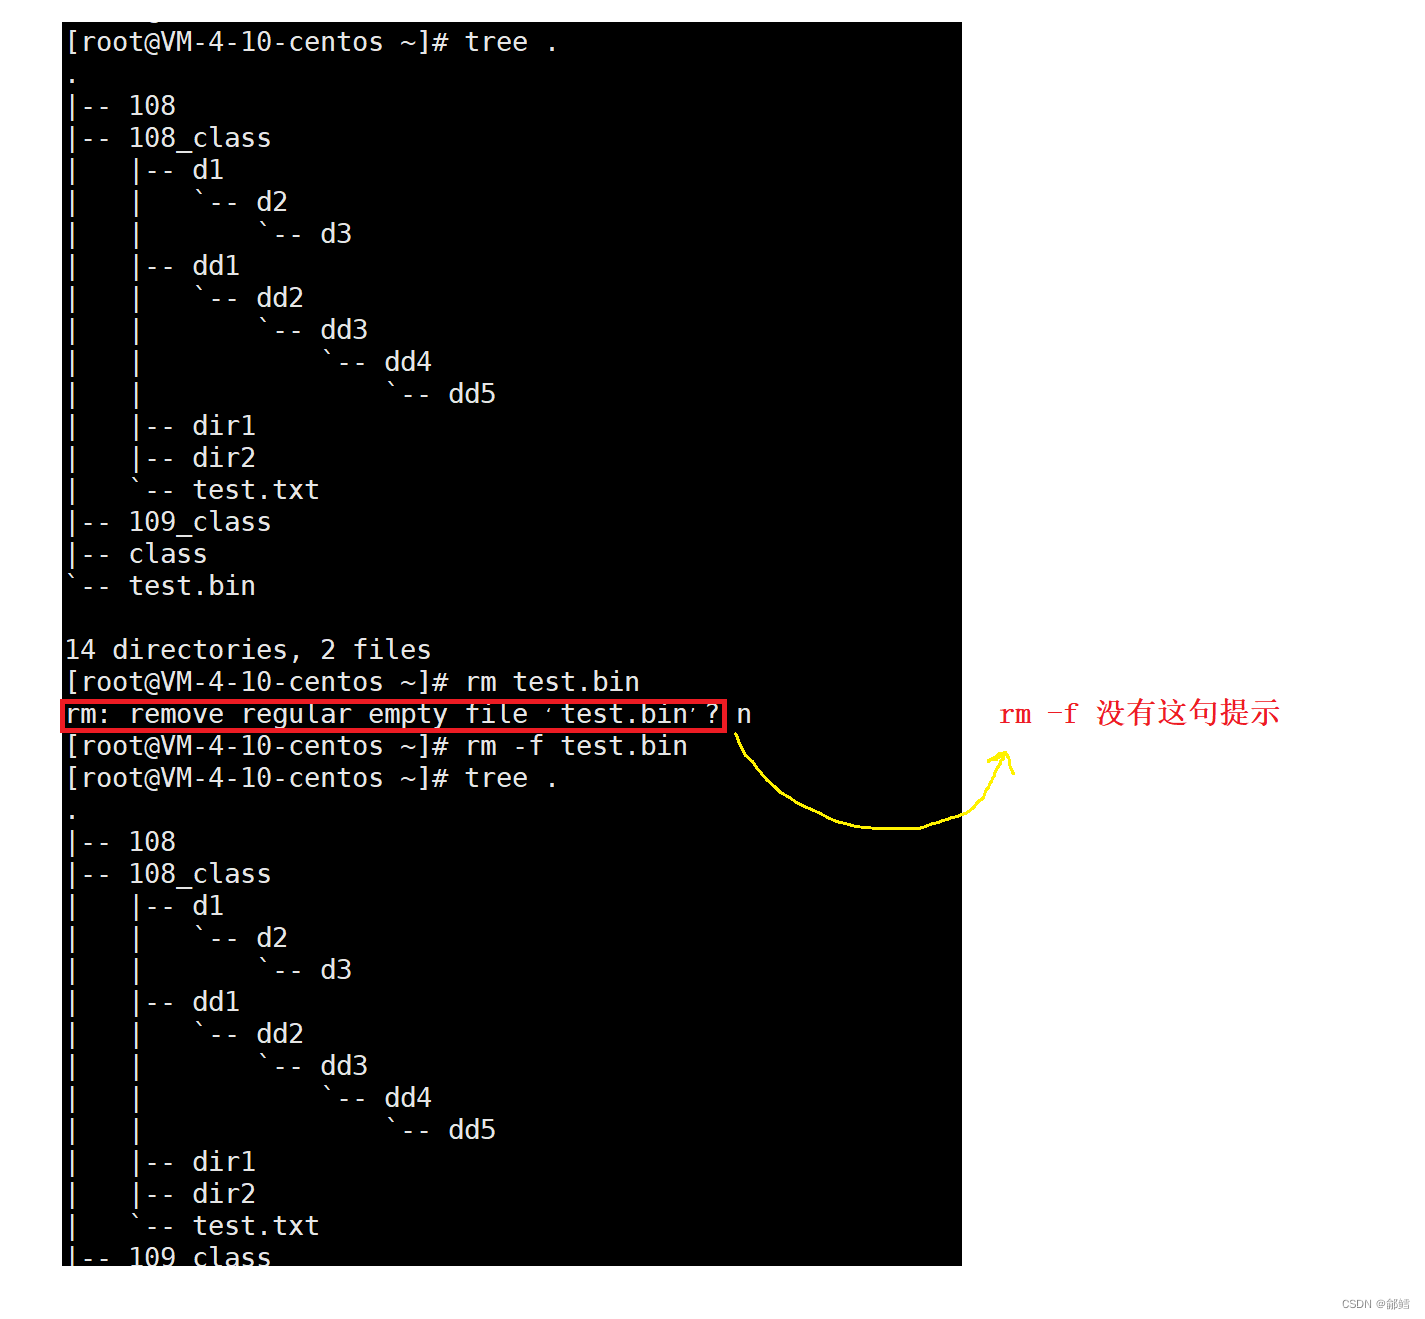
rm -f (force)
rm -f test.c
rm命令会问你是否要rm: remove regular empty file ‘test.bin’?
rm -f命令 就不会问
[root@VM-4-10-centos ~]# tree .
.
|-- 108
|-- 108_class
|   |-- d1
|   |   `-- d2
|   |       `-- d3
|   |-- dd1
|   |   `-- dd2
|   |       `-- dd3
|   |           `-- dd4
|   |               `-- dd5
|   |-- dir1
|   |-- dir2
|   `-- test.txt
|-- 109_class
|-- class
`-- test.bin

14 directories, 2 files
[root@VM-4-10-centos ~]# rm test.bin
rm: remove regular empty file ‘test.bin’? n
[root@VM-4-10-centos ~]# rm -f test.bin
[root@VM-4-10-centos ~]# tree .
.
|-- 108
|-- 108_class
|   |-- d1
|   |   `-- d2
|   |       `-- d3
|   |-- dd1
|   |   `-- dd2
|   |       `-- dd3
|   |           `-- dd4
|   |               `-- dd5
|   |-- dir1
|   |-- dir2
|   `-- test.txt
|-- 109_class
`-- class
rm -r(recursive)
[root@VM-4-10-centos ~]# tree .
.
|-- 108_class
|   |-- d1
|   |   `-- d2
|   |       `-- d3
|   |-- dd1
|   |   `-- dd2
|   |       `-- dd3
|   |           `-- dd4
|   |               `-- dd5
|   |-- dir1
|   |-- dir2
|   `-- test.txt
`-- x1
    `-- x2
        `-- x3
            `-- x4

16 directories, 0 files
[root@VM-4-10-centos ~]# rm -r x1
rm: descend into directory ‘x1’? y
rm: descend into directory ‘x1/x2’? y
rm: descend into directory ‘x1/x2/x3’? y
rm: remove directory ‘x1/x2/x3/x4’? y
rm: remove directory ‘x1/x2/x3’? y
rm: remove directory ‘x1/x2’? y
rm: remove directory ‘x1’? y
[root@VM-4-10-centos ~]# tree .
.
`-- 108_class
    |-- d1
    |   `-- d2
    |       `-- d3
    |-- dd1
    |   `-- dd2
    |       `-- dd3
    |           `-- dd4
    |               `-- dd5
    |-- dir1
    |-- dir2
    `-- test.txt

12 directories, 0 files
递归删除x1时,它老是问我是否要删除
rm -rf
rm -rf(删库跑路专用) 强制删除 ,就不会每次都问是否需要删除
特别注意: 上面说到 -f 是强制性删除,-r 是递归式删除,这两个结合在一起就是递归式强制性删除,千万不要执行以下指令,因为在Linux当中没有类似回收站的东西也没有撤销删除的功能,删除指令一旦执行则是不可逆的。
[root@VM-4-10-centos ~]# tree .
.
`-- 108_class
    |-- d1
    |   `-- d2
    |       `-- d3
    |-- dd1
    |   `-- dd2
    |       `-- dd3
    |           `-- dd4
    |               `-- dd5
    |-- dir1
    |-- dir2
    `-- test.txt

12 directories, 0 files
[root@VM-4-10-centos ~]# rm -rf 108_class
[root@VM-4-10-centos ~]# tree .
.

0 directories, 0 files
rm -i (interactive)
删除前逐一询问确认 , 在删除前 ,会问一下你remove regular empty file ‘test.txt’?
[root@VM-4-10-centos 108_class]# tree .
.
|-- d1
|-- dd1
|   `-- dd2
|-- mytest.txt
|-- test2.c
|-- test3.c
|-- test.c
`-- test.txt

3 directories, 5 files
[root@VM-4-10-centos 108_class]# rm -i test.txt
rm: remove regular empty file ‘test.txt’? y
[root@VM-4-10-centos 108_class]# tree .
.
|-- d1
|-- dd1
|   `-- dd2
|-- mytest.txt
|-- test2.c
|-- test3.c
`-- test.c

3 directories, 4 files
* (通配符)
通配符可以匹配任意一个文件的名称
[root@VM-4-10-centos 108_class]# tree .
.
|-- d1
|-- dd1
|   `-- dd2
|-- test2.c
|-- test3.c
|-- test.c
`-- test.txt

3 directories, 4 files
[root@VM-4-10-centos 108_class]# ls *
test2.c  test3.c  test.c  test.txt

d1:

dd1:
dd2
[root@VM-4-10-centos 108_class]# ls *
test2.c  test3.c  test.c  test.txt

d1:

dd1:
dd2
[root@VM-4-10-centos 108_class]# ls *.c
test2.c  test3.c  test.c
[root@VM-4-10-centos 108_class]# ls test. *
ls: cannot access test.: No such file or directory
test2.c  test3.c  test.c  test.txt

d1:

dd1:
dd2
man指令
man ls
LS(1)                                        User Commands                                       LS(1)

NAME
       ls - list directory contents

SYNOPSIS
       ls [OPTION]... [FILE]...

DESCRIPTION
       List  information  about the FILEs (the current directory by default).  Sort entries alphabeti‐
       cally if none of -cftuvSUX nor --sort is specified.

       Mandatory arguments to long options are mandatory for short options too.

       -a, --all
              do not ignore entries starting with .

       -A, --almost-all
              do not list implied . and ..

       --author
              with -l, print the author of each file

       -b, --escape
              print C-style escapes for nongraphic characters
echo
echo 后面跟的是字符串
[root@VM-4-10-centos 108_class]# tree .
.
|-- d1
|-- dd1
|   `-- dd2
|-- mytest.txt
|-- test2.c
|-- test3.c
`-- test.c

3 directories, 4 files
[root@VM-4-10-centos 108_class]# echo "hello Linux " > mytest.txt
没有在显示器显示 ,是因为这个数据被写入了文件中
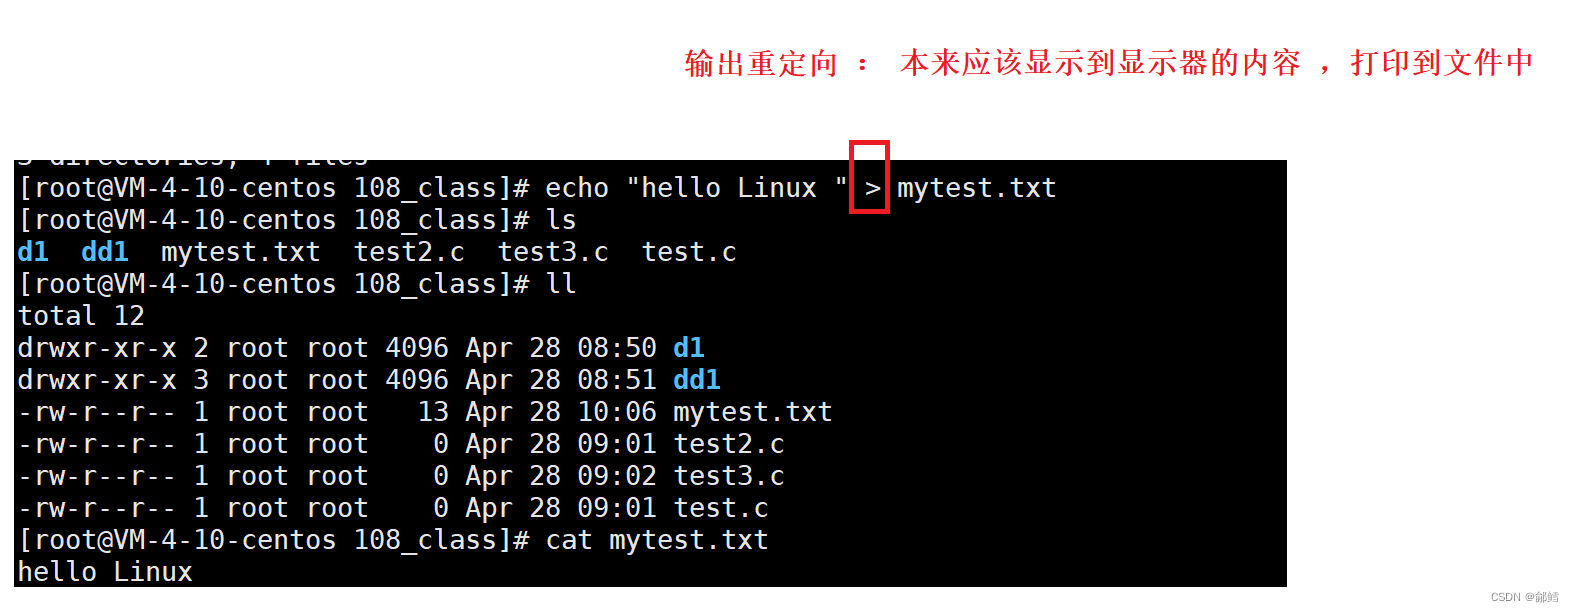
输出重定向有一个特点 ,向目标文件写入的时候是覆盖写入,先清空文件 ,再写入新内容
举例说明:
[root@VM-4-10-centos ~]# tree .
.
|-- 108_class
|   |-- d1
|   |   `-- d2
|   |       `-- d3
|   |           `-- d4
|   `-- test.txt
|-- lesson2
|   `-- x1
|       `-- x2
|           `-- x3
|-- lesson3
|   |-- cxq
|   |-- d1
|   |   `-- d2
|   |       `-- d3
|   `-- test.c
`-- test.txt

14 directories, 3 files
[root@VM-4-10-centos ~]# echo "108 good" > test.txt
[root@VM-4-10-centos ~]# cat test.txt
108 good
[root@VM-4-10-centos ~]# >test.txt
[root@VM-4-10-centos ~]# cat test.txt
输出重定向会先清空文件 ,输出重定向左边是空白即没有写入新内容,所以cat 打印文件内容是空白
之前都用touch newfile , 现在也可以用 输出重定向来创建文件
[root@VM-4-10-centos ~]# >newfile
[root@VM-4-10-centos ~]# ll
total 16
drwxr-xr-x 3 root root 4096 Apr 28 17:27 108_class
drwxr-xr-x 3 root root 4096 Apr 29 09:42 lesson2
drwxr-xr-x 4 root root 4096 Apr 29 09:42 lesson3
-rw-r--r-- 1 root root    0 Apr 29 20:21 newfile
-rw-r--r-- 1 root root   54 Apr 29 16:59 test.txt
那如果不想清空文件 如何做 ? 这就需要使用追加(append)重定向
追加重定向的符号是 >>
举例说明
[root@VM-4-10-centos ~]# cat test.txt
108 good
[root@VM-4-10-centos ~]# echo "108 good" >> test.txt
[root@VM-4-10-centos ~]# echo "108 good" >> test.txt
[root@VM-4-10-centos ~]# echo "108 good" >> test.txt
[root@VM-4-10-centos ~]# echo "108 good" >> test.txt
[root@VM-4-10-centos ~]# echo "108 good" >> test.txt
[root@VM-4-10-centos ~]# cat test.txt
108 good
108 good
108 good
108 good
108 good
108 good
输入重定向的符号是 <
输入重定向:==本来应该从键盘文件中读取,现在不用从键盘中读取,从指定的文件中读取 ==
举例说明
[root@VM-4-10-centos ~]# cat
1
1
2
2
3
3
cp(copy)指令
功能: 复制文件或目录
[root@VM-4-10-centos 108_class]# ll
total 12
drwxr-xr-x 2 root root 4096 Apr 28 08:50 d1
drwxr-xr-x 3 root root 4096 Apr 28 08:51 dd1
-rw-r--r-- 1 root root 13 Apr 28 10:06 mytest.txt
-rw-r--r-- 1 root root 0 Apr 28 09:01 test2.c
-rw-r--r-- 1 root root 0 Apr 28 09:02 test3.c
-rw-r--r-- 1 root root 0 Apr 28 09:01 test.c
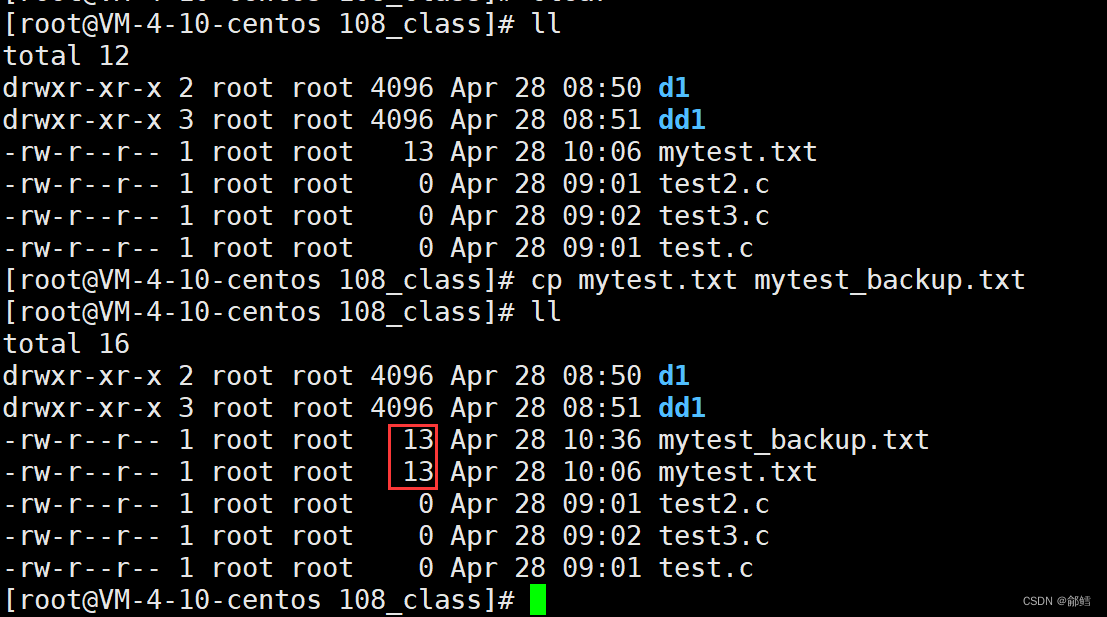
[root@VM-4-10-centos 108_class]# cp mytest.txt mytest_backup.txt
[root@VM-4-10-centos 108_class]# ll
total 16
drwxr-xr-x 2 root root 4096 Apr 28 08:50 d1
drwxr-xr-x 3 root root 4096 Apr 28 08:51 dd1
-rw-r--r-- 1 root root 13 Apr 28 10:36 mytest_backup.txt
-rw-r--r-- 1 root root 13 Apr 28 10:06 mytest.txt
-rw-r--r-- 1 root root 0 Apr 28 09:01 test2.c
-rw-r--r-- 1 root root 0 Apr 28 09:02 test3.c
-rw-r--r-- 1 root root 0 Apr 28 09:01 test.c
将 mytest .txt 拷贝到上级目录下 ,并重命名为Dmytest.txt
[root@VM-4-10-centos 108_class]# tree .
.
|-- d1
|-- dd1
|   `-- dd2
|-- mytest_backup.txt
|-- mytest.txt
|-- test2.c
|-- test3.c
`-- test.c
3 directories, 5 files
[root@VM-4-10-centos 108_class]# cp mytest.txt ../Dmytest.txt
[root@VM-4-10-centos 108_class]# ls ../
108_class  Dmytest.txt
在Linux 下 ,同一个目录下 ,不能存在同名文件

cp -r (recursive)
目录本身是递归定义的 ,如果需要拷贝整个目录 ,需要将目录及其子目录等各种文件全部拷贝到另一个目录
[root@VM-4-10-centos ~]# tree .
.
|-- 108_class
|   |-- d1
|   |-- dd1
|   |   `-- dd2
|   |-- mytest_backup.txt
|   |-- mytest.txt
|   |-- test2.c
|   |-- test3.c
|   `-- test.c
`-- lesson3
    |-- d1
    |   `-- d2
    |       `-- d3
    |-- test.c
    `-- test.txt

8 directories, 7 files
[root@VM-4-10-centos ~]# cp -r lesson3 lesson3_backup
[root@VM-4-10-centos ~]# ll
total 12
drwxr-xr-x 4 root root 4096 Apr 28 10:36 108_class
drwxr-xr-x 3 root root 4096 Apr 28 14:50 lesson3
drwxr-xr-x 3 root root 4096 Apr 28 15:07 lesson3_backup
cp -ri(interactive)
覆盖文件之前先询问用户
[root@VM-4-10-centos ~]# ls
108_class  lesson3
[root@VM-4-10-centos ~]# cp -ri lesson3 lesson3_backup
[root@VM-4-10-centos ~]# ls
108_class  lesson3  lesson3_backup
cp -rf
[root@VM-4-10-centos 108_class]# tree .
.
|-- d1
|-- dd1
|   `-- dd2
|-- mytest_backup.txt
|-- mytest.txt
|-- test2.c
|-- test3.c
`-- test.c

3 directories, 5 files
[root@VM-4-10-centos 108_class]# cp -rf test.c mytest.c
[root@VM-4-10-centos 108_class]# tree .
.
|-- d1
|-- dd1
|   `-- dd2
|-- mytest_backup.txt
|-- mytest.c
|-- mytest.txt
|-- test2.c
|-- test3.c
`-- test.c

3 directories, 6 files
cat (concatenate)
功能: 查看目标文件的内容
cat 后面跟的是文件名 ,这点要和echo 区分
[root@VM-4-10-centos 108_class]# pwd
/root/108_class
[root@VM-4-10-centos 108_class]# ll
total 16
drwxr-xr-x 2 root root 4096 Apr 28 08:50 d1
drwxr-xr-x 3 root root 4096 Apr 28 08:51 dd1
-rw-r--r-- 1 root root   13 Apr 28 10:36 mytest_backup.txt
-rw-r--r-- 1 root root   13 Apr 28 10:06 mytest.txt
-rw-r--r-- 1 root root    0 Apr 28 09:01 test2.c
-rw-r--r-- 1 root root    0 Apr 28 09:02 test3.c
-rw-r--r-- 1 root root    0 Apr 28 09:01 test.c
[root@VM-4-10-centos 108_class]# cat mytest_backup.txt
hello Linux
cat -n
对输出的所有行编号
[root@VM-4-10-centos ~]# cat test.txt
108 good
108 good
108 good
108 good
108 good
108 good
hello Linux
hello Linux
hello Linux
hello Linux
hello Linux
hello Linux
hello Linux
[root@VM-4-10-centos ~]# cat -n test.txt
     1	108 good
     2	108 good
     3	108 good
     4	108 good
     5	108 good
     6	108 good
     7	hello Linux
     8	hello Linux
     9	hello Linux
    10	hello Linux
    11	hello Linux
    12	hello Linux
    13	hello Linux
cat -b
对非空输出行编号
[root@VM-4-10-centos ~]# cat test.txt
108 good
108 good
108 good
108 good
108 good
108 good
hello Linux
hello Linux
hello Linux
hello Linux
hello Linux
hello Linux
hello Linux


hello Linux
hello Linux
hello Linux
hello Linux
hello Linux
[root@VM-4-10-centos ~]# cat -b test.txt
     1	108 good
     2	108 good
     3	108 good
     4	108 good
     5	108 good
     6	108 good
     7	hello Linux
     8	hello Linux
     9	hello Linux
    10	hello Linux
    11	hello Linux
    12	hello Linux
    13	hello Linux
    14
    15
    16
    17
    18
    19
    20
    21	hello Linux
    22	hello Linux
    23	hello Linux
    24	hello Linux
    25	hello Linux
cat -s
不输出多行空行
[root@VM-4-10-centos ~]# cat -n test.txt
     1	hello Linux
     2	hello Linux
     3	hello Linux
     4	hello Linux
     5	hello Linux
     6	hello Linux
     7	hello Linux
     8	hello Linux
     9
    10
    11
    12
    13
    14	good
    15	good
    16	good
    17	good
    18	good
[root@VM-4-10-centos ~]# cat -s test.txt
hello Linux
hello Linux
hello Linux
hello Linux
hello Linux
hello Linux
hello Linux
hello Linux

good
good
good
good
good
cat -sn
[root@VM-4-10-centos ~]# cat -sn test.txt
     1	hello Linux
     2	hello Linux
     3	hello Linux
     4	hello Linux
     5	hello Linux
     6	hello Linux
     7	hello Linux
     8	hello Linux
     9
    10	good
    11	good
    12	good
    13	good
    14	good
cat 不适合看大文本 ,cat 适合看小文本
mv (move)
可以用来移动文件或者将文件改名(move (rename) files),经常用来备份文件或者目录
这里将mytest.c 重命名为Dmytest.c
[root@VM-4-10-centos lesson3]# ll
total 8
drwxr-xr-x 3 root root 4096 Apr 28 14:50 d1
drwxr-xr-x 2 root root 4096 Apr 28 15:56 mytest.c
-rw-r--r-- 1 root root    0 Apr 28 14:50 test.c
-rw-r--r-- 1 root root    0 Apr 28 14:50 test.txt
[root@VM-4-10-centos lesson3]# mv mytest.c Dmytest.c
[root@VM-4-10-centos lesson3]# ll
total 8
drwxr-xr-x 3 root root 4096 Apr 28 14:50 d1
drwxr-xr-x 2 root root 4096 Apr 28 15:56 Dmytest.c
-rw-r--r-- 1 root root    0 Apr 28 14:50 test.c
-rw-r--r-- 1 root root    0 Apr 28 14:50 test.txt
[root@VM-4-10-centos lesson3]#
我们这里把当前目录下的test.c文件剪切到上级目录中
[root@VM-4-10-centos lesson3]# ll
total 8
drwxr-xr-x 3 root root 4096 Apr 28 14:50 d1
drwxr-xr-x 2 root root 4096 Apr 28 15:56 Dmytest.c
-rw-r--r-- 1 root root    0 Apr 28 14:50 test.c
-rw-r--r-- 1 root root    0 Apr 28 14:50 test.txt
[root@VM-4-10-centos lesson3]# mv test.c ../
[root@VM-4-10-centos lesson3]# ls
d1  Dmytest.c  test.txt
[root@VM-4-10-centos lesson3]# ll ../
total 8
drwxr-xr-x 4 root root 4096 Apr 28 15:50 108_class
drwxr-xr-x 4 root root 4096 Apr 28 16:27 lesson3
-rw-r--r-- 1 root root    0 Apr 28 14:50 test.c
把上层路径下的test.c 剪切到当前路径下
[root@VM-4-10-centos ~]# ls
108_class  lesson3  test.c
[root@VM-4-10-centos ~]# cd lesson3
[root@VM-4-10-centos lesson3]# ls
d1
[root@VM-4-10-centos lesson3]# mv ../test.c .
[root@VM-4-10-centos lesson3]# ls
d1  test.c
剪切并重命名
[root@VM-4-10-centos 108_class]# tree .
.
|-- d1
|   `-- d2
|       `-- d3
|           `-- d4
|-- test.c
`-- test.txt

5 directories, 1 file
[root@VM-4-10-centos 108_class]# tree ../
../
|-- 108_class
|   |-- d1
|   |   `-- d2
|   |       `-- d3
|   |           `-- d4
|   |-- test.c
|   `-- test.txt
`-- lesson3
    |-- d1
    |   `-- d2
    |       `-- d3
    `-- test.c

10 directories, 2 files
[root@VM-4-10-centos 108_class]# mv test.c ../mytest.c
[root@VM-4-10-centos 108_class]# ls ../
108_class  lesson3  mytest.c
那如何区分 剪切 、重命名 、剪切并重命名 ?(对于普通文件进行的操作)
mv hello.txt …/ 一般是剪切到上级目录下
mv hello.txt …/a.txt 一般是剪切到上级目录下并重命名
mv a.txt b.txt 一般是重命名
mv a.txt b.txt 不就是mv a.txt ./b.txt
将一个文件A重命名B 可以理解为将文件A剪切到当前目录下并重命名为文件B
(在当前目录下剪切并重命名)
[root@VM-4-10-centos ~]# tree .
.
|-- 108_class
|   |-- d1
|   |   `-- d2
|   |       `-- d3
|   |           `-- d4
|   `-- test.txt
|-- lesson3
|   |-- d1
|   |   `-- d2
|   |       `-- d3
|   `-- test.c
`-- mytest.c

10 directories, 2 files
[root@VM-4-10-centos ~]# mv mytest.c ./a.c
[root@VM-4-10-centos ~]# tree .
.
|-- 108_class
|   |-- d1
|   |   `-- d2
|   |       `-- d3
|   |           `-- d4
|   `-- test.txt
|-- a.c
`-- lesson3
    |-- d1
    |   `-- d2
    |       `-- d3
    `-- test.c

10 directories, 2 files
将lesson2的上级目录下的cxq 文件 剪切到当前文件(lesson2)下
[root@VM-4-10-centos ~]# tree .
.
|-- 108_class
|   |-- d1
|   |   `-- d2
|   |       `-- d3
|   |           `-- d4
|   `-- test.txt
|-- cxq
|-- lesson2
|   `-- x1
|       `-- x2
|           `-- x3
`-- lesson3
    |-- d1
    |   `-- d2
    |       `-- d3
    `-- test.c

14 directories, 2 files
[root@VM-4-10-centos ~]# cd lesson2

[root@VM-4-10-centos lesson2]# mv ../cxq .
[root@VM-4-10-centos lesson2]# tree ../
../
|-- 108_class
|   |-- d1
|   |   `-- d2
|   |       `-- d3
|   |           `-- d4
|   `-- test.txt
|-- lesson2
|   |-- cxq
|   `-- x1
|       `-- x2
|           `-- x3
`-- lesson3
    |-- d1
    |   `-- d2
    |       `-- d3
    `-- test.c

14 directories, 2 files
mv指令对于普通文件和目录的操作大体是一样的,略有一点不同
mv XXX …/YYY(XXX 和YYY 都是具体目录)并不是将XXX剪切到上级目录并重命名为YYY,而是将XXX剪切到YYY目录下
mv cxq …/lesson3 将cxq 剪切到lesson3的目录里面了
[root@VM-4-10-centos lesson2]# tree ../
../
|-- 108_class
|   |-- d1
|   |   `-- d2
|   |       `-- d3
|   |           `-- d4
|   `-- test.txt
|-- lesson2
|   |-- cxq
|   `-- x1
|       `-- x2
|           `-- x3
`-- lesson3
    |-- d1
    |   `-- d2
    |       `-- d3
    `-- test.c

14 directories, 2 files
[root@VM-4-10-centos lesson2]# cd ..
[root@VM-4-10-centos ~]# ll lesson3
total 4
drwxr-xr-x 3 root root 4096 Apr 28 14:50 d1
-rw-r--r-- 1 root root    0 Apr 28 14:50 test.c
[root@VM-4-10-centos ~]# cd lesson2
[root@VM-4-10-centos lesson2]# ll
total 8
drwxr-xr-x 2 root root 4096 Apr 28 20:54 cxq
drwxr-xr-x 3 root root 4096 Apr 28 20:41 x1
[root@VM-4-10-centos lesson2]# mv cxq ../lesson3
[root@VM-4-10-centos lesson2]# cd ..
[root@VM-4-10-centos ~]# ll lesson3
total 8
drwxr-xr-x 2 root root 4096 Apr 28 20:54 cxq
drwxr-xr-x 3 root root 4096 Apr 28 14:50 d1
-rw-r--r-- 1 root root    0 Apr 28 14:50 test.c
[root@VM-4-10-centos ~]# tree .
.
|-- 108_class
|   |-- d1
|   |   `-- d2
|   |       `-- d3
|   |           `-- d4
|   `-- test.txt
|-- lesson2
|   `-- x1
|       `-- x2
|           `-- x3
`-- lesson3
    |-- cxq
    |-- d1
    |   `-- d2
    |       `-- d3
    `-- test.c

14 directories, 2 files
^C
Ctrl + C :终止因为程序或者指令异常,而导致我们无法进行指令输入
指令和可执行程序
指令和可执行程序都是可以被执行的 ,也就是说指令就是可执行程序,和我们自己写的代码编译好的程序没有本质区别
那指令在哪里?
指令是在系统中特定的路径下存在的 ,指令一定是某种可执行程序
那我们在指令执行,应该做什么?
先在系统中查找对应的指令
指令的本质就是文件 ,只不过是可执行文件 ,就是直接安装到系统的某种路径下
which
查看指令对应的路径
[root@VM-4-10-centos 108_class]# which ll
alias ll='ls -l --color=auto'
	/usr/bin/ls
补充 :
Linux 下一切皆文件 ,凡是具有读写方法的设备文件都称之为文件 ,
比如显示器 (向显示器打印- >fwrite fread) 、键盘(从键盘进行读取->fread,键盘fwrite ),普通文件(fwrite fread ),这些都具有读写方法
more
cat指令仅适用于查看内容较少的文件,我们若是要查看海量信息文件,则可以适用more指令
语法: more 文件
功能: 查看目标文件的内容。
可通过按回车键进行下翻操作, 按Q停止
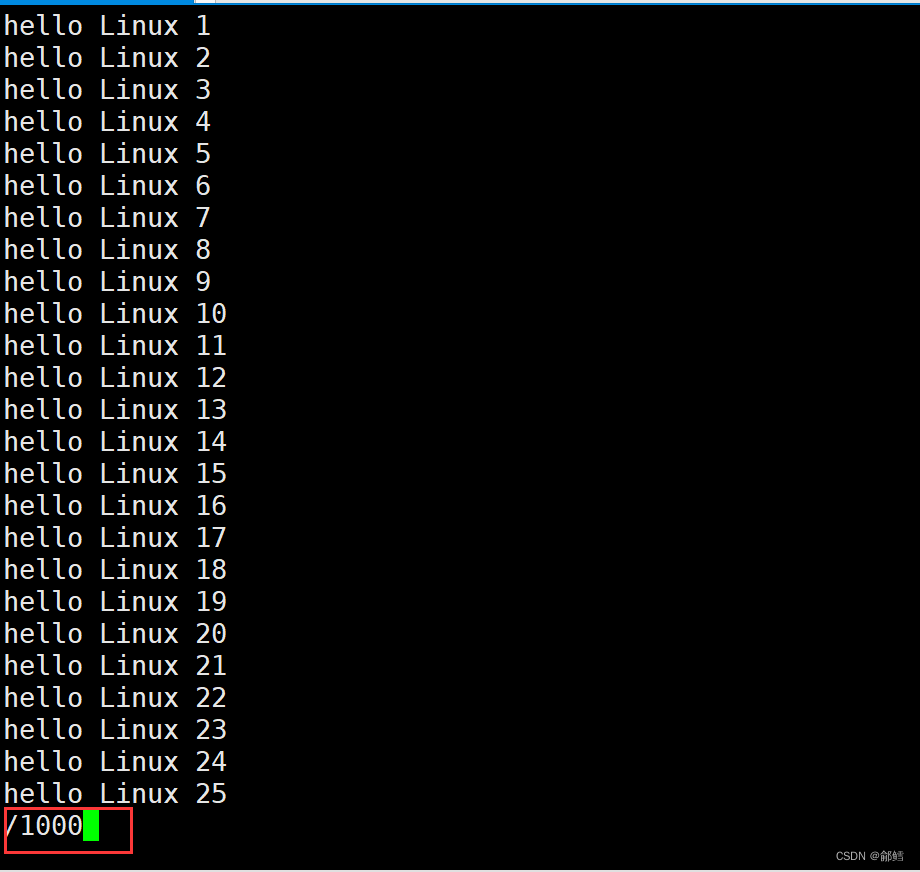
[root@VM-4-10-centos ~]# more test.txt
hello Linux 1
hello Linux 2
hello Linux 3
hello Linux 4
hello Linux 5
hello Linux 6
hello Linux 7
hello Linux 8
hello Linux 9
hello Linux 10
hello Linux 11
hello Linux 12
hello Linux 13
hello Linux 14
hello Linux 15
hello Linux 16
hello Linux 17
hello Linux 18
hello Linux 19
hello Linux 20
hello Linux 21
hello Linux 22
注意: more指令只能通过按回车键进行下翻操作,无法进行上翻操作,并且more指令在查看之前会先加载整个文件
more -n
[root@VM-4-10-centos ~]# more -10 test.txt
hello Linux 1
hello Linux 2
hello Linux 3
hello Linux 4
hello Linux 5
hello Linux 6
hello Linux 7
hello Linux 8
hello Linux 9
hello Linux 10
less指令
上面的more指令只能进行下翻操作,而less指令可以同时支持上翻和下翻操作,按Q退出 ,ctrl+ c是不能退出的
语法: less 选项 文件
功能: 既有查看目标文件的内容的功能,又有搜索功能。
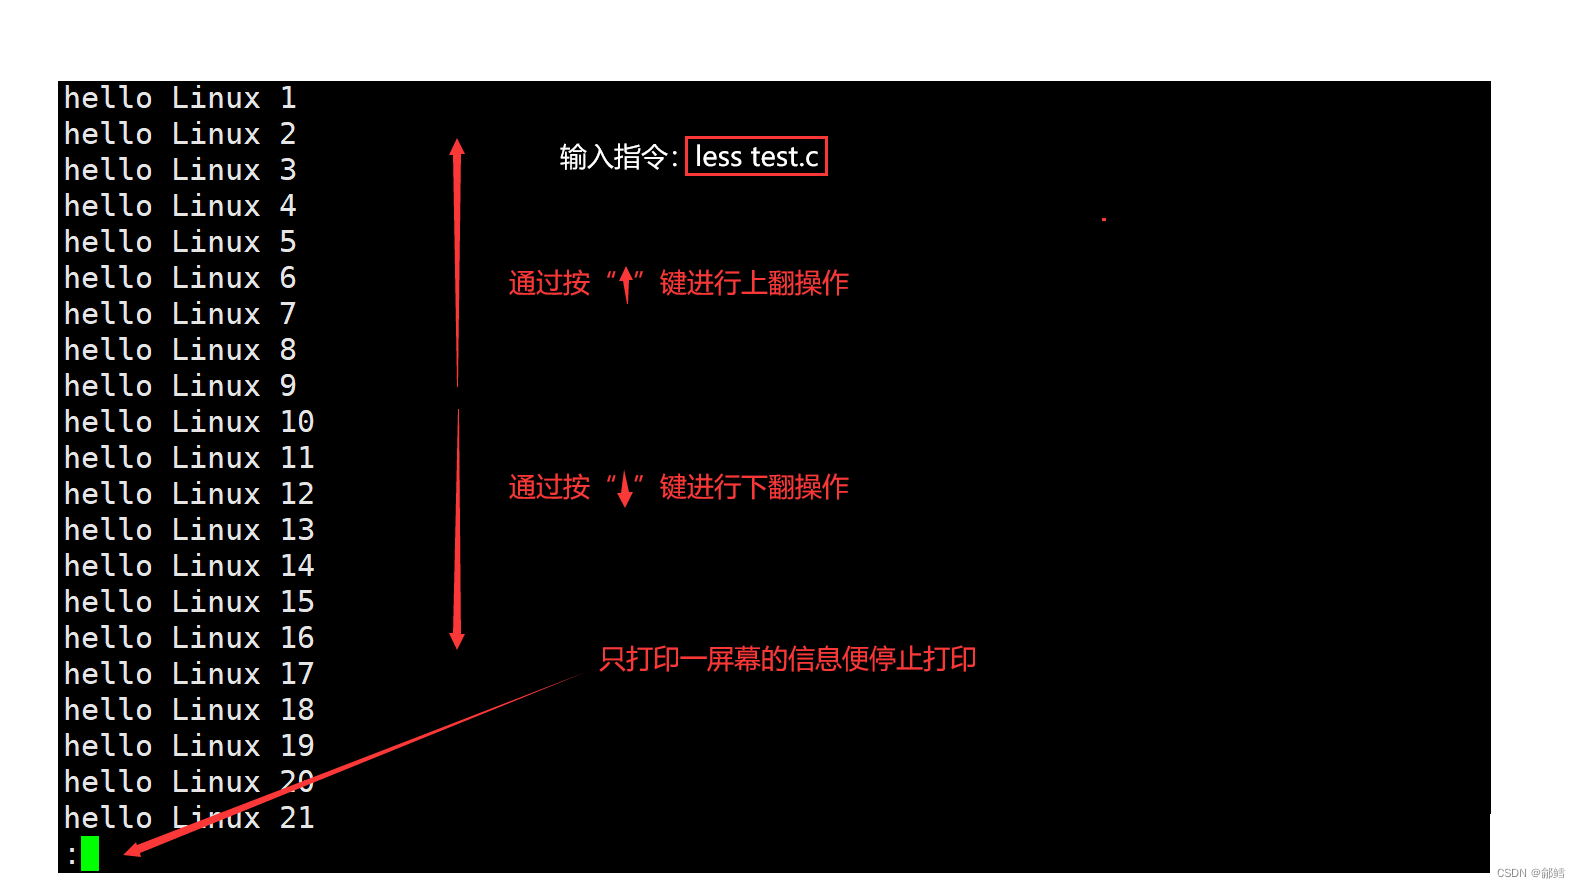
注意: less指令可以通过按上下键进行上翻和下翻操作,并且less指令在查看之前不会加载整个文件
常用选项:
1)-i 忽略搜索时的大小写。
2)-N 显示每行的行号。
3)/字符串 向下搜索“字符串”的功能。
4)?字符串 向上搜索“字符串”的功能。
5)n 重复前一个搜索(与/或?有关)。
6)N 反向重复前一个搜索(与/或?有关)。

head指令
语法: head 选项 文件
功能: 用于显示文件的开头至标准输出中,默认head指令打印其相应文件的开头10行。
[root@VM-4-10-centos ~]# head log.txt
hello Linux 1
hello Linux 2
hello Linux 3
hello Linux 4
hello Linux 5
hello Linux 6
hello Linux 7
hello Linux 8
hello Linux 9
hello Linux 10
tail指令
语法: tail 选项 文件
功能: 用于显示文件的末尾至标准输出中,默认tail指令打印其相应文件的末尾10行。
[root@VM-4-10-centos ~]# tail log.txt
hello Linux 9991
hello Linux 9992
hello Linux 9993
hello Linux 9994
hello Linux 9995
hello Linux 9996
hello Linux 9997
hello Linux 9998
hello Linux 9999
hello Linux 10000
如何读取文件中间某一段内容?
如果现在log.txt文件当中有一万行内容,我们如何读取第1001至1020行?
方法一: 写上 less log.txt
less log.txt
然后搜索就行了
方法二:
log.txt
在认识了head和tail指令后,你可能很容易想到如下方法:先用head指令读取log.txt文件中的前1010行存入临时文件temp.txt中,然后将temp.txt文件的后10行打印输出即可。
[root@VM-4-10-centos ~]# head -1020 log.txt > temp.txt
[root@VM-4-10-centos ~]# tail -20 temp.txt
hello Linux 1001
hello Linux 1002
hello Linux 1003
hello Linux 1004
hello Linux 1005
hello Linux 1006
hello Linux 1007
hello Linux 1008
hello Linux 1009
hello Linux 1010
hello Linux 1011
hello Linux 1012
hello Linux 1013
hello Linux 1014
hello Linux 1015
hello Linux 1016
hello Linux 1017
hello Linux 1018
hello Linux 1019
hello Linux 1020
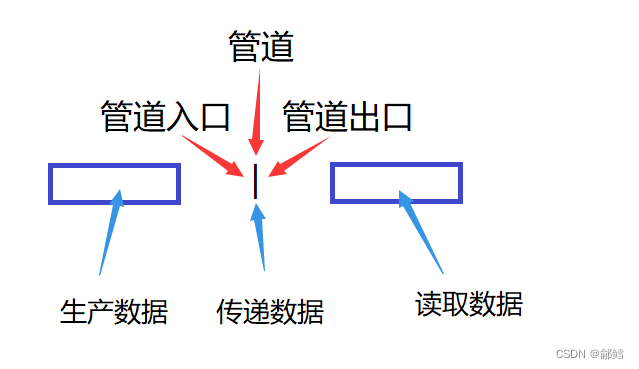
这样写显然有点麻烦(还需要创建一个临时文件),有一种简便的方式可以实现该操作,该方式需要用到“命令行管道”(一种符号,后面会被“系统”解释成为管道文件)
我们知道,管道是用于传输某种资源的,计算机上面最重要的资源就是数据。
在指令中管道用“|”来表示,管道左边接收产生的数据,右边读取数据。:
[root@VM-4-10-centos ~]# head -1020 log.txt |tail -21
hello Linux 1000
hello Linux 1001
hello Linux 1002
hello Linux 1003
hello Linux 1004
hello Linux 1005
hello Linux 1006
hello Linux 1007
hello Linux 1008
hello Linux 1009
hello Linux 1010
hello Linux 1011
hello Linux 1012
hello Linux 1013
hello Linux 1014
hello Linux 1015
hello Linux 1016
hello Linux 1017
hello Linux 1018
hello Linux 1019
hello Linux 1020
date指令
语法: date 选项 格式
功能: 用于显示时间、设置时间、完成时间与时间戳之间的相互转换等。
对于date,使用者可以设定任意想要显示的格式
date +%Y:%m:%d
[root@VM-4-10-centos ~]# date
Wed Jun  7 16:53:12 CST 2023
[cxq@VM-4-10-centos ~]$ date +%Y-%m-%d-%H-%M-%S
2023-06-07-19-04-43
将时间以时间戳的方式显示,时间戳是指格林威治时间自1970年1月1日00:00:00至当前时间的总秒数
完成时间与时间戳之间的相互转换
1)date +%s 显示当前时间的时间戳。
2)date -d @时间戳 将时间戳转换为时间
[cxq@VM-4-10-centos ~]$ date +%s
1686137850
[cxq@VM-4-10-centos ~]$ date -d @1686137850
Wed Jun  7 19:37:30 CST 2023
[cxq@VM-4-10-centos ~]$ date +%Y-%m-%d-%H-%M-%S -d @1686137850
2023-06-07-19-37-30
cal指令
cal指令可以用于显示公历(阳历)日历。
语法: cal 选项 月份 年份
功能: 用于查看日历等时间信息,如只有一个参数,则表示年份(1~9999),如有两个参数,则表示月份和年份。
[cxq@VM-4-10-centos ~]$ cal
      June 2023
Su Mo Tu We Th Fr Sa
             1  2  3
 4  5  6  7  8  9 10
11 12 13 14 15 16 17
18 19 20 21 22 23 24
25 26 27 28 29 30
find指令
语法: find 路径 选项 …
功能: 用于在文件树中查找文件,并作出相应的处理(可能访问磁盘->效率比较低)。
find:可以在指定的路径下进行文件的搜索,在磁盘文件中查找
[cxq@VM-4-10-centos ~]$ ll
total 8
drwxrwxr-x 3 cxq cxq 4096 Jun  7 18:43 d1
drwxrwxr-x 2 cxq cxq 4096 Jun  7 18:47 lesson4
-rw-rw-r-- 1 cxq cxq    0 Jun  7 20:18 test.c
[cxq@VM-4-10-centos ~]$ find ~ -name test.c
/home/cxq/test.c
which(搜索指令的路径)
Linux当中的每个指令其实都是用计算机语言编写出的可执行程序,这些程序都存储在文件当中,我们可以通过which指令查看某一指令的程序文件所在路径。
语法: which 指令
功能: 用于查找某一指令的程序文件所在路径。
[cxq@VM-4-10-centos ~]$ which ls
alias ls='ls --color=auto'
	/usr/bin/ls
[cxq@VM-4-10-centos ~]$ which test.c
/usr/bin/which: no test.c in (/usr/local/bin:/usr/bin:/usr/local/sbin:/usr/sbin:/home/cxq/.local/bin:/home/cxq/bin)
[cxq@VM-4-10-centos ~]$ which pwd
/usr/bin/pwd
查看pwd指令的程序文件所在路径
whereis
whereis:在系统特定的路径下查找,既可以找到可执行程序,又可以找到手册,安装包压缩包等之类
[cxq@VM-4-10-centos ~]$ whereis ls
ls: /usr/bin/ls /usr/share/man/man1/ls.1.gz /usr/share/man/man1p/ls.1p.gz
[cxq@VM-4-10-centos ~]$ whereis test.c
test: /usr/bin/test /usr/share/man/man1/test.1.gz /usr/share/man/man1p/test.1p.gz
alias指令
当你觉得某一指令太长时,你可以使用alias指令给它起一个别名。
语法: alias 别名=‘原名’
功能: 可以用于给指令取别名。
grep
grep指令类似于关键词搜索(行文本过滤器)。
语法: grep 选项 搜寻字符串 文件
功能: 在文件中搜索字符串,将找到的行打印出来。
[cxq@VM-4-10-centos ~]$ grep '9999' log.txt
hello bit 9999
hello bit 19999
hello bit 29999
hello bit 39999
hello bit 49999
hello bit 59999
hello bit 69999
hello bit 79999
hello bit 89999
hello bit 99990
hello bit 99991
hello bit 99992
hello bit 99993
hello bit 99994
hello bit 99995
hello bit 99996
hello bit 99997
hello bit 99998
hello bit 99999
常用选项:
(1)-v 反向选择,显示出没有待搜索字符串的行
[cxq@VM-4-10-centos ~]$ cat log.txt
hello world
hello world
hello world
hello world

hello bit
hello BIT
hello Bit

12345678
34567
890
[cxq@VM-4-10-centos ~]$ grep 'world' log.txt
hello world
hello world
hello world
hello world
[cxq@VM-4-10-centos ~]$ grep -v 'world' log.txt

hello bit
hello BIT
hello Bit

12345678
34567
890
(2)-n 输出行号
[cxq@VM-4-10-centos ~]$ grep -n '' log.txt
1:hello world
2:hello world
3:hello world
4:hello world
5:
6:hello bit
7:hello BIT
8:hello Bit
9:
10:12345678
11:34567
12:890
(3)-i 忽略大小写进行查找。
[cxq@VM-4-10-centos ~]$ grep -i 'bit' log.txt
hello bit
hello BIT
hello Bit
添加与删除用户
添加
第一步: 输入addser yourid(yourid是待创建的用户的用户名)。

第二步: 输入passwd yourid进行设置密码。

Linux当中输入密码时,密码是不回显的。
第三步: 再次输入密码进行确认。
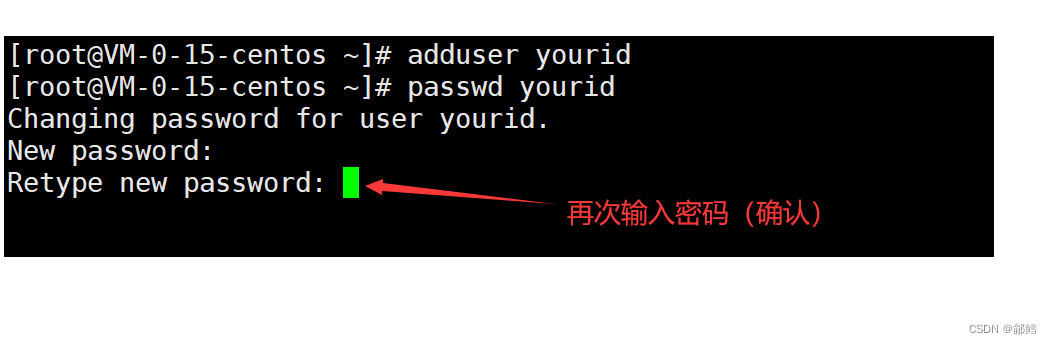
当看到以下提示时,说明用户创建成功。

删除
如何删除用户账号?
删除账号时之间输入userdel -r yourid(yourid是要删除的用户的用户名)

注意: 创建和删除用户的操作者都必须是root用户,普通用户是不能删除和创建的。
zip指令
zip指令用于打包压缩目录或文件。
为什么要打包并压缩?
能被打包压缩的一定是一个整体 ,由多个文件组成一个文件,一个文件不容易造成文件缺失
打包:可以防止文件丢失。
压缩:利用特定的算法将我们的文件进行体积的减少,可以帮助我们在网络传输过程中节省时间
语法: zip 选项 压缩文件.zip 待打包目录或文件
功能: 将目录或文件打包压缩成zip格式。
常用选项:
(1)-r 递归处理,将指定目录下的所有文件和子目录一并处理
[cxq@VM-4-10-centos lesson4]$ ll
total 8
drwxrwxr-x 3 cxq cxq 4096 Jun 8 15:45 d1
-rw-rw-r-- 1 cxq cxq 53 Jun 9 16:22 log.txt
[cxq@VM-4-10-centos lesson4]$ zip -r d1.zip d1
adding: d1/ (stored 0%)
adding: d1/d2/ (stored 0%)
adding: d1/d2/file4.txt (stored 0%)
adding: d1/d2/file5.txt (stored 0%)
adding: d1/d2/d3/ (stored 0%)
adding: d1/file2.txt (stored 0%)
adding: d1/file1.txt (stored 0%)
adding: d1/file3.txt (stored 0%)
[cxq@VM-4-10-centos lesson4]$ ll
total 12
drwxrwxr-x 3 cxq cxq 4096 Jun 8 15:45 d1
-rw-rw-r-- 1 cxq cxq 1225 Jun 9 16:26 d1.zip
-rw-rw-r-- 1 cxq cxq 53 Jun 9 16:22 log.txt
[cxq@VM-4-10-centos lesson4]$ mv d1.zip ..
[cxq@VM-4-10-centos lesson4]$ cd ..
[cxq@VM-4-10-centos 108]$ ll
total 8
-rw-rw-r-- 1 cxq cxq 1225 Jun 9 16:26 d1.zip
drwxrwxr-x 3 cxq cxq 4096 Jun 9 16:32 lesson4
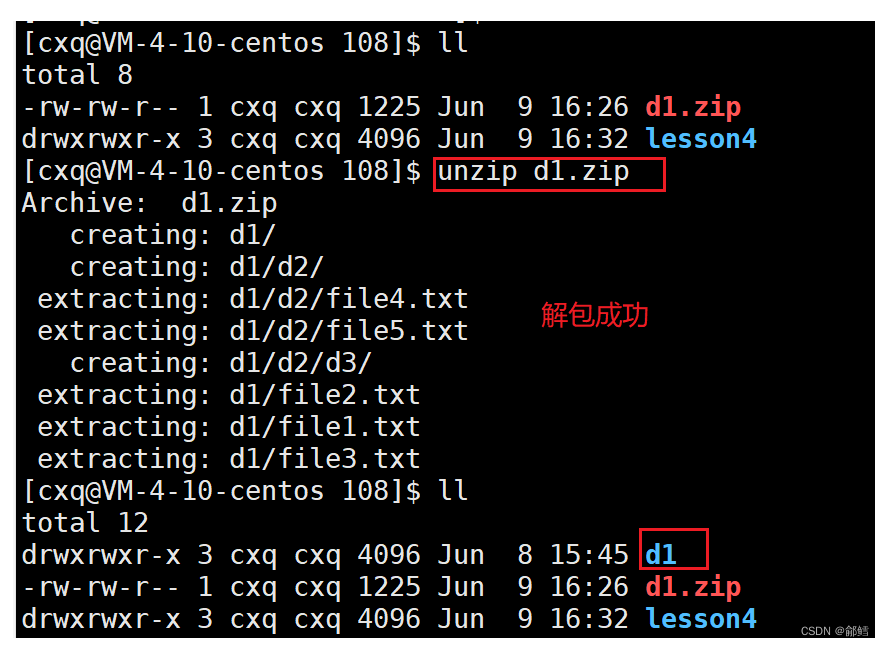
[cxq@VM-4-10-centos 108]$ unzip d1.zip
Archive: d1.zip
creating: d1/
creating: d1/d2/
extracting: d1/d2/file4.txt
extracting: d1/d2/file5.txt
creating: d1/d2/d3/
extracting: d1/file2.txt
extracting: d1/file1.txt
extracting: d1/file3.txt
[cxq@VM-4-10-centos 108]$ ll
total 12
drwxrwxr-x 3 cxq cxq 4096 Jun 8 15:45 d1
-rw-rw-r-- 1 cxq cxq 1225 Jun 9 16:26 d1.zip
drwxrwxr-x 3 cxq cxq 4096 Jun 9 16:32 lesson4
[cxq@VM-4-10-centos 108]$ tree d1
d1
|-- d2
| |-- d3
| |-- file4.txt
| `-- file5.txt
|-- file1.txt
|-- file2.txt
`-- file3.txt
2 directories, 5 files

unzip指令
unzip指令用于解压文件。
语法: unzip 压缩文件.zip 选项 目录
功能: 将压缩文件解压到指定目录当中。
当我们解压压缩包的时候,一般有两种解压目的地,一种是默认解压到我们当前的位置,另一种是解压到我们默认的目录下。 解压文件时若不带-d选项和目标目录,则默认解压到当前目录下
从下图我们便可以看到,当unzip带上-d选项之后,我们就可以将d1.zip压缩包解压到test目录下

打包和压缩
[cxq@VM-4-10-centos lesson4]$ zip  -r d1.zip d1 log.txt
  adding: d1/ (stored 0%)
  adding: d1/d2/ (stored 0%)
  adding: d1/d2/file4.txt (stored 0%)
  adding: d1/d2/file5.txt (stored 0%)
  adding: d1/d2/d3/ (stored 0%)
  adding: d1/file2.txt (stored 0%)
  adding: d1/file1.txt (stored 0%)
  adding: d1/file3.txt (stored 0%)
  adding: log.txt (stored 0%)
[cxq@VM-4-10-centos lesson4]$ ll
total 12
drwxrwxr-x 3 cxq cxq 4096 Jun  8 15:45 d1
-rw-rw-r-- 1 cxq cxq 1420 Jun  9 16:47 d1.zip
-rw-rw-r-- 1 cxq cxq   53 Jun  9 16:22 log.txt
[cxq@VM-4-10-centos lesson4]$ rm d1 log.txt -rf
[cxq@VM-4-10-centos lesson4]$ ll
total 4
-rw-rw-r-- 1 cxq cxq 1420 Jun  9 16:47 d1.zip
[cxq@VM-4-10-centos lesson4]$ unzip d1.zip
Archive:  d1.zip
   creating: d1/
   creating: d1/d2/
 extracting: d1/d2/file4.txt
 extracting: d1/d2/file5.txt
   creating: d1/d2/d3/
 extracting: d1/file2.txt
 extracting: d1/file1.txt
 extracting: d1/file3.txt
 extracting: log.txt
[cxq@VM-4-10-centos lesson4]$ ll
total 12
drwxrwxr-x 3 cxq cxq 4096 Jun  8 15:45 d1
-rw-rw-r-- 1 cxq cxq 1420 Jun  9 16:47 d1.zip
-rw-rw-r-- 1 cxq cxq   53 Jun  9 16:22 log.txt
tar指令
tar 只是一种打包格式,并不对文件进行压缩,主要是为了便于文件的管理,所以打包后的文档大小一般远远大于 zip 和 tar.gz,但这种格式也有很明显的优点,例如打包速度非常快,打包时 CPU 占用率也很低
语法: tar 选项 压缩文件 …
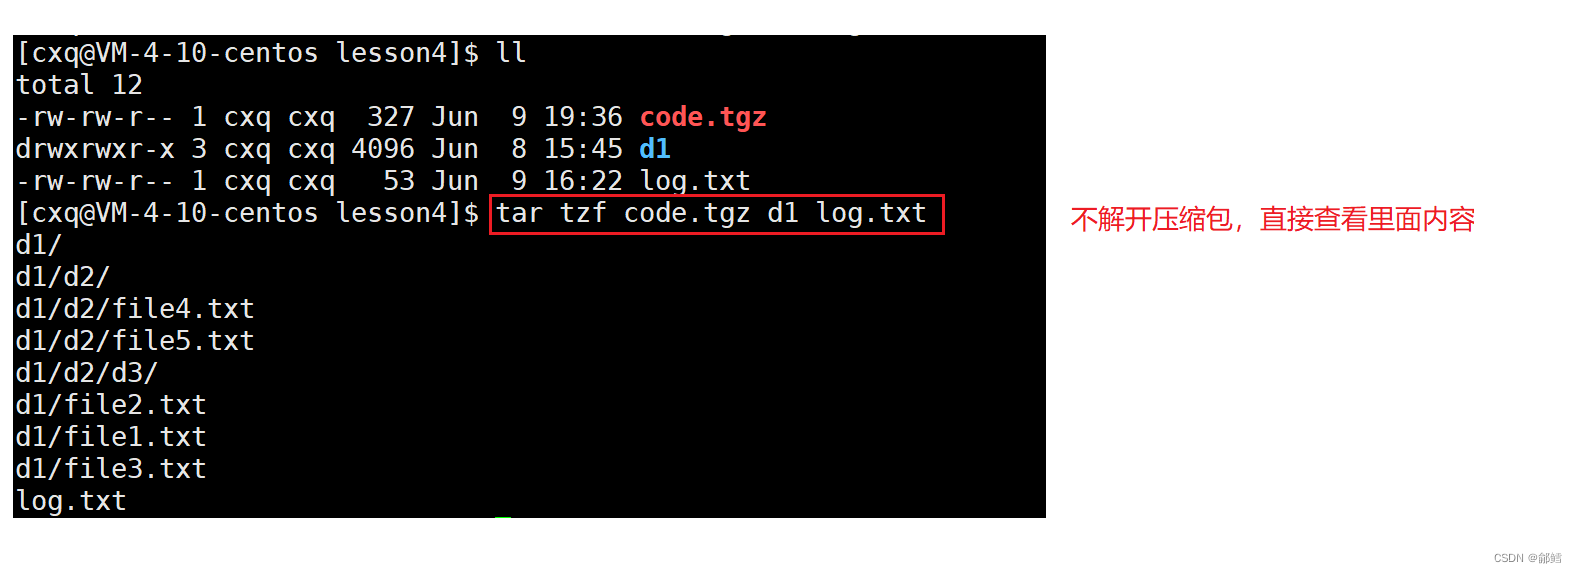
功能: 打包/解包,不解开压缩包,直接查看里面内容。
常用选项:
1)-c 建立一个压缩文件的参数指令(create的意思)。
2)-x 解开一个压缩文件的参数指令。
3)-t 查看tarfile里面的文件。
4)-z 是否同时具有gzip属性?即是否需要用gzip压缩?
5)-j 是否同时具有bzip2属性?即是否需要用bzip2压缩?
6)-v 压缩的过程中显示文件(常用)。
7)-f 使用档名,请留意,在f之后要立即接档名,不要再加参数。
8)-C 解压到指定目录。
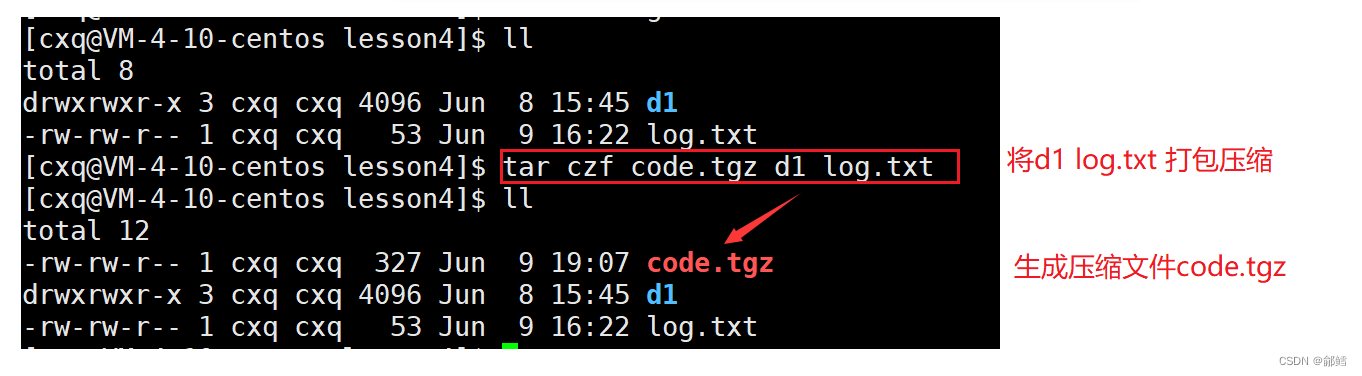
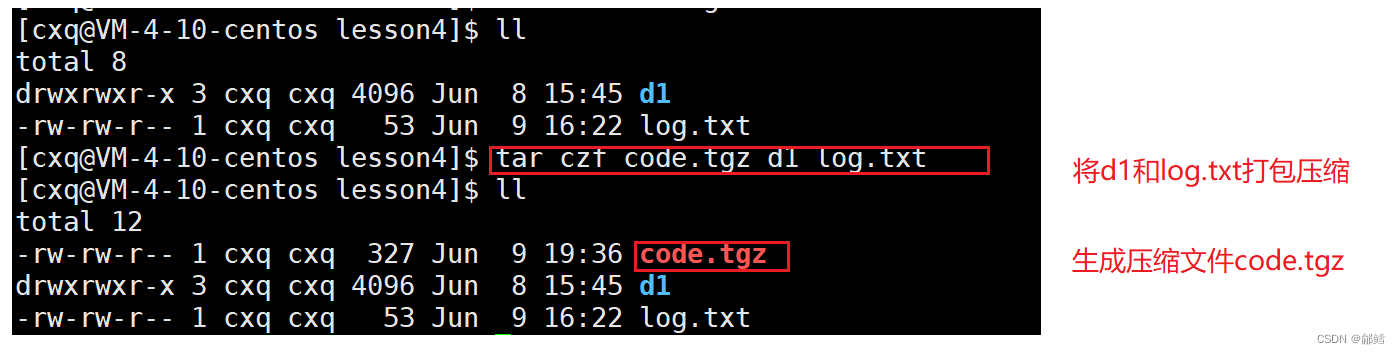
打包示例:
总结:
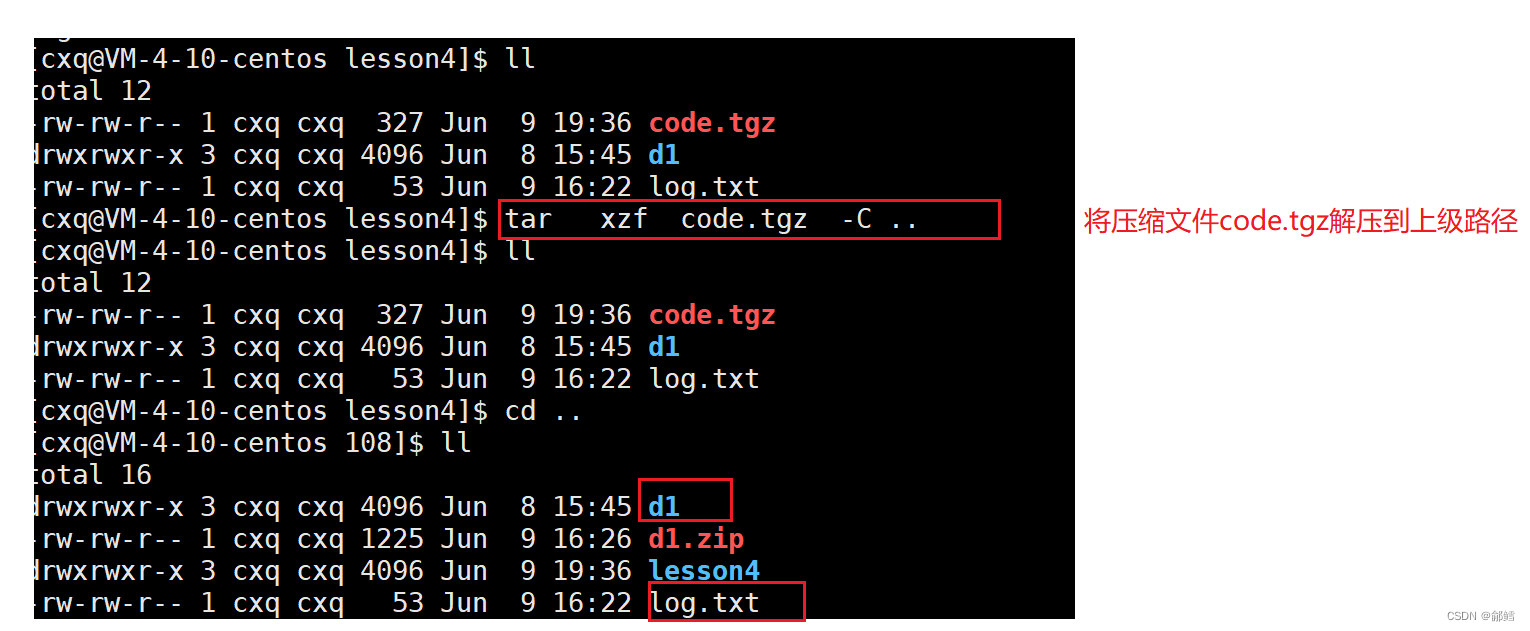
tar czf XXX —打包压缩(c表示create ,z表示使用zip的方式进行压缩 , f表示新形成的文档名称) tar(打包后缀) 、.gz(压缩后缀) xxx.tar.gz ,我们一般简写为tgz
tar tzf XXX.tgz —–预览
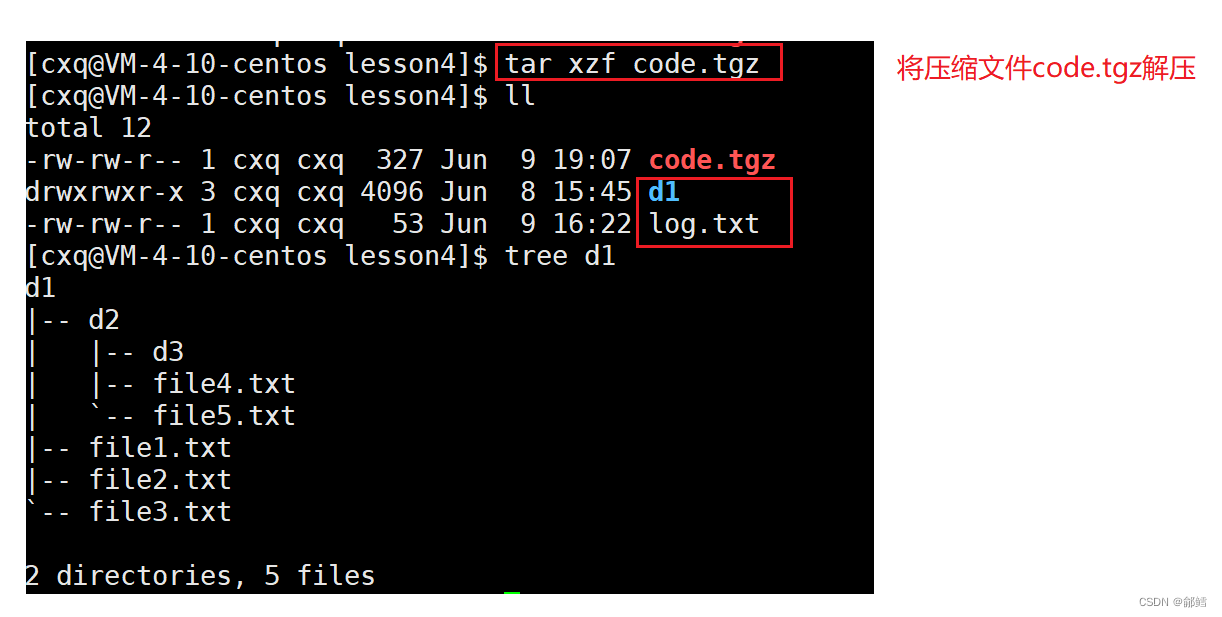
tar xzf XXX. tgz —–解压解包
解压到指定路径下,其实这个-C选项和我们unzip的-d选项作用是相同的,我们可以看到通过-C选项我们就把压缩包解压到上级路径中
bc指令
Windows里面有计算器,Linux下面也有,bc指令就是Linux下的计算器。
语法: bc
功能: 进行运算。

uname指令
语法: uname 选项
功能: 用于获取电脑和操作系统的相关信息。
常用选项:
1)-r 输出电脑和操作系统相关信息。

2)-a 详细输出所有信息,依次为内核名称,主机名,内核版本号,内核版本,硬件名,处理器类型,硬件平台类型,操作系统名称。

x86_64 = x64 , x86== 32位机器
如果你觉得这篇文章对你有帮助,不妨动动手指给点赞收藏加转发,给鄃鳕一个大大的关注
你们的每一次支持都将转化为我前进的动力!!!