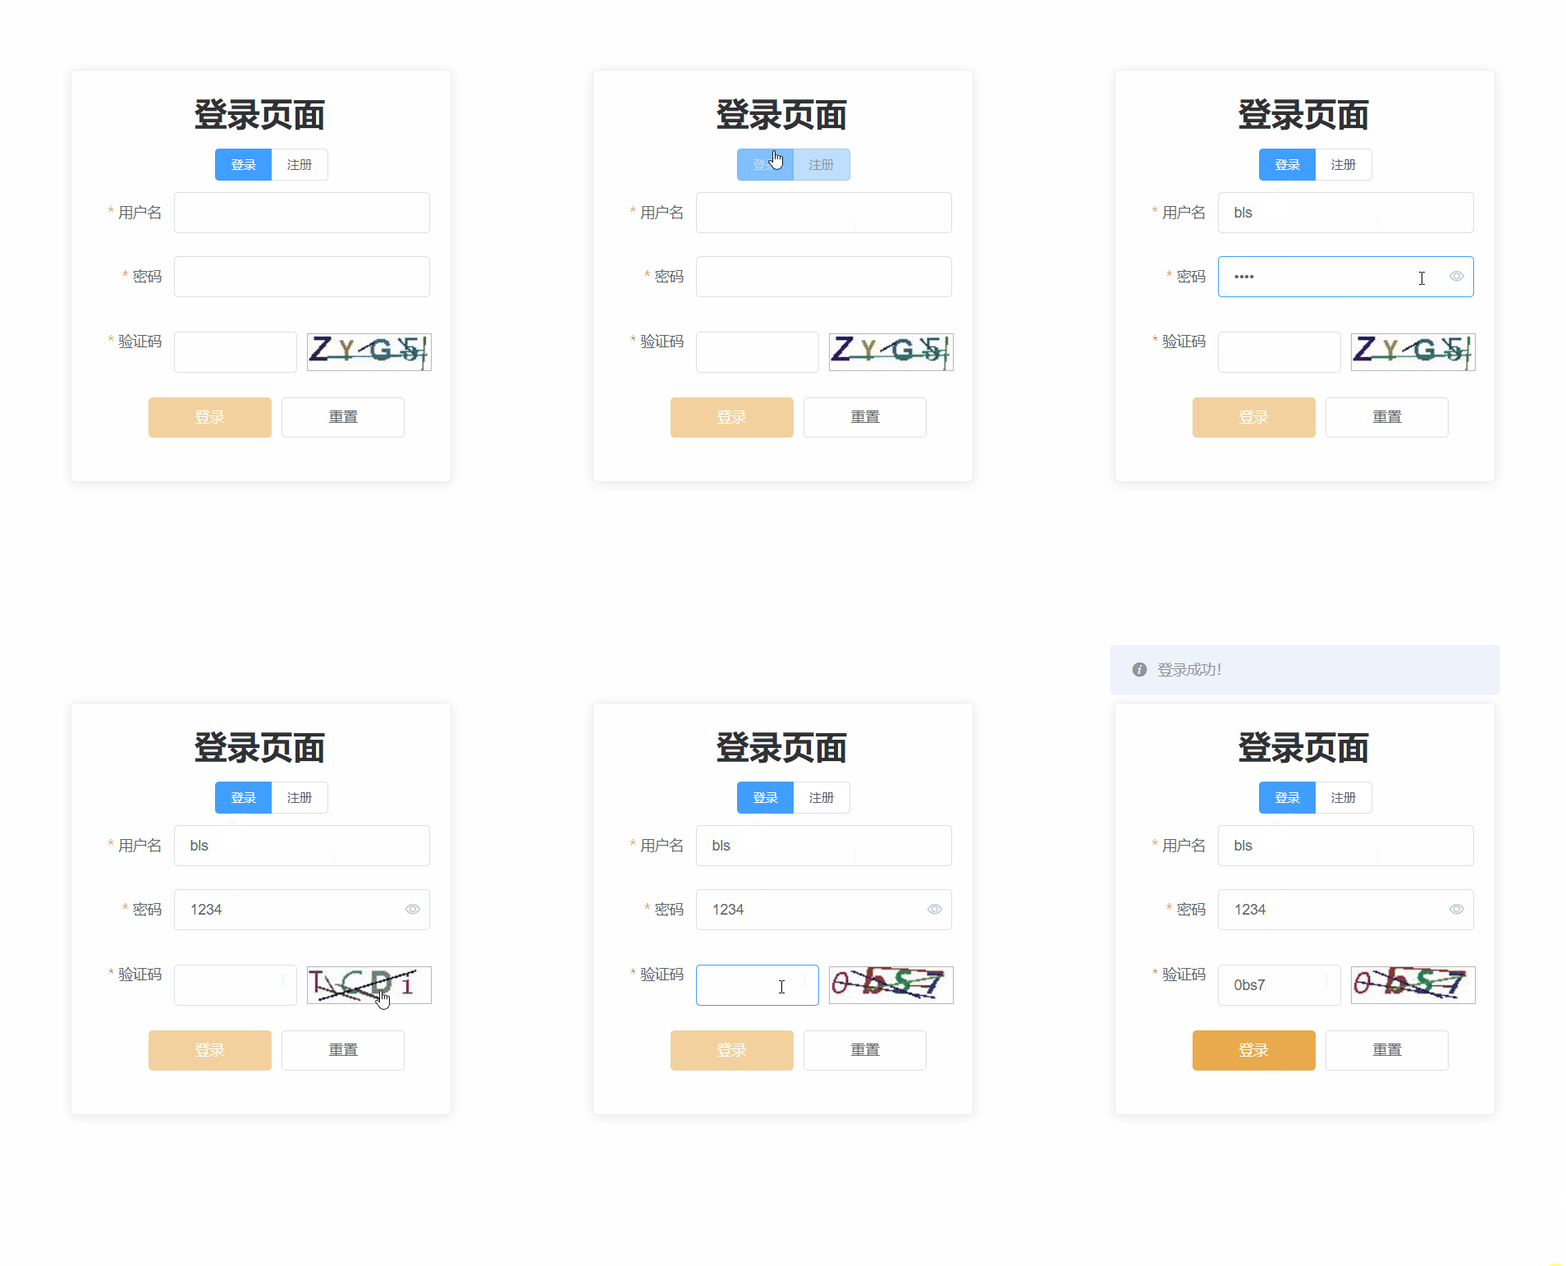
一、运行效果展示


!注意:前端的Vue项目中要引入element-ui和axios
# npm安装element-ui、axios
npm insatll element-ui -S
npm install axios -S
# 在main中引入
// 引入ElementUI
import ElementUI from 'element-ui'
import 'element-ui/lib/theme-chalk/index.css'
Vue.use(ElementUI)

// 使用axios
import axios from 'axios'
axios.defaults.baseURL = 'http://127.0.0.1:'
Vue.prototype.$axios = axios
二、环境依赖准备
1、引入pom依赖
<!-- jwt -->
<dependency>
  <groupId>com.auth0</groupId>
  <artifactId>java-jwt</artifactId>
  <version>3.18.2</version>
</dependency>
<!-- redis -->
<dependency>
  <groupId>org.springframework.boot</groupId>
  <artifactId>spring-boot-starter-data-redis</artifactId>
</dependency>
<!-- lombok -->
<dependency>
  <groupId>org.projectlombok</groupId>
  <artifactId>lombok</artifactId>
  <optional>true</optional>
</dependency>
2、配置yaml
server:
  port: 8080
spring:
  application:
    name: login-service # 服务名称
  redis:
    host: 127.0.0.1
    port: 6379
    password: 123456
    database: 0 #操作的是0号数据库
    jedis:
      #Redis连接池配置
      pool:
        max-active: 8 #最大连接数
        max-wait: 1ms #连接池最大阻塞等待时间
        max-idle: 4 #连接池中的最大空闲连接
        min-idle: 0 #连接池中的最小空闲连接
三、jwt生成与验证token
1、编写token工具类TokenUtils
import com.auth0.jwt.JWT;
import com.auth0.jwt.JWTCreator;
import com.auth0.jwt.algorithms.Algorithm;
import com.auth0.jwt.exceptions.TokenExpiredException;
import lombok.Data;
import lombok.extern.slf4j.Slf4j;
import org.springframework.beans.factory.annotation.Autowired;
import org.springframework.data.redis.core.StringRedisTemplate;
import org.springframework.data.redis.core.ValueOperations;
import org.springframework.stereotype.Component;
import java.util.Calendar;
import java.util.concurrent.TimeUnit;

@Component
@Data
@Slf4j
public class TokenUtils {

    @Autowired
    private StringRedisTemplate stringRedisTemplate;

    // 创建Token
    public String createToken(String userName, String hostIp) {
        //时间工具类
        Calendar instance = Calendar.getInstance();
        //设置过期时间  单位:SECOND秒  3个小时失效
        instance.add(Calendar.SECOND, 3 * 60 * 60);
        //签名(自定义)
        Algorithm algorithm = Algorithm.HMAC256("buliangshuai");
        // 创建token
        JWTCreator.Builder builder = JWT.create()
                //添加键值对数据
                .withClaim("userName", userName)
                //添加过期时间
                .withExpiresAt(instance.getTime());
        // 选择签名算法HMAC256,添加密钥字符串签名
        String token = builder.sign(algorithm);
        //输出token
        System.out.println("用户" + userName + "的token是:" + token);
        // 将token存入redis
        ValueOperations<String, String> forValue = stringRedisTemplate.opsForValue();
        // 存入主机IP和token,指定过期时间
        forValue.set(hostIp+"token", token, 3 * 60 * 60, TimeUnit.SECONDS);
        return token;
    }

    // 验证Token
    public boolean verifyToken(String token, String hostIp) {
        try {
            // 根据主机地址和redis中存储的值比对判断token是否正确
            String redisToken = stringRedisTemplate.boundValueOps(hostIp + "token").get();
            if(!token.equals(redisToken)){
                return false;
            }
        } catch (TokenExpiredException e) {
            //令牌过期抛出异常
            System.out.println("令牌过期");
            return false;
        } catch (Exception e) {
            //token非法验证失败抛出异常
            System.out.println("检验失败");
            return false;
        }
        return true;
    }
}
2、编写token接口控制类
import com.blywl.common.utils.TokenUtils;
import lombok.extern.slf4j.Slf4j;
import org.springframework.beans.factory.annotation.Autowired;
import org.springframework.web.bind.annotation.*;
import javax.servlet.http.HttpServletRequest;

@RestController
@RequestMapping("/test")
@Slf4j
@CrossOrigin // 跨域
public class TestController {
    @Autowired
    private TokenUtils tokenUtils;

    // 创建token
    @PostMapping("/token")
    public String createToken(@RequestParam("userName") String userName, HttpServletRequest request){
        return tokenUtils.createToken(userName, request.getRemoteAddr());
    }

    // 验证token
    @PostMapping("/verifyToken")
    public boolean verifyToken(@RequestParam("token") String token, HttpServletRequest request){
        return tokenUtils.verifyToken(token, request.getRemoteAddr());
    }
}
3、前端api调用
import axios from 'axios'

let hostIp= "http://127.0.0.1:"
export default {
    // 生成用户Token
    createToken(data) {
        return axios({
            url: hostIp + '8080/test/token',
            params: data,
            method: 'post'
        })
    }

}
四、随机验证码
1、验证码工具类codeUtils
import javax.imageio.ImageIO;
import java.awt.*;
import java.awt.image.BufferedImage;
import java.io.IOException;
import java.io.OutputStream;
import java.util.Random;

/**
 * code验证码生成工具类
 */
public class CodeUtils {
    /**
     * 生成验证码图片的宽度
     */
    private int width = 100;

    /**
     * 生成验证码图片的高度
     */
    private int height = 30;

    /**
     * 字符样式
     */
    private String[] fontNames = { "宋体", "楷体", "隶书", "微软雅黑" };

    /**
     * 定义验证码图片的背景颜色为白色
     */
    private Color bgColor = new Color(255, 255, 255);

    /**
     * 生成随机
     */
    private Random random = new Random();

    /**
     * 定义code字符
     */
    private String codes = "0123456789abcdefghijklmnopqrstuvwxyzABCDEFGHIJKLMNOPQRSTUVWXYZ";

    /**
     * 记录随机字符串
     */
    private String text;

    /**
     * 获取一个随意颜色
     * @return
     */
    private Color randomColor() {
        int red = random.nextInt(150);
        int green = random.nextInt(150);
        int blue = random.nextInt(150);
        return new Color(red, green, blue);
    }

    /**
     * 获取一个随机字体
     *
     * @return
     */
    private Font randomFont() {
        String name = fontNames[random.nextInt(fontNames.length)];
        int style = random.nextInt(4);
        int size = random.nextInt(5) + 24;
        return new Font(name, style, size);
    }

    /**
     * 获取一个随机字符
     *
     * @return
     */
    private char randomChar() {
        return codes.charAt(random.nextInt(codes.length()));
    }

    /**
     * 创建一个空白的BufferedImage对象
     *
     * @return
     */
    private BufferedImage createImage() {
        BufferedImage image = new BufferedImage(width, height, BufferedImage.TYPE_INT_RGB);
        Graphics2D g2 = (Graphics2D) image.getGraphics();
        //设置验证码图片的背景颜色
        g2.setColor(bgColor);
        g2.fillRect(0, 0, width, height);
        return image;
    }

    public BufferedImage getImage() {
        BufferedImage image = createImage();
        Graphics2D g2 = (Graphics2D) image.getGraphics();
        StringBuffer sb = new StringBuffer();
        for (int i = 0; i < 4; i++) {
            String s = randomChar() + "";
            sb.append(s);
            g2.setColor(randomColor());
            g2.setFont(randomFont());
            float x = i * width * 1.0f / 4;
            g2.drawString(s, x, height - 8);
        }
        this.text = sb.toString();
        drawLine(image);
        return image;
    }

    /**
     * 绘制干扰线
     *
     * @param image
     */
    private void drawLine(BufferedImage image) {
        Graphics2D g2 = (Graphics2D) image.getGraphics();
        int num = 5;
        for (int i = 0; i < num; i++) {
            int x1 = random.nextInt(width);
            int y1 = random.nextInt(height);
            int x2 = random.nextInt(width);
            int y2 = random.nextInt(height);
            g2.setColor(randomColor());
            g2.setStroke(new BasicStroke(1.5f));
            g2.drawLine(x1, y1, x2, y2);
        }
    }

    public String getText() {
        return text;
    }

    public static void output(BufferedImage image, OutputStream out) throws IOException {
        ImageIO.write(image, "JPEG", out);
    }
}
2、编写验证码接口控制类
import com.blywl.common.utils.CodeUtils;
import org.springframework.beans.factory.annotation.Autowired;
import org.springframework.data.redis.core.StringRedisTemplate;
import org.springframework.data.redis.core.ValueOperations;
import org.springframework.web.bind.annotation.*;
import javax.servlet.http.HttpServletRequest;
import javax.servlet.http.HttpServletResponse;
import java.awt.image.BufferedImage;
import java.io.IOException;
import java.util.concurrent.TimeUnit;

@RestController
@RequestMapping("/login")
@CrossOrigin // 跨域
public class LoginController {

    @Autowired
    private StringRedisTemplate stringRedisTemplate;

    /**
     * 生成验证码图片
     */
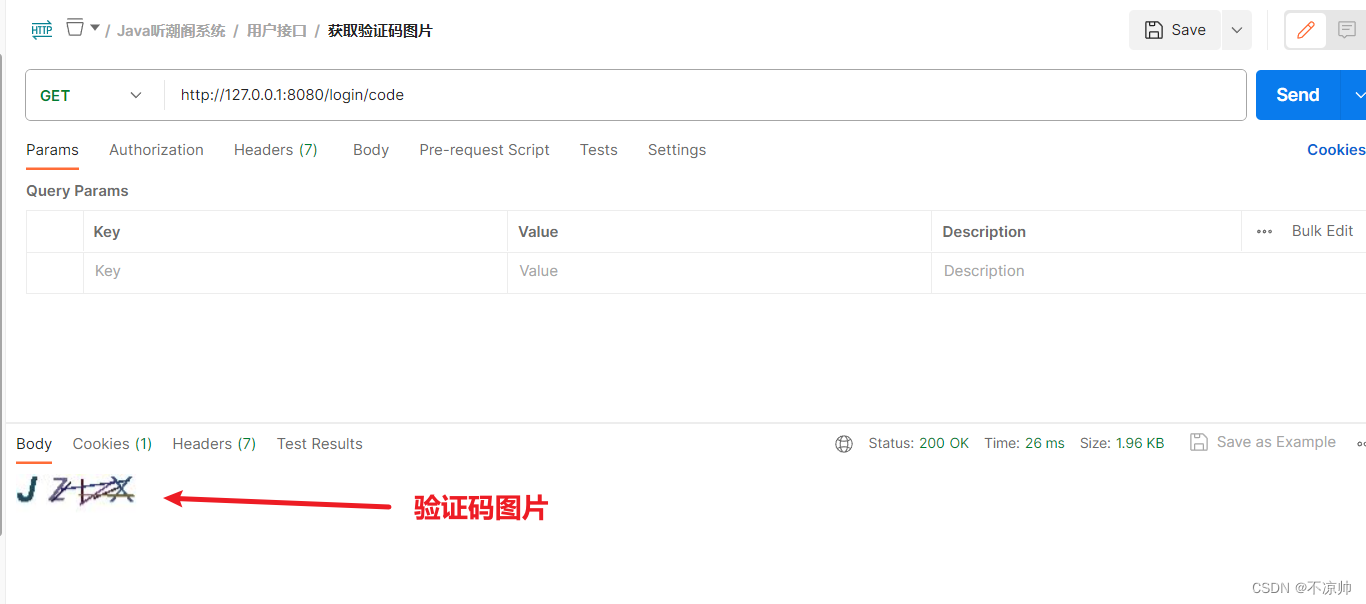
    @GetMapping("/code")
    public void code(HttpServletRequest request, HttpServletResponse res) throws IOException {
        CodeUtils code = new CodeUtils();
        // 生成验证码图片
        BufferedImage image = code.getImage();
        // 将验证码text存入redis中
        String text = code.getText();
        ValueOperations<String, String> forValue = stringRedisTemplate.opsForValue();
        String hostIp = request.getRemoteAddr() + "code";
        // 主机,code,3分钟过期
        forValue.set(hostIp, text, 3 * 60, TimeUnit.SECONDS);
        // 响应验证码图片
        CodeUtils.output(image, res.getOutputStream());
    }

    /**
     * 登录
     */
    @PostMapping("/login")
    public String login(@RequestParam("code") String code, HttpServletRequest request) {
        // 根据主机地址和redis中存储的值比对判断验证码是否正确
        String hostIp = request.getRemoteAddr() + "code";
        String redisCode = stringRedisTemplate.boundValueOps(hostIp).get();
        System.out.println("redisValue:" + redisCode);
        if (code.equalsIgnoreCase(redisCode)) {
            return "登录成功!";
        }
        return "登录失败~";
    }

}
3、前端api调用
// 登录
async login(data) {
    return axios({
        url: hostIp + '8080/login/login',
        params: data,
        method: 'post'
    })
},
五、完整前端代码
Login.vue
<template>
  <div class="login">
    <!-- 卡片 -->
    <el-card class="box-card">
      <h1 style="margin: 0 0 14px 100px">登录页面</h1>
      <!-- 登录 or 注册 -->
      <el-radio-group v-model="labelPosition" class="radioGroup" size="small">
        <el-radio-button label="login">登录</el-radio-button>
        <el-radio-button label="signIn">注册</el-radio-button>
      </el-radio-group>
      <!-- user输入表单 -->
      <el-form label-position="right" label-width="80px" :model="user">
        <el-form-item
            label="用户名"
            prop="name"
            :rules="[ { required: true, message: '请输入用户名', trigger: 'blur' } ]">
          <el-input v-model="user.name"></el-input>
        </el-form-item>
        <el-form-item
            label="密码"
            prop="password"
            :rules="[ { required: true, message: '请输入密码', trigger: 'blur' } ]">
          <el-input type="password" v-model="user.password" show-password></el-input>
        </el-form-item>
        <el-form-item
            v-if="labelPosition==='signIn'"
            label="确认密码"
            prop="checkPassword"
            :rules="[ { required: true, message: '请输入再次输入密码', trigger: 'blur' } ]">
          <el-input type="password" v-model="user.checkPassword" show-password></el-input>
        </el-form-item>
        <el-form-item
            label="验证码"
            prop="code"
            :rules="[ { required: true, message: '请输入验证码', trigger: 'blur' } ]">
          <el-input v-model="user.code" style="width: 120px"></el-input>
          <el-image class="codeImg" :src="imgUrl" style="cursor: pointer" @click="resetImg"></el-image>
        </el-form-item>
        <!--按钮-->
        <el-form-item class="button">
          <el-button class="button1" v-if="labelPosition==='login'" type="warning" @click="login"
                     :disabled="user.name===''||user.password===''||user.code===''" >登录
          </el-button>
          <el-button class="button1" v-if="labelPosition==='signIn'" type="warning" @click="signIn"
                     :disabled="user.name===''||user.password===''||user.checkPassword===''||user.code===''">注册
          </el-button>
          <el-button class="button1" @click="resetForm">重置</el-button>
        </el-form-item>
      </el-form>
    </el-card>
  </div>
</template>

<script>
import logApi from "../assets/api/loginApi"

export default {
  name: "Login",
  data() {
    return {
      labelPosition: 'login',  // 开始先定位到登录
      // 用户数据
      user: {
        name: '',
        password: '',
        checkPassword: '',
        code: ''  // 验证码
      },
      imgUrl: '',
    }
  },
  // 创建周期函数
  created() {
    // 获取验证码图片
    this.imgUrl = this.$axios.defaults.baseURL + "8080/login/code"
  },
  methods: {
    // 登录
    login() {
      // 生成token并存储在浏览器内存中(可以使用localStorage.getItem('token'))查看token)
       logApi.createToken({"userName": this.user.name}).then( r =>
           localStorage.setItem("token", r.data)
      )
      // 验证码校验
      logApi.login({"code": this.user.code,}).then( r =>
          this.$message.info(r.data)
      )
    },
    // 注册
    signIn() {
      if (this.user.checkPassword !== this.user.password) {
        this.$message.error("两次输入的密码不一致!")
      }
    },
    // 点击刷新验证码图片
    resetImg(){
      this.imgUrl = this.$axios.defaults.baseURL + "8080/login/code?time="+new Date();
    },
    // 重置表单
    resetForm() {
      this.user.name = ""
      this.user.password = ""
      this.user.checkPassword = ""
    }
  }
}
</script>

<style>
.login{
    width: 100%;
    height: 100%;
    /*position: fixed;*/
    /*background-image: url(~@/assets/images/login.png);*/
    /*background-repeat: no-repeat;*/
    /*background-size: cover;*/
}
.box-card {
    width: 370px;
    margin: 5% auto auto auto;
    border: 1px solid #1f808c;
}
.radioGroup{
    width: 100%;
    margin: 0 0 10px 120px;
}
.codeImg{
    width: 120px;
    height: 35px;
    position: relative;
    top: 13px;
    left: 10px;
    border: 1px solid #b7b7b7;
}
.button{
    width: 100%;
    margin: 0 0 0 -25px;
}
.button1{
    width: 120px;
}

</style>
loginApi.js
import axios from 'axios'

let hostIp= "http://127.0.0.1:"
export default {
    // 登录
    async login(data) {
        return axios({
            url: hostIp + '8080/login/login',
            params: data,
            method: 'post'
        })
    },

    // 生成用户Token
    createToken(data) {
        return axios({
            url: hostIp + '8080/test/token',
            params: data,
            method: 'post'
        })
    }

}