介绍vue运行环境的搭建、vue项目的初步构建与运行、使用element-ui组件构建页面内容、使用页面模块与路由设置等。基于此教程,可以初步实现一个静态网页,并对vue项目由一定理解。
1、基本环境安装
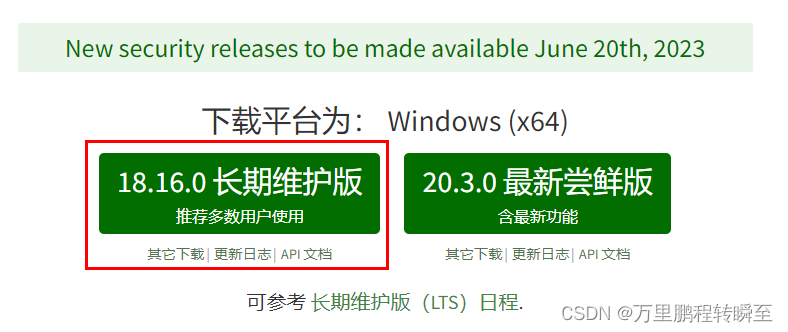
vue项目的编译运行依赖nodejs环境,故需要下载安装。地址:https://nodejs.org/zh-cn
下载时选18.16稳定版,安装时一直使用默认选项即可,安装完后重启一下电脑(怕环境变量设置没有生效)。
1.1 npm设置
验证vue运行环境,同时按win+r,输入cmd,打开终端,然后输入npm -v,输出版本号即表示vue运行环境安装成功了。npm命令可以用于安装各种vue工具,类似于python的pip。
C:\Users\Administrator>npm -v
9.5.1
设置淘宝源
使用npm安装包时,通常到国外下载,国内用户可以设置淘宝源
npm config set registry https://registry.npm.taobao.org/
npm命令简介
npm install <Module Name> #使用npm安装包,默认为本地安装
npm install <Module Name> -g   # 使用npm安装包,全局安装
npm uninstall <Module Name> # 使用npm卸载已经安装的包
npm list -g # 查看所有安装的包
npm --registry https://registry.npm.taobao.org install express #指定安装时从淘宝下载包(单个包安装,express 为某个具体包名)
1.2 安装vue
npm install vue
npm install --global vue-cli
1.3 安装vscode
访问 https://code.visualstudio.com/,下载并安装vscode即可
2、构建基本项目
2.1 构建项目
逐行执行代码即可启动默认的模板项目
# 创建一个基于 webpack 模板的新项目
vue init webpack my-project  #该命令会输出很多选项,一直按回车,使用没人配置即可
cd my-project
npm run dev
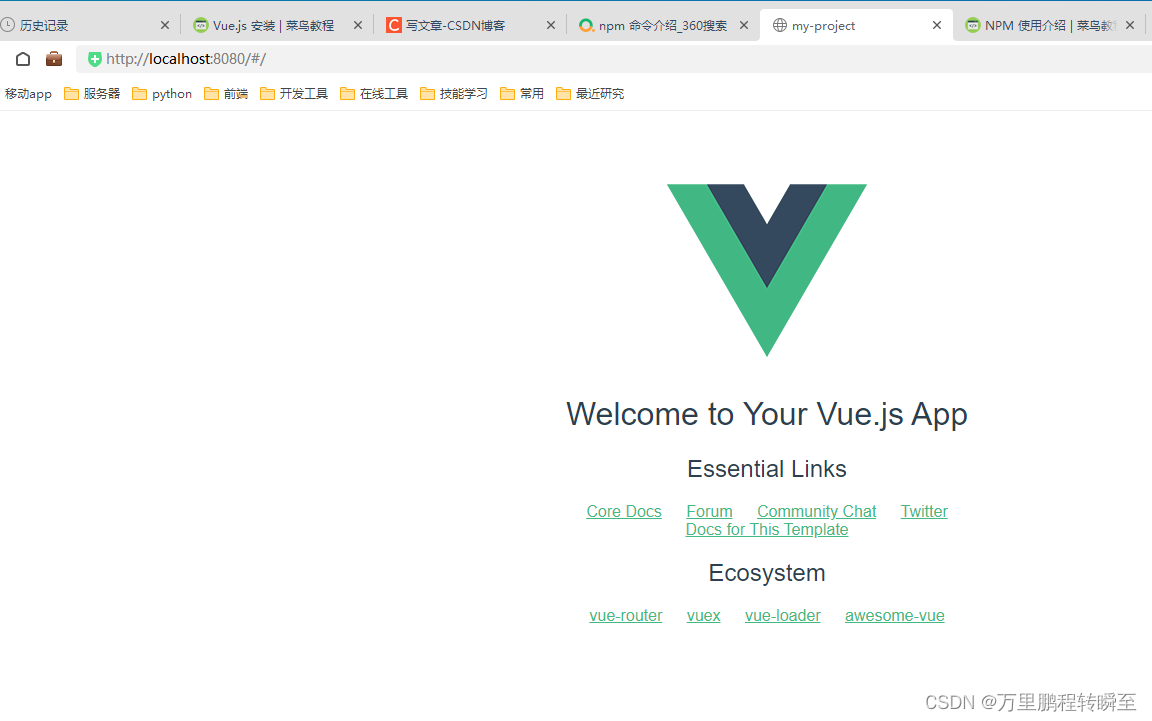
启动后输出如下,在浏览器输入http://localhost:8080即可
C:\Users\Administrator\my-project>npm run dev

> [email protected] dev
> webpack-dev-server --inline --progress --config build/webpack.dev.conf.js

(node:1484) [DEP0111] DeprecationWarning: Access to process.binding('http_parser') is deprecated.
(Use `node --trace-deprecation ...` to show where the warning was created)
 12% building modules 24/27 modules 3 active ...\Administrator\my-project\src\App.vue{

     parser: "babylon" } is deprecated; we now treat it as {

     parser: "babel" }.
 95% emitting

 DONE  Compiled successfully in 2099ms                                                                          20:00:04

 I  Your application is running here: http://localhost:8080
打开后的页面效果如下所示
2.2 项目查看
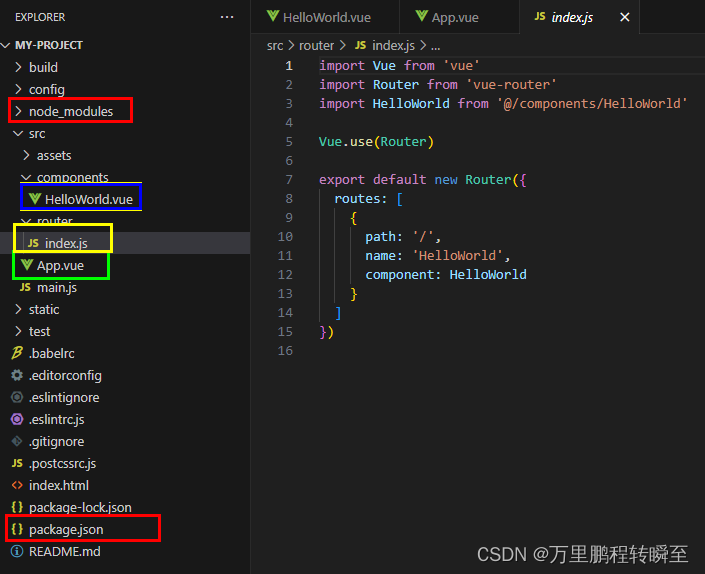
使用vscode打开目录 C:\Users\Administrator\my-project,并安装vue项目插件

项目结构如下其中node_modules是本项目所依赖的包的存储路径,package.json记录了这些包的属性信息。App.vue与main.js设置了整个项目的入口(这两个文件通常是不用修改的)
只需要将App.vue的内容保持为以下即可,即为所有的页面都设置一个通用的router-view组件,可以看到该页面的内容与我们在网站首页看到的不一样,这是因为vue的路由设置,其为router-view组件设置了内容模板。
<template>
  <div id="app">
    <!--img src="./assets/logo.png"-->
    <router-view/>
  </div>
</template>
router/index.js是用于设置vue的路由信息的,其默认内容如下,可见其为’/'路径设置的组件为HelloWorld,故我们在访问网站根目录时看到的内容就是HelloWorld.vue里面的。注:这里import包时,如果时自己写的(在src目录下),则起始符号为'@/',否则vue会到node_modules目录下查找组件
import Vue from 'vue'
import Router from 'vue-router'
import HelloWorld from '@/components/HelloWorld'

Vue.use(Router)

export default new Router({


  routes: [
    {


      path: '/',
      name: 'HelloWorld',
      component: HelloWorld
    }
  ]
})
components目录下(可以自己设置目录的名称)存放着自定义的页面组件,如HelloWorld.vue,其内容比较长,下面进行了删减。可以看到一个vue页面组件由template、script和style 三大部分构成,template用于设置页面的结构元素(位置排列),script用于设置页面的数据和执行逻辑代码,style 用于设置页面的样式细节。vue项目的模板语法请参考:https://www.runoob.com/vue2/vue-template-syntax.html
这里需要注意的是export default { name: 'HelloWorld',},这里设置的name,是用于其他页面或代码import的
<template>
  <div class="hello">
    <h1>{

   { msg }}</h1>
    <h2>Essential Links</h2>
  </div>
</template>

<script>
export default {


  name: 'HelloWorld',
  data () {


    return {


      msg: 'Welcome to Your Vue.js App'
    }
  }
}
</script>

<!-- Add "scoped" attribute to limit CSS to this component only -->
<style scoped>
h1, h2 {


  font-weight: normal;
}
</style>
2.3 项目设置
在config/index.js中可以设置vue项目的一些基本属性,如运行时的dev设置host、port等,导出时的build设置index、assetsRoot等
'use strict'
// Template version: 1.3.1
// see http://vuejs-templates.github.io/webpack for documentation.

const path = require('path')

module.exports = {


  dev: {


    // Paths
    assetsSubDirectory: 'static',
    assetsPublicPath: '/',
    proxyTable: {

    },

    // Various Dev Server settings
    host: 'localhost', // can be overwritten by process.env.HOST
    port: 8080, // can be overwritten by process.env.PORT, if port is in use, a free one will be determined
    autoOpenBrowser: false,
    errorOverlay: true,
    notifyOnErrors: true,
    poll: false, // https://webpack.js.org/configuration/dev-server/#devserver-watchoptions-

    // Use Eslint Loader?
    // If true, your code will be linted during bundling and
    // linting errors and warnings will be shown in the console.
    useEslint: false,
    // If true, eslint errors and warnings will also be shown in the error overlay
    // in the browser.
    showEslintErrorsInOverlay: false,

    /**
     * Source Maps
     */

    // https://webpack.js.org/configuration/devtool/#development
    devtool: 'cheap-module-eval-source-map',

    // If you have problems debugging vue-files in devtools,
    // set this to false - it *may* help
    // https://vue-loader.vuejs.org/en/options.html#cachebusting
    cacheBusting: true,

    cssSourceMap: true
  },

  build: {


    // Template for index.html
    index: path.resolve(__dirname, '../dist/index.html'),

    // Paths
    assetsRoot: path.resolve(__dirname, '../dist'),
    assetsSubDirectory: 'static',
    assetsPublicPath: '/',

    /**
     * Source Maps
     */

    productionSourceMap: true,
    // https://webpack.js.org/configuration/devtool/#production
    devtool: '#source-map',

    // Gzip off by default as many popular static hosts such as
    // Surge or Netlify already gzip all static assets for you.
    // Before setting to `true`, make sure to:
    // npm install --save-dev compression-webpack-plugin
    productionGzip: false,
    productionGzipExtensions: ['js', 'css'],

    // Run the build command with an extra argument to
    // View the bundle analyzer report after build finishes:
    // `npm run build --report`
    // Set to `true` or `false` to always turn it on or off
    bundleAnalyzerReport: process.env.npm_config_report
  }
}
3、使用element-ui构建页面
3.1 安装element-ui
在vscode中打卡终端
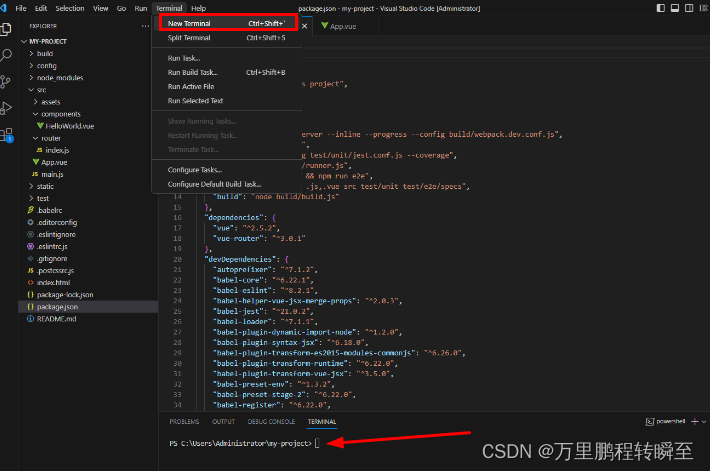
然后输入以下命令安装element-ui 库
npm install element-ui -S
3.2 引入 Element
内容参考自https://element.faas.ele.me/#/zh-CN/component/quickstart
在main.js进行以下修改,即可实现对Element的全局引入
import Vue from 'vue'
import App from './App'
import router from './router'
import ElementUI from 'element-ui';  //-----add-----
import 'element-ui/lib/theme-chalk/index.css';//-----add-----

Vue.use(ElementUI);  //-----add-----
Vue.config.productionTip = false

/* eslint-disable no-new */
new Vue({


  el: '#app',
  router,
  components: {

     App },
  template: '<App/>',
  render: h => h(App) //-----add-----
})
当运行vue的终端报错提示以下信息时,可将其关闭
 ✘  http://eslint.org/docs/rules/no-trailing-spaces  Trailing spaces not allowed
  src\components\HelloWorld.vue:35:1
然后打开config/index.js,找到useEslint,将其设置为false,然后在执行npm run dev 重新启动vue服务。
3.3 使用Element页面组件
打开HelloWorld.vue,用以下内容进行替换
<template>
  <el-container>
    <el-header>Header</el-header>
    <el-container>
      <el-aside width="200px">Aside</el-aside>
      <el-container>
        <el-main>Main</el-main>
      </el-container>
    </el-container>
      <el-container>
        <el-footer>Footer</el-footer>
    </el-container>
  </el-container>
</template>

<script>
export default {


  name: 'HelloWorld',
  data () {


    return {


      msg: 'Welcome to Your Vue.js App'
    }
  }
}
</script>

<!-- Add "scoped" attribute to limit CSS to this component only -->
<style scoped>
 .el-header, .el-footer {


    background-color: #B3C0D1;
    color: #333;
    text-align: center;
    line-height: 60px;
  }

  .el-aside {


    background-color: #D3DCE6;
    color: #333;
    text-align: center;
    line-height: 200px;
  }

  .el-main {


    background-color: #E9EEF3;
    color: #333;
    text-align: center;
    line-height: 300px;
  }

  body > .el-container {


    margin-bottom: 40px;
  }

</style>
打开浏览器可以看到以下内容,这就是elementui中容器布局
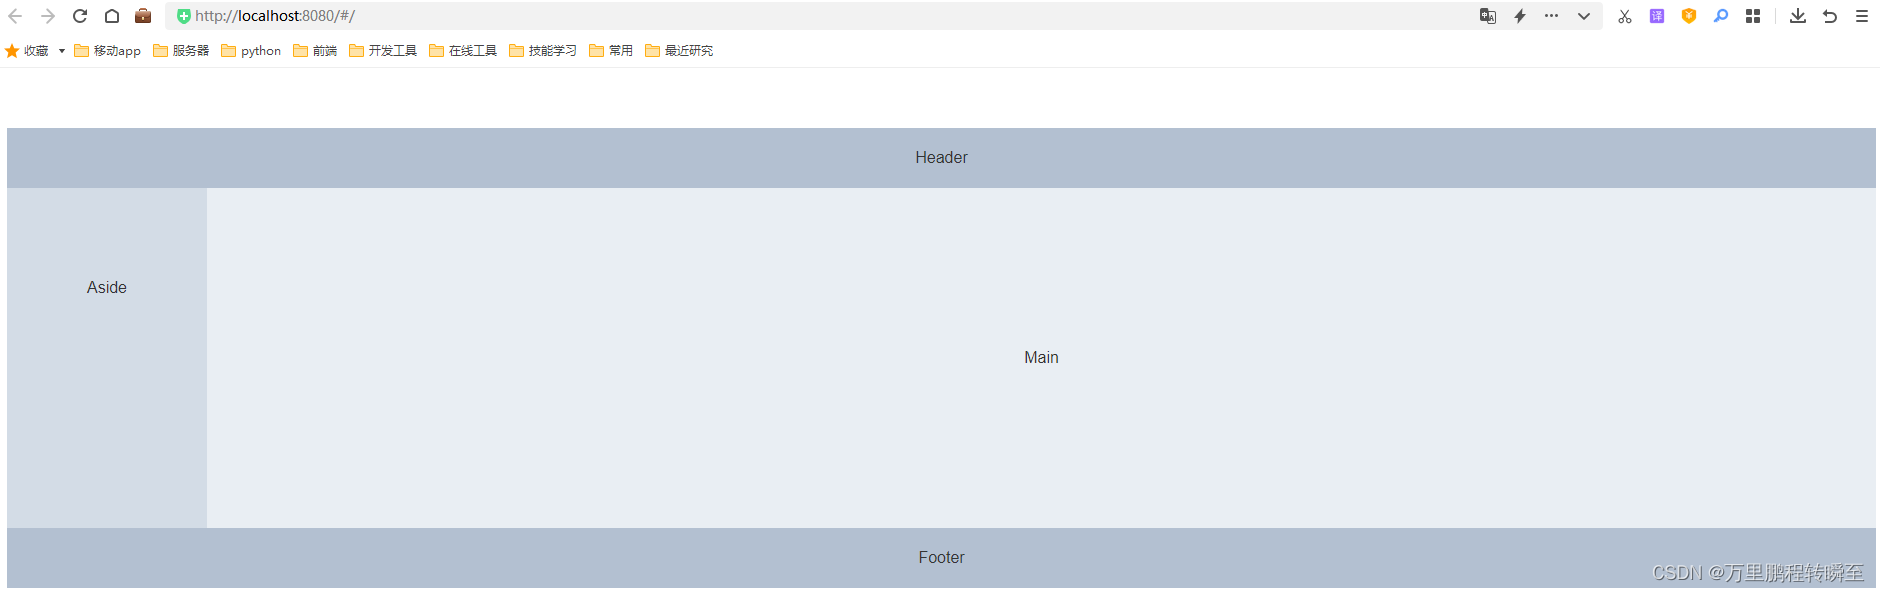
elementui所提供的页面组件是极其丰富的,具体可以查看https://element.faas.ele.me/#/zh-CN/component/
4、页面模板与路由
4.1 页面创建
在components目录下创建Login.vue,内容如下。该页面不使用页面模板
<template>
    <el-form :model="ruleForm" status-icon :rules="rules" ref="ruleForm" label-width="100px" class="demo-ruleForm">
    <el-form-item label="用户名" >
      <el-input type="text" v-model="ruleForm.name"></el-input>
    </el-form-item>
    <el-form-item label="密码" prop="pass">
      <el-input type="password" v-model="ruleForm.pass" autocomplete="off"></el-input>
    </el-form-item>
    <el-form-item>
      <el-button type="primary" @click="submitForm('ruleForm')">登录</el-button>
      <el-button @click="resetForm('ruleForm')">重置</el-button>
    </el-form-item>
  </el-form>

</template>
  <script>
    export default {


    name: 'login',
      data() {


        var validatePass = (rule, value, callback) => {


          if (value === '') {


            callback(new Error('请输入密码'));
          } else {


            if (this.ruleForm.checkPass !== '') {


              this.$refs.ruleForm.validateField('checkPass');
            }
            callback();
          }
        };
        return {


          ruleForm: {


            checkPass: '',
          },
          rules: {


            pass: [
              {

     validator: validatePass, trigger: 'blur' }
            ]
          }
        };
      },
      methods: {


        submitForm(formName) {


          this.$refs[formName].validate((valid) => {


            if (valid) {


              //进入后台主页
              this.$router.push({

    name:'main'});
            } else {


              console.log('error submit!!');
              return false;
            }
          });
        },
        resetForm(formName) {


          this.$refs[formName].resetFields();
        }
      }
    }
  </script>
在components目录下创建main.vue,内容如下。该页面作为页面模板,由其中的设置子页面的位置,并定义了to_url函数绑定特定按钮的点击事件。
<template>
  <el-container>
    <el-header>Header</el-header>
    <el-container>
      <el-aside width="200px">
        <el-aside width="200px" style="background-color: rgb(238, 241, 246)">
    <el-menu :default-openeds="['1']">
      <el-submenu index="1">
        <template slot="title"><i class="el-icon-message"></i>可用导航</template>
        <el-menu-item-group >
          <el-menu-item index="1-1" v-on:click="to_url('showimg')">显示图片(默认页面)</el-menu-item>
          <el-menu-item index="1-2" v-on:click="to_url('showtable')">显示表格</el-menu-item>
          <el-menu-item index="1-2" v-on:click="to_url('login')">退出</el-menu-item>
        </el-menu-item-group>
      </el-submenu>

      <el-submenu index="2">
        <template slot="title"><i class="el-icon-menu"></i>导航二</template>
        <el-menu-item-group>
          <template slot="title">分组一</template>
          <el-menu-item index="2-1">选项1</el-menu-item>
          <el-menu-item index="2-2">选项2</el-menu-item>
        </el-menu-item-group>
        <el-menu-item-group title="分组2">
          <el-menu-item index="2-3">选项3</el-menu-item>
        </el-menu-item-group>
        <el-submenu index="2-4">
          <template slot="title">选项4</template>
          <el-menu-item index="2-4-1">选项4-1</el-menu-item>
        </el-submenu>
      </el-submenu>
    </el-menu>
  </el-aside>

      </el-aside>
      <el-container>
        <el-main>
          <router-view/>
        </el-main>
      </el-container>
    </el-container>
      <el-container>
        <el-footer>Footer</el-footer>
    </el-container>
  </el-container>
</template>

<script>
export default {


  name: 'main',
  data () {


    return {


      msg: 'Welcome to Your Vue.js App'
    }
  },
  methods: {


    to_url: function (url) {


      this.$router.push({

      name:url});
    }
  }
}
</script>

<!-- Add "scoped" attribute to limit CSS to this component only -->
<style scoped>
 .el-header, .el-footer {


    background-color: #B3C0D1;
    color: #333;
    text-align: center;
    line-height: 60px;
  }

  .el-aside {


    background-color: #D3DCE6;
    color: #333;
    text-align: center;
    line-height: 200px;
  }

  .el-main {


    background-color: #E9EEF3;
    color: #333;
    text-align: center;
    line-height: 300px;
  }

  body > .el-container {


    margin-bottom: 40px;
  }

</style>
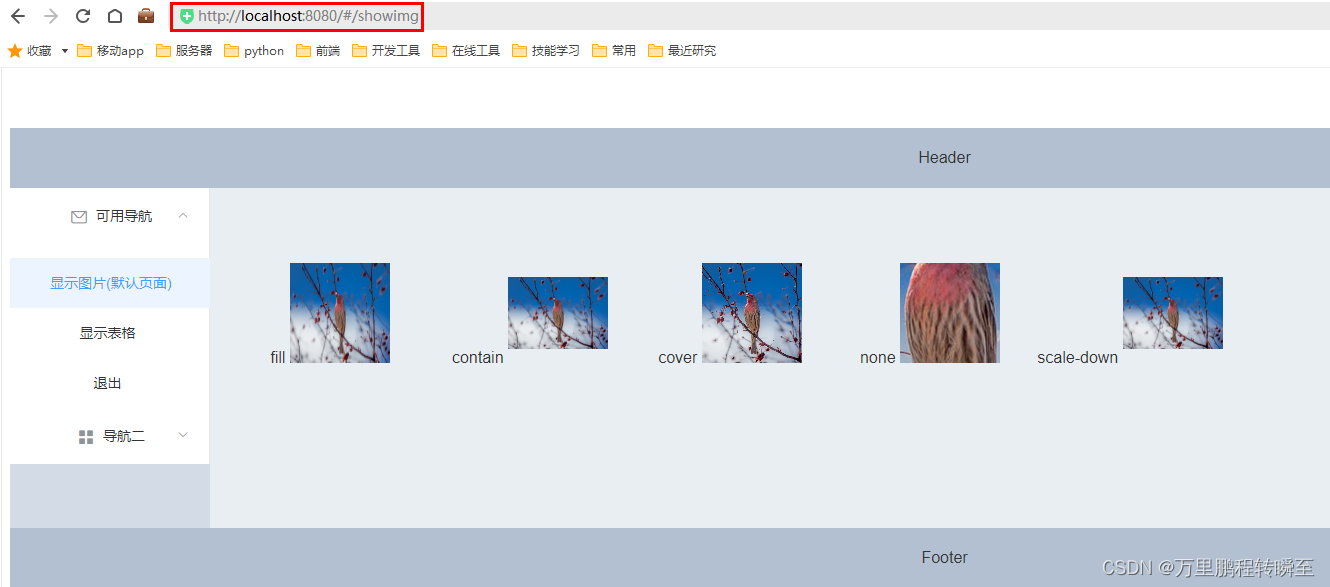
在components目录下创建showimg.vue,内容如下。该页面使用mian.vue作为页面模板
<template>
    <div class="demo-image">
    <div class="block" v-for="fit in fits" :key="fit">
        <span class="demonstration">{

   { fit }}</span>
        <el-image
        style="width: 100px; height: 100px"
        :src="url"
        :fit="fit"></el-image>
    </div>
    </div>
  </template>

  <script>
  export default {


    name: 'showimg',
    data() {


      return {


        fits: ['fill', 'contain', 'cover', 'none', 'scale-down'],
        url: 'https://fuss10.elemecdn.com/e/5d/4a731a90594a4af544c0c25941171jpeg.jpeg'
      }
    }
  }
  </script>

  <!-- Add "scoped" attribute to limit CSS to this component only -->
  <style scoped>
  .block{


    width:200px;
    float: left;

  }
  </style>
在components目录下创建showtable.vue,内容如下。该页面使用mian.vue作为页面模板
<template>
    <el-table
      :data="tableData"
      style="width: 100%">
      <el-table-column
        prop="date"
        label="日期"
        width="180">
      </el-table-column>
      <el-table-column
        prop="name"
        label="姓名"
        width="180">
      </el-table-column>
      <el-table-column
        prop="address"
        label="地址">
      </el-table-column>
    </el-table>
  </template>

  <script>
    export default {


    name: 'showtable',
      data() {


        return {


          tableData: [{


            date: '2016-05-02',
            name: '王小虎',
            address: '上海市普陀区金沙江路 1518 弄'
          }, {


            date: '2016-05-04',
            name: '王小虎',
            address: '上海市普陀区金沙江路 1517 弄'
          }, {


            date: '2016-05-01',
            name: '王小虎',
            address: '上海市普陀区金沙江路 1519 弄'
          }, {


            date: '2016-05-03',
            name: '王小虎',
            address: '上海市普陀区金沙江路 1516 弄'
          }]
        }
      }
    }
  </script>
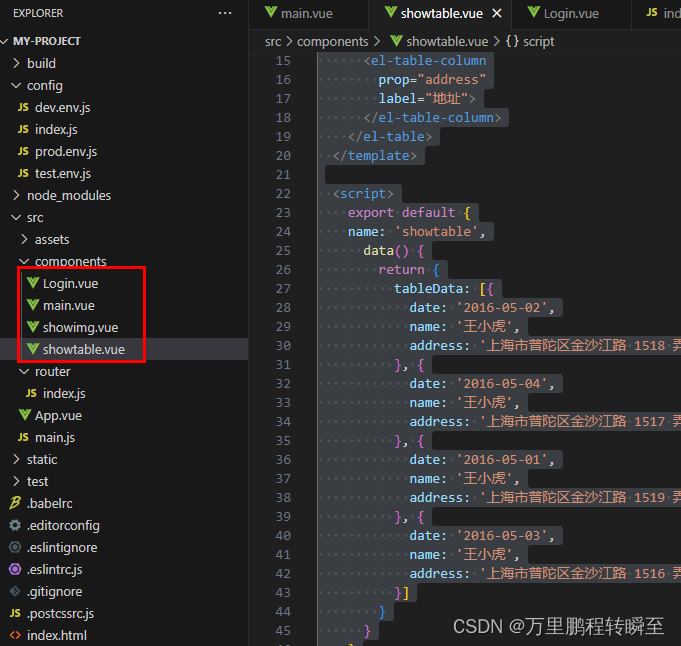
最终目录效果如下
4.2 路由设置
打开router/index.js,填入以下内容,设置各个组件之间的属性和关系。path用于设置组件对应的url地址,name用于设置组件的名称用于this.$router.push({name:'<name>'});,component用于设置具体的组件。children用于设置组件的子模块内容,其子模块显示位置由当前模块内所决定。
import Vue from 'vue'
import Router from 'vue-router'
import main from '@/components/main'
import showimg from '@/components/showimg'
import showtable from '@/components/showtable'
import login from '@/components/Login'

Vue.use(Router)

export default new Router({


  routes: [
    {


      path: '/',
      name: 'login',
      component: login
    },
    {


      path: '/main',
      name: 'main',
      component: main,
      //redirect:showimg,  //默认打开showimg组件
      children:[
				{


					path:"/showimg",
          name: 'showimg',
					component:showimg
				},
				{


					path:"/showtable",
          name: 'showtable',
					component:showtable
				}
			]
    }
  ]
})
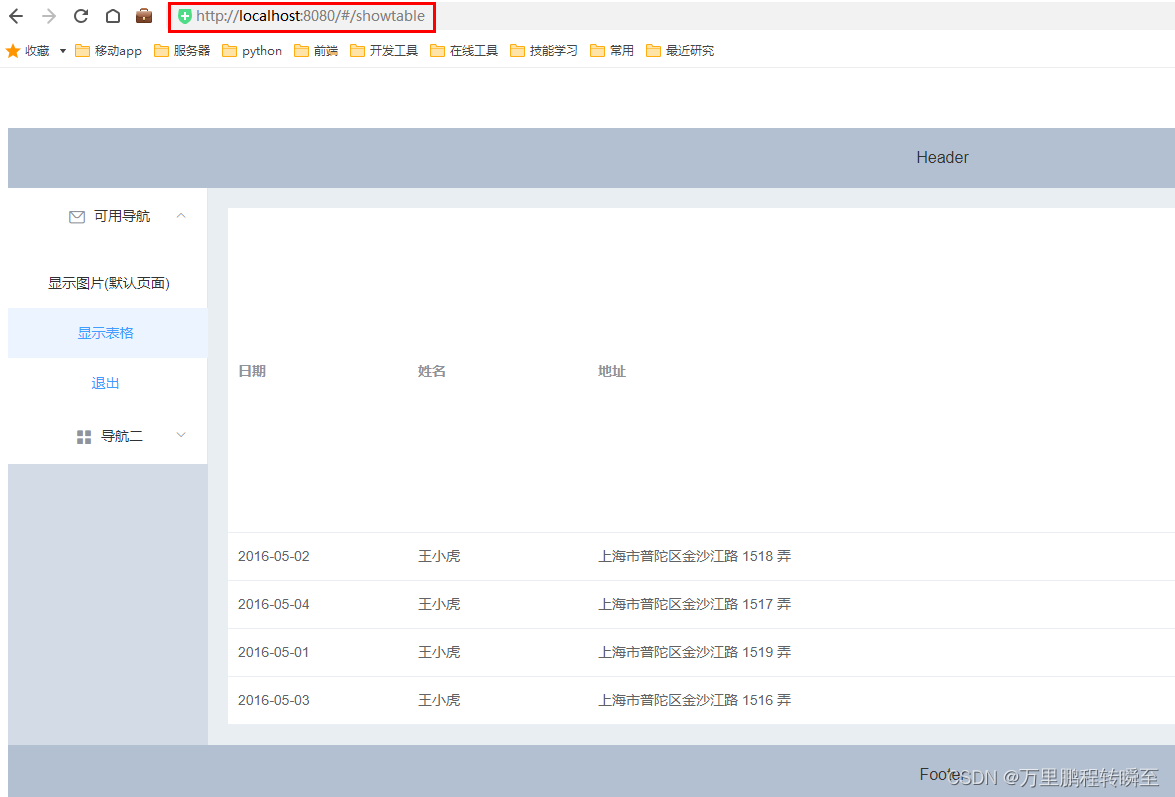
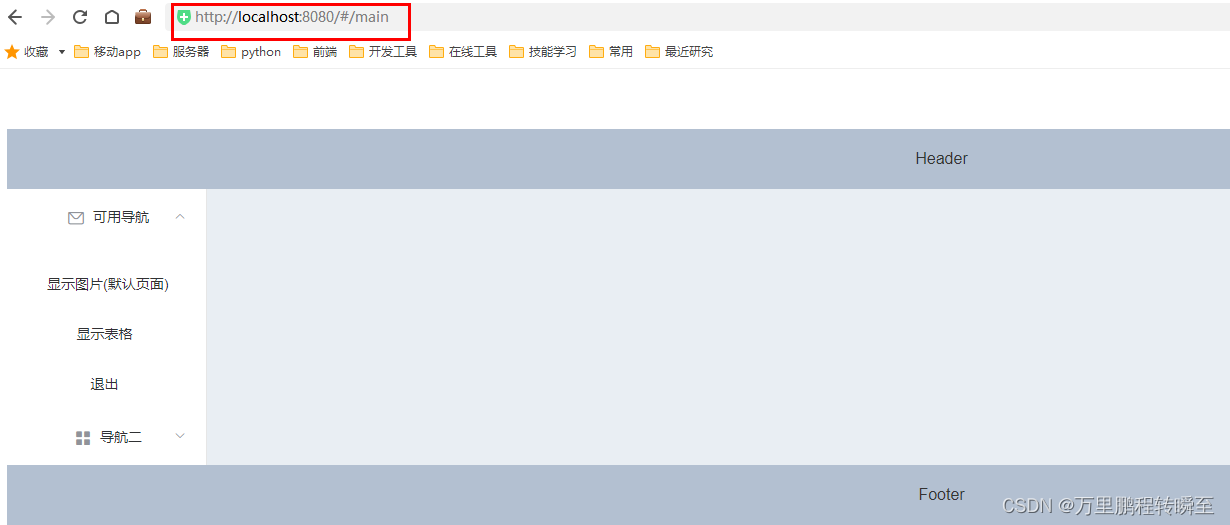
在这里的代码设置中,main组件为后台模块页面,showimg组件和showtable组件为套用后台模块的子页面。
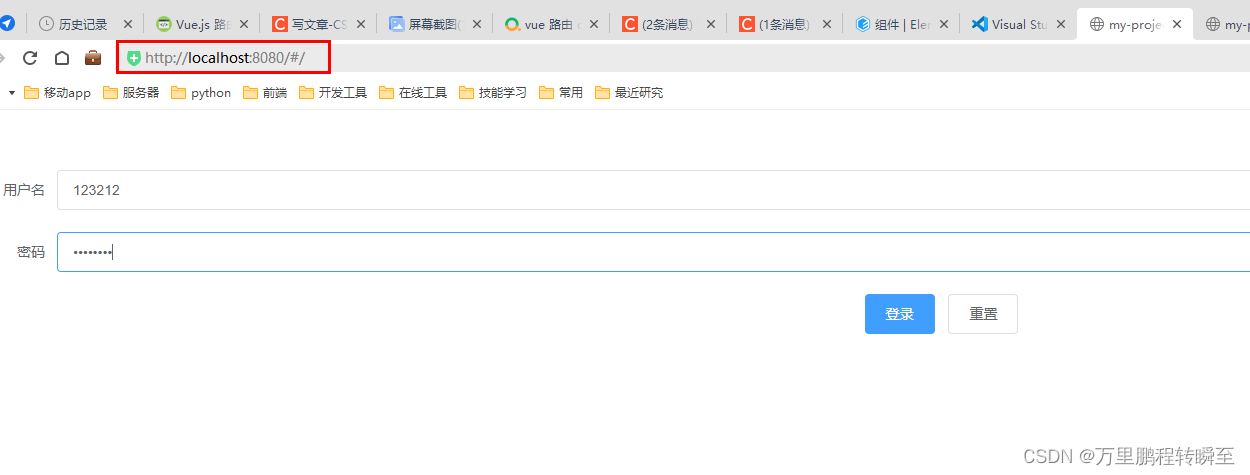
4.3 页面效果
http://localhost:8080/#/
http://localhost:8080/#/main
http://localhost:8080/#/showimg
http://localhost:8080/#/showtable