从今天开始,我来分享一些关于Android的一些基础知识,感兴趣一起来学啊!
大学生交流群:728910358
目录
前言
从今天开始,我准备分享我最近一年所学到的一些Android基础知识,一方面为了巩固一下我的知识体系,还有一方面是方便各位CSDN有需求的小伙伴学习,接下来让我们一起来学习Android的第一次内容:基础布局容器。
一、线性布局LinearLayout
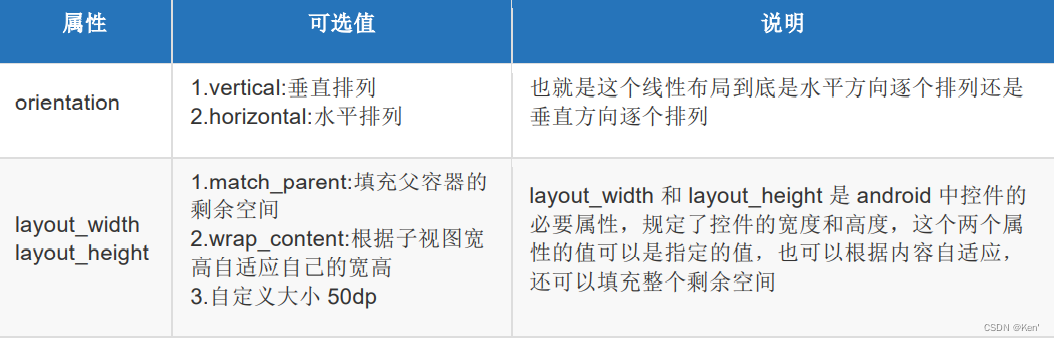
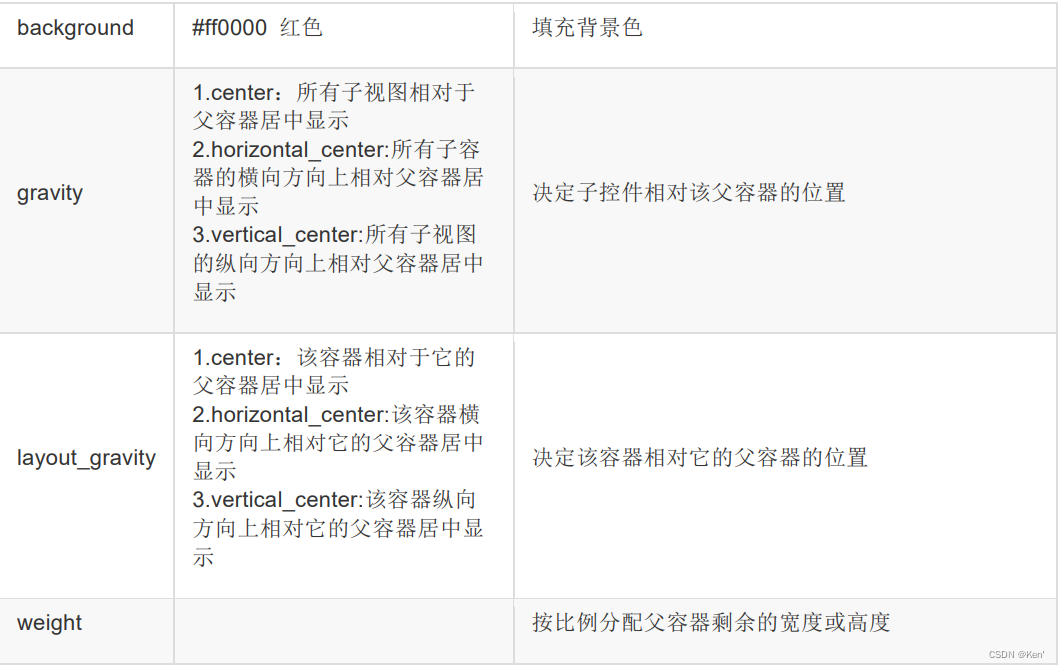
线性布局就是从左到右或从上到下按顺序排列的一种布局。下面讲一讲 LinearLayout 的基础属性。
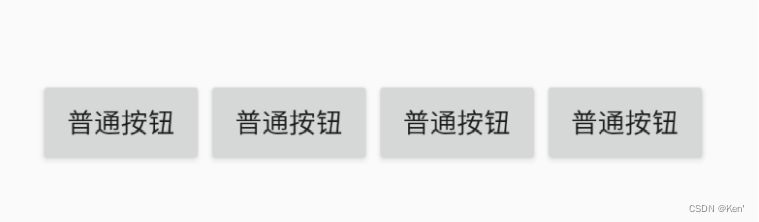
效果展示
android:orientation ="vertical"所有子视图纵向摆放

<?xml version="1.0" encoding="utf-8"?>
<LinearLayout xmlns:android="http://schemas.android.com/apk/res/android"
 android:layout_width="match_parent"
 android:layout_height="match_parent"
 android:gravity="center" //子视图相对父视图居中显示
 android:orientation="vertical"> //所有子视图纵向摆放
 <Button
 android:layout_width="wrap_content"
 android:layout_height="wrap_content"
 android:text="普通按钮" />
 <Button
 android:layout_width="wrap_content"
 android:layout_height="wrap_content"
 android:text="普通按钮" />
 <Button
 android:layout_width="wrap_content"
android:layout_height="wrap_content"
 android:text="普通按钮" />
 <Button
 android:layout_width="wrap_content"
 android:layout_height="wrap_content"
 android:text="普通按钮" />
</LinearLayout>
android:orientation ="horizontal"所有子视图横向摆放
<?xml version="1.0" encoding="utf-8"?>
<LinearLayout xmlns:android="http://schemas.android.com/apk/res/android"
android:layout_width="match_parent"
android:layout_height="match_parent"
android:gravity="center" //子视图相对父视图居中显示
android:orientation="horizontal"> //所有子视图横向摆放
......... 省略
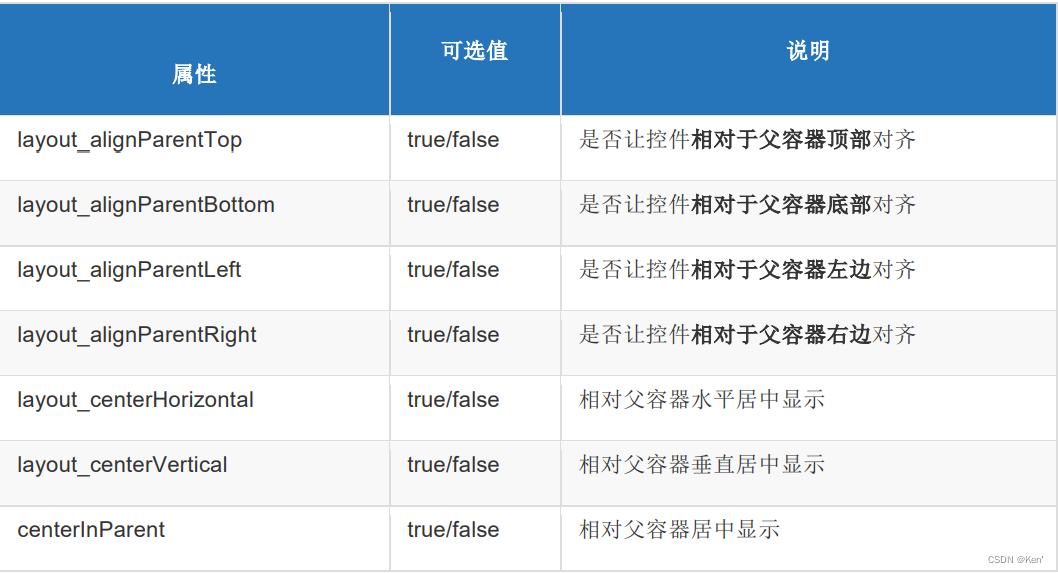
</LinearLayout>二、相对布局RelativeLayout
相对于父元素 7 个常用属性
相对于兄弟元素 4 个常用属性
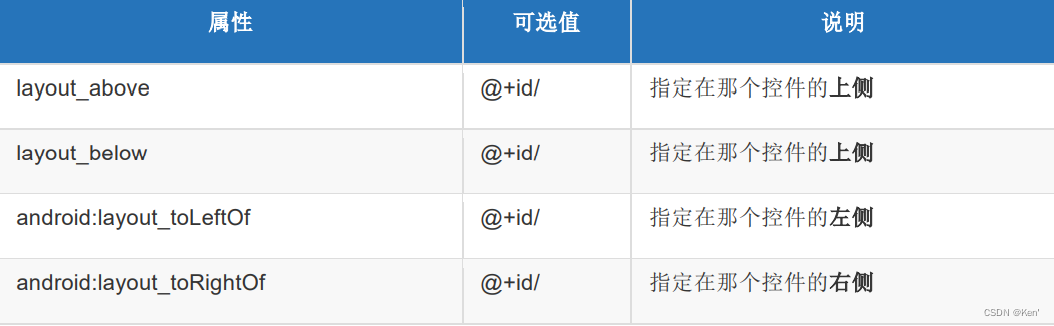
相对于兄弟元素的对齐方式


效果演示
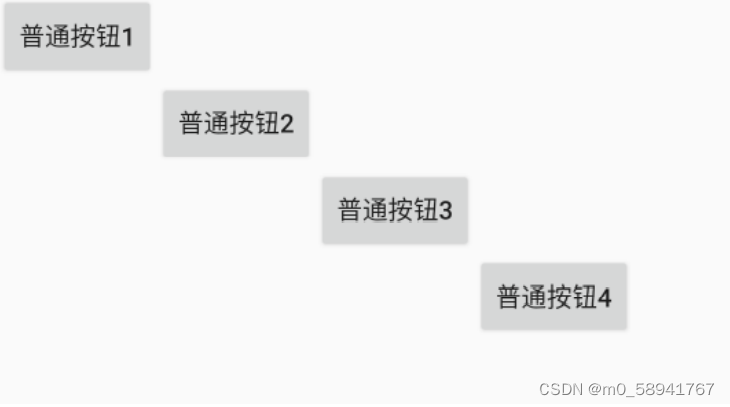
使用 layout_below 使得后面一个组件位于前面一个组件的下方,配合 layout_toRightOf 使得后面一个组件位于前面一个组件的右方。
<?xml version="1.0" encoding="utf-8"?>
<RelativeLayout
xmlns:android="http://schemas.android.com/apk/res/android"
 android:layout_width="match_parent"
 android:layout_height="match_parent">
 <Button
 android:id="@+id/btn1"
 android:layout_width="wrap_content"
 android:layout_height="wrap_content"
 android:text="普通按钮 1" />
 <Button
 android:id="@+id/btn2"
 android:layout_width="wrap_content"
 android:layout_height="wrap_content"
 android:layout_below="@+id/btn1"
 android:layout_toRightOf="@+id/btn1"
 android:text="普通按钮 2" />
 <Button
 android:id="@+id/btn3"
 android:layout_width="wrap_content"
 android:layout_height="wrap_content"
 android:layout_below="@+id/btn2"
 android:layout_toRightOf="@+id/btn2"
 android:text="普通按钮 3" />
 <Button
 android:id="@+id/btn4"
 android:layout_width="wrap_content"
 android:layout_height="wrap_content"
 android:layout_below="@+id/btn3"
 android:layout_toRightOf="@+id/btn3"
 android:text="普通按钮 4" />
</RelativeLayout>
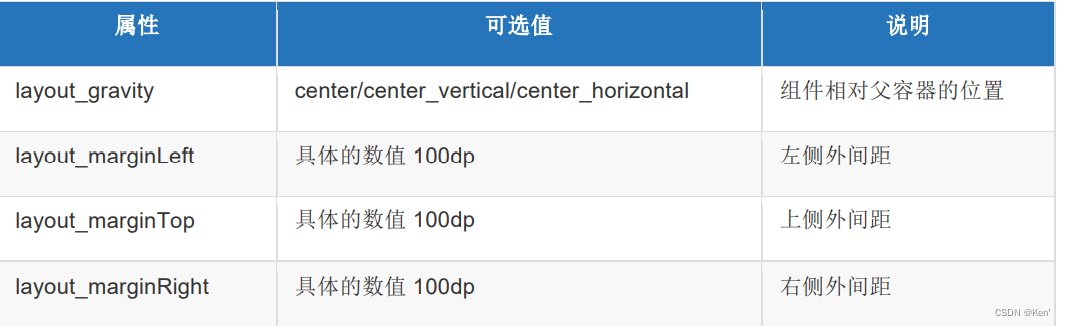
三、 帧布局FrameLayout
组件的默认位置都是左上角,组件之间可以重叠。像千层饼一样,一层压着一层可以设置上下左右的对齐、水平垂直居中、设置方式与线性布局相似。
常用属性
效果演示
<?xml version="1.0" encoding="utf-8"?>
<FrameLayout xmlns:android="http://schemas.android.com/apk/res/android"
 android:layout_width="match_parent"
 android:layout_height="match_parent">
 <!-- android:background="@color/purple_200"设置文本的背景色
 android:gravity="center_horizontal" // 文本中的文字对齐方
式
 android:paddingTop="100dp" // 文本的上边内间距
 android:text="layout_gravity:center" // 现实的文本内容
 android:textSize="30dp" /> // 文本字号大小-->
 <TextView
 android:layout_width="match_parent"
 android:layout_height="match_parent"
 android:layout_gravity="center"
 android:background="@color/purple_200"
 android:gravity="center_horizontal"
 android:paddingTop="100dp"
 android:text="layout_gravity:center"
 android:textSize="30dp" />
 <TextView
 android:layout_width="300dp"
 android:layout_height="360dp"
 android:layout_gravity="center"
 android:background="@color/purple_500" />
 <TextView
 android:layout_width="240dp"
 android:layout_height="240dp"
 android:layout_gravity="center"
 android:background="@color/purple_700" />
 <TextView
 android:layout_width="140dp"
 android:layout_height="140dp"
 android:layout_gravity="center"
 android:background="@color/teal_700" />
 <TextView
 android:layout_width="60dp"
 android:layout_height="60dp"
 android:layout_gravity="center"
 android:background="#ffffff"
 android:gravity="center" />
</FrameLayout>
总结
