Apache Zeppelin系列教程第五篇——Interpreter原理分析_诸葛子房_的博客-CSDN博客
Apache Zeppelin系列教程第四篇——JDBCInterpreter原理分析_诸葛子房_的博客-CSDN博客
前文介绍jdbc interpreter和interpreter模块交互代码,本篇文章主要分析Zengine调用Interpreter模块代码。
介绍完这篇文章之后,我们即可将paragraph run的流程串起来(后面会将整个流程进行串讲)
同样,来看下这个测试类
zeppelin-zengine/src/test/java/org/apache/zeppelin/interpreter/remote/RemoteInterpreterTest.java
  @Test
  public void testFIFOScheduler() throws InterruptedException, InterpreterException {
    LOGGER.info("===testFIFOScheduler====");
    interpreterSetting.getOption().setPerUser(InterpreterOption.SHARED);
    // by default SleepInterpreter would use FIFOScheduler
    LOGGER.info("===getInterpreter====");
    final Interpreter interpreter1 = interpreterSetting.getInterpreter("user1", note1Id, "sleep");
    LOGGER.info("===createDummyInterpreterContext====");
    final InterpreterContext context1 = createDummyInterpreterContext();
    // run this dummy interpret method first to launch the RemoteInterpreterProcess to avoid the
    // time overhead of launching the process.
    LOGGER.info("111");
    LOGGER.info("=====name:{}=======",interpreter1.getClassName());
    System.out.println(interpreter1.getClassName());
    interpreter1.interpret("10101", context1);
    LOGGER.info("222");
    Thread thread1 = new Thread() {
      @Override
      public void run() {
        try {
          assertEquals(Code.SUCCESS, interpreter1.interpret("100", context1).code());
        } catch (InterpreterException e) {
          e.printStackTrace();
          fail();
        }
      }
    };
    Thread thread2 = new Thread() {
      @Override
      public void run() {
        try {
          assertEquals(Code.SUCCESS, interpreter1.interpret("100", context1).code());
        } catch (InterpreterException e) {
          e.printStackTrace();
          fail();
        }
      }
    };
    long start = System.currentTimeMillis();
    thread1.start();
    thread2.start();
    thread1.join();
    thread2.join();
    long end = System.currentTimeMillis();
    assertTrue((end - start) >= 200);
  }
可以看下这个测试方法,这边加了一些日志
RemoteInterpreterTest 继承 AbstractInterpreterTest 里面的抽象类,会先执行setUp方法对读取配置文件信息interpreter 进行初始化
核心主要是执行RemoteInterpreter里面的 interpret 方法,
  @Override
  public InterpreterResult interpret(final String st, final InterpreterContext context)
      throws InterpreterException {
    LOGGER.info("st:\n{}", st);
    if (LOGGER.isDebugEnabled()) {
      LOGGER.debug("st:\n{}", st);
    }

    final FormType form = getFormType();
    RemoteInterpreterProcess interpreterProcess = null;
    try {
      interpreterProcess = getOrCreateInterpreterProcess();
    } catch (IOException e) {
      throw new InterpreterException(e);
    }
    if (!interpreterProcess.isRunning()) {
      return new InterpreterResult(InterpreterResult.Code.ERROR,
              "Interpreter process is not running\n" + interpreterProcess.getErrorMessage());
    }
    return interpreterProcess.callRemoteFunction(client -> {
          RemoteInterpreterResult remoteResult = client.interpret(
              sessionId, className, st, convert(context));
          Map<String, Object> remoteConfig = (Map<String, Object>) GSON.fromJson(
              remoteResult.getConfig(), new TypeToken<Map<String, Object>>() {
              }.getType());
          context.getConfig().clear();
          if (remoteConfig != null) {
            context.getConfig().putAll(remoteConfig);
          }
          GUI currentGUI = context.getGui();
          GUI currentNoteGUI = context.getNoteGui();
          if (form == FormType.NATIVE) {
            GUI remoteGui = GUI.fromJson(remoteResult.getGui());
            GUI remoteNoteGui = GUI.fromJson(remoteResult.getNoteGui());
            currentGUI.clear();
            currentGUI.setParams(remoteGui.getParams());
            currentGUI.setForms(remoteGui.getForms());
            currentNoteGUI.setParams(remoteNoteGui.getParams());
            currentNoteGUI.setForms(remoteNoteGui.getForms());
          } else if (form == FormType.SIMPLE) {
            final Map<String, Input> currentForms = currentGUI.getForms();
            final Map<String, Object> currentParams = currentGUI.getParams();
            final GUI remoteGUI = GUI.fromJson(remoteResult.getGui());
            final Map<String, Input> remoteForms = remoteGUI.getForms();
            final Map<String, Object> remoteParams = remoteGUI.getParams();
            currentForms.putAll(remoteForms);
            currentParams.putAll(remoteParams);
          }

          return convert(remoteResult);
        }
    );

  }
其中getOrCreateInterpreterProcess()一路点下去 最终是去调用zeppelin-zengine/src/main/java/org/apache/zeppelin/interpreter/remote/ExecRemoteInterpreterProcess.java 里面的start 方法,通过 commons-exec命令执行shell 或者cmd 脚本(bin/interpreter.sh) 启动一个独立的进程,shell 脚本里面具体执行的类(org.apache.zeppelin.interpreter.remote.RemoteInterpreterServer),和前一篇文章interpreter 原理分析相呼应
  @Override
  public void start(String userName) throws IOException {
    // start server process
    CommandLine cmdLine = CommandLine.parse(interpreterRunner);
    cmdLine.addArgument("-d", false);
    cmdLine.addArgument(getInterpreterDir(), false);
    cmdLine.addArgument("-c", false);
    cmdLine.addArgument(getIntpEventServerHost(), false);
    cmdLine.addArgument("-p", false);
    cmdLine.addArgument(String.valueOf(intpEventServerPort), false);
    cmdLine.addArgument("-r", false);
    cmdLine.addArgument(getInterpreterPortRange(), false);
    cmdLine.addArgument("-i", false);
    cmdLine.addArgument(getInterpreterGroupId(), false);
    if (isUserImpersonated() && !userName.equals("anonymous")) {
      cmdLine.addArgument("-u", false);
      cmdLine.addArgument(userName, false);
    }
    cmdLine.addArgument("-l", false);
    cmdLine.addArgument(getLocalRepoDir(), false);
    cmdLine.addArgument("-g", false);
    cmdLine.addArgument(getInterpreterSettingName(), false);

    interpreterProcessLauncher = new InterpreterProcessLauncher(cmdLine, getEnv());
    interpreterProcessLauncher.launch();
    interpreterProcessLauncher.waitForReady(getConnectTimeout());
    if (interpreterProcessLauncher.isLaunchTimeout()) {
      throw new IOException(
          String.format("Interpreter Process creation is time out in %d seconds", getConnectTimeout() / 1000) + "\n"
              + "You can increase timeout threshold via "
              + "setting zeppelin.interpreter.connect.timeout of this interpreter.\n"
              + interpreterProcessLauncher.getErrorMessage());
    }

    if (!interpreterProcessLauncher.isRunning()) {
      throw new IOException("Fail to launch interpreter process:\n" + interpreterProcessLauncher.getErrorMessage());
    }

    if (isHadoopClientAvailable()) {
      String launchOutput = interpreterProcessLauncher.getProcessLaunchOutput();
      Matcher m = YARN_APP_PATTER.matcher(launchOutput);
      if (m.find()) {
        String appId = m.group(1);
        LOGGER.info("Detected yarn app: {}, add it to YarnAppMonitor", appId);
        YarnAppMonitor.get().addYarnApp(ConverterUtils.toApplicationId(appId), this);
      }
    }
  }
而实际调用thrift server 端服务的client 端代码

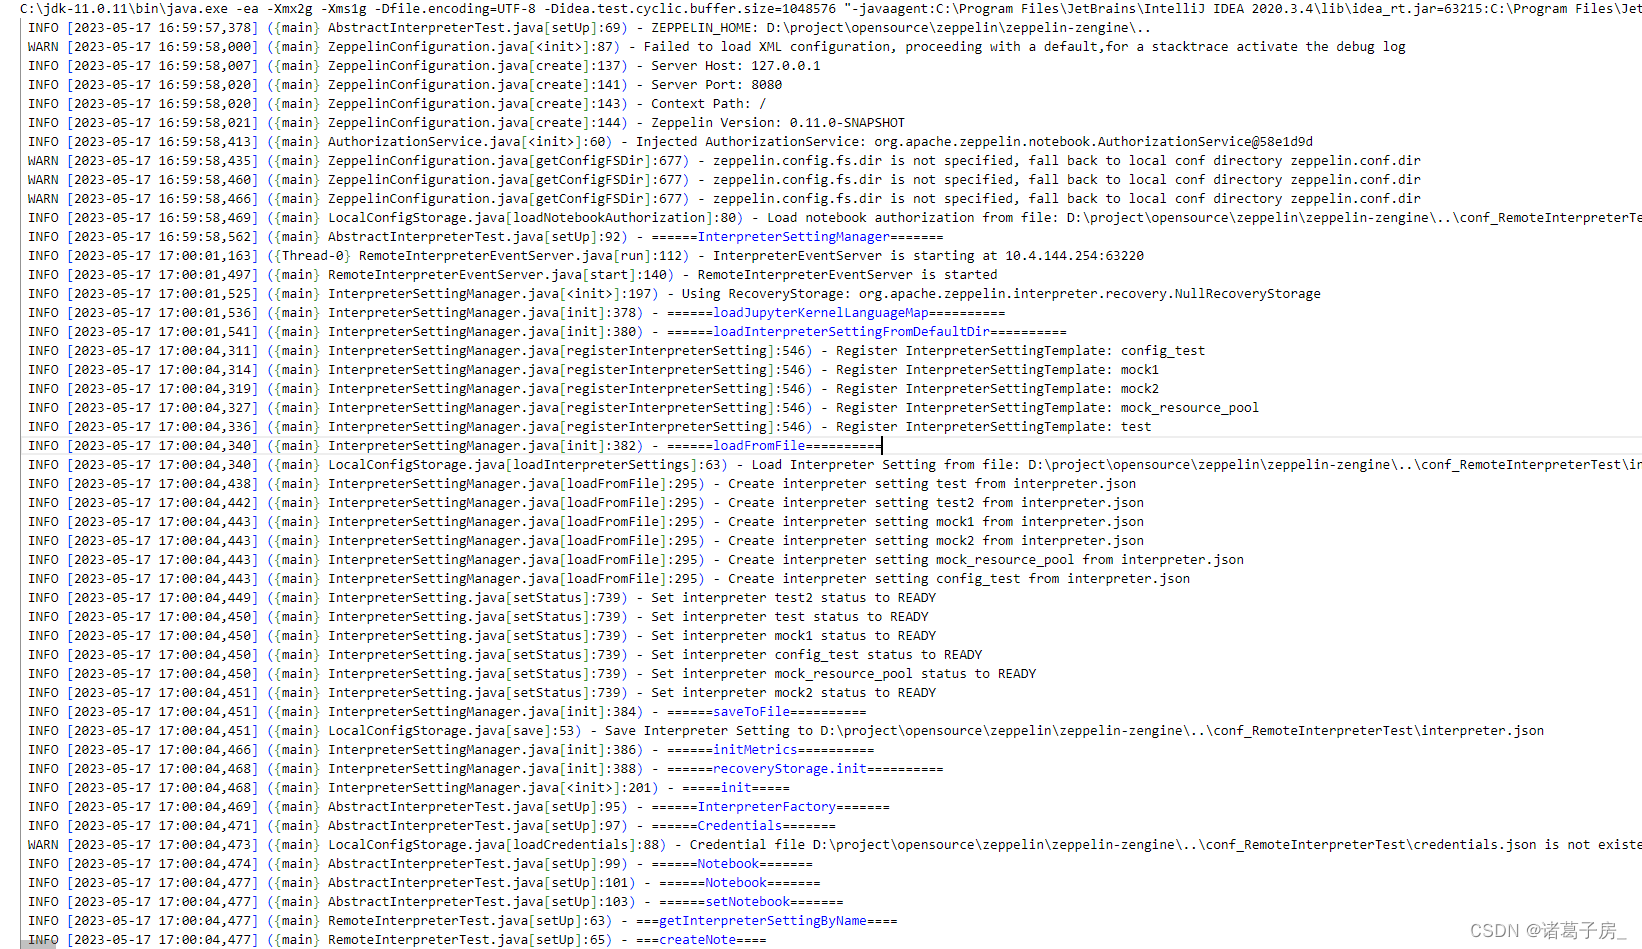


上述图片是代码运行的log,可以帮助我们定位代码的运行顺序
({FIFO-RemoteInterpreter-python-shared_process-shared_session-1} ProcessLauncher.java[launch]:96) - Process is launched: [.\\bin\interpreter.cmd, -d, ./\interpreter/python, -c, 10.4.144.223, -p, 52945, -r, :, -i, python-shared_process, -l, ./\local-repo\python, -g, python]
({FIFO-RemoteInterpreter-md-shared_process-shared_session-1} ProcessLauncher.java[launch]:96) - Process is launched: [.\\bin\interpreter.cmd, -d, ./\interpreter/md, -c, 10.4.144.223, -p, 52945, -r, :, -i, md-shared_process, -l, ./\local-repo\md, -g, md]
({FIFO-RemoteInterpreter-jdbc-shared_process-shared_session-1} ProcessLauncher.java[launch]:96) - Process is launched: [.\\bin\interpreter.cmd, -d, ./\interpreter/jdbc, -c, 10.4.144.223, -p, 52945, -r, :, -i, jdbc-shared_process, -l, ./\local-repo\jdbc, -g, jdbc]
参考