1.YOLOv5 特征图可视化
可视化代码:
def feature_visualization(x, module_type, stage, n=2, save_dir=Path('runs/detect/exp')):
    """
    x:              Features to be visualized
    module_type:    Module type
    stage:          Module stage within model
    n:              Maximum number of feature maps to plot
    save_dir:       Directory to save results
    """
    if 'Detect' not in module_type:
        batch, channels, height, width = x.shape  # batch, channels, height, width
        if height > 1 and width > 1:
            f = save_dir / f"stage{stage}_{module_type.split('.')[-1]}_features.png"  # filename

            blocks = torch.chunk(x[0].cpu(), channels, dim=0)  # select batch index 0, block by channels
            n = min(n, channels)  # number of plots
            fig, ax = plt.subplots(math.ceil(n / 2), 2, tight_layout=True)  # 8 rows x n/8 cols
            ax = ax.ravel()
            plt.subplots_adjust(wspace=0.05, hspace=0.05)
            for i in range(n):
                ax[i].imshow(blocks[i].squeeze())  # cmap='gray'
                ax[i].axis('off')

            LOGGER.info(f'Saving {f}... ({n}/{channels})')
            plt.savefig(f, dpi=300, bbox_inches='tight')
            plt.close()
            np.save(str(f.with_suffix('.npy')), x[0].cpu().numpy())  # npy save
使用:
feature_visualization(features, name, stage_id, save_dir=ROOT / "visual")
结果示例:
2.优化的特征图可视化
可视化代码:
def feature_visualization(x, module_type, stage, n=2, save_dir=Path('runs/detect/exp')):
    """
    x:              Features to be visualized
    module_type:    Module type
    stage:          Module stage within model
    n:              Maximum number of feature maps to plot
    save_dir:       Directory to save results
    """
    if 'Detect' not in module_type:
        batch, channels, height, width = x.shape  # batch, channels, height, width
        if height > 1 and width > 1:
            f = save_dir / f"stage{stage}_{module_type.split('.')[-1]}_features.png"  # filename

            blocks = torch.chunk(x[0].cpu(), channels, dim=0)  # select batch index 0, block by channels
            n = min(n, channels)  # number of plots
            fig, ax = plt.subplots(math.ceil(n / 2), 2, tight_layout=True)  # 8 rows x n/8 cols
            ax = ax.ravel()
            plt.subplots_adjust(wspace=0.05, hspace=0.05)
            for i in range(n):
                block = blocks[i].squeeze().detach().numpy()
                block = (block - np.min(block)) / (np.max(block) - np.min(block))
                temp = np.array(block * 255.0, dtype=np.uint8)
                temp = cv2.applyColorMap(temp, cv2.COLORMAP_JET)
                ax[i].imshow(temp, cmap=plt.cm.jet)  # cmap='gray'
                ax[i].axis('off')

            LOGGER.info(f'Saving {f}... ({n}/{channels})')
            plt.savefig(f, dpi=300, bbox_inches='tight')
            plt.close()
            np.save(str(f.with_suffix('.npy')), x[0].cpu().numpy())  # npy save
使用:
feature_visualization(features, name, stage_id, save_dir=ROOT / "visual")
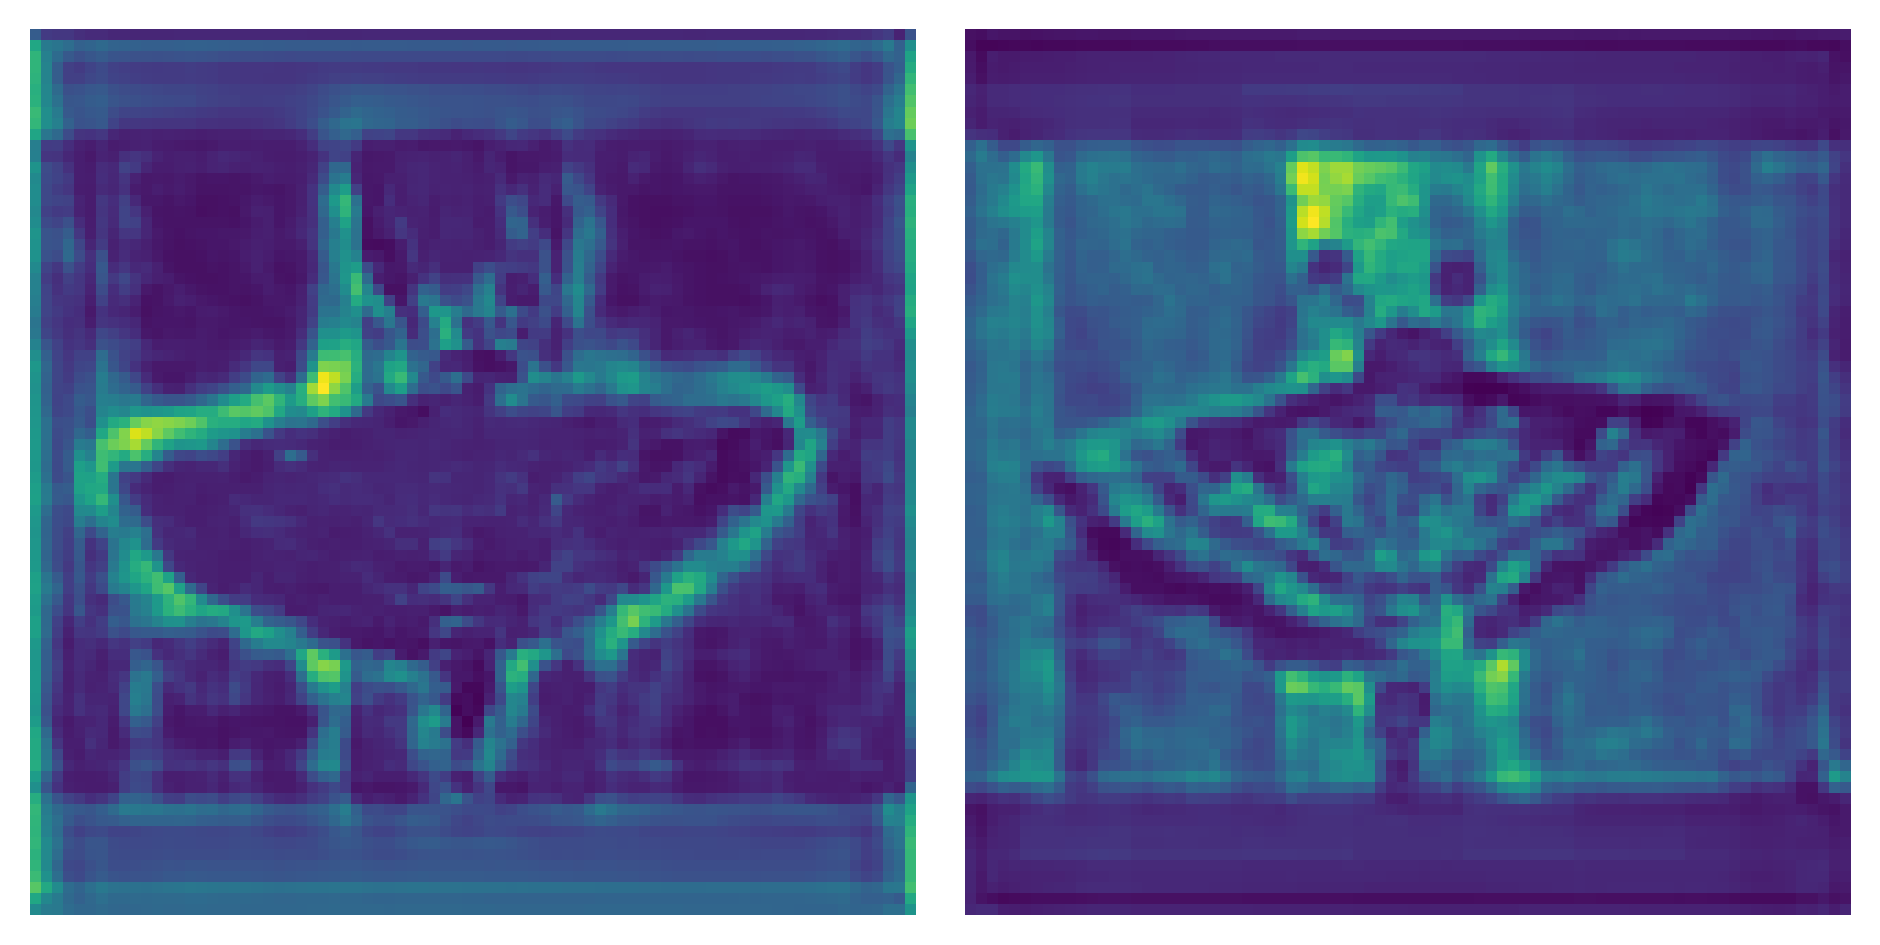
结果示例:

优化的可视化代码可视化结果更加清晰
参考:GitHub - z1069614715/objectdetection_script: 一些关于目标检测的脚本的改进思路代码,详细请看readme.md
3.注意力图可视化(YOLO)
可视化代码:
def show_CAM(save_img_path, image, feature_maps, class_id, all_ids=97, image_size=(640, 640), normalization=True):
    """
    save_img_path: save heatmap images path
    feature_maps: this is a list [tensor,tensor,tensor], tensor shape is [1, 3, N, N, all_ids]
    normalization: Normalize score and class to 0 to 1
    image_size: w, h
    """
    SHOW_NAME = ["score", "class", "class*score"]
    img_ori = image
    layers0 = feature_maps[0].reshape([-1, all_ids])
    layers1 = feature_maps[1].reshape([-1, all_ids])
    layers2 = feature_maps[2].reshape([-1, all_ids])
    layers = torch.cat([layers0, layers1, layers2], 0)
    if normalization:
        score_max_v = 1.
        score_min_v = 0.
        class_max_v = 1.
        class_min_v = 0.
    else:
        score_max_v = layers[:, 4].max()  # compute max of score from all anchor
        score_min_v = layers[:, 4].min()  # compute min of score from all anchor
        class_max_v = layers[:, 5 + class_id].max()  # compute max of class from all anchor
        class_min_v = layers[:, 5 + class_id].min()  # compute min of class from all anchor
    for j in range(3):  # layers
        layer_one = feature_maps[j]
        # compute max of score from three anchor of the layer
        if normalization:
            anchors_score_max = layer_one[0, :, :, :, 4].max(0)[0].sigmoid()
            # compute max of class from three anchor of the layer
            anchors_class_max = layer_one[0, :, :, :, 5 + class_id].max(0)[0].sigmoid()
        else:
            anchors_score_max = layer_one[0, :, :, :, 4].max(0)[0]
            # compute max of class from three anchor of the layer
            anchors_class_max = layer_one[0, :, :, :, 5 + class_id].max(0)[0]

        scores = ((anchors_score_max - score_min_v) / (
                score_max_v - score_min_v))
        classes = ((anchors_class_max - class_min_v) / (
                class_max_v - class_min_v))

        layer_one_list = []
        layer_one_list.append(scores)
        layer_one_list.append(classes)
        layer_one_list.append(scores * classes)
        for idx, one in enumerate(layer_one_list):
            layer_one = one.cpu().numpy()
            if normalization:
                ret = ((layer_one - layer_one.min()) / (layer_one.max() - layer_one.min())) * 255
            else:
                ret = ((layer_one - 0.) / (1. - 0.)) * 255
            ret = ret.astype(np.uint8)
            gray = ret[:, :, None]
            ret = cv2.applyColorMap(gray, cv2.COLORMAP_JET)

            ret = cv2.resize(ret, image_size)
            img_ori = cv2.resize(img_ori, image_size)

            show = ret * 0.50 + img_ori * 0.50
            show = show.astype(np.uint8)
            cv2.imwrite(os.path.join(save_img_path, f"{j}_{SHOW_NAME[idx]}.jpg"), show)
使用:
show_CAM(ROOT/"visual",
         cv2.imread(path),
         ret[1],
         0,  # 指的是你想查看的类别 这个代码中我们看的是bear 所有在coco数据集中是21
         80+ 5,  # 80+5指的是coco数据集的80个类别+ x y w h score 5个数值
         image_size=(640, 640),  # 模型输入尺寸

         # 如果为True将置信度和class归一化到0~1,方便按置信度进行区分热力图,
         # 如果为False会按本身数据分布归一化,这样方便查看相对置信度。
         normalization=True
         )
结果示例:
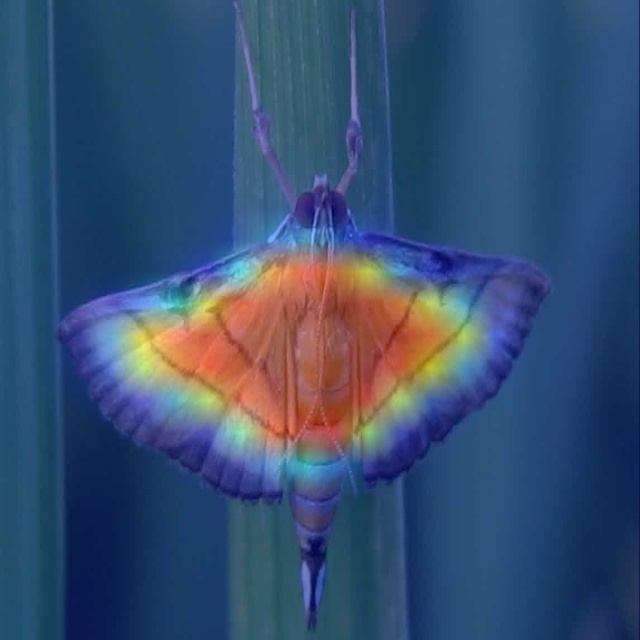
参考:GitHub - z1069614715/objectdetection_script: 一些关于目标检测的脚本的改进思路代码,详细请看readme.md