简述 JavaScript 中 prototype
这篇笔记主要捋一下这么几个概念:
- JS 的继承
- 构造函数
new的作用及简易实现__proto__&prototype- 同样的方法,class 和 prototype 中分别是怎么实现的
基础概念
JS 是通过 prototype chaining 实现继承的语言,所有的基类都会绑定在 prototype chain 上如:
class Base {


  constructor() {

    }
}

class Extended extends Base {


  constructor() {


    super();
  }
}

class Descendant extends Extended {


  constructor() {


    super();
  }
}

const descedant = new Descendant();
console.log(descedant.__proto__);
__proto__ 本身就暴露了当前对象的 [[Prototype]],它所指向的是另一个对象,也就是 prototype chain 上的继承 (粗暴的理解一下就是父类)。返回的对象又可以通过调用 __proto__ 继续获得父类的 [[Prototype]],一步步向上追溯一直到 [[Prototype]] 为 null 为止,一般到这个时候,也是获取到 Object 了——JS 之中,除了 primitive type,万物皆对象。
需要注意的是,__proto__ 返回的对象是 [[Prototype]] 也是 <prototype>,二者是一样的,只不过前者是 chrome 的称呼,后者是 Firefox 的,这里为了一致就使用 [[Prototype]]。获取当前 [[Prototype]] 的方法有两种:
-
__proto__已经 Deprecated 了,deno 中甚至不支持实现
-
Object.getPrototypeOf()/Reflect.getPrototypeOf()推荐使用这个函数
构造函数
class 是 ES6 新出的语法糖,在 ES6 之前都是使用构造函数去实现的,如:
function Person(name, age) {


  this.name = name;
  this.age = age;
}

// equivalent to
class Person {


  constructor(name, age) {


    this.name = name;
    this.age = age;
  }
}
实现结果都是一致的:
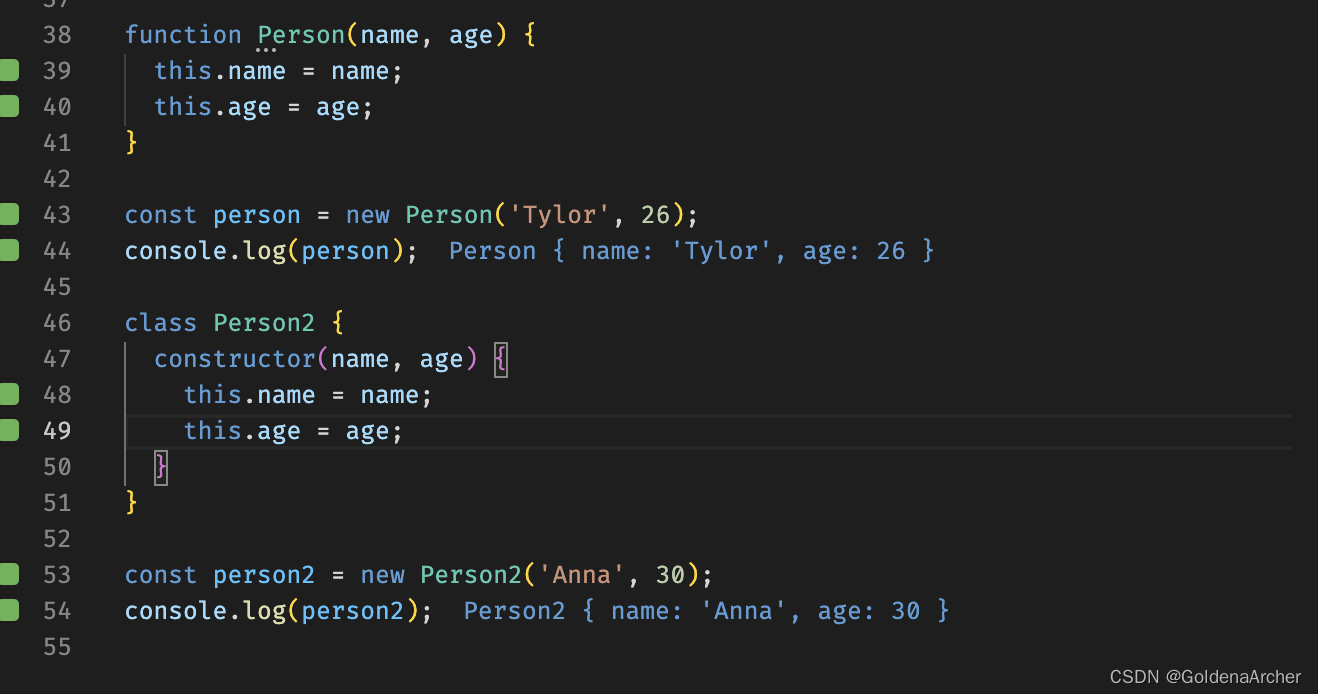
同样,constructor 也不是一定需要大写,小写也是可以实现同样的功能:
function person3(name, age) {


  this.name = name;
  this.age = age;
}

const person3Instance = new person3('Deborah', 99);
console.log(person3Instance);
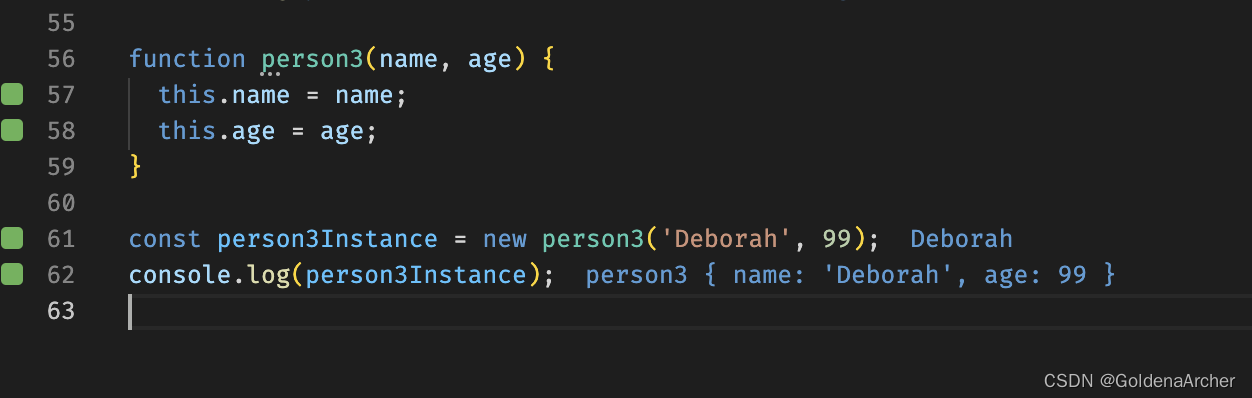
大写只是一个约定俗成的规范。
new 关键字
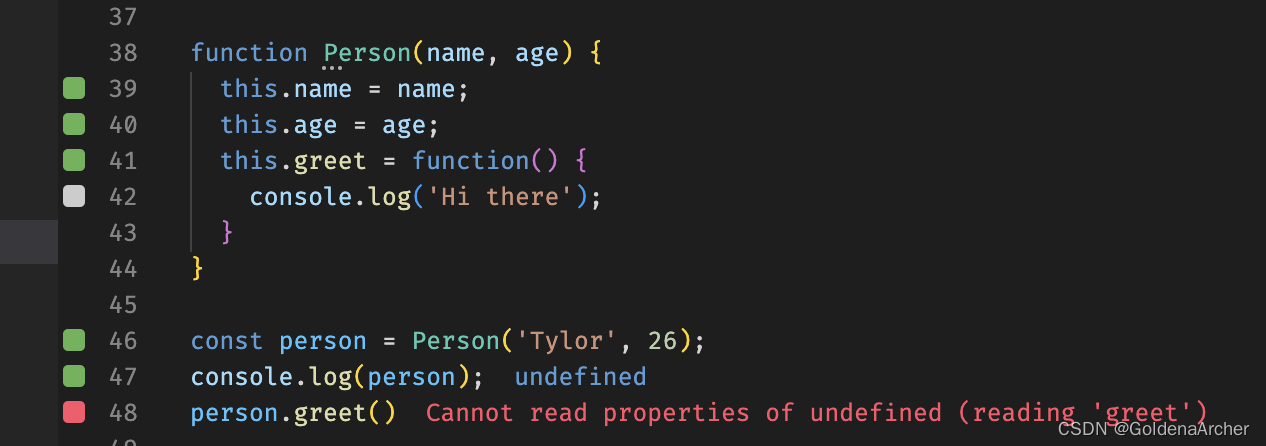
new 在使用构造函数的时候是必须的,否则它只是返回了一个 undefined:
function Person(name, age) {


  this.name = name;
  this.age = age;
  this.greet = function () {


    console.log('Hi there');
  };
}

const person = Person('Tylor', 26);
console.log(person);
person.greet();
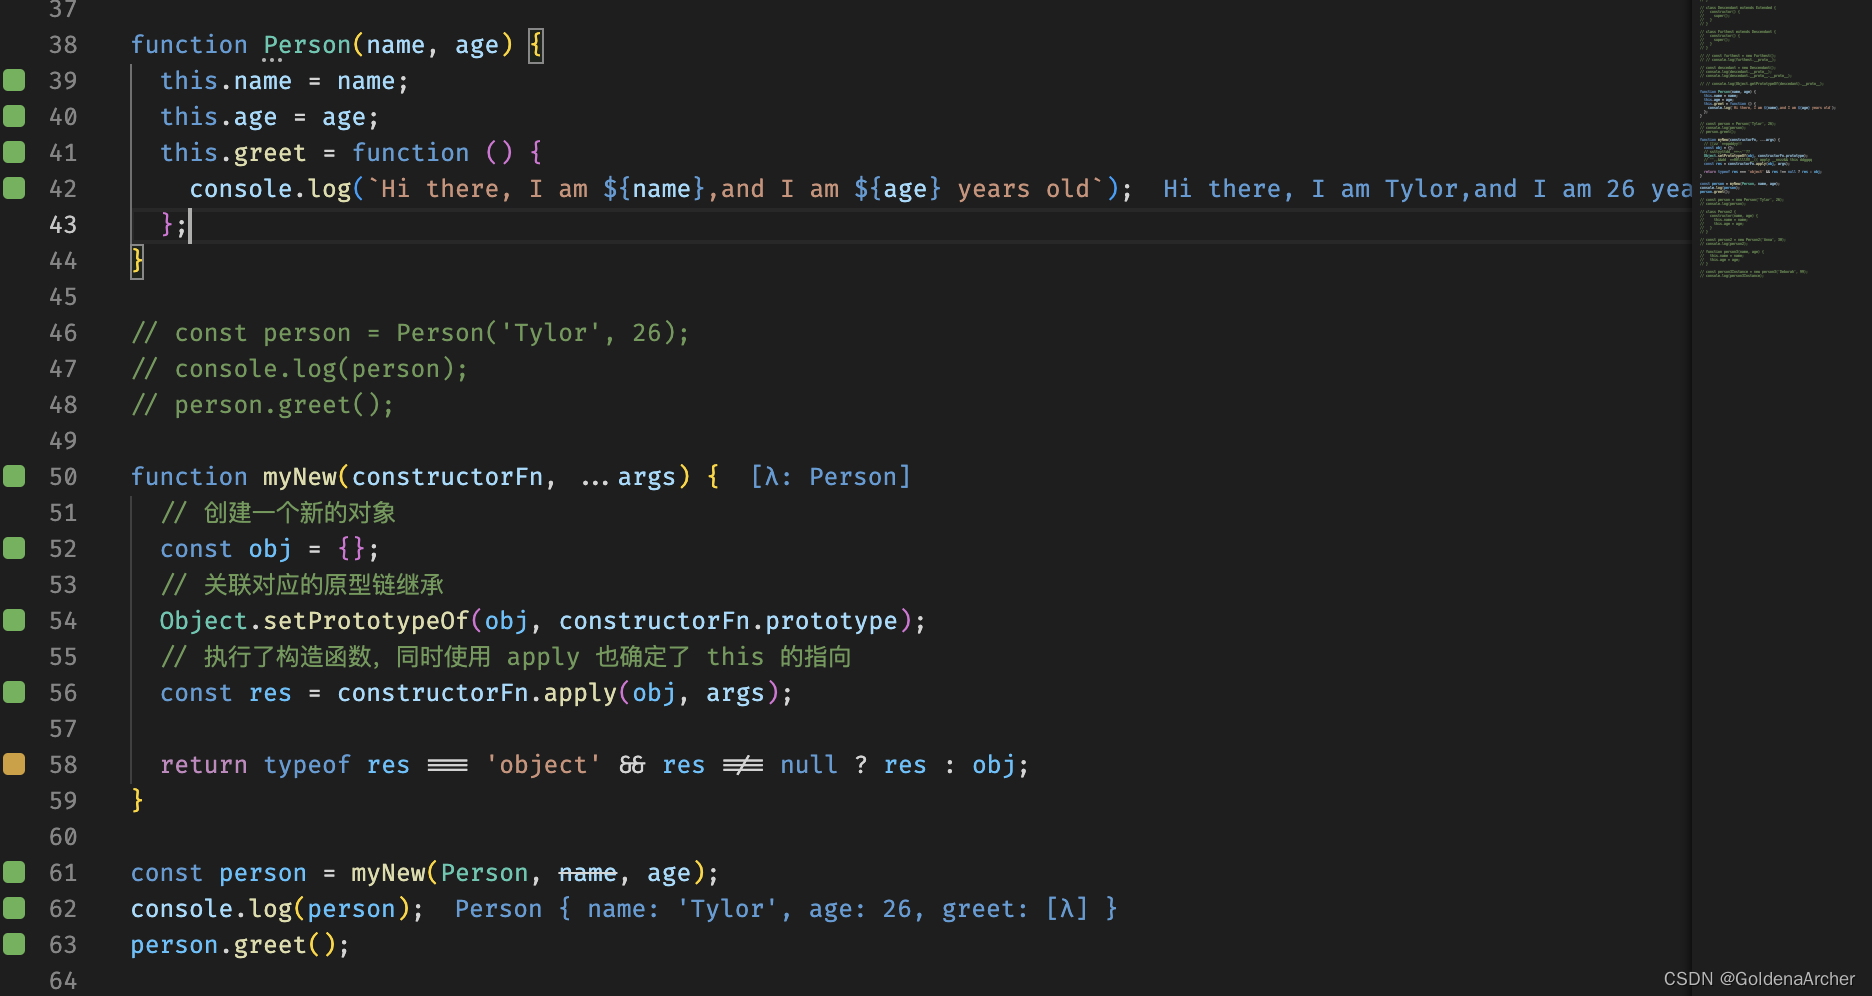
new 的作用在于
- 它创建了一个新的对象
- 它关联了对应的原型链继承
- 它绑定了
this的指向 - 它执行了构造函数内的部分
一个简单的实现 new 的函数为:
function myNew(constructorFn, ...args) {


  // 创建一个新的对象
  const obj = {

    };
  // 关联对应的原型链继承
  Object.setPrototypeOf(obj, constructorFn.prototype);
  // 执行了构造函数,同时使用 apply 也确定了 this 的指向
  const res = constructorFn.apply(obj, args);

  return typeof res === 'object' && res !== null ? res : obj;
}
__proto__ 和 prototype 的区别
简单的说就是,__proto__ 作用于实例上,而 prototype 作用于构造函数上。
如,准确的说函数的实现不是像上面那样实现的,而是:
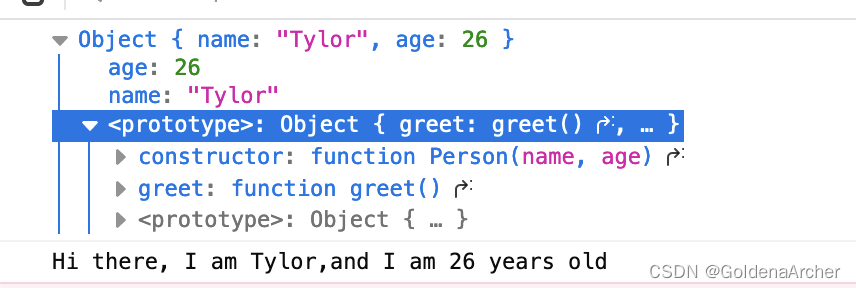
Person.prototype.greet = function () {


  console.log(`Hi there, I am ${

      this.name},and I am ${

      this.age} years old`);
};
从自动提示上也可以看到,实例化的对象是无法访问内部的 [[Prototype]] 的:
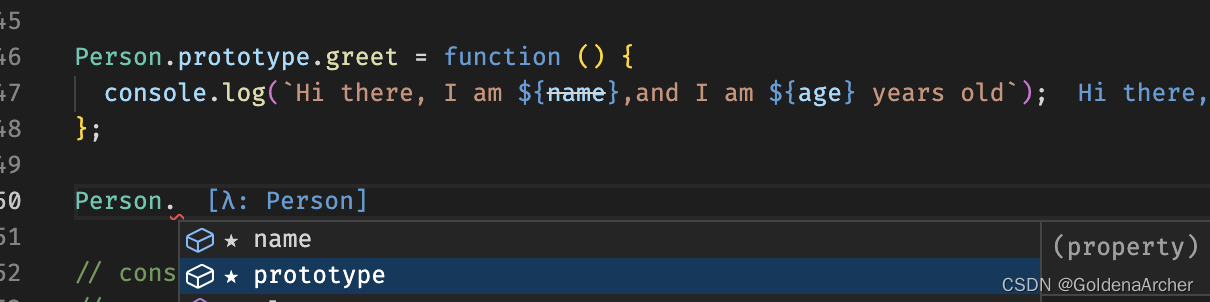

另外,所有的函数实现其实都是绑定在 prototype 上的:
主要的原因就是因为函数本质上也是对象,而在每次实例化的时候都创建一个新的对象,是一个非常昂贵的事情。因此 JS 会将函数绑定到 [[Prototype]] 上,这样所有的实例化的对象可以共享一个函数。
如果想要每次实例化的时候都创建一个新的函数,则可以使用 arrow function(在 class 中使用),这也是 ES6 语法的 pro and con 了。
super 与 this
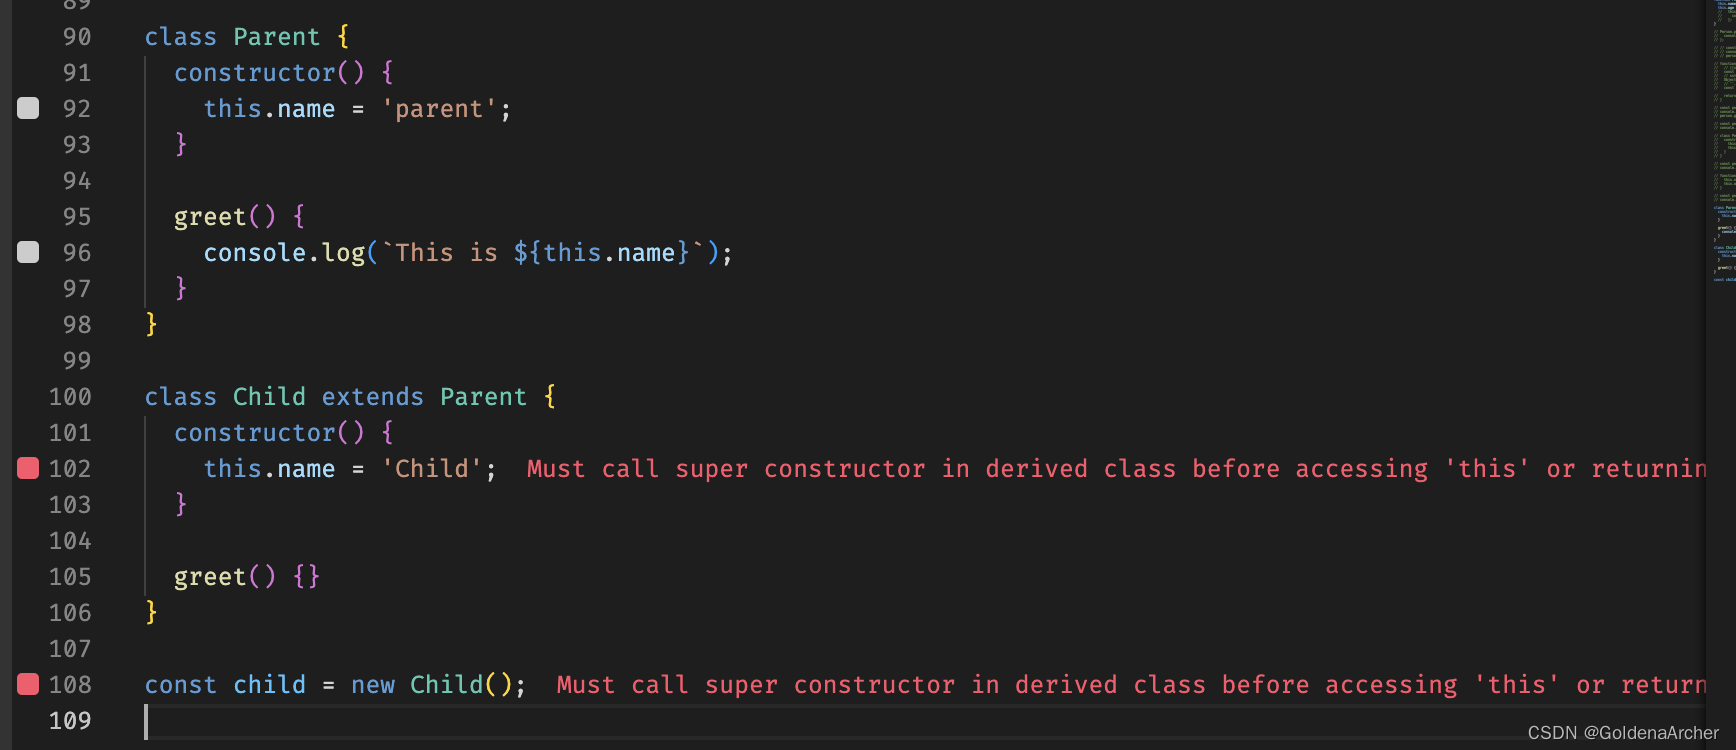
到这一步,基本上使用 prototype 去实现 class 都实现的差不多了,除了继承这一部分,以下面代码为例:
class Parent {


  constructor() {


    this.name = 'parent';
  }

  greet() {


    console.log(`This is ${

      this.name}`);
  }
}

class Child extends Parent {


  constructor() {


    this.name = 'Child';
  }

  greet() {

    }
}

const child = new Child();
事实上 JS 会报错:
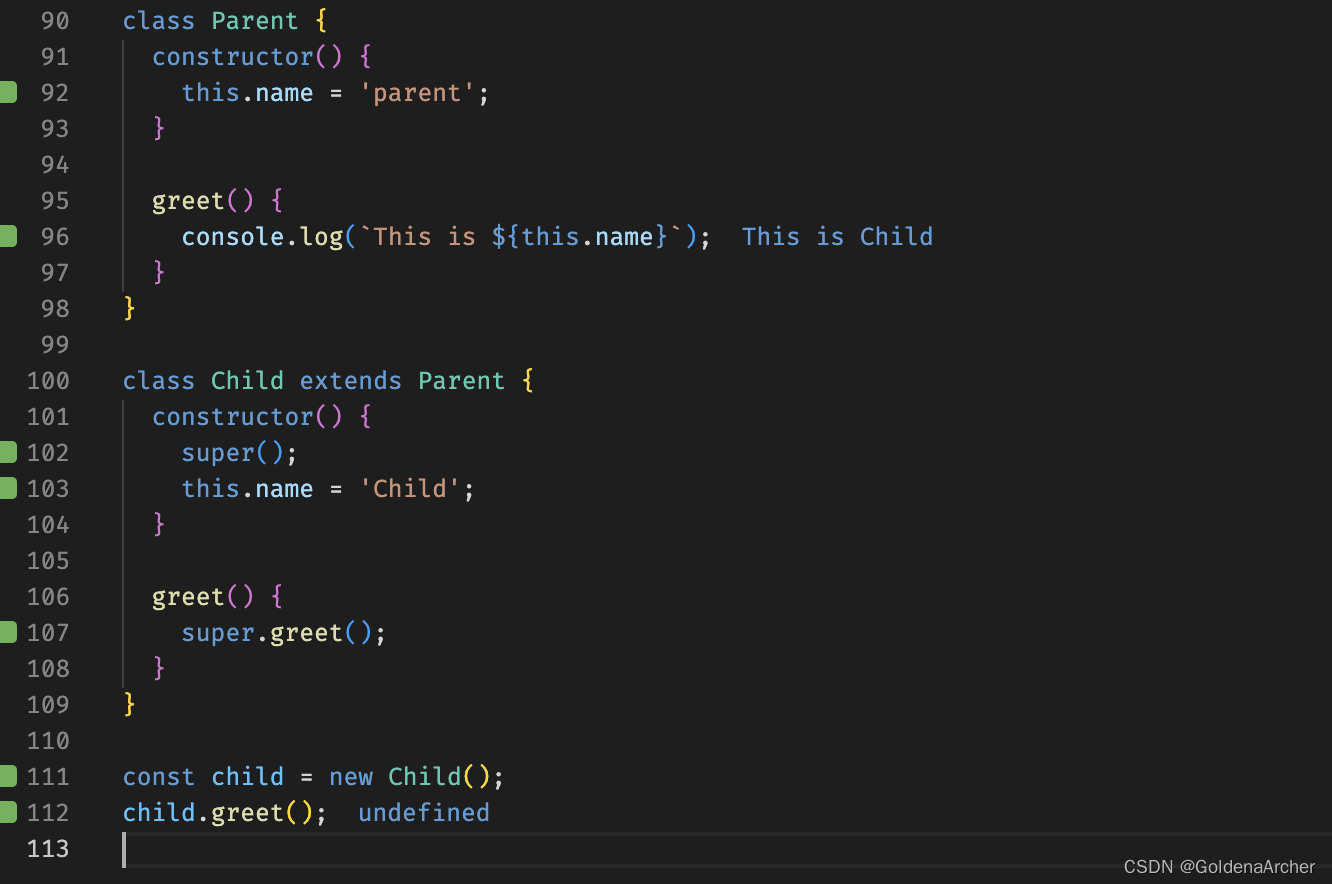
在当调用了 super 之后就会发现,this 的指向被绑定到了 Child 中:
class Parent {


  constructor() {


    this.name = 'parent';
  }

  greet() {


    console.log(`This is ${

      this.name}`);
  }
}

class Child extends Parent {


  constructor() {


    super();
    this.name = 'Child';
  }

  greet() {


    super.greet();
  }
}

const child = new Child();
child.greet();
接下来要模拟实现的就是这一步,其中需要注意的就是:
-
实现继承关系
这点可以通过修改
prototype进行实现,已知[[Prototype]]中包含了所有的 prototype chain,这里也只需要将Child.prototype指向Parent.prototype,并且绑定对应的 构造函数即可。 -
修改
this的指向
function Parent() {


  this.name = 'Parent';
}

Parent.prototype.greet = function () {


  console.log(`This is ${

      this.name}`);
};

function Child() {


  // bind child to parent
  Parent.call(this);
  this.name = 'Child';
}

// set up inheritance
Child.prototype = Object.create(Parent.prototype);
Child.prototype.constructor = Child;

Child.prototype.greet = function () {


  Parent.prototype.greet.call(this);
};

const child = new Child();
child.greet();
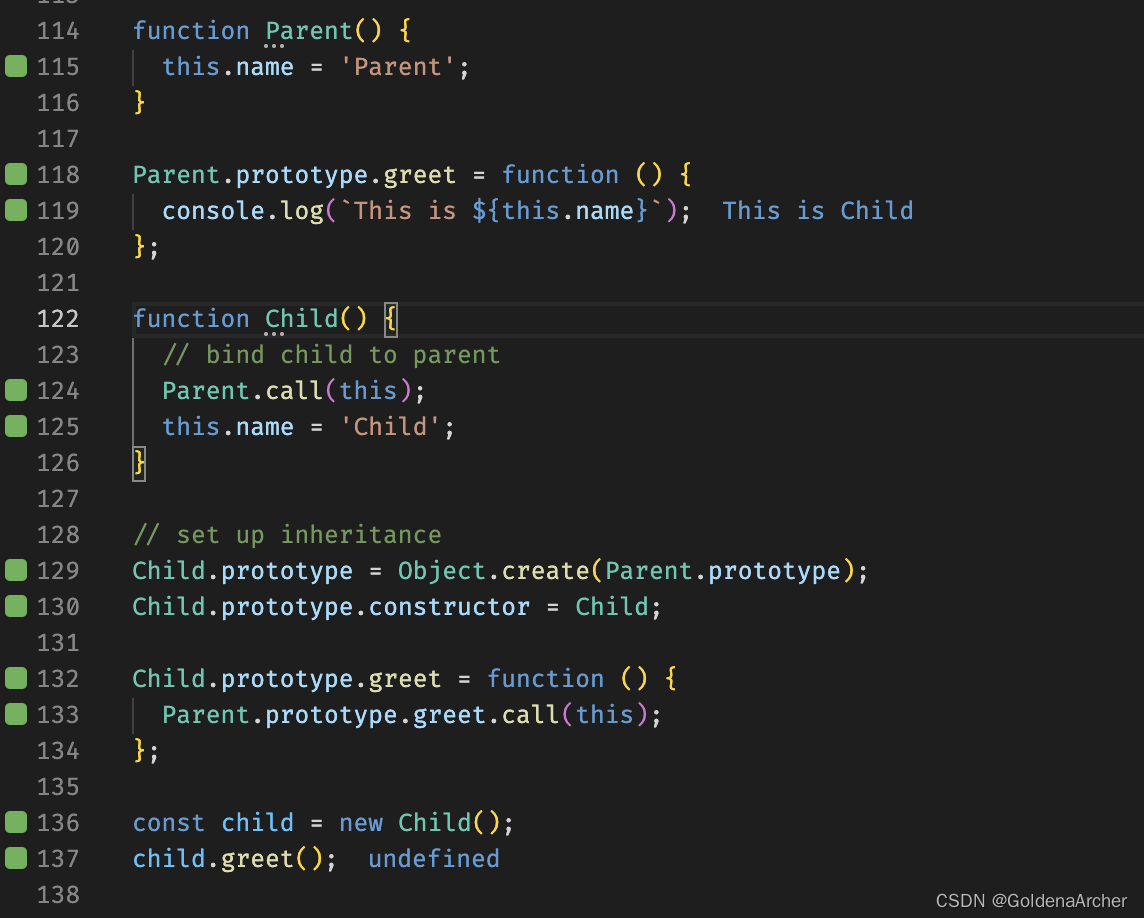
这样,prototype 中的继承关系也实现了。
这也是为什么 JS 推荐使用 class 而非重新实现一个 prototype 的原因,主要还是因为使用 class 的代码更加简洁易读。