-
为什么用swagger2?swagger1和2试用对比
-
在springMVC项目中引入swagger2
-
springfox与swagger的关系
-
对第2步配置的说明
1.为什么用swagger2?swagger1和2试用对比
试用过swagger-springmvc和springfox-swagger2后,为了能限定暴露哪些接口,选用swagger2。且swagger2的引入更加轻量化:依赖关系+swagger2配置文件+@Api注解搞定,不必像swagger-springmvc还需要单独引入页面显示包。
2.在springMVC项目中引入swagger2
1.配置依赖关系
pom.xml
<!-- swagger2 -->
<dependency>
    <groupId>io.springfox</groupId>
    <artifactId>springfox-swagger2</artifactId>
    <version>2.6.1</version>
</dependency>
<dependency>
    <groupId>io.springfox</groupId>
    <artifactId>springfox-swagger-ui</artifactId>
    <version>2.6.1</version>
</dependency>
注:不必引入jackson-core, jackson-databind,会造成tomcat启动报错:
org.springframework.context.ApplicationContextException: Failed to start bean 'documentationPluginsBootstrapper'; nested exception is com.google.common.util.concurrent.ExecutionError: com.google.common.util.concurrent.ExecutionError: java.lang.NoClassDefFoundError: com/fasterxml/jackson/annotation/JsonProperty$Access
原因:pom有最近多余添加的的依赖,删除即可。
2.配置Swagger2Congig类
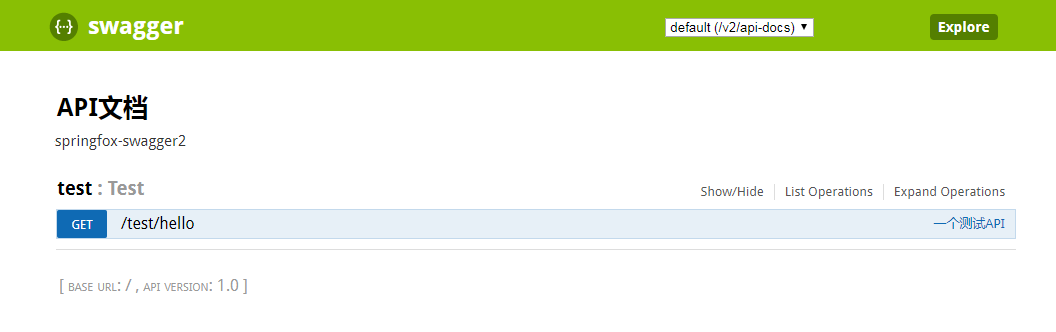
@Configuration
@EnableSwagger2
@EnableWebMvc
@ComponentScan(basePackages = {"cn.com.sinosure.appApi.controller"})
public class Swagger2Config extends WebMvcConfigurerAdapter {
    @Bean
    public Docket api() {
        return new Docket(DocumentationType.SWAGGER_2)
                .select()  // 选择那些路径和api会生成document
                .paths(Predicates.not(PathSelectors.regex("/error.*")))
                .apis(RequestHandlerSelectors.basePackage("cn.com.xx.packageName"))  //  根据包名选择
                //.apis(RequestHandlerSelectors.any())  // 对所有api进行监控
                .paths(PathSelectors.any())  // 对所有路径进行监控
                .build()
                .apiInfo(apiInfo());
    }

    private ApiInfo apiInfo() {
        return new ApiInfoBuilder()
                .title("API文档")
                .description("springfox-swagger2")
                .termsOfServiceUrl("")
                .version("1.0")
                .build();
    }

    @Override
    public void addResourceHandlers(ResourceHandlerRegistry registry) {
        //enabling swagger-ui part for visual documentation
        registry.addResourceHandler("swagger-ui.html").addResourceLocations("classpath:/META-INF/resources/");
        registry.addResourceHandler("/webjars/**").addResourceLocations("classpath:/META-INF/resources/webjars/");
    }
}
注:自定义的swagger2配置类应在<context:component-scan>配置的base-package路径下,否则会造成访问 http://localhost:8080/<projectName>/swagger-ui.html 除swagger图标正常显示外,其他空白。
3.写一个Test类(试用)
@Controller
@RequestMapping("/test")
public class Test {
    @ApiOperation(value = "一个测试API", notes = "第一个测试api")
    @ResponseBody
    @RequestMapping(value = "/hello", method = RequestMethod.GET)
    public String hello() {
        return "hello";
    }
}
4.http://localhost:8080/swagger-ui.html
3.springfox与swagger的关系
Swagger API开发框架,基于OAS(OpenAPI Specification,一个API规范,规范RESTful服务开发过程;描述API接口,采用YAML格式/json格式)。
初代:基于Spring的组件:swagger-springmvc
后发展为springfox,其中的一个组件springfox-swagger2,可以自动生成符合OAS规范的json文件;另一个组件springfox-swagger-ui负责解析此json文件,以友好的界面形式展现。
4.对第2步配置的说明
任务拆解
- 一个spring项目,引入swagger2。
- 生成一个符合OAS规范的json文件。前文已提到springfox-swagger2可自动生成此json文件,但需要我们在项目中做一些配置:对swagger的配置主要围绕Docket类,作为一个bean注入spring中。通过这个配置文件,我们可以:
选择哪些路径和api会暴露出来;
将API描述信息封装到apiInfo类中,作为参数传给Docket。
- 控制器,通过注解的方式,告诉springfox,这个控制器需要他来收集API信息。
验收
- json文档
http://localhost:8080/<projectName>/v2/api-docs
- 可视化显示
在swagger-springmvc组件中,需要单独引用swagger-ui的页面显示包(把dist目录下的内容拷到项目中WEB-INF目录下)。
而使用升级后的springfox-swagger2,只需要添加对springfox-swagger-ui的依赖。
http://localhost:8080/<projextName>/swagger-ui.html
5.参考:
Setting Up Swagger 2 with a Spring REST API