OpenCvSharp的图像基本处理功能:平移、旋转、镜像、映射
0.项目概述
使用OpenCvSharp中的图像处理函数,实现平移、旋转、镜像、映射等功能,并在picturebox上显示结果,最后将图片保存到本地磁盘。
源代码:https://download.csdn.net/download/sunsoldeir1/86509684
1基础步骤
安装和引用OpenCvSharp、OpenCvSharp.Extensions参照上篇博客:https://blog.csdn.net/sunsoldeir1/article/details/126327557。
2界面设计
2.1在左侧工具箱中,分别搜索Picturebox、Label、Button、groupBox、tabControl等控件并拖入。
2.2将Picturebox、Label、Button、groupBox等控件进行布局、改名、调整形状和字体,形成如下界面:

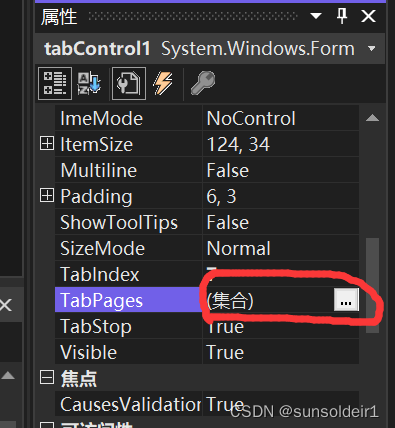
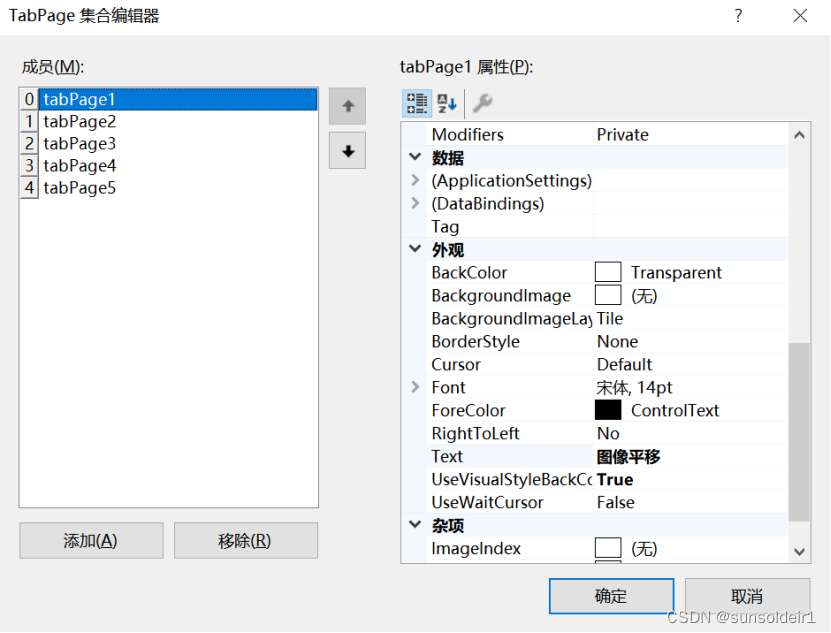
2.3在tabControl中的TabPages添加成员并修改Text。
2.4 打开图片并在picturebox1上显示,使用以下代码实现:
private void button1_Click(object sender, EventArgs e)//打开图片
        {


            OpenFileDialog file = new OpenFileDialog();//OpenFileDialog是一个类,实例化此类可以设置弹出一个文件对话框
            file.Filter = "JPG(*.JPG;*.JPEG);PNG文件(*.PNG);bmp文件(*.BMP);gif文件(*.GIF)|*.jpg;*.jpeg;*.png;*.bmp;*.gif";//文件类型过滤,只可选择图片的类型
            file.ShowDialog();//显示通用对话框
            if (file.FileName != string.Empty)
            {


                try
                {


                    pathname = file.FileName;
                    Img1 = Cv2.ImRead(pathname);//读取路径下的图片
                    pictureBox1.Load(pathname); //pictureBox1直接加载

                }
                catch (Exception ex)
                {


                    MessageBox.Show(ex.Message);
                }
            }
        }
2.5 保存picturebox2上的图片,使用以下代码实现:
  private void button3_Click(object sender, EventArgs e) //保存图片
    {


        SaveFileDialog saveImageDialog = new SaveFileDialog();
        saveImageDialog.Title = "图片保存";
        saveImageDialog.Filter = "jpg图片|*.JPG|gif图片|*.GIF|png图片|*.PNG|jpeg图片|*.JPEG|BMP图片|*.BMP";//文件类型过滤,只可选择图片的类型
        saveImageDialog.FilterIndex = 1;//设置默认文件类型显示顺序
        saveImageDialog.FileName = "图片保存"; //设置默认文件名,可为空
        saveImageDialog.RestoreDirectory = true; //OpenFileDialog与SaveFileDialog都有RestoreDirectory属性,这个属性默认是false,打开一个文件后,那么系统默认目录就会指向刚才打开的文件。如果设为true就会使用系统默认目录
        if (saveImageDialog.ShowDialog() == DialogResult.OK)
        {


            string fileName = saveImageDialog.FileName.ToString();
            if (fileName != "" && fileName != null)
            {


                string fileExtName = fileName.Substring(fileName.LastIndexOf(".") + 1).ToString();
                System.Drawing.Imaging.ImageFormat imgformat = null;
                if (fileExtName != "")
                {


                    switch (fileExtName)
                    {


                        case "jpg":
                            imgformat = System.Drawing.Imaging.ImageFormat.Jpeg;
                            break;
                        case "png":
                            imgformat = System.Drawing.Imaging.ImageFormat.Png;
                            break;
                        case "gif":
                            imgformat = System.Drawing.Imaging.ImageFormat.Gif;
                            break;
                        case "bmp":
                            imgformat = System.Drawing.Imaging.ImageFormat.Bmp;
                            break;
                        default:
                            imgformat = System.Drawing.Imaging.ImageFormat.Jpeg;
                            break;
                    }
                    try
                    {


                        MessageBox.Show("保存路径:" + fileName, "提示", MessageBoxButtons.OK, MessageBoxIcon.Information);
                        pictureBox2.Image.Save(fileName, imgformat);
                    }
                    catch
                    {


                        MessageBox.Show("图片保存失败!");
                    }
                }
            }
        }
    }
2.6保存picturebox2上的图片,使用以下代码实现:
   private void button3_Click(object sender, EventArgs e) //保存图片
    {


        SaveFileDialog saveImageDialog = new SaveFileDialog();
        saveImageDialog.Title = "图片保存";
        saveImageDialog.Filter = "jpg图片|*.JPG|gif图片|*.GIF|png图片|*.PNG|jpeg图片|*.JPEG|BMP图片|*.BMP";//文件类型过滤,只可选择图片的类型
        saveImageDialog.FilterIndex = 1;//设置默认文件类型显示顺序
        saveImageDialog.FileName = "图片保存"; //设置默认文件名,可为空
        saveImageDialog.RestoreDirectory = true; //OpenFileDialog与SaveFileDialog都有RestoreDirectory属性,这个属性默认是false,打开一个文件后,那么系统默认目录就会指向刚才打开的文件。如果设为true就会使用系统默认目录
        if (saveImageDialog.ShowDialog() == DialogResult.OK)
        {


            string fileName = saveImageDialog.FileName.ToString();
            if (fileName != "" && fileName != null)
            {


                string fileExtName = fileName.Substring(fileName.LastIndexOf(".") + 1).ToString();
                System.Drawing.Imaging.ImageFormat imgformat = null;
                if (fileExtName != "")
                {


                    switch (fileExtName)
                    {


                        case "jpg":
                            imgformat = System.Drawing.Imaging.ImageFormat.Jpeg;
                            break;
                        case "png":
                            imgformat = System.Drawing.Imaging.ImageFormat.Png;
                            break;
                        case "gif":
                            imgformat = System.Drawing.Imaging.ImageFormat.Gif;
                            break;
                        case "bmp":
                            imgformat = System.Drawing.Imaging.ImageFormat.Bmp;
                            break;
                        default:
                            imgformat = System.Drawing.Imaging.ImageFormat.Jpeg;
                            break;
                    }
                    try
                    {


                        MessageBox.Show("保存路径:" + fileName, "提示", MessageBoxButtons.OK, MessageBoxIcon.Information);
                        pictureBox2.Image.Save(fileName, imgformat);
                    }
                    catch
                    {


                        MessageBox.Show("图片保存失败!");
                    }
                }
            }
        }
    }
3功能实现
3.1初始化变量
Mat Img1;//用 Mat类定义图片1
Mat Img2;//用 Mat类定义图片2
 Bitmap bitmap;//Bitmap类定义picturebox2要显示的图片
3.2平移
3.2.1布局
加入textbox、label、button等控件形成以下布局。

将两个textbox的Keypress属性设置为只有整数才能输入。
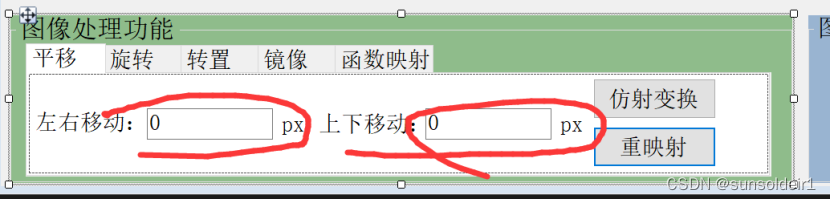
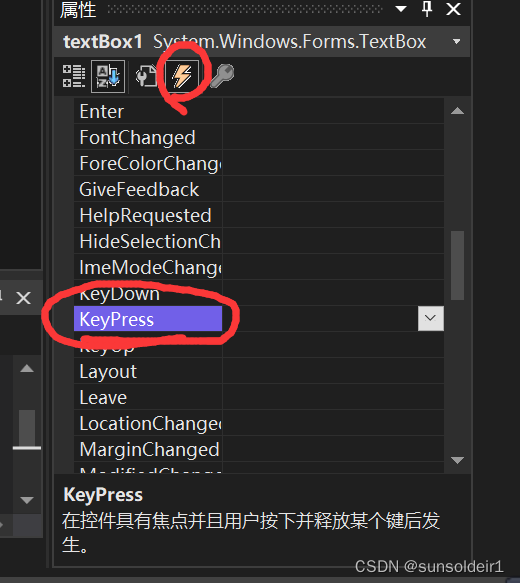
双击Keypress,输入以下代码:
e.Handled = !char.IsNumber(e.KeyChar);
if (!e.Handled)
{
(sender as TextBox).Tag = (sender as TextBox).Text;
}
else if (char.IsControl(e.KeyChar))
{
e.Handled = !e.Handled;
}
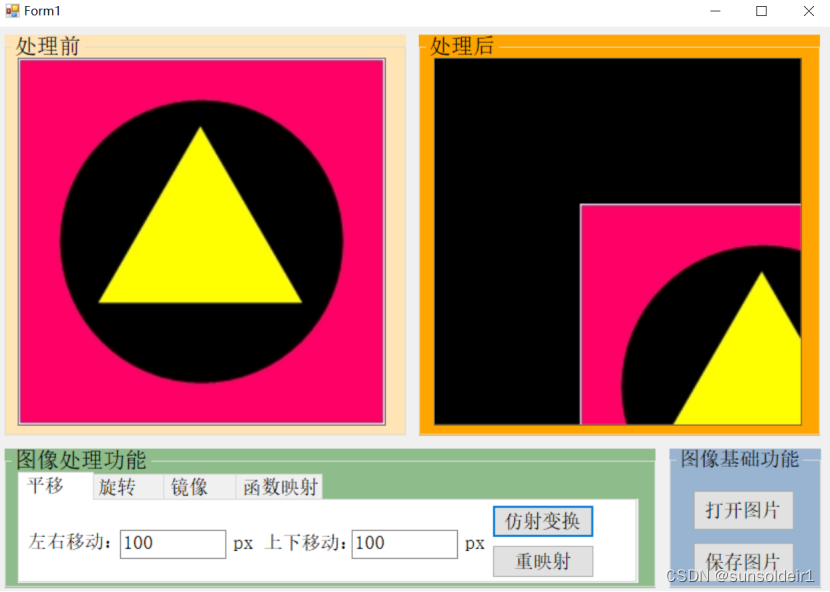
3.2.2 通过仿射变换实现平移
双击“仿射变换”,使用WarpAffine,输入以下代码:
if (pictureBox1.Image == null)//判断图片是否已打开
{
MessageBox.Show("没有打开图片");
return;
}
int Offset_right = Convert.ToInt32(textBox1.Text);
int Offset_down = Convert.ToInt32(textBox2.Text);
Mat T_mat = new Mat(2,3, MatType.CV_32FC1);
T_mat.At<float>(0, 0) = 1;
T_mat.At<float>(0, 2) = Offset_right;
T_mat.At<float>(1, 1) = 1;
T_mat.At<float>(1, 2) = Offset_down;
Cv2.WarpAffine(Img1, Img2, T_mat, Img1.Size());
bitmap = BitmapConverter.ToBitmap(Img2); //把Mat格式的图片转换成Bitmap
pictureBox2.Image = bitmap;
处理结果:
3.2.3 通过重映射实现平移
双击“重映射”,输入以下代码:
private void button2_Click_1(object sender, EventArgs e)
        {


            if (pictureBox1.Image == null )//判断图片是否已打开
            {


                MessageBox.Show("没有打开图片");
                return;
            }
            int Offset_right = Convert.ToInt32(textBox1.Text);
            int Offset_down  = Convert.ToInt32(textBox2.Text);
            Img2= imgTranslation(Img1,  Offset_right, Offset_down);
            bitmap = BitmapConverter.ToBitmap(Img2); //把Mat格式的图片转换成Bitmap
            pictureBox2.Image = bitmap;
        }
        Mat imgTranslation(Mat src, int xOffset, int yOffset)
        {


            //建立两个映射表
            Mat map_x = new Mat(src.Size(), MatType.CV_32FC1);
            Mat map_y = new Mat(src.Size(), MatType.CV_32FC1);
            for (int i = 0; i < src.Width ; i++)
            {


                for (int j = 0; j < src.Height; j++)
                {


                    int x = i - xOffset;
                    int y = j - yOffset;
                    if (x >= 0 && y >= 0 && x < src.Width && y < src.Height)
                    {


                        map_x.Set(j, i, (float)x);
                        map_y.Set(j, i, (float)y);
                        //img1.at<Vec3b>(i, j) = img.ptr<Vec3b>(y)[x];
                    }
                }
            }
            Mat dst = new Mat(src.Size(), MatType.CV_32FC1);
            Cv2.Remap(src, dst, map_x, map_y);
            return dst;
        }
处理结果:
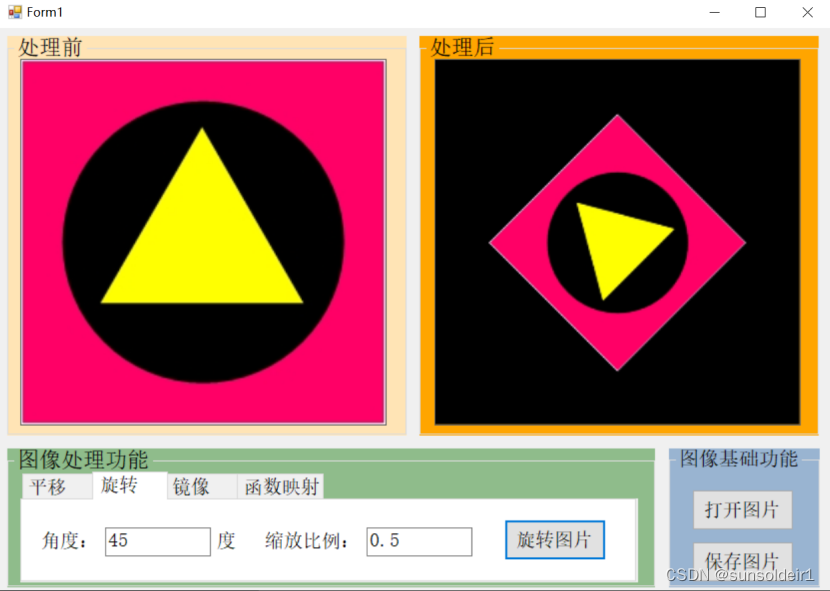
3.3旋转
3.3.1布局
加入textbox、label、button等控件形成以下布局。
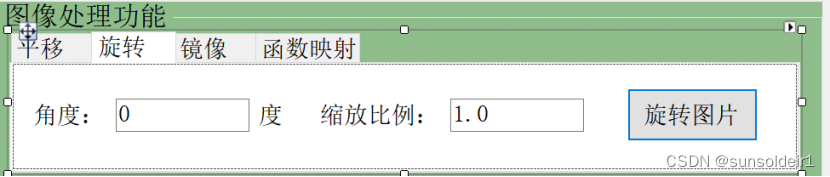
3.3.2旋转图片功能
双击“旋转图片”,使用WarpAffine,输入以下代码:
if (pictureBox1.Image == null)//判断图片是否已打开
            {


                MessageBox.Show("没有打开图片");
                return;
            }
            Point2f Img_center = new Point2f(Img1.Cols / 2, Img1.Rows / 2);
            double angle = Convert.ToDouble(textBox3.Text);
            double scale = Convert.ToDouble(textBox4.Text);
            Mat R_mat = Cv2.GetRotationMatrix2D(Img_center, angle, scale);
            Cv2.WarpAffine(Img1, Img2, R_mat, Img1.Size());
            bitmap = BitmapConverter.ToBitmap(Img2); //把Mat格式的图片转换成Bitmap
            pictureBox2.Image = bitmap;
处理结果:
3.4平移
3.4.1布局
加入textbox、label、button等控件形成以下布局。

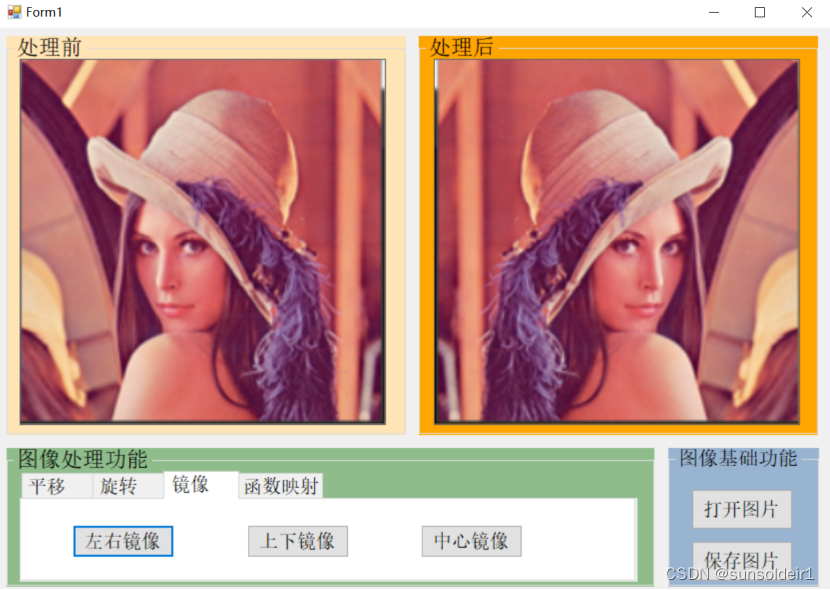
3.4.2左右镜像
双击“左右镜像”,输入以下代码:
  if (pictureBox1.Image == null)//判断图片是否已打开
            {


                MessageBox.Show("没有打开图片");
                return;
            }
            Cv2.Flip(Img1, Img2, FlipMode.Y);
            bitmap = BitmapConverter.ToBitmap(Img2); //把Mat格式的图片转换成Bitmap
            pictureBox2.Image = bitmap;
结果:
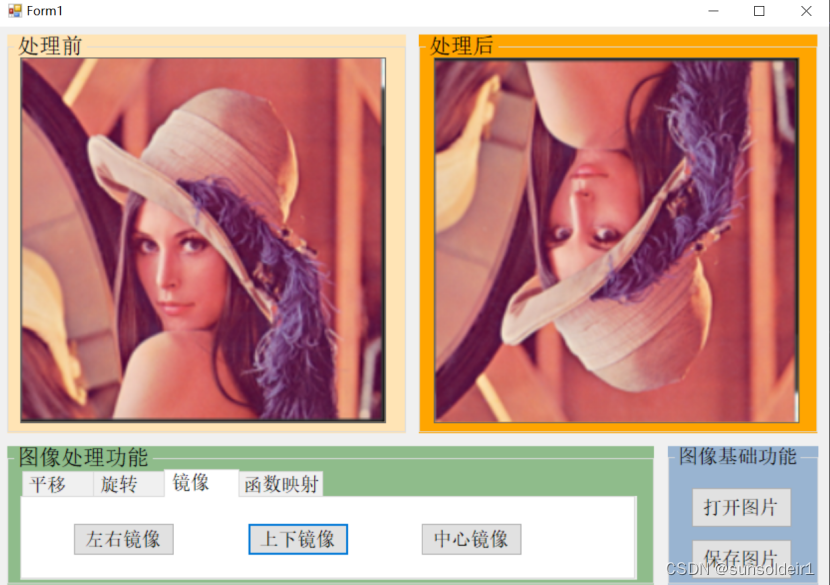
3.4.3上下镜像
双击“上下镜像”,输入以下代码:
 if (pictureBox1.Image == null)//判断图片是否已打开
            {


                MessageBox.Show("没有打开图片");
                return;
            }
            Cv2.Flip(Img1, Img2, FlipMode.X);
            bitmap = BitmapConverter.ToBitmap(Img2); //把Mat格式的图片转换成Bitmap
            pictureBox2.Image = bitmap;
结果:
3.4.4中心镜像
双击“中心镜像”,输入以下代码:
 if (pictureBox1.Image == null)//判断图片是否已打开
            {


                MessageBox.Show("没有打开图片");
                return;
            }
            Cv2.Flip(Img1, Img2, FlipMode.Y);
            bitmap = BitmapConverter.ToBitmap(Img2); //把Mat格式的图片转换成Bitmap
            pictureBox2.Image = bitmap;
结果:
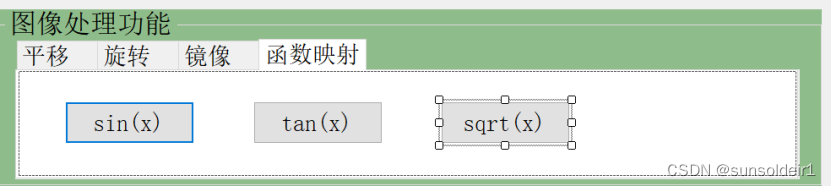
3.5 函数映射
3.5.1布局
加入textbox、label、button等控件形成以下布局。
3.5.1 sin(x)
双击“sin(x)”,输入以下代码:
if (pictureBox1.Image == null)//判断图片是否已打开
            {


                MessageBox.Show("没有打开图片");
                return;
            }
            //建立两个映射表
            Mat map_x = new Mat(Img1.Size(), MatType.CV_32FC1);
            Mat map_y = new Mat(Img1.Size(), MatType.CV_32FC1);
            for (int i = 0; i < Img1.Width; i++)
            {


                for (int j = 0; j < Img1.Height; j++)
                {


                    map_x.Set(j, i, (float)i);
                    map_y.Set(j, i, (float)(j+5*Math.Sin(i/5.0)));
                }
            }
            Cv2.Remap(Img1, Img2, map_x, map_y);
            bitmap = BitmapConverter.ToBitmap(Img2); //把Mat格式的图片转换成Bitmap
            pictureBox2.Image = bitmap;
结果:

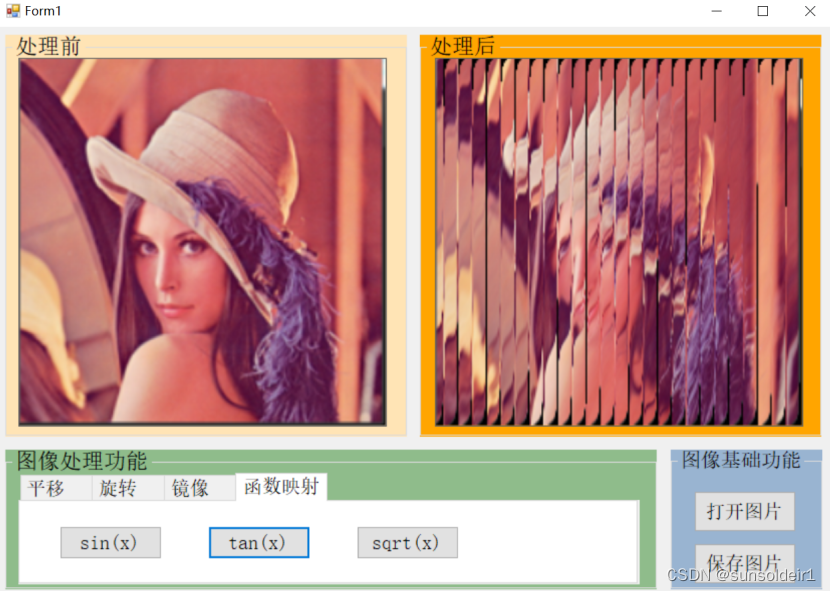
3.5.2 tan(x)
双击“tan(x)”,输入以下代码:
if (pictureBox1.Image == null)//判断图片是否已打开
{
MessageBox.Show(“没有打开图片”);return;
}
//建立两个映射表
Mat map_x = new Mat(Img1.Size(), MatType.CV_32FC1);
Mat map_y = new Mat(Img1.Size(), MatType.CV_32FC1);
for (int i = 0; i < Img1.Width; i++)
{
for (int j = 0; j < Img1.Height; j++)
{
map_x.Set(j, i, (float)i);
map_y.Set(j, i, (float)(j + 3 * Math.Tan(i / 3.0)));
}
}
Cv2.Remap(Img1, Img2, map_x, map_y);
bitmap = BitmapConverter.ToBitmap(Img2); //把Mat格式的图片转换成Bitmap
pictureBox2.Image = bitmap;
结果:
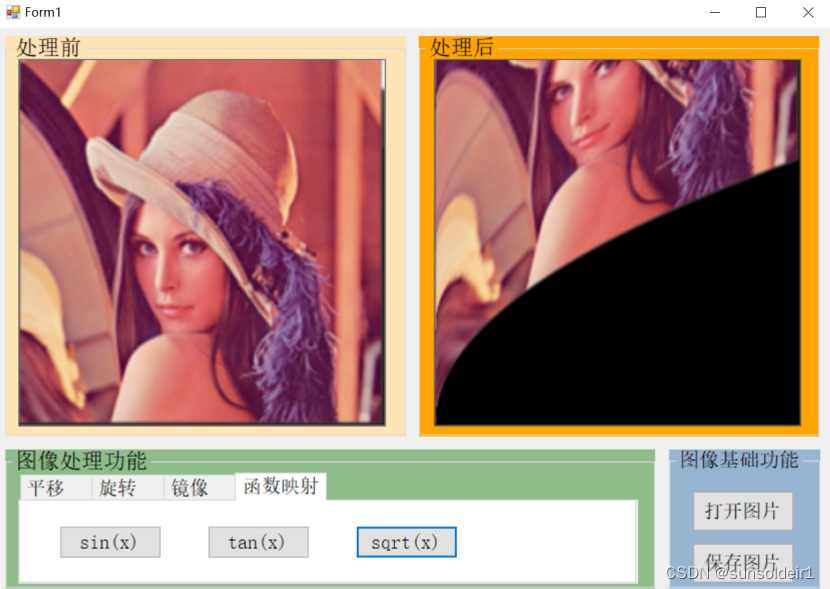
3.5.3 sqrt(x)
双击“sqrt(x)”,输入以下代码:
  if (pictureBox1.Image == null)//判断图片是否已打开
        {


            MessageBox.Show("没有打开图片");
            return;
        }
        //建立两个映射表
        Mat map_x = new Mat(Img1.Size(), MatType.CV_32FC1);
        Mat map_y = new Mat(Img1.Size(), MatType.CV_32FC1);
        for (int i = 0; i < Img1.Width; i++)
        {


            for (int j = 0; j < Img1.Height; j++)
            {


                map_x.Set(j, i, (float)i);
                map_y.Set(j, i, (float)(j +  5.0*Math.Sqrt(i*5.0 )));
            }
        }
        Cv2.Remap(Img1, Img2, map_x, map_y);
        bitmap = BitmapConverter.ToBitmap(Img2); //把Mat格式的图片转换成Bitmap
        pictureBox2.Image = bitmap;
结果: