一 四大组件
1.1 Activity组件,它一个单独的窗口,程序流程都必须在Activity中运行。
1.2 service组件,用于在后台完成用户指定的操作。
1.3 content provider组件,会为所有的应用准备一个内容窗口,并且保留数据库、文件。
1.4 broadcast receiver组件,是程序之间传递信息时的一种机制,作用就是接收或者发送通知。
二 Service简介
2.1 Service服务,是一种运行在后台的程序,所谓后台就是不显示给用户看的程序,所以可以把它当作无组件的Activity。
2.2 官方解释如下,Service 是一个可以在后台执行长时间运行操作而不提供用户界面的应用组件。服务可由其他应用组件启动,而且即使用户切换到其他应用,服务仍将在后台继续运行。 此外,组件可以绑定到服务,以与之进行交互,甚至是执行进程间通信 (IPC)。 例如,服务可以处理网络事务、播放音乐,执行文件 I/O 或与内容提供程序交互,而所有这一切均可在后台进行
2.3 常见使用场景,比如大部分音乐播放器在后台播放音乐就属于Service,还有大部分app内更新也是开启一个后台服务更新,从而不影响用户的其它操作。
三 Service启动方式
3.1 startService方式创建和启动
第一步:创建service类,继承service
public class TestService extends Service {

    @Override
    public void onCreate() {
        super.onCreate();

    }


    @Override
    public int onStartCommand(Intent intent, int flags, int startId) {
        return super.onStartCommand(intent, flags, startId);
    }

    @Override
    public IBinder onBind(Intent arg0) {
        return null;
    }

    @Override
    public void onDestroy() {
        super.onDestroy();
    }
}
方法解析:
onCreate()
只有在Service被创建的时刻被调用,多次启动服务startService(),只调用一次。可以在这个里面做一些初始化工作。
onStartCommand()
可以多次调用,每次启动服务startService()都会调用,上面代码可以看到这个方法需要返回一个整型值。这个整型代表系统应该怎么样处理这个Service。有如下三种类型
- START_STICKY:使用这个返回值,如果系统杀死我们的Service将会重新创建。但是,发送给Service的Intent不会再投递。这样Service是一直运行的。
- START_NOT_STICKY:如果系统杀死了Service,不会重新创建,除非客户端显式地调用了onStart命令。
- START_REDELIVER_INTENT:功能与START_STICKY类似。另外,在这种情况下Intent会重新传递给Service。
onDestroy()
该方法是服务销毁时候调用,比如手动调用stopService()方法。
第二步:在清单文件 AndroidManifest.xml 里面注册该服务组件
<application
	android:allowBackup="true"
	android:icon="@mipmap/ic_launcher"
	android:label="@string/app_name"
	android:supportsRtl="true"
	android:theme="@style/Theme.MyApplication">
	<activity
		android:name=".MainActivity"
		android:exported="true">
		<intent-filter>
			<action android:name="android.intent.action.MAIN" />

			<category android:name="android.intent.category.LAUNCHER" />
		</intent-filter>
	</activity>

	<service android:name=".TestService"
		android:enabled="true"/>
</application>
第三步: 启动服务startService
跟启动Activity差不多,只是这个是服务组件
Intent intent = new Intent(MainActivity.this, TestService.class);
intent.putExtra("name", "serviceAndroid");
startService(intent);
第四步:手动停止服务
Intent intent = new Intent(MainActivity.this, TestService.class);
stopService(intent);
3.2 bindService
绑定服务的使用场景:需要绑定组件的时候,比如绑定Activity,和组件进行数据的传递和交互需要用到绑定服务。
创建绑定服务的步骤:
第一步:跟创建普通服务一样,创建Service类,继承Service
public class TestMyBinderService extends Service {
    @Override
    public void onCreate() {
        super.onCreate();
    }

    @Override
    public int onStartCommand(Intent intent, int flags, int startId) {
        return super.onStartCommand(intent, flags, startId);
    }

    @Override
    public void onDestroy() {
        super.onDestroy();
    }


    @Nullable
    @Override
    public IBinder onBind(Intent intent) {
        return null;
    }

    @Override
    public boolean onUnbind(Intent intent) {
        return super.onUnbind(intent);
    }
}
可以看到 onBind 返回是空,还没绑定任何服务
第二步:创建一个Binder类,来绑定一个服务,用于onBind的返回值。
如下Binder类 绑定了TestMyBinderService 服务
public class MyServiceBinder extends Binder {
	TestMyBinderService getService(){
		//返回MyBinderService实例,以便客户端可以调用公共方法
		return TestMyBinderService.this;
	}
}
第三步:在onBind里面绑定上面的 TestMyBinderService 服务。
为了后面方便测试数据的交互,可以创建一些数据
public class TestMyBinderService extends Service {
    //创建字符串变量
   private String name;

    public String getName() {
        return name;
    }

    @Override
    public void onCreate() {
        super.onCreate();
        //初始化字符串变量,后面用于组件通信
        name="嘿嘿哈哈哈";
    }

    @Override
    public int onStartCommand(Intent intent, int flags, int startId) {
        return super.onStartCommand(intent, flags, startId);
    }


    @Nullable
    @Override
    public IBinder onBind(Intent intent) {
        //绑定服务
        return new MyServiceBinder();
    }

    @Override
    public boolean onUnbind(Intent intent) {
        //解绑服务
        return super.onUnbind(intent);
    }

    @Override
    public void onDestroy() {
        super.onDestroy();
    }
}
第四步:创建连接服务的组件,比如在Acivity里面创建ServiceConnection类
private class MyConn implements ServiceConnection {

	//当服务连接成功调用
	@Override
	public void onServiceConnected(ComponentName name, IBinder service) {
		//获取中间人对象Binder
		MyServiceBinder myBinder = (MyServiceBinder) service;
		//通过Binder获取绑定的服务
		TestMyBinderService testMyBinderService= myBinder.getService();

        //获取服务里面的name变量
		String nameValue=testMyBinderService.getName();
		Log.e(TAG, "onServiceConnected: "+nameValue );

	}
	//失去连接
	@Override
	public void onServiceDisconnected(ComponentName name) {

	}
}
第五步:绑定服务bindService
public class MainActivity extends AppCompatActivity {

    MyConn myConn;

    @Override
    protected void onCreate(Bundle savedInstanceState) {
        super.onCreate(savedInstanceState);
        setContentView(R.layout.activity_main);

        myConn = new MyConn();
        Intent intent= new Intent(this, TestMyBinderService.class);
        bindService(intent, myConn, BIND_AUTO_CREATE);
    }
}
第六步:解绑服务
@Override
protected void onDestroy() {
	super.onDestroy();
	//当activity 销毁的时候 解绑服务
	if(myConn!=null){
		unbindService(myConn);
	}
}
3.3 service生命

3.4 两种启动服务方式总结:
startService: 后台一直运行 不能交互数据。
bindService :当启动的组件被摧毁的时候 Service也跟着销毁 能够交互数据
四 IntentService
4.1 刚开始接触服务可能有一个误区,服务是不是线程可以用来执行耗时任务用的,这种观点是错误的。因为服务跟Activity一样也运行在主线程中,并不建议执行耗时任务。所以需要跟Activity一样需要开启子线程来执行耗时任务
4.2 所以service派生出一个单独的工作线程类来执行耗时任务,就是下面将要说的IntentService。
4.3 IntentService是service的一个派生类,下图是继承关系
| java.lang.Object | ||||
| ↳ | android.content.Context | |||
| ↳ | android.content.ContextWrapper | |||
| ↳ | android.app.Service | |||
| ↳ | android.app.IntentService | |||
4.4 使用步骤
第一步:创建IntentService类
public class TestIntentService extends IntentService {
    private static final String TAG = "TestIntentService";
    /**
     * 构造函数
     * @deprecated
     */
    public TestIntentService() {
        //传入字符串,标识IntentService子线程name
        super("newIntentService");
    }

    /**
     * 处理耗时业务
     *
     * @param intent 接收传进来的参数
     */
    @Override
    protected void onHandleIntent(@Nullable Intent intent) {
        //intent获取任务分类
        String action = intent.getAction();
        switch (action) {
            case "com.test.task1":
                try {
                    Thread.sleep(3000);
                } catch (InterruptedException e) {
                    e.printStackTrace();
                }
                Log.d(TAG, "onHandleIntent: task1 finished !");
                break;

            case "com.test.task2":
                Log.d(TAG, "onHandleIntent: task2 finished !");
                break;
        }
    }

    /**
     * 耗时任务执行完毕之后自动销毁
     */
    @Override
    public void onDestroy() {
        super.onDestroy();

    }
}
第二步:IntentService同样在清单文件注册才能使用
<application
	android:allowBackup="true"
	android:icon="@mipmap/ic_launcher"
	android:label="@string/app_name"
	android:supportsRtl="true"
	android:theme="@style/Theme.MyApplication">
	<activity
		android:name=".MainActivity"
		android:launchMode="standard"
		android:exported="true">
		<intent-filter>
			<action android:name="android.intent.action.MAIN" />

			<category android:name="android.intent.category.LAUNCHER" />
		</intent-filter>
	</activity>


	<service android:name=".TestIntentService"
		android:enabled="true"
		android:exported="true"/>
</application>
第三步:在Activity里面启动服务
@Override
public void onClick(View v) {
Intent intent;
switch (v.getId()){
	case R.id.btn_start_work_1:
		intent = new Intent(this, TestIntentService.class);
		intent.setAction("com.test.task1");
		startService(intent);
		break;

	case R.id.btn_start_work_2:
		intent = new Intent(this, TestIntentService.class);
		intent.setAction("com.test.task2");
		startService(intent);
		break;
}
4.5 IntentService启动工作流程
- 创建默认的工作线程,用于在应用的主线程外执行传递给 onStartCommand() 的所有 Intent。
- 创建工作队列,用于将 Intent 逐一传递给 onHandleIntent() 实现,这样您就永远不必担心多线程问题。
- 在处理完所有启动请求后停止服务,因此您永远不必调用 stopSelf()。
- 提供 onBind() 的默认实现(返回 null)。
- 提供 onStartCommand() 的默认实现,可将 Intent 依次发送到工作队列和 onHandleIntent() 实现。
4.6 IntentService使用注意:
- IntentService的业务逻辑是在 onHandleIntent 方法中执行的,onHandleIntent 方法执行在工作线程,所以不需要重新开线程,并且能够保证线程安全,这就是 IntentService 的强大之处了。
- IntentService 的onHandleIntent(Intent intent) 方法默认是在子线程上的,任务执行完成后,服务会自动销毁,所以通常无需手动停止服务;
- 不建议使用bind的方式开启IntentService;
- 如果任务没有执行完,手动停止了服务,会调用onDestroy()方法那么onHandleIntent()方法里的逻辑可能会不停,直到线程结束;
- 如果连续启动了IntentService,那么任务会在第一次完成之后,继续进行第二次,直到执行够启动服务的次数,服务结束;
- 如果连续启动了IntentService,第一次执行过程中,停止了服务,那么第二次启动的任务也不会再执行;
- IntentService受 Android 8.0(API级别26)强加的所有后台执行限制的约束。在大多数情况下,最好使用JobIntentService,在Android 8.0或更高版本上运行时使用JobIntentService;
- IntentService 一次只处理一个Intent,逻辑运行的子线程上,不影响主线程,如果此代码需要很长时间,它将阻止对同一个IntentService的其他请求,但它不会阻止任何其他内容。处理完所有请求后,IntentService会自行停止,因此不应该调用Service.stopSelf()
五 Service版本适配
5.1上面说了Android 8.0开始强加所有后台执行限制的约束,所以8.0后不能使用startService直接启动服务,如果当前程序在后台,就必须启动前台服务startForegroundService。
从
startService(new Intent(this, MyService.class));变为
startForegroundService(new Intent(this, MyService.class));5.2 启动前台服务之后,必须在5秒之内执行 startForeground 方法
//8.0版本开始,启动前台服务之后,必须在5秒之内执行 startForeground 方法
if (android.os.Build.VERSION.SDK_INT >= android.os.Build.VERSION_CODES.O) {
	String channelId="newChannelId";
	String channelName="channelName";
	NotificationChannel channel = new NotificationChannel(channelId, channelName,
			NotificationManager.IMPORTANCE_LOW);
	NotificationManager manager = (NotificationManager) getSystemService(Context.NOTIFICATION_SERVICE);
	manager.createNotificationChannel(channel);
	Notification notification = new NotificationCompat.Builder(this, channelId)
			.setAutoCancel(true)
			.setCategory(Notification.CATEGORY_SERVICE)
			.setOngoing(true)
			.setPriority(NotificationManager.IMPORTANCE_LOW).build();
	startForeground(1, notification);
}
注意:
- startForeground 的 ID 不能为0。
- 如要从前台移除服务,请调用 stopForeground()。
5.3 Android 9 之后,还需要添加权限:
<uses-permission android:name="android.permission.FOREGROUND_SERVICE" />5.4 完整适配后的java
public class TestIntentService extends IntentService {
    private static final String TAG = "TestIntentService";

    @Override
    public void onCreate() {
        super.onCreate();
        //8.0版本开始,启动前台服务之后,必须在5秒之内执行 startForeground 方法
        if (android.os.Build.VERSION.SDK_INT >= android.os.Build.VERSION_CODES.O) {
            String channelId="newChannelId";
            String channelName="channelName";
            NotificationChannel channel = new NotificationChannel(channelId, channelName,
                    NotificationManager.IMPORTANCE_LOW);
            NotificationManager manager = (NotificationManager) getSystemService(Context.NOTIFICATION_SERVICE);
            manager.createNotificationChannel(channel);
            Notification notification = new NotificationCompat.Builder(this, channelId)
                    .setAutoCancel(true)
                    .setCategory(Notification.CATEGORY_SERVICE)
                    .setOngoing(true)
                    .setPriority(NotificationManager.IMPORTANCE_LOW).build();
            startForeground(1, notification);
        }
    }

    @Override
    public int onStartCommand(@Nullable Intent intent, int flags, int startId) {
        return super.onStartCommand(intent, flags, startId);
    }

    /**
     * 构造函数
     * @deprecated
     */
    public TestIntentService() {
        //传入字符串,标识IntentService子线程name
        super("newIntentService");
        Log.e(TAG, "TestIntentService");
    }

    /**
     * 处理耗时业务
     *
     * @param intent 接收传进来的参数
     */
    @Override
    protected void onHandleIntent(@Nullable Intent intent) {
        //intent获取任务分类
        String action = intent.getAction();
        switch (action) {
            case "com.test.task1":
                try {
                    //耗时任务
                    //.....................
                    Thread.sleep(3000);
                } catch (InterruptedException e) {
                    e.printStackTrace();
                }
                Log.e(TAG, "onHandleIntent: task1 finished !");
                break;

            case "com.test.task2":
                //耗时任务
                //.....................
                Log.e(TAG, "onHandleIntent: task2 finished !");
                break;
        }
    }

    /**
     * 耗时任务执行完毕之后自动销毁
     */
    @Override
    public void onDestroy() {
        super.onDestroy();
        Log.e(TAG, "onDestroy");
    }
}
<manifest xmlns:android="http://schemas.android.com/apk/res/android">
    <uses-permission android:name="android.permission.INTERNET" />
    <uses-permission android:name="android.permission.FOREGROUND_SERVICE" />

    <application
        android:allowBackup="true"
        android:icon="@mipmap/ic_launcher"
        android:label="@string/app_name"
        android:supportsRtl="true"
        android:theme="@style/Theme.MyApplication">
        <activity
            android:name=".MainActivity"
            android:exported="true">
            <intent-filter>
                <action android:name="android.intent.action.MAIN" />

                <category android:name="android.intent.category.LAUNCHER" />
            </intent-filter>
        </activity>

        <service android:name=".TestIntentService"
            android:enabled="true"
            android:exported="true"/>
    </application>

</manifest>
六 JobService
6.1 由于从Android 8.0开始禁止应用在后台运行时创建Service,所以要解决这种这种问题有以下几种方案:
- 通过Context.startForegroundService()方式启动一个前台Service,前台Service的启动没有受到限制。
- 集成Google Firebase Messaging。
- 使用JobService。
6.2 JobService也是Service的派生类,主要有以下方法

6.3 JobService需要与JobScheduler、JobInfo配合使用。JobScheduler是用来对JobService进行调度的,决定其执行的时机和频次。JobInfo是用来设置一些JobService的执行信息。
6.4 实现步骤
第一步:JobService
- 需要实现两个函数onStartJob()和onStopJob()
- 默认运行在主线程,所以需要开启一个子线程
public class TestJobService extends JobService {
    private static final String TAG = "TestJobService";

    @Override
    public boolean onStartJob(JobParameters jobParameters) {
        work.start();
        return false;
    }

    @Override
    public boolean onStopJob(JobParameters jobParameters) {
        return false;
    }

    private Thread work = new Thread(new Runnable() {
        @Override
        public void run() {
            try {
                Thread.sleep(3000);
            } catch (InterruptedException e) {
                e.printStackTrace();
            }
            Log.e(TAG, "finished !");
        }
    });
}
第二步:在清单文件AndroidManifest.xml 里面注册服务
<application
	android:allowBackup="true"
	android:icon="@mipmap/ic_launcher"
	android:label="@string/app_name"
	android:supportsRtl="true"
	android:theme="@style/Theme.MyApplication">
	<activity
		android:name=".MainActivity"
		android:exported="true">
		<intent-filter>
			<action android:name="android.intent.action.MAIN" />

			<category android:name="android.intent.category.LAUNCHER" />
		</intent-filter>
	</activity>


	<service android:name=".TestJobService"
		android:enabled="true"
		android:exported="true"
		android:permission="android.permission.BIND_JOB_SERVICE"
		/>
</application>
第三步:在Activity里面JobScheduler开启服务
public class MainActivity extends AppCompatActivity {

    @Override
    protected void onCreate(Bundle savedInstanceState) {
        super.onCreate(savedInstanceState);
        setContentView(R.layout.activity_main);
        scheduleService();
    }

    //运行一个服务
    private void scheduleService(){
        JobScheduler jobScheduler = (JobScheduler) getSystemService(JOB_SCHEDULER_SERVICE);
        JobInfo.Builder builder = new JobInfo.Builder(1, new ComponentName(this, TestJobService.class));  //指定哪个JobService执行操作
        jobScheduler.schedule(builder.build());
    }
}
当然也可以配置 JobInfo 来开启服务
需要添加开机启动监听权限
<uses-permission android:name="android.permission.RECEIVE_BOOT_COMPLETED" />int jobId = 1;
JobScheduler jobScheduler = (JobScheduler)getSystemService(Context.JOB_SCHEDULER_SERVICE);
ComponentName jobService = new ComponentName(getPackageName(),
TestJobService.class.getName());
JobInfo jobInfo = new JobInfo.Builder(jobId,jobService)
.setMinimumLatency(1000)//延时
.setOverrideDeadline(1000)//若失效,定时
.setPeriodic(15 * 60 * 1000)//任务执行周期
.setPersisted(true)//设备重启后是否继续执行
.setRequiresCharging(true)//设置是否需要充电
.setRequiredNetworkType(JobInfo.NETWORK_TYPE_ANY)//网络条件,任意网络,默认NETWORK_TYPE_NONE
.build();
if(jobScheduler != null){
jobScheduler.schedule(jobInfo);
}第四步:手动结束服务
结束指定服务
jobScheduler.cancel(0);结束全部队列服务
jobScheduler.cancelAll();6.5 JobInfo API解释
setMinimumLatency (long minLatencyMillis)
设置job延迟一段时间后执行:谁还不是个宝宝,就不能等我打扮完再安排我?ps:打扮时间是
minLatencyMillis 毫秒
调用了此方法后又设置了setPeriodic周期将会 boom!按照逻辑想想也不对是把,设置了周期又设置延迟,你让系统怎么执行,按照谁来走?左右为难啊。
setOverrideDeadline (long maxExecutionDelayMillis)
设置此Job的最大延迟调度,无论任何条件,即使有条件不满足,Job也将在该截止时间前运行,说白了就是一个系统执行此job的deadline。
同样,设置了周期时间会抛异常。setRequiredNetworkType (int networkType)
在某种 网络类型下才可以执行此任务,比如说无网,任何网络,wifi,4g等等setRequiresBatteryNotLow (boolean batteryNotLow)
设置是否低电量才执行这个任务setRequiresCharging (boolean requiresCharging)
设置是否在充电时执行任务setRequiresDeviceIdle (boolean requiresDeviceIdle)
设置是否在交互时执行任务,当用户玩手机的时候,就不执行,不玩了就执行。setRequiresStorageNotLow (boolean storageNotLow)
指定此Job是否只在可用存储空间太低时运行,默认为false。
6.6 JobService里面onStartJob返回true和false的区别
@Override
public boolean onStartJob(JobParameters jobParameters) {

	return false;
}
- 如果你的onStartJob返回false,你的onStopJob不会执行,千万不要在onStopJob里面做无用功了。
- 但是如果你要返回true的话,意味着你的任务是一个耗时操作。按照Service是在主线程执行的规定,你需要在onStartJob里面写一个异步操作,这里用AsynTask和Handler都行。
- 在任务执行结束的时候需要手动调用相关方法来结束本次任务,否则将会造成阻塞,让系统误以为你一直在运行,还没结束,导致后面的任务没法执行。
- joinFinished就是需要我们手动执行的方法,它有两个参数,第一个是JobParameters,第二个是wantsReschedule
6.7 当然也有和IntentService对应的JobService
方法,JobIntentService。和IntentService功能差不多,也是异步处理任务的服务,这个不再多说。
public class TestJobIntentService extends JobIntentService {
    @Override
    protected void onHandleWork(@NonNull Intent intent) {
        //耗时任务
    }
}
七 AIDL
7.1 上面所说的都是本地服务,既应用内启动服务。那怎样开启远程服务呢,即跨进程服务调用。这就要用到AIDL技术。
7.2 什么是AIDL?
AIDL(Android Interface Definition Language)是一种 IDL 语言,用于生成可以在 Android 设备上两个进程之间进行进程间通信(IPC)的代码。 通过 AIDL,可以在一个进程中获取另一个进程的数据和调用其暴露出来的方法,从而满足进程间通信的需求。通常,暴露方法给其他应用进行调用的应用称为服务端,调用其他应用的方法的应用称为客户端,客户端通过绑定服务端的 Service 来进行交互
7.3 AIDL创建流程
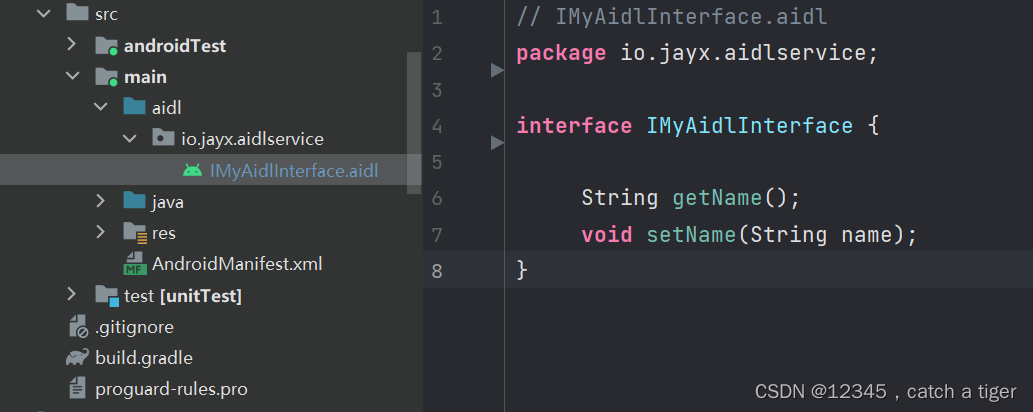
第一步:main下面创建aidl文件,创建aidl接口,IMyAidlInterface.aidl
第二步: 创建AIDL代理类MyAidlInterface,继承IMyAidlInterface.Stub。并实现接口里面的两个方法
 class MyAidlInterface extends IMyAidlInterface.Stub{

	@Override
	public String getName() throws RemoteException {
		return "i'm yours";
	}

	@Override
	public void setName(String name) throws RemoteException {

	}
}
第三步:常见绑定服务,绑定MyAidlInterface接口
public class MyService extends Service {

    public MyService() {
    }

    @Override
    public IBinder onBind(Intent intent) {
        // TODO: Return the communication channel to the service.
        return new MyAidlInterface();
    }

}
第四步: 创建 ServiceConnection 连接服务,通过AIDL获取里面的变量
class MyServiceConnection implements ServiceConnection {
	@Override
	public void onServiceConnected(ComponentName name, IBinder service) {
		IMyAidlInterface iMyAidlInterface = IMyAidlInterface.Stub.asInterface(service);
		try {
			tvName.setText(iMyAidlInterface.getName());
		} catch (RemoteException e) {
			e.printStackTrace();
		}
	}

	@Override
	public void onServiceDisconnected(ComponentName name) {

	}
};
第五步:Activity绑定服务
public class MainActivity extends AppCompatActivity {
    private TextView tvName;

    private MyServiceConnection myServiceConnection;
    @Override
    protected void onCreate(Bundle savedInstanceState) {
        super.onCreate(savedInstanceState);
        setContentView(R.layout.activity_main);
        tvName = (TextView) findViewById(R.id.tv_name);
        //绑定服务
        myServiceConnection = new MyServiceConnection();
        Intent intent = new Intent(this,MyService.class);
        bindService(intent, myServiceConnection , Context.BIND_AUTO_CREATE);
    }

     class  MyServiceConnection implements ServiceConnection {
        @Override
        public void onServiceConnected(ComponentName name, IBinder service) {
            IMyAidlInterface iMyAidlInterface = IMyAidlInterface.Stub.asInterface(service);
            try {
                tvName.setText(iMyAidlInterface.getName());
            } catch (RemoteException e) {
                e.printStackTrace();
            }
        }

        @Override
        public void onServiceDisconnected(ComponentName name) {

        }
    };

}
第六步:Activity的onDestroy()里面解绑服务
@Override
protected void onDestroy() {
	super.onDestroy();
	if(myServiceConnection!=null){
		unbindService(myServiceConnection);
	}
}
八 程序保活方案
8.1 保活的含义:
保活即尽量避免程序被系统机制杀死,从而实现尽可能长时间的不间断运行,来实现自己的一些业务,比如持久性定位服务。
8.2 保活的难点:
我们知道随着手机系统的发展,屏幕越来越大,耗电量越来越快,手机电池一直是硬伤,基本每天都要充电。
所以google一直在对系统耗电量方面做极致的优化。比如熄屏或者退到后台可能就会被系统机制杀死,
所以持续耗电的应用会被系统认为是恶意软件,会优先被杀死,从而随着系统版本的升级,保活会越来越困难。
8.3 保活方案:
保活最常用的方案就是开启后台服务,来让程序一直处于运行状态,就不会被系统提前回收。
常用保活方案有以下几种:
像素保活
创建一个像素的Activity,监听熄屏开启像素页面,亮屏关闭像素页面开启前台服务
创建Service的同时开启一个通知栏,使得service处于前台运行无声音乐
在服务里面循环播放本地音乐,使服务处于一直执行任务中,不容易被系统杀死利用系统通知机制重新拉起服务
在网络连接改变, 用户屏幕解锁, 电源连接 / 断开, 系统启动完成, 安装 / 卸载软件包时拉起Service双进程守护
创建两个service,一个服务停止就立马拉起另一个服务,这样相互守护来达到不被杀死的目的。JobService
允许执行多个任务,允许执行周期性,开启启动,插电启动等配置,可以来进行系统保活开启应用后台运行和厂商白名单管理
可以在设置里面开启后台启动任务或者加入厂商系统的后台管理白名单,可以进一步降低进程被杀的概率,可以在系统后台长时间运行
8.4 随着系统的升级和耗电应用的优化,大部分方案在高版本手机已经满足不了保活的条件,还是很容易被系统杀死,所以最新的方案是:
双进程守护保活 + JobScheduler 方案
实现步骤:
第一步:创建JobService
@RequiresApi(api = Build.VERSION_CODES.LOLLIPOP)
public class KeepAliveJobService extends JobService {
    @Override
    public boolean onStartJob(JobParameters params) {
        Log.i("KeepAliveJobService", "JobService onStartJob 开启");
        if (Build.VERSION.SDK_INT >= Build.VERSION_CODES.N){
            // 如果当前设备大于 7.0 , 延迟 5 秒 , 再次执行一次
            startJob(this);
        }

        // 判定本地前台进程是否正在运行
        boolean isLocalServiceRunning =
                ServiceUtils.isServiceRunning(this, LocalForegroundService.class.getName());
        if (!isLocalServiceRunning){
            startService(new Intent(this, LocalForegroundService.class));
        }

        // 判定远程前台进程是否正在运行
        boolean isRemoteServiceRunning =
                ServiceUtils.isServiceRunning(this, RemoteForegroundService.class.getName());
        if (!isRemoteServiceRunning){
            startService(new Intent(this, RemoteForegroundService.class));
        }

        return false;
    }

    @Override
    public boolean onStopJob(JobParameters params) {
        Log.i("KeepAliveJobService", "JobService onStopJob 关闭");
        return false;
    }

    public static void startJob(Context context){
        // 创建 JobScheduler
        JobScheduler jobScheduler =
                (JobScheduler) context.getSystemService(Context.JOB_SCHEDULER_SERVICE);

        // 第一个参数指定任务 ID
        // 第二个参数指定任务在哪个组件中执行
        // setPersisted 方法需要 android.permission.RECEIVE_BOOT_COMPLETED 权限
        // setPersisted 方法作用是设备重启后 , 依然执行 JobScheduler 定时任务
        JobInfo.Builder jobInfoBuilder = new JobInfo.Builder(10,
                new ComponentName(context.getPackageName(), KeepAliveJobService.class.getName()))
                .setPersisted(true);

        // 7.0 以下的版本, 可以每隔 5000 毫秒执行一次任务
        if (Build.VERSION.SDK_INT < Build.VERSION_CODES.N){
            jobInfoBuilder.setPeriodic(5_000);

        }else{
            // 7.0 以上的版本 , 设置延迟 5 秒执行
            // 该时间不能小于 JobInfo.getMinLatencyMillis 方法获取的最小值
            jobInfoBuilder.setMinimumLatency(5_000);
        }

        // 开启定时任务
        jobScheduler.schedule(jobInfoBuilder.build());

    }
}
第二步:创建判断服务运行工具类
public class ServiceUtils {
    /**
     * 判定 Service 是否在运行
     * @param context
     * @return
     */
    public static boolean isServiceRunning(Context context, String serviceName){
        if(TextUtils.isEmpty(serviceName)) return false;

        ActivityManager activityManager =
                (ActivityManager) context.getSystemService(Context.ACTIVITY_SERVICE);

        // 最多获取 200 个正在运行的 Service
        List<ActivityManager.RunningServiceInfo> infos =
                activityManager.getRunningServices(200);

        // 遍历当前运行的 Service 信息, 如果找到相同名称的服务 , 说明某进程正在运行
        for (ActivityManager.RunningServiceInfo info: infos){
            if (TextUtils.equals(info.service.getClassName(), serviceName)){
                return true;
            }
        }

        return false;
    }
}
第三步:配置清单文件
<?xml version="1.0" encoding="utf-8"?>
<manifest xmlns:android="http://schemas.android.com/apk/res/android"
    package="kim.hsl.two_progress_alive">

    <uses-permission android:name="android.permission.FOREGROUND_SERVICE" />

    <uses-permission android:name="android.permission.RECEIVE_BOOT_COMPLETED" />

    <application
        android:allowBackup="true"
        android:icon="@mipmap/ic_launcher"
        android:label="@string/app_name"
        android:roundIcon="@mipmap/ic_launcher_round"
        android:supportsRtl="true"
        android:theme="@style/Theme.Two_Progress_Alive">
        <activity android:name=".MainActivity">
            <intent-filter>
                <action android:name="android.intent.action.MAIN" />

                <category android:name="android.intent.category.LAUNCHER" />
            </intent-filter>
        </activity>

        <!-- 本地提权前台服务 Service -->
        <service
            android:name=".LocalForegroundService"
            android:enabled="true"
            android:exported="true"></service>

        <!-- 本地服务 , API 18 ~ 25 以上的设备, 关闭通知到专用服务 -->
        <service
            android:name=".LocalForegroundService$CancelNotificationService"
            android:enabled="true"
            android:exported="true"></service>

        <!-- 远程提权前台服务 Service -->
        <service
            android:name=".RemoteForegroundService"
            android:enabled="true"
            android:exported="true"
            android:process=":remote"></service>

        <!-- 远程服务 , API 18 ~ 25 以上的设备, 关闭通知到专用服务 -->
        <service
            android:name=".RemoteForegroundService$CancelNotificationService"
            android:enabled="true"
            android:exported="true"
            android:process=":remote"></service>

        <!-- JobScheduler 拉活 -->
        <service
            android:name=".KeepAliveJobService"
            android:enabled="true"
            android:exported="true"
            android:permission="android.permission.BIND_JOB_SERVICE"></service>

    </application>

</manifest>
第四步:Activity里面开启服务
public class MainActivity extends AppCompatActivity {

    @Override
    protected void onCreate(Bundle savedInstanceState) {
        super.onCreate(savedInstanceState);
        setContentView(R.layout.activity_main);

        // 通过前台 Service 提升应用权限
        // 启动普通 Service , 但是在该 Service 的 onCreate 方法中执行了 startForeground
        // 变成了前台 Service 服务
        startService(new Intent(this, LocalForegroundService.class));
        startService(new Intent(this, RemoteForegroundService.class));

        // JobScheduler 拉活
        if (Build.VERSION.SDK_INT >= Build.VERSION_CODES.LOLLIPOP) {
            KeepAliveJobService.startJob(this);
        }
    }
}
8.5 保活源码方案参考链接:
https://github.com/xingda920813/HelloDaemon
https://github.com/fanqieVip/keeplive