
部署环境(MacOS/Linux)
1.安装JDK环境
目前SeaTunnel支持运行在JDK8及以上的环境。用户需要自行安装JDK环境。
2.下载安装包
目前SeaTunnel的最新版本是2.3.1版本。这里我们安装部署2.3.1版本,如果你需要下载其它版本,可以从https://seatunnel.apache.org/download中查询对应的版本。
mkdir ~/seatunnel
cd ~/seatunnel
wget https://dlcdn.apache.org/incubator/seatunnel/2.3.1/apache-seatunnel-incubating-2.3.1-bin.tar.gz
tar -zxvf apache-seatunnel-incubating-2.3.1-bin.tar.gz
3.选择需要的插件
SeaTunnel的安装包中默认不包含同步数据需要的连接器插件,用户需要先编辑config目录下的plugin_config文件,这个文件中描述了需要下载和安装的连接器插件,默认所有已经支持的连接器插件都会下载和安装。我们可以修改该文件,删除我们不需要的插件,只保留我们需要的插件。
cd ~/seatunnel/apache-seatunnel-incubating-2.3.1
vi config/plugin_config
然后修改内容,本次我只需要JDBC,MySQL CDC,StarRocks ,Assert,Fake,Console这6个连接器,其它的删除,最终文件内容如下:
--connectors-v2--
connector-assert
connector-cdc-mysql
connector-jdbc
connector-starrocks
connector-fake
connector-console
--end--
4.运行下载安装命令
下面我们运行连接器下载安装命令,注意,这一步依赖你的机器上已经安装部署了Maven并且机器可以连接互联网,你可以通过如下命令确认是否安装了Maven:
mvn
如果显示如下信息,说明Maven环境已经安装部署好了,如果出现问题报错,请先安装部署或修复Maven的问题再进行下面的部署。
Apache Maven 3.6.3 (cecedd343002696d0abb50b32b541b8a6ba2883f)
Maven home: /Users/gaojun/app/apache-maven-3.6.3
Java version: 1.8.0_181, vendor: Oracle Corporation, runtime: /Library/Java/JavaVirtualMachines/jdk1.8.0_181.jdk/Contents/Home/jre
Default locale: zh_CN, platform encoding: UTF-8
OS name: "mac os x", version: "10.16", arch: "x86_64", family: "mac"
运行下载安装连接器插件的命令:
cd ~/seatunnel/apache-seatunnel-incubating-2.3.1
sh bin/install-plugin.sh
等待命令执行完成,连接器插件即下载安装完成。安装完成后可见~/seatunnel/apache-seatunnel-incubation-2.3.1/connectors/seatunnel/目录下已经有了安装好的连接器插件。

5.启动一个单节点的SeaTunnel Zeta节点
cd ~/seatunnel/apache-seatunnel-incubating-2.3.1
nohup sh bin/seatunnel-cluster.sh 2>&1 &
通过jps命令我们能查看进程是否已经启动,进程名为SeaTunnelServer
jps
6.运行自带的离线批同步demo任务
在config目录下有一个自带的离线批同步任务的配置文件v2.batch.config.template,该文件定义了一个作业,使用一个叫FakeSource的Source连接器生成数据,并将数据发送给Console这个Sink,Console Sink的作用是将接收到的数据打印到控制台。
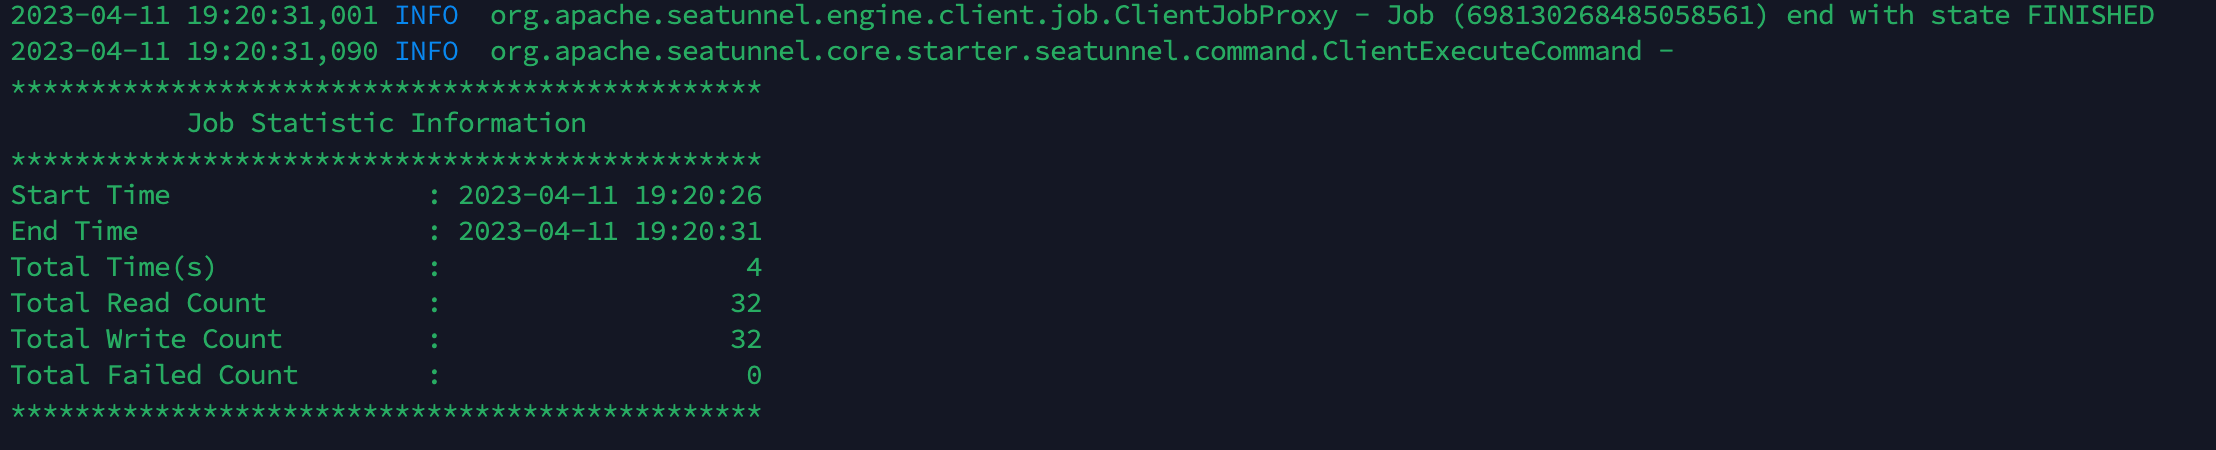
所以运行该作业可以看到在控制台中会打印数据,一共有32行数据将被打印,每条数据有两个字段(name, age)。v2.batch.config.template文件的内容如下:
env {
  # You can set SeaTunnel environment configuration here
  execution.parallelism = 2
  job.mode = "BATCH"
  checkpoint.interval = 10000
  #execution.checkpoint.interval = 10000
  #execution.checkpoint.data-uri = "hdfs://localhost:9000/checkpoint"
}

source {
  # This is a example source plugin **only for test and demonstrate the feature source plugin**
  FakeSource {
    parallelism = 2
    result_table_name = "fake"
    row.num = 16
    schema = {
      fields {
        name = "string"
        age = "int"
      }
    }
  }

  # If you would like to get more information about how to configure Seatunnel and see full list of source plugins,
  # please go to https://seatunnel.apache.org/docs/category/source-v2
}

sink {
  Console {
  }

  # If you would like to get more information about how to configure Seatunnel and see full list of sink plugins,
  # please go to https://seatunnel.apache.org/docs/category/sink-v2
}
执行该demo作业:
cd ~/seatunnel/apache-seatunnel-incubating-2.3.1
sh bin/seatunnel.sh --config config/v2.batch.config.template
作业运行完成后能够看到如下监控信息:
7.运行自带的实时同步demo作业
在config目录下有一个自带的实时同步任务的配置文件v2.streaming.conf.template,该文件定义了一个作业,使用一个叫FakeSource的Source连接器生成数据,并将数据发送给Console这个Sink,Console Sink的作用是将接收到的数据打印到控制台。
所以运行该作业可以看到在控制台中会打印数据,因为是实时作业,该作业不会自动停止,v2.streaming.conf.template文件的内容如下:
env {
  # You can set flink configuration here
  execution.parallelism = 2
  job.mode = "STREAMING"
  checkpoint.interval = 2000
  #execution.checkpoint.interval = 10000
  #execution.checkpoint.data-uri = "hdfs://localhost:9000/checkpoint"
}

source {
  # This is a example source plugin **only for test and demonstrate the feature source plugin**
  FakeSource {
    parallelism = 2
    result_table_name = "fake"
    row.num = 16
    schema = {
      fields {
        name = "string"
        age = "int"
      }
    }
  }

  # If you would like to get more information about how to configure Seatunnel and see full list of source plugins,
  # please go to https://seatunnel.apache.org/docs/category/source-v2
}

sink {
  Console {
  }

  # If you would like to get more information about how to configure Seatunnel and see full list of sink plugins,
  # please go to https://seatunnel.apache.org/docs/category/sink-v2
}
执行该demo作业:
cd ~/seatunnel/apache-seatunnel-incubating-2.3.1
sh bin/seatunnel.sh --config config/v2.streaming.conf.template
作业运行1分钟左右,应该能够看到如下监控信息: 
说明作业正常运行,通过Control+C结束该作业,中止作业运行。
到此,SeaTunnel Zeta部署并验证完成。
本文由 白鲸开源科技 提供发布支持!