face_recognition是世界上最简单的人脸识别库了,你可以通过Python引用或者命令行的形式使用它,来管理和识别人脸。该软件包使用dlib中最先进的人脸识别深度学习算法,使得识别准确率在Labled Faces in the world数据集下达到了99.38%准确率。
在安装face_recognition是需要先安装dlib库,dlib库是一个用来人脸关键点检测的 python 库,但因为其是 C++ 编写还需要一些依赖,比较复杂,这里推荐使用conda安装会自动下载相关的依赖
face_recognition库安装
# 安装dlib
conda install -c https://conda.anaconda.org/conda-forge dlib
# -i https://pypi.tuna.tsinghua.edu.cn/simple 国内下载比较慢,清华镜像
pip install face_recognition -i https://pypi.tuna.tsinghua.edu.cn/simple
常用API介绍
load_image_file(file, mode=‘RGB’)
加载一个图像文件到一个numpy array类型的对象上。
参数:
- file:待加载的图像文件名字
- mode:转换图像的格式。只支持“RGB”(8位RGB, 3通道)和“L”(黑白)
- return:一个包含图像数据的numpy array类型的对象
face_landmarks(face_image,face_locations=None,model=“large”)
给定一个图像,提取图像中每个人脸的脸部特征位置
参数:
- face_image:输入的人脸图片
- face_locations=None:可选参数,默认值为None,代表默认解码图片中的每一个人脸。若输入face_locations()[i]可指定人脸进行解码
- model=“large”:输出的特征模型,默认为“large”,可选“small”。当选择为"small"时,只提取左眼、右眼、鼻尖这三种脸部特征。
face_encodings(face_image, known_face_locations=None, num_jitters=1)
给定一个图像,返回图像中每个人脸的128脸部编码(特征向量)。
参数:
- face_image:输入的人脸图像
- known_face_locations:可选参数,如果你知道每个人脸所在的边界框
- num_jitters=1:在计算编码时要重新采样的次数。越高越准确,但速度越慢(100就会慢100倍)
- return:一个128维的脸部编码列表
batch_face_locations(images, number_of_times_to_upsample=1, batch_size=128)
给定一个图像,返回图像中每个人脸的位置
参数:
- img:一个image(numpy array类型)
- number_of_times_to_upsample:从images的样本中查找多少次人脸,该参数值越高的话越能发现更小的人脸。
- model:使用哪种人脸检测模型。“hog” 准确率不高,但是在CPUs上运行更快,“cnn” 更准确更深度(且GPU/CUDA加速,如果有GPU支持的话),默认是“hog”
- return:一个元组列表,列表中的每个元组包含人脸的位置(top, right, bottom, left)
compare_faces(known_face_encodings, face_encoding_to_check, tolerance=0.6)
比较脸部编码列表和候选编码,看看它们是否匹配。
参数:
- known_face_encodings:已知的人脸编码列表
- face_encoding_to_check:待进行对比的单张人脸编码数据
- tolerance:两张脸之间有多少距离才算匹配。该值越小对比越严格,0.6是典型的最佳值。
- return:一个 True或者False值的列表,该表指示了known_face_encodings列表的每个成员的匹配结果
face_distance(face_encodings, face_to_compare)
给定一组面部编码,将它们与已知的面部编码进行比较,得到欧氏距离。对于每一个比较的脸,欧氏距离代表了这些脸有多相似。
参数:
- faces:要比较的人脸编码列表
- face_to_compare:待进行对比的单张人脸编码数据
- tolerance:两张脸之间有多少距离才算匹配。该值越小对比越严格,0.6是典型的最佳值
- return:一个numpy ndarray,数组中的欧式距离与faces数组的顺序一一对应
face_recognition应用代码实践:
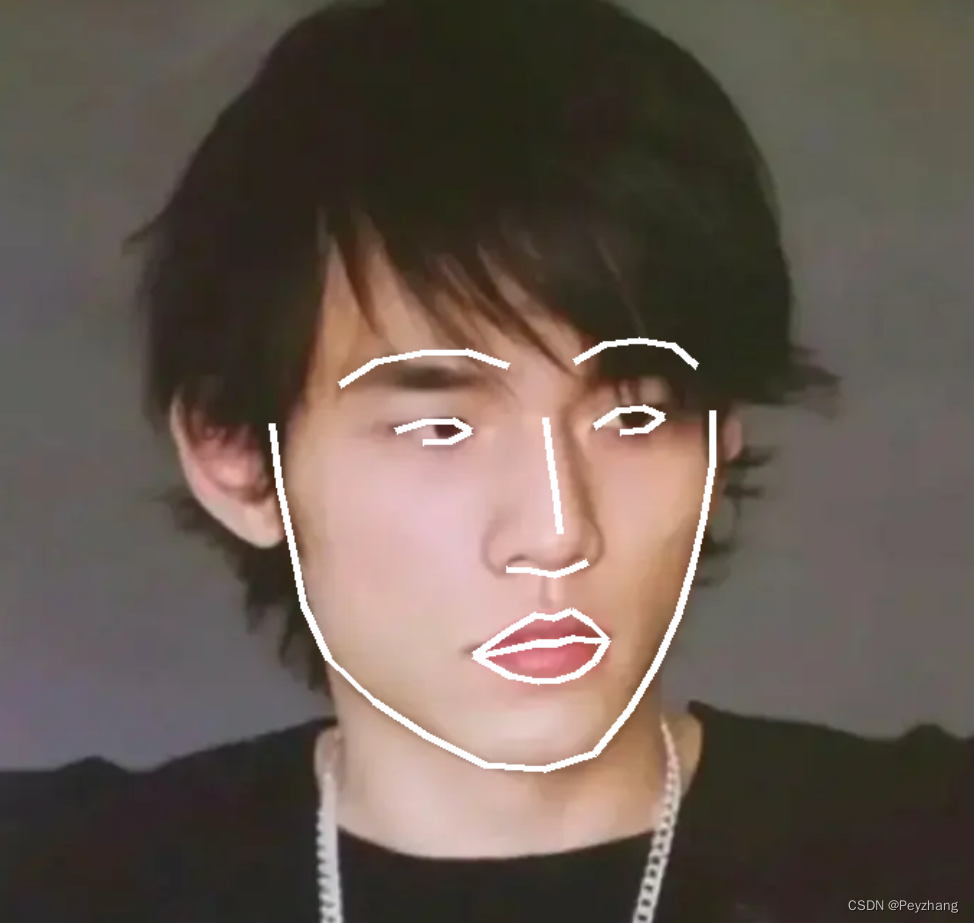
特征点
from PIL import Image, ImageDraw
import face_recognition
# Load the jpg file into a numpy array
image = face_recognition.load_image_file("./data/zjl.jpg")
# Find all facial features in all the faces in the image
ace_landmarks_list = face_recognition.face_landmarks(image)

pil_image = Image.fromarray(image)

for face_landmarks in face_landmarks_list:
    draw = ImageDraw.Draw(pil_image, 'RGBA')
    for key in face_landmarks.keys():
        #左图
        draw.point(face_landmarks[feature_key],fill=(256, 256, 256))
        #右图
        #draw.line(face_landmarks[feature_key], width=5)
    pil_image.show()
代码运行效果: