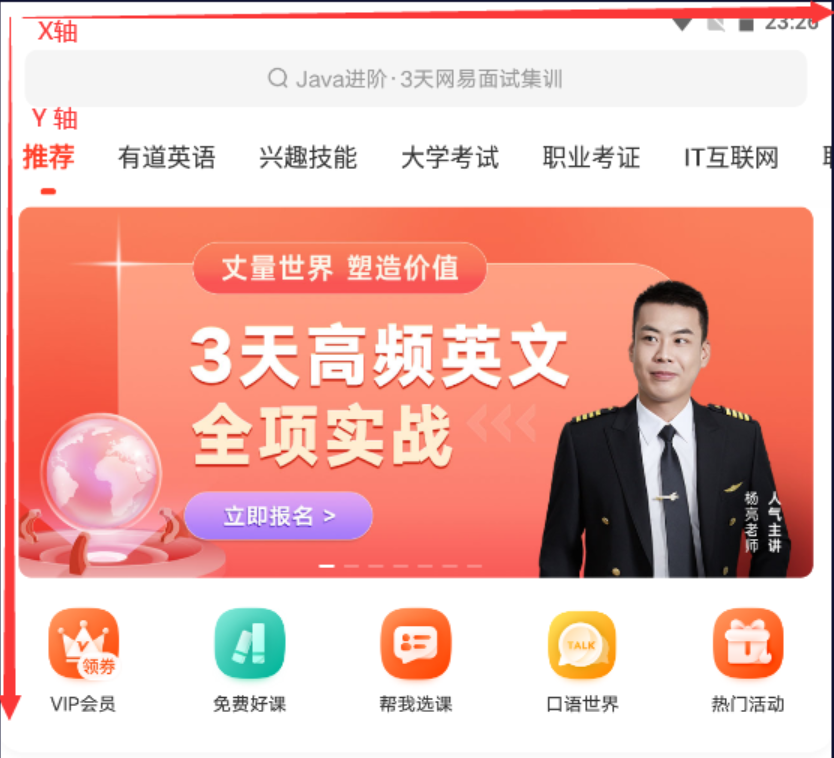
手机上坐标说明
手机从左上角开始为0,横着的是x轴,竖着的是y轴
定位
基本定位
python新版本不支持此写法
driver.find_element_by_accessibility_id() 对应 content-desc
driver.find_element_by_id() 对应 resource-id
driver.find_element_by_name() 对应 text
driver.find_element_by_xpath() 对应 xpath

By 定位
python新版本支持此写法
driver.find_element(AppiumBy.ID,"resource-id")
driver.find_element(AppiumBy.XPATH,"xpath")
driver.find_element(AppiumBy.ACCESSIBILITY_ID,"content-desc")
driver.find_element(AppiumBy.NAME,"text")
Xpath定位
driver.find_element_by_xpath("//*[@text=' 扫一扫 ']")
driver.find_element_by_xpath("//*[@resource-id='com.taobao.taobao:id/tv_scan_text']")
driver.find_element_by_xpath("//*[@content-desc=' 帮助 ']")
driver.find_element(AppiumBy.XPATH, "//*[@resource-id='com.taobao.taobao:id/tv_scan_text'' and @text=' 你好']")
driver.find_element(AppiumBy.XPATH,"//*[Contains(@text, 'hello')]")
交互
元素交互方法

点击方法:element.click()
输入操作:element.send_keys(“tong”)
设置元素的值:element.set_value(“tongtong”)
清除操作:element.clear()
是否可见:element.is_displayed 返回 true or false
是否可用:element.enabled() 返回 true or false
是否被选中:element.is_selected() 返回 true or false
获取属性值:element.get_attribute(name)
元素属性

获取元素文本:element.text
获取元素坐标:element.location,结果:
获取元素尺寸(高和宽):element.size,结果:
# 设置等待时间
WebDriverWait(driver, 60).until(
    lambda x: x.find_element(By.ID, "com.ss.android.ugc.aweme:id/h1a"))


WebDriverWait(driver, 10).until(
    lambda x: x.find_element(AppiumBy.ANDROID_UIAUTOMATOR, 'new UiSelector().text("开始练习")'))
# 根据id定位元素
driver.find_element(By.ID, "00000000-0000-08b5-ffff-ffff000000a6")
# 点击操作
driver.find_element(By.ID, et_search).click()
# 输入文字
driver.find_element(By.ID, et_search).send_keys("易知课堂")
# id定位放大器,并点击图标
driver.find_element(by=By.ID,value="com.android.settings:id/search").click()
sleep(1)
# 使用class定位,输入hello
driver.find_element(by=By.CLASS_NAME,value="android.widget.EditText").send_keys('hello')
sleep(1)
# 使用xpath定位返会按钮,并点击
driver.find_element(by=By.XPATH,value="//*[@class='android.widget.ImageButton']").click()
sleep(1)
# 根据AppiumBy.ANDROID_UIAUTOMATOR定位元素
Android UiAutomator定位技巧
UiAutomator 是 Android SDK 自带的一个测试框架,这个测试框架提供了一系列的 API,可以与 Android APP 进行交互,例如打开菜单,点击,滑动等。当 Appium 的 Caps 参数 uiautomationName 设置为 UiAutomator2 时,就能够实现与手机端的 UiAutomator 进行通信并且使用 UiAutomator 执行测试代码。如果不进行设置,默认也是使用 UiAutomator2 工作引擎。UiAutomator1 是较老的工作引擎,如果想测试较老版本的 Android 系统(低于 Android4.4 版本)需要设置 uiautomationName=“UiAutomator1”。由于 Android UiAutomator 是 Android SDK 中自带的工作引擎,使用这种定位方式,速度上要比 Xpath 定位方式快很多。但由于写法比较特殊,调试起来要相对麻烦,如果定位语句编写不当,脚本编辑器也不会给出任何提示信息。只能在运行的时候校验对错。
driver.find_element(AppiumBy.ANDROID_UIAUTOMATOR, 'new UiSelector().text("搜索")')uiautomator定位
优点:uiautomator是Android工作引擎,速度快
缺点:书写复杂,容易出错
driver.find_element(AppiumBy.ANDROID_UIAUTOMATOR, 表达式)
表达式如下
newUiSelector().resourceId('id')
newUiSelector().className('clasename')
newUiSelector().description('content-desc')
newUiSelector().text('text')
newUiSelector().textContains('text')
newUiSelector().textStartWith('text')
newUiSelector().textMatches('正则表达式')
组合定位
newUiSelector().resourceId('id').text('text')
newUiSelector().className('clasename').text('text')
父子关系 childSelector
newUiSelector().resourceId('id').childSelector(text("text"))
兄弟关系 fromParent
newUiSelector().resourceId('id').fromParent(text("text"))
滚动查找元素
driver.find_element_by_android_uiautomator('new UiScrollable(new UiSelector().scrollable(true).instance(0)).scrllIntoView(new UiSelector().text("文本").instance(0));')# 根据xpath定位元素
driver.find_element(By.XPATH, num2)xpath模糊定位使用contains
driver.find_element(By.XPATH, '//*[contains(@content-desc, "学车")]') 
通过元素定位兄弟元素
# 定位第1个兄弟元素
element1 = '//android.view.View[@content-desc="设置"]/preceding-sibling::android.view.View[1]'
# 定位第2个兄弟元素
element2 = '//android.view.View[@content-desc="设置"]/preceding-sibling::android.view.View[2]'

element1 = WebDriverWait(driver, 10).until(
    lambda x: x.find_element(By.XPATH, element1))
# 总页数
content_desc_element1 = element1.get_attribute("content-desc")

element2 = WebDriverWait(driver, 10).until(
            lambda x: x.find_element(By.XPATH, element2))
弟弟元素定位
following-sibling::
android.view.View[1]是相对与“健康自测记录”而言的第一个弟弟元素,所示用[1]
"//android.view.View[@content-desc='健康自测记录']/following-sibling::android.view.View[1]"因为By包升级,以前的老方法不可用,例如下面的代码
driver.find_element_by_accessibility_id("content-desc属性值")
#python 版本不同,不兼容这种方法
使用这种方法去调用元素,可以运行
#使用这种方法去调用元素,可以运行
driver.find_element(AppiumBy.ACCESSIBILITY_ID,value='搜索设置')
# 滑动
def target_click(driver, x1, y1):  # x1,y1为你编写脚本时适用设备的实际坐标
    x_1 = x1 / 1440  # 计算坐标在横坐标上的比例
    y_1 = y1 / 2723  # 计算坐标在纵坐标上的比例
    x = driver.get_window_size()['width']  # 获取设备的屏幕宽度
    y = driver.get_window_size()['height']  # 获取设备屏幕的高度
    driver.tap([(x_1 * x, y_1 * y)])  # 模拟单手点击操作


# 获得机器屏幕大小x,y
def getSize(dr):
    x = dr.get_window_size()['width']
    y = dr.get_window_size()['height']
    return (x, y)


# 屏幕向上滑动
def swipeUp(t, dr):
    l = getSize(dr)
    x1 = int(l[0] * 0.5)  # x坐标
    y1 = int(l[1] * 0.75)  # 起始y坐标
    y2 = int(l[1] * 0.25)  # 终点y坐标
    dr.swipe(x1, y1, x1, y2, t)


# 屏幕向下滑动
def swipeDown(t,dr):
    l = getSize(dr)
    x1 = int(l[0] * 0.5)  # x坐标
    y1 = int(l[1] * 0.25)  # 起始y坐标
    y2 = int(l[1] * 0.75)  # 终点y坐标
    dr.swipe(x1, y1, x1, y2, t)


# 屏幕向左滑动
def swipLeft(t,dr):
    l = getSize(dr)
    x1 = int(l[0] * 0.75)
    y1 = int(l[1] * 0.5)
    x2 = int(l[0] * 0.05)
    dr.swipe(x1, y1, x2, y1, t)


# 屏幕向右滑动
def swipRight(t, dr):
    l = getSize(dr)
    x1 = int(l[0] * 0.05)
    y1 = int(l[1] * 0.5)
    x2 = int(l[0] * 0.75)
    dr.swipe(x1, y1, x2, y1, t)


# # 调用向左滑动
# swipLeft(1000)
# sleep(3)
# # 调用向右滑动
# swipRight(1000)
# # 调用向上滑动
# swipeUp(1000)
# # 调用向下滑动
# swipeDown(1000)
#拖动
mask="com.runbey.ybjkwyc:id/mask"
# 收藏
collect="com.runbey.ybjkwyc:id/tv_collect"
WebDriverWait(driver, 10).until(
    lambda x: x.find_element(By.ID, mask))
mask = driver.find_element(By.ID, mask)
WebDriverWait(driver, 10).until(
    lambda x: x.find_element(By.ID, collect))
collect = driver.find_element(By.ID, collect)
# 把mask元素拖动到collect
driver.drag_and_drop(mask, collect)
import os
from time import sleep
from appium import webdriver
# 导个AppiumBy包
from appium.webdriver.common.appiumby import AppiumBy
from selenium.webdriver.common.by import By
# 定义字典变量
desired_caps = {}
# 字典追加启动参
desired_caps["platformName"] = "Android"
desired_caps["platformVersion"] = "7.1.2"
desired_caps["deviceName"] = "192.168.56.101:5555"
desired_caps["appPackage"] = "com.android.settings"
desired_caps["appActivity"] = ".Settings"
# 设置中文
desired_caps["unicodeKeyboard"] = True
desired_caps["resetKeyboard"] = True
# 获取driver
driver = webdriver.Remote("http://127.0.0.1:4723/wd/hub", desired_caps)
"""
上面的代码不过多说明,
基本启动appium的代码
我这里使用的是雷电模拟器+appium+python代码方式
"""
sleep(1)
# id定位放大器,并点击图标
driver.find_element(by=By.ID, value="com.android.settings:id/search").click()
sleep(1)
# 使用class定位,输入hello
driver.find_element(by=By.CLASS_NAME, value="android.widget.EditText").send_keys('hello')
sleep(1)
# 使用xpath定位返会按钮,并点击
driver.find_element(by=By.XPATH, value="//*[@class='android.widget.ImageButton']").click()
sleep(1)
# 使用name定位,点击放大镜按钮
# 我在这里发现了问题!!!!------>by_accessibility_id方法不可用!
# driver.find_element_by_accessibility_id("content-desc属性值")# ----->跑不通
# driver.find_element(by=By.accessibility_id,value="content-desc属性值")# ----->跑不通
# driver.find_element("accessibility","content-desc属性值").click()# ----->跑不通
# 正确的输入方法如下所示!!!
print(f"方便看能否运行,我打印了这行字...")
driver.find_element(AppiumBy.ACCESSIBILITY_ID, value='搜索设置')
print(f"ok调试结束,方法成功....")
sleep(3)
driver.quit()